
Some nail trends require hours of patience and a whole box of tiny tools. Then there is nail design with lines, which somehow manages to look incredibly polished and intentional while actually being one of the more approachable styles I teach clients in my chair. A few clean strokes in the right places can completely change the personality of a manicure, and I have watched this simple technique turn basic sets into something that looks like it came straight out of a magazine.
I remember the exact moment nail design with lines clicked for me as something worth focusing on professionally. A client came in wanting something minimal but still eye catching, and instead of reaching for stickers or rhinestones, I grabbed a thin striping brush and just started drawing. The result was so clean and modern that she booked her next three appointments around variations of the same concept.
In this guide I want to share everything I have learned about nail design with lines over years of working behind the chair, from the tools that actually make a difference to the specific techniques that separate a shaky, amateur looking line from a crisp, professional one. Whether you are a nail artist looking to sharpen your skills or someone hoping to recreate this look at home, there is something here for you.
Also Read: Firework Nail Design Ideas That Will Make Your Manicure Explode With Style
Why Nail Design With Lines Has Become Such A Popular Choice
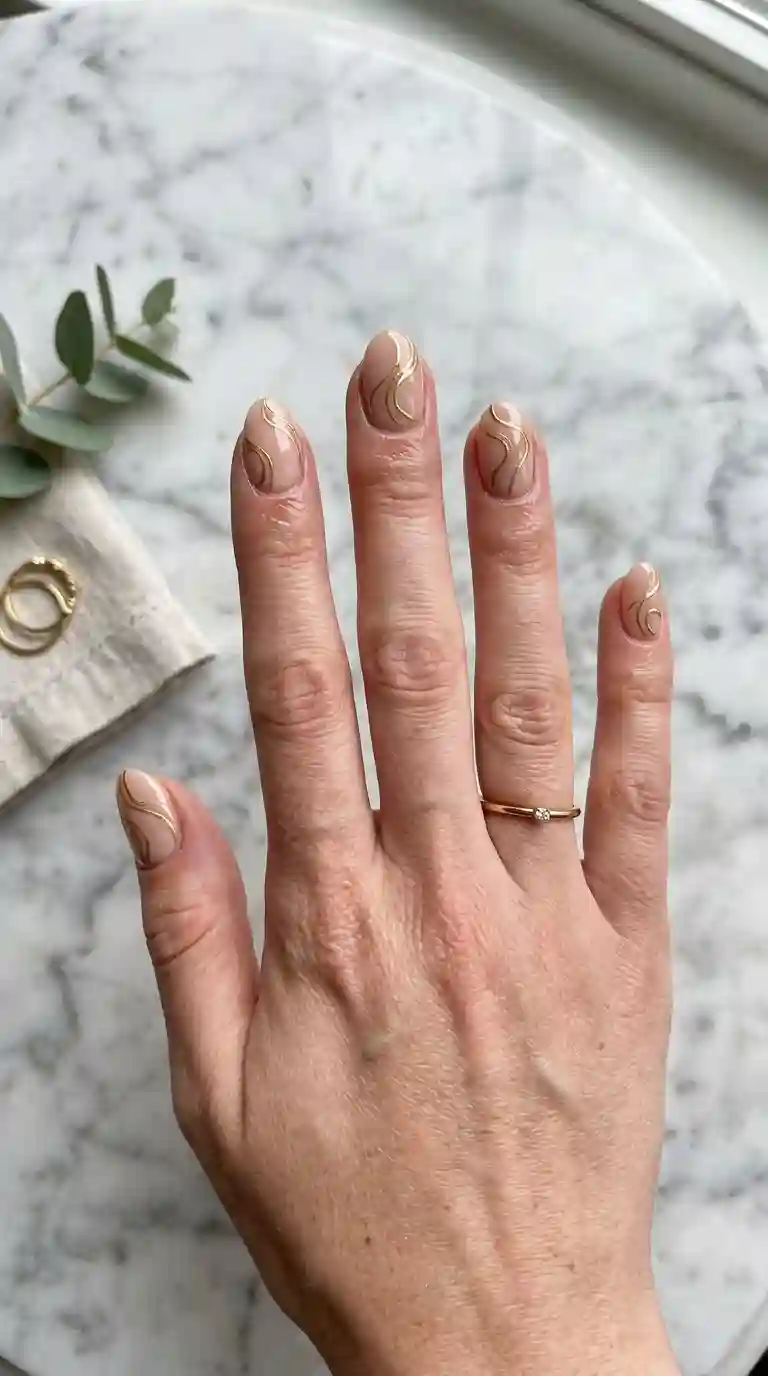
Nail design with lines has grown into one of the most requested styles I see in my studio, and honestly, the appeal makes complete sense once you think it through. Lines are incredibly versatile. They can be minimal and delicate, or bold and graphic, depending on thickness, placement and color, which means this single technique can produce dozens of completely different looks.
Another reason nail design with lines keeps trending is how well it photographs. Clean geometric shapes and crisp strokes translate beautifully on camera, which explains why so much nail inspiration content online features some variation of lines, whether that means simple stripes, abstract swirls or structured grid patterns.
From a professional standpoint, I also appreciate nail design with lines because it does not require expensive tools or rare products. A steady hand, a thin brush and some basic polish colors are really all you need to create something that looks intentional and refined. That accessibility is part of why this style has stuck around rather than fading after a single season.
My Personal Approach To Nail Design With Lines As A Nail Artist
Working with clients day after day, I have noticed that nail design with lines tends to attract people who want something that feels artistic without being overwhelming. It is a style that reads as confident and put together, even when the actual design is quite simple underneath.
What I love most about nail design with lines is how much room there is for personal expression. Two clients can both ask for a linear design and walk out with completely different results, simply based on the thickness of the lines, the spacing between them or the color palette chosen. That variety keeps this technique feeling fresh even after painting it hundreds of times.
I always tell clients that nail design with lines works beautifully for almost any occasion, from a casual everyday manicure to something more elevated for a formal event. The key is adjusting the boldness of the lines to match the setting, which is something we will get into throughout this guide.
Understanding The Basics Of Nail Design With Lines
Before diving into specific styles, it helps to understand the foundational principles behind nail design with lines. At its core, this technique relies on contrast, spacing and precision. A single clean line against a solid background can look just as striking as a complex pattern, provided the execution is sharp.
I always tell beginners that nail design with lines comes down to three main factors, the thickness of the line, the direction it travels across the nail and the color contrast against the base. Adjusting any one of these factors changes the entire feel of the design, from delicate and minimal to bold and graphic.
Must Read : Sweater Nail Design Ideas That Turn Your Manicure Into Cozy Wearable Art
Straight Lines Versus Curved Lines In Nail Art
One decision that shapes the entire look of nail design with lines is whether to go straight or curved. Straight lines tend to feel more structured, modern and geometric, while curved lines feel softer, more organic and often more whimsical.
I personally love combining both within the same set. A few nails with crisp straight lines paired with one or two nails featuring soft curved swirls creates a nice visual balance, and it is one of my favorite ways to keep nail design with lines feeling dynamic rather than repetitive across all ten fingers.
Minimalist Nail Design With Lines For Everyday Wear
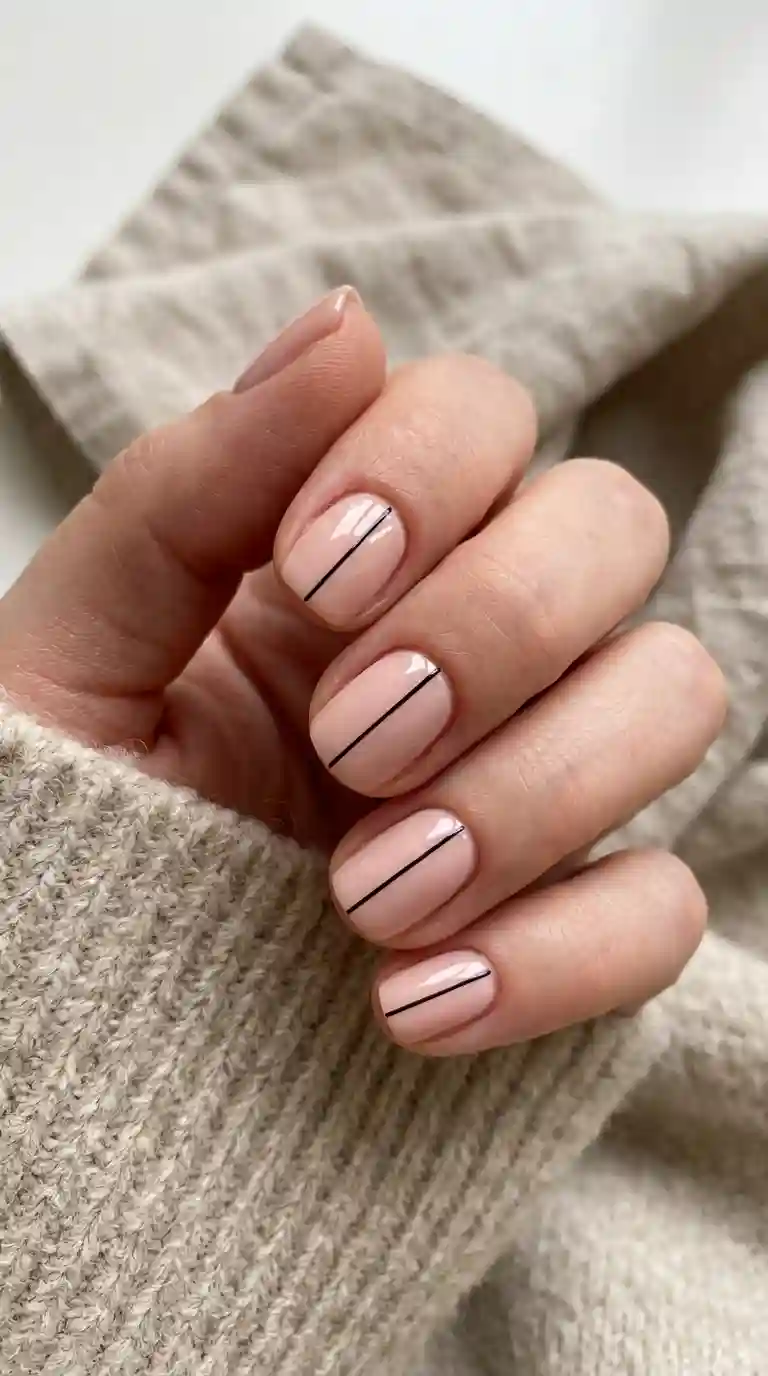
If I had to recommend one style for someone brand new to this trend, it would be a minimalist version of nail design with lines. A single thin line across an otherwise plain nail already reads as intentional and stylish, without requiring much time or skill to execute.
For this look, I usually start with a neutral or nude base color, then add one clean line in a contrasting shade, whether that is black, gold or a deep brown. The line can run diagonally, vertically or even just along the cuticle for a subtle accent that still qualifies as nail design with lines without feeling like a major statement.
Clients love this minimalist approach because it works for literally any setting, from the office to a casual weekend outing, and it pairs easily with any outfit without competing for attention.
Geometric Nail Design With Lines For A Modern Edge
For clients wanting something bolder, geometric nail design with lines brings a completely different energy to the table. Instead of a single subtle stroke, this style involves multiple intersecting lines that create shapes like triangles, grids or angular patterns across the nail.
One of my favorite variations involves painting a solid color base, then using a thin brush or striping tape to create a triangle in the corner of the nail using two or three straight lines. This creates a sharp, architectural look that feels incredibly modern and works especially well on square or squoval nail shapes.
Another approach I use often involves dividing the nail into sections using parallel lines, almost like a minimalist color block effect but achieved entirely through linework. This version of nail design with lines takes a bit more planning, but the payoff is a manicure that looks like it required far more effort than it actually did.
Abstract Swirl Nail Design With Lines
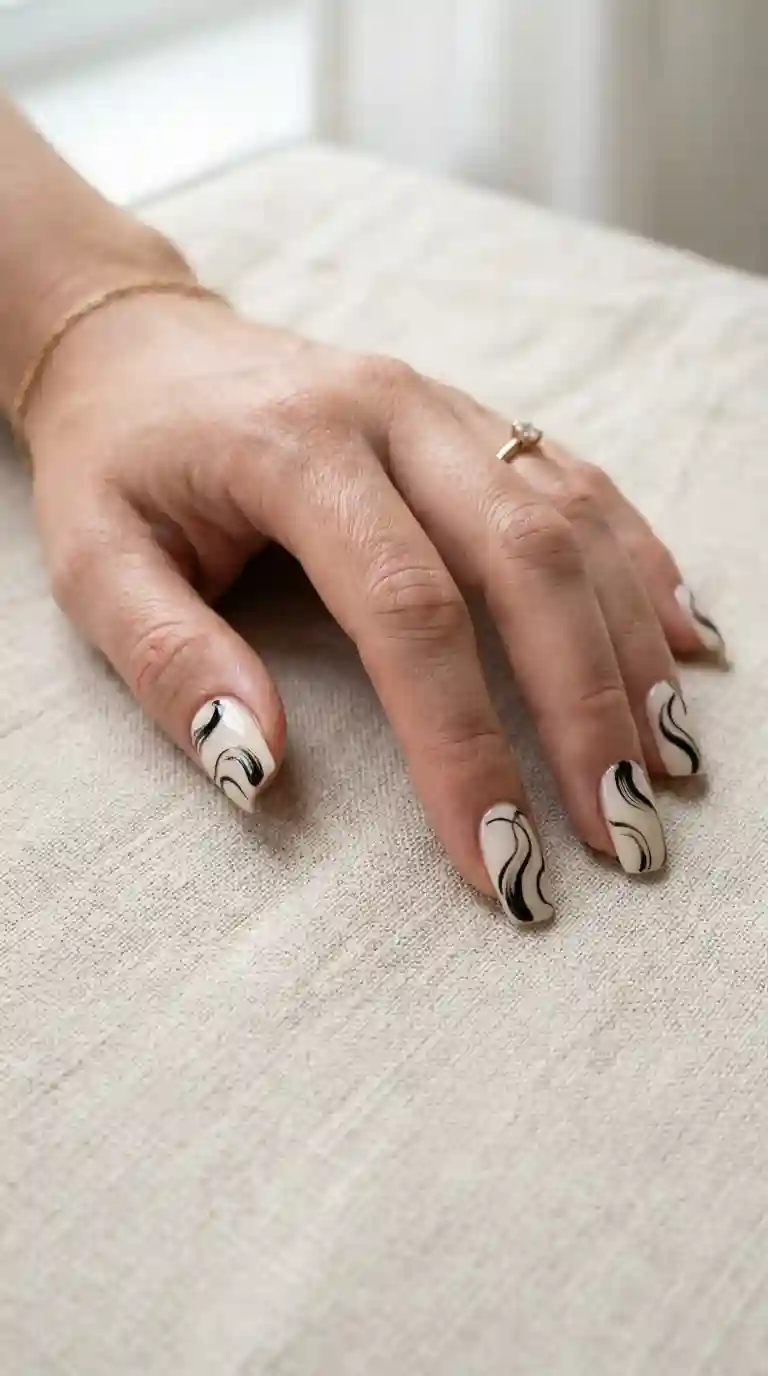
Swirls and abstract linework have become incredibly popular within the broader category of nail design with lines, largely because they feel artistic and unique to each individual set. No two swirl patterns ever look exactly the same, which makes this style feel personal rather than mass produced.
I usually create this effect using a thin detail brush and a steady, relaxed hand, letting the line curve naturally rather than forcing a perfect shape. The goal with abstract nail design with lines is not precision in the traditional sense, but rather a sense of movement and flow across the nail surface.
For clients who want something a bit more structured within the abstract style, I sometimes add small dots at the end of each swirl or a tiny cluster of dots scattered near the lines, which adds visual interest without disrupting the organic feel of the overall design.
Must Read : Light Pink Chrome Nails: The Dreamy Mirror Manicure Everyone Is Falling In Love With
Nail Design With Lines Using Negative Space
Negative space is one of the most effective tools available when working with nail design with lines, and it is something I lean on constantly in my studio. Rather than covering the entire nail in polish, leaving certain sections bare and using lines to frame or outline that empty space creates a striking, modern effect.
A popular version of this technique involves painting the edges of the nail with a thin line, leaving the center completely unpolished or covered only in a sheer topcoat. This creates a delicate, almost architectural outline effect that photographs beautifully and works well for clients who want something eye catching but still subtle.
Combining negative space with nail design with lines also tends to make manicures feel lighter and less committed, which is great for clients transitioning between seasons or simply wanting a break from fully saturated color.
French Tip Reimagined With Nail Design With Lines
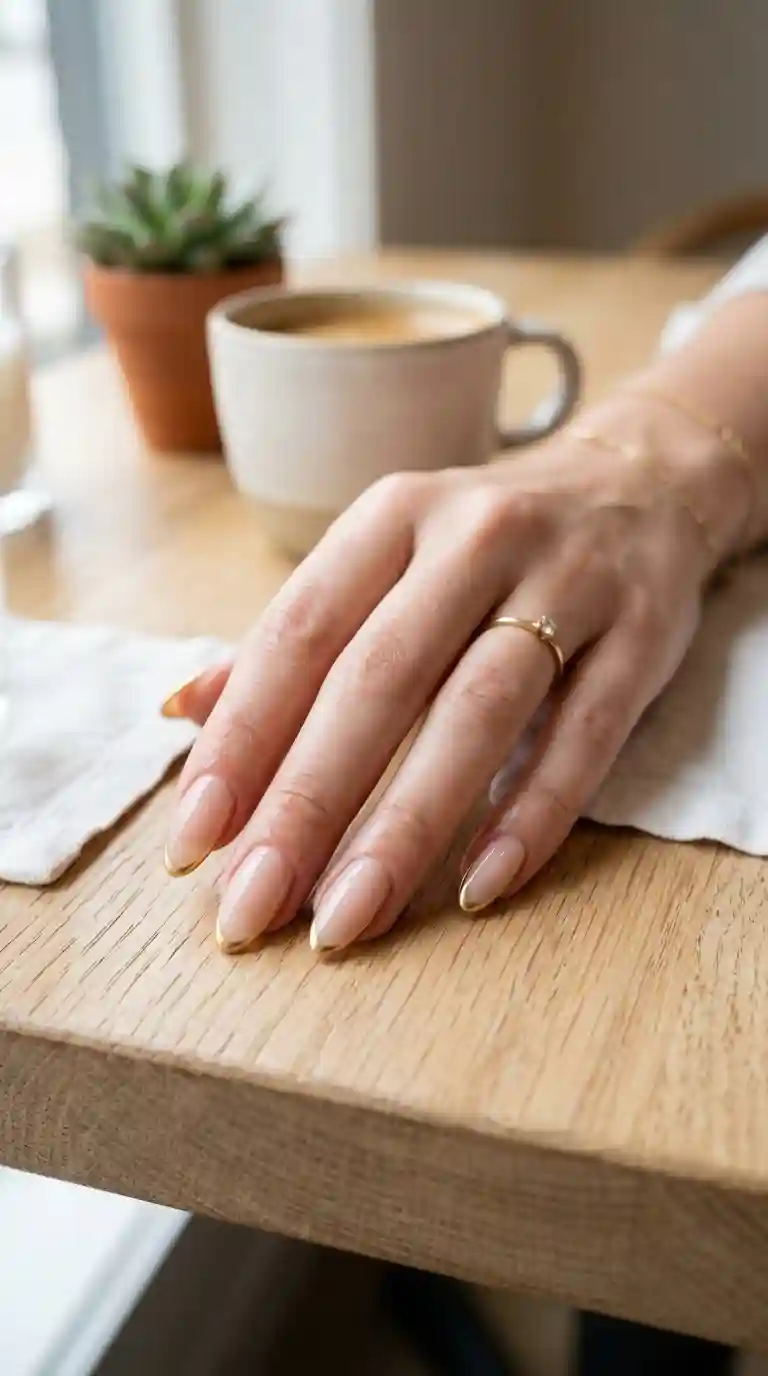
The classic french manicure gets a fresh, contemporary update when reimagined through nail design with lines. Instead of the traditional solid white tip, a single thin line traces the smile line of the nail, creating a much more delicate and modern take on this timeless style.
I usually create this look using a fine striping brush, carefully tracing the natural curve of the nail tip in gold, silver or a soft pastel shade. This approach to nail design with lines keeps the elegance of a french manicure while feeling considerably more refined and up to date.
This variation has become one of my most requested looks for clients attending weddings or formal events, since it offers that classic, polished feeling without looking overly traditional or dated.
Vertical Stripe Nail Design With Lines
Vertical lines running the length of the nail create a really interesting optical effect, often making the nail appear slightly longer and more elongated. This particular take on nail design with lines works beautifully for clients with shorter nail beds who want the illusion of extra length.
I typically paint two or three thin vertical lines evenly spaced across the nail, sometimes in a single color and sometimes in a gradient of shades moving from light to dark. This creates a subtle, sophisticated pattern that still reads clearly as nail design with lines while offering a slightly different visual effect compared to horizontal or diagonal placement.
Horizontal Line Nail Design For A Bold Statement
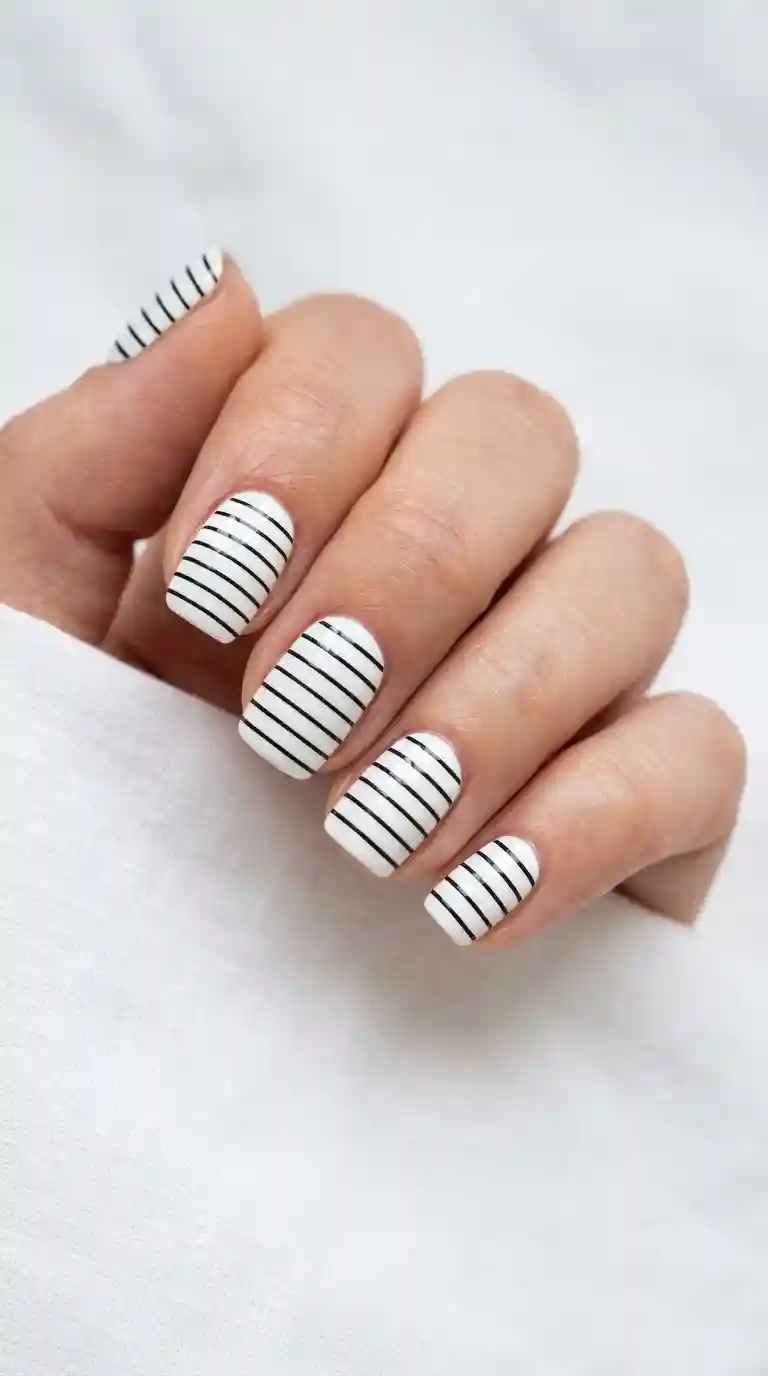
Horizontal lines create a completely different visual rhythm compared to their vertical counterparts, and this version of nail design with lines tends to feel bolder and more graphic. Evenly spaced horizontal stripes across a solid base color instantly draw the eye and create a strong, structured look.
I usually recommend this style for clients who want something a bit more daring, since the horizontal orientation naturally stands out more than subtle vertical or diagonal lines. Pairing horizontal stripes with a high contrast color combination, like black lines over a bright white base, amplifies the graphic effect even further.
Read Also : Business Nail Ideas That Look Polished, Professional And Powerful Every Single Day
Nail Design With Lines For Short Nails
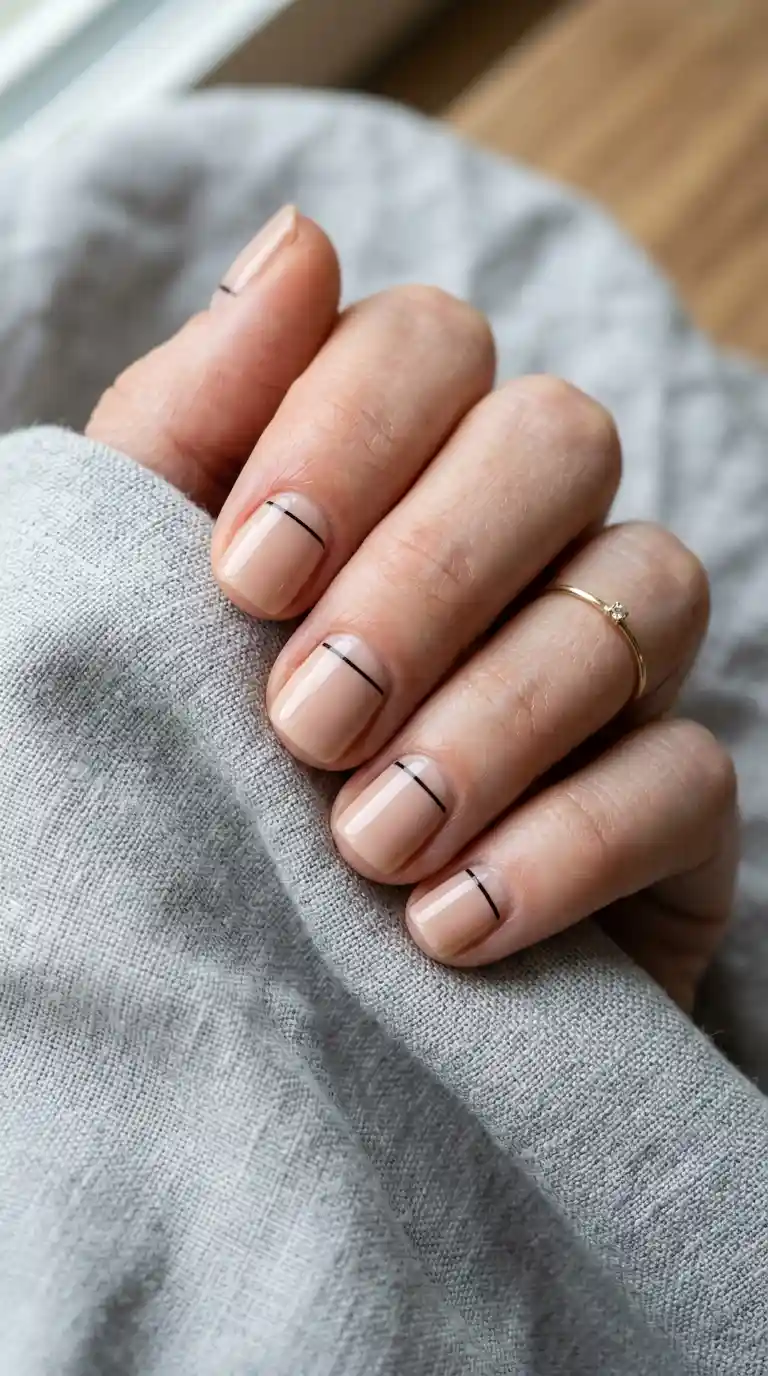
A question I get asked constantly is whether nail design with lines works well on shorter nails, and the answer is absolutely yes. In fact, I often find that simple linework looks even more polished on shorter nail beds compared to more elaborate designs, since there is less surface area competing for attention.
For shorter nails, I usually recommend keeping the design simple, one or two clean lines rather than a complex pattern that might feel cramped on a smaller canvas. A single line near the cuticle or a thin diagonal stroke across the center of the nail tends to look proportionate and elegant regardless of nail length.
Nail Design With Lines For Long And Almond Shaped Nails
On longer nails, there is significantly more room to experiment with nail design with lines. I love using the extra surface area for more elaborate patterns, whether that means multiple intersecting lines, layered swirls or a combination of straight and curved elements within the same nail.
Almond and coffin shaped nails in particular provide a beautiful canvas for detailed linework, since the elongated shape naturally complements vertical and diagonal line placement. I often design a more intricate pattern on the accent nails while keeping the remaining nails simpler, which helps the overall set feel balanced rather than overly busy.
Nail Design With Lines In Bold Colors
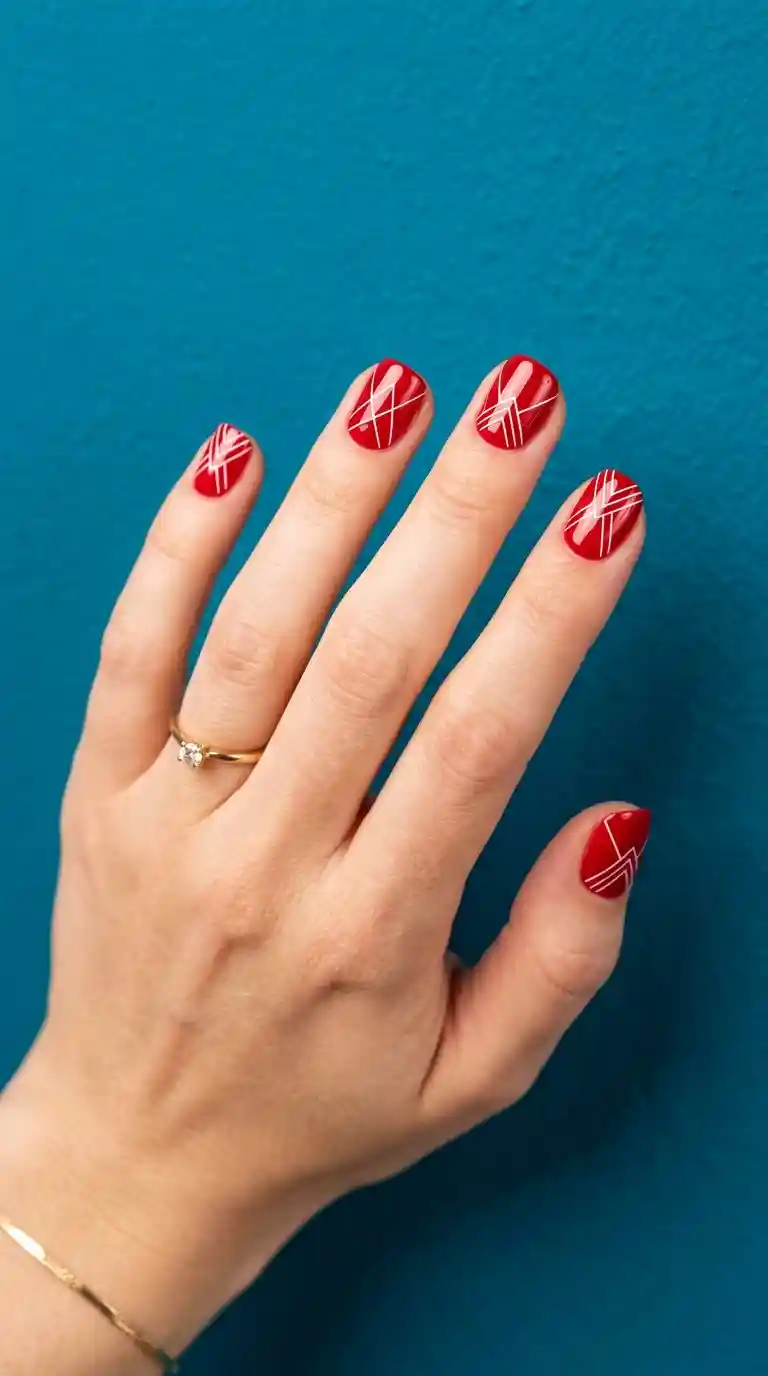
While neutral tones tend to dominate a lot of minimalist nail art, nail design with lines also looks absolutely striking in bold, saturated colors. A bright red base with crisp white lines, or a deep emerald green with thin gold linework, creates a much more dramatic and attention grabbing effect.
I often suggest bold color combinations for clients heading to a special event or simply wanting their manicure to make more of a statement. The contrast between a vivid base color and a sharply defined line tends to photograph incredibly well, which makes this version of nail design with lines especially popular for special occasions.
Nail Design With Lines Using Metallic Accents
Metallic polish adds a completely different dimension to nail design with lines, giving even the simplest pattern a much more luxurious feel. Gold, silver and chrome finishes catch the light beautifully, turning a basic straight line into something that feels considerably more elevated.
I usually apply metallic linework using a thin striping brush dipped in chrome powder mixed with a bit of top coat, or a specialized metallic striping polish designed specifically for fine detail work. Even a single metallic line against a matte or glossy solid base instantly elevates the entire look of a simple manicure.
Matte Base With Glossy Nail Design With Lines
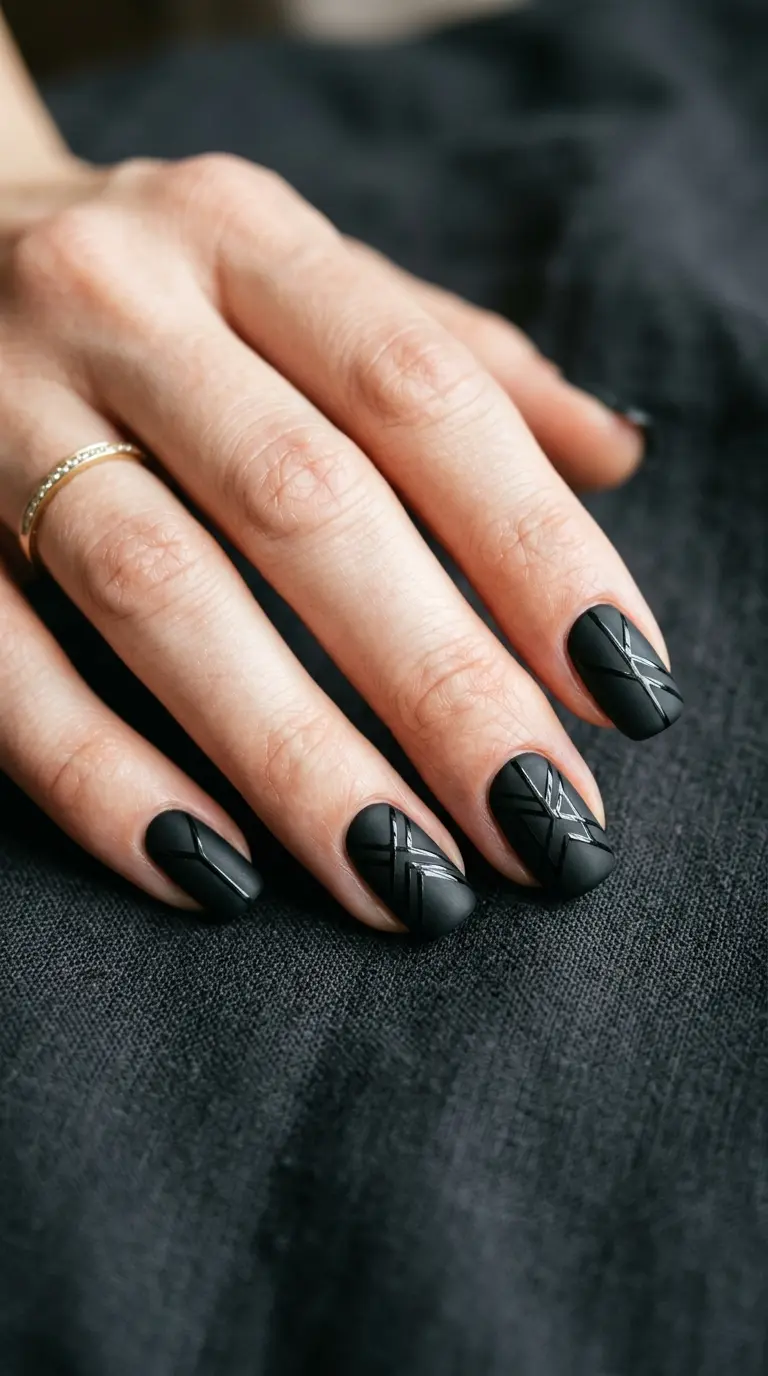
One of my favorite techniques involves combining matte and glossy finishes within the same nail design with lines, using texture rather than color to create contrast. A fully matte base with glossy lines traced on top creates a subtle, sophisticated effect that only becomes fully visible under certain lighting.
This technique requires a bit more precision, since you need to seal the glossy lines carefully without disrupting the surrounding matte finish. The result, however, is a nail design with lines that feels incredibly refined and unique, since this particular textural contrast is not something everyone thinks to try.
Also Read : Western Fall Nails: The Boldest Autumn Nail Trend Taking Over This Season
Nail Design With Lines For Acrylic And Gel Extensions
Clients often ask whether nail design with lines translates well onto acrylic or gel extensions, and the answer is definitely yes. Extensions actually provide a wonderful canvas for detailed linework, since the length and shape can be customized before any design work even begins.
For acrylic sets, I typically recommend a longer almond or coffin shape when planning more intricate nail design with lines, since the extended surface allows for multiple intersecting patterns or layered effects that might feel cramped on a natural, shorter nail. Gel extensions offer a slightly more flexible, natural feeling alternative that still provides plenty of room for detailed work.
How To Create Nail Design With Lines At Home
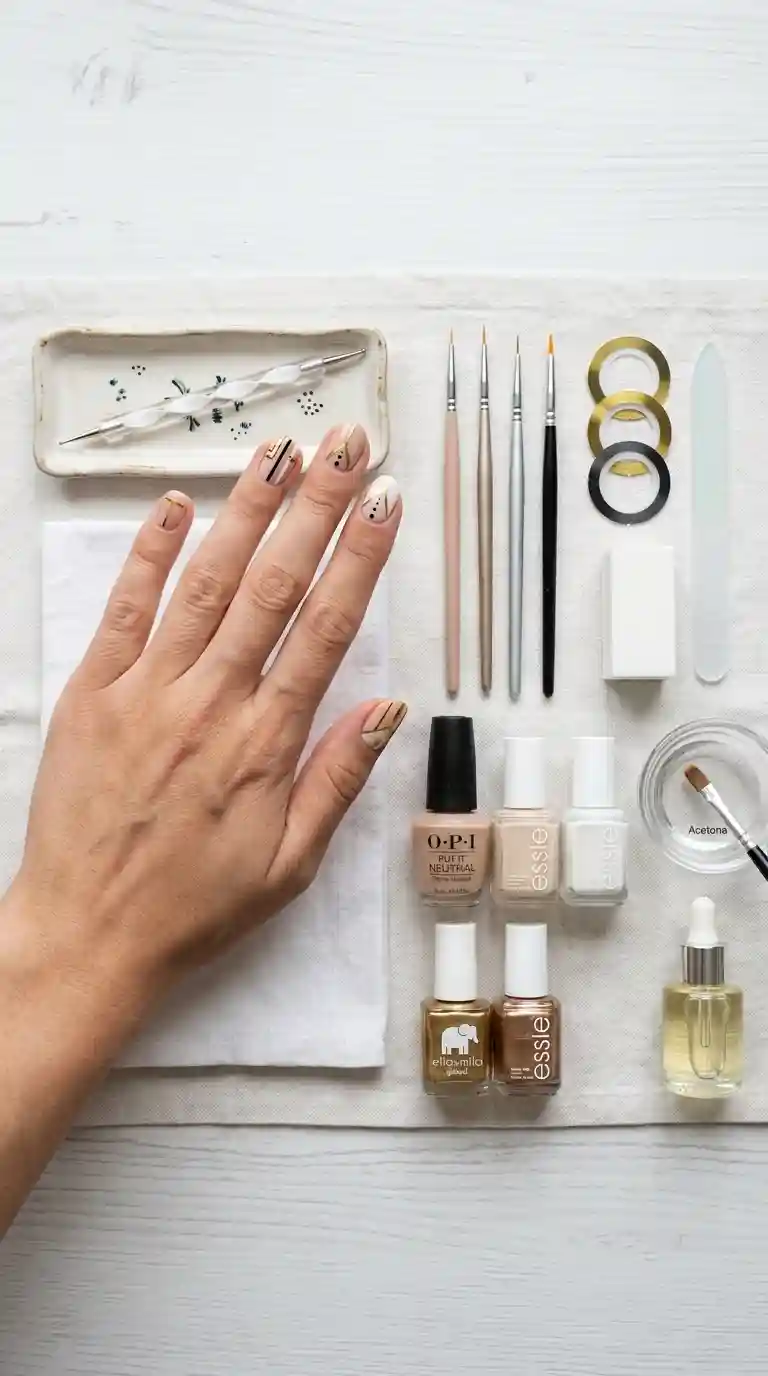
You do not need professional training to create nail design with lines at home, though a bit of practice definitely helps develop a steadier hand. Over the years I have picked up a few tricks that make this process much more manageable for clients trying this technique on their own.
Start with a fully dry, properly prepped base color. Attempting to draw lines over wet or tacky polish almost always results in smudging or dragging, which ruins the crisp effect that makes nail design with lines look so polished in the first place. Patience during the drying stage really does make a significant difference in the final result.
Once your base color is completely dry, use a thin detail brush or striping tape to create your chosen line pattern. Resting your hand on a stable surface and moving the brush in one smooth, confident stroke rather than several small hesitant ones tends to produce a much cleaner line.
Step By Step Guide For Nail Design With Lines
- Start with clean, dry nails and gently push back the cuticles.
- Apply a thin base coat and allow it to dry completely.
- Paint your chosen base color in two thin coats, letting each layer dry fully.
- Use a fine detail brush or striping tape to create your line pattern with confident, steady strokes.
- Allow the lines to dry completely before applying a topcoat.
- Seal everything with a glossy or matte topcoat depending on your preferred finish.
Following these steps in order really does make a noticeable difference in how clean and professional your finished nail design with lines ends up looking, even for a first attempt.
Tools And Products I Use For Nail Design With Lines
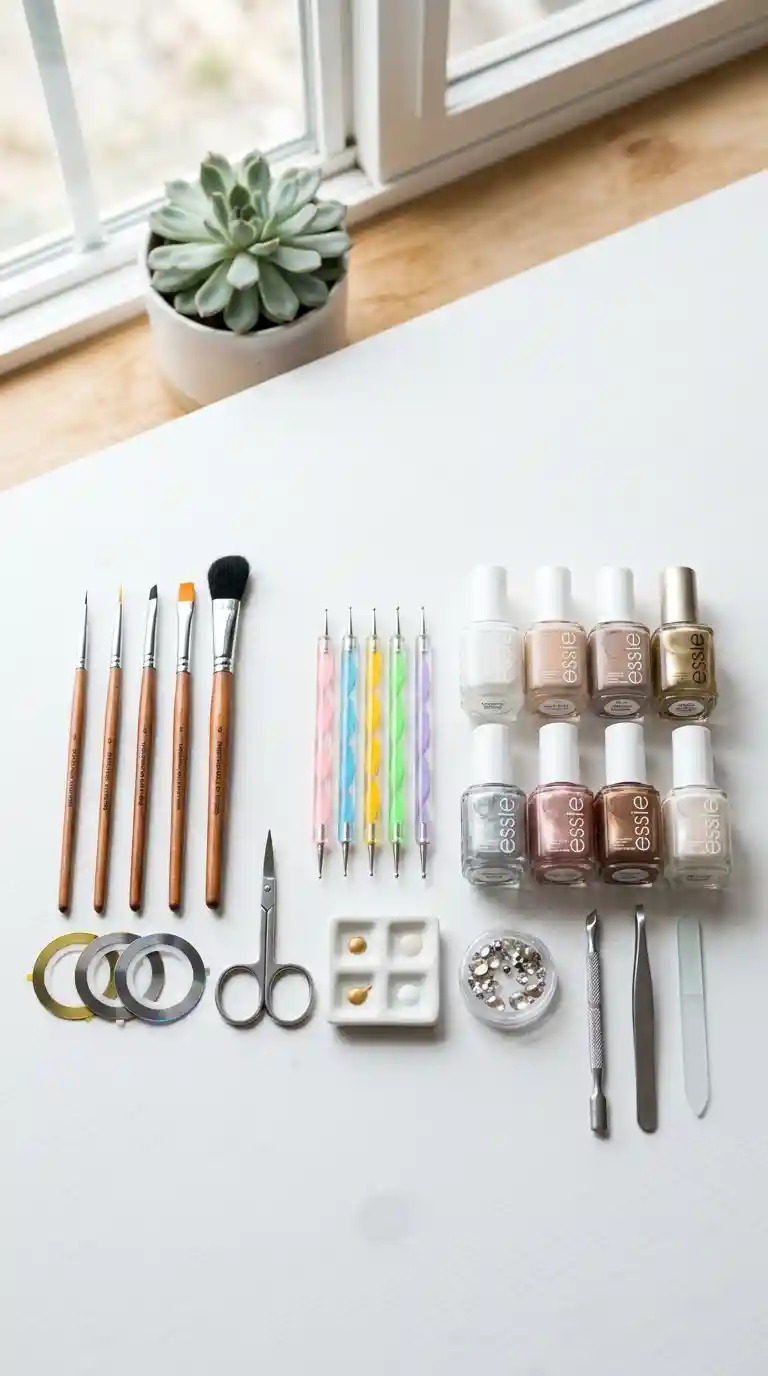
Over the years I have built up a small collection of tools that make creating nail design with lines significantly easier, both in my studio and for clients trying this technique at home. A quality striping brush, ideally with very fine, tapered bristles, is probably the single most important tool for achieving clean, consistent lines.
Nail art striping tape has also become one of my favorite shortcuts, especially for straight or geometric nail design with lines. Simply placing the tape exactly where you want a crisp edge, painting over it and peeling it away before the polish fully dries produces incredibly sharp results without needing a perfectly steady hand.
I also always keep a dotting tool nearby, since small dots often pair beautifully with linework, adding a little extra detail at the end of a swirl or along the edge of a geometric pattern. A good quality thinning solution for your polish can also make a noticeable difference, since polish that is too thick tends to drag and clump when trying to create fine lines.
Also Read : Neon Orange And Black Nails: The Boldest Manicure Trend Taking Over This Season
How To Keep Nail Design With Lines Looking Fresh Longer
The cleanest, most precise nail design with lines can still fall victim to everyday wear if you are not careful with aftercare. I always recommend applying a fresh topcoat every few days, since this simple habit helps protect the fine linework from chipping or fading prematurely.
Wearing gloves while washing dishes or cleaning also helps preserve the crisp appearance of nail design with lines, since hot water and harsh soap tend to weaken polish adhesion over time. Applying cuticle oil daily keeps the surrounding skin healthy and helps prevent lifting at the edges, which is especially important for designs that rely on clean lines meeting a precise edge.
Using a gel based topcoat rather than a standard one also makes a significant difference in how long the fine details within nail design with lines actually last, since gel formulas tend to resist chipping and smudging far better than traditional polish.
Common Mistakes To Avoid With Nail Design With Lines
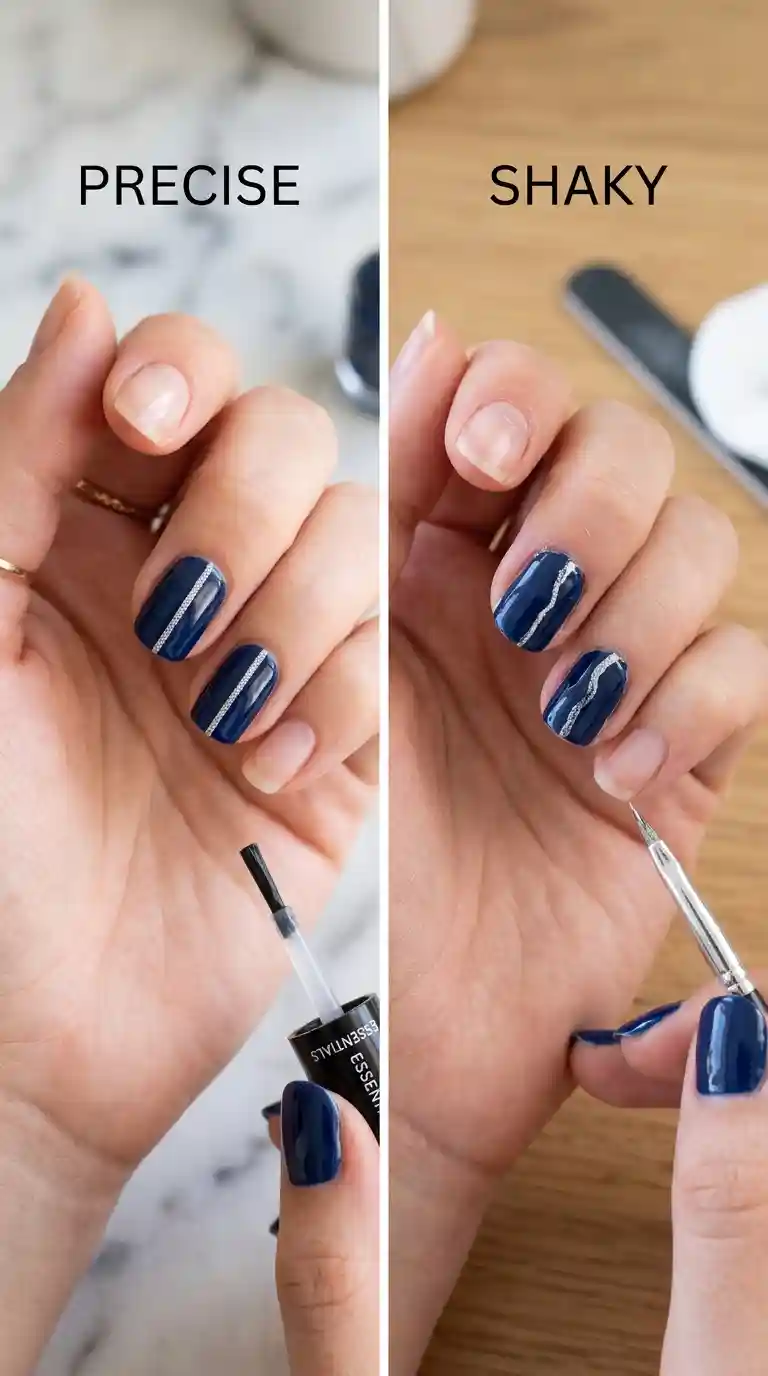
After years of creating nail design with lines professionally, I have seen almost every mistake possible, and honestly made a few myself while learning. The most common issue is rushing the process, attempting to paint a line quickly rather than slowly and deliberately, which almost always results in a shaky, uneven stroke.
Another mistake I see often involves using polish that is too thick or too old. Polish that has thickened over time tends to drag rather than glide smoothly, making it much harder to achieve the clean, crisp lines that define good nail design with lines. Keeping your polish fresh and occasionally adding a few drops of thinner solution can make a noticeable difference.
Skipping proper drying time between the base color and the linework is another frequent issue. Attempting to draw lines over polish that is not fully dry almost always results in smudging or dragging, which undermines the entire point of this precise, detail oriented technique.
Nail Design With Lines For Beginners
If you are completely new to nail art, nail design with lines might feel intimidating at first, especially watching more advanced patterns online, but it is actually a great starting point for building confidence with a brush. Starting with a single straight line across an otherwise plain nail is a simple, forgiving design that still looks intentional and polished.
I usually recommend beginners practice on a paper nail wheel before committing to their actual nails, which allows you to get comfortable with pressure, angle and speed without the pressure of ruining a finished manicure. Once a single straight line starts to feel comfortable, you can slowly progress to more advanced variations like intersecting lines or gentle curves.
Seasonal Variations Of Nail Design With Lines
Nail design with lines adapts beautifully across every season, which is part of why I find myself returning to this technique constantly throughout the year. In spring, I often use soft pastel lines against a white or cream base, creating a fresh, delicate look. Summer tends to call for brighter, bolder color combinations, while autumn pairs beautifully with warm metallics like copper and gold.
During winter, I love using nail design with lines in icy silvers and whites, sometimes combined with subtle glitter for a frosted effect. This adaptability is one of the biggest reasons this particular style has remained so popular across different seasons rather than fading after a single trend cycle.
Pairing Nail Design With Lines With Your Outfit
I love encouraging clients to think about nail design with lines as part of their overall outfit rather than something separate. Because linework can range from delicate and minimal to bold and graphic, this style adapts easily to almost any wardrobe or occasion.
For a polished office look, subtle nude tones with thin gold or black lines feel professional without drawing too much attention. For a bolder, more fashion forward outfit, high contrast color combinations within nail design with lines can actually become a statement piece in their own right, complementing rather than competing with the rest of the look.
Also Read: Heart Nails: The Ultimate Guide to Falling in Love With Your Manicure
Nail Design With Lines For Special Occasions
Beyond everyday wear, nail design with lines often becomes a popular choice for weddings, formal events and celebrations where clients want something elegant but not overly loud. A soft nude base with delicate gold linework feels timeless and sophisticated, making it one of my most requested styles for bridal appointments specifically.
For special occasions, I often add a bit of extra detail, like a few tiny rhinestones placed along the lines or a subtle metallic shimmer within the polish itself. These small additions help nail design with lines feel a bit more elevated and appropriate for the celebratory nature of the event without overwhelming the overall simplicity of the style.
Caring For Your Natural Nails Underneath Detailed Designs
A beautiful nail design with lines always starts with healthy nails underneath. I always recommend applying cuticle oil nightly, regardless of how busy life gets, since this simple habit keeps the nail bed properly hydrated and helps prevent premature lifting or peeling.
Taking short breaks between manicures, especially if you regularly wear gel or acrylic extensions, gives your natural nails time to recover and stay strong. Healthy, well maintained nails not only make nail design with lines look more polished, they also help the design last significantly longer before needing a touch up.
Final Thoughts On Nail Design With Lines
After years of creating nail design with lines for clients in my chair, I can honestly say this technique has earned its place as one of the most versatile styles in modern nail art. It works for almost any occasion, adapts easily across seasons and color palettes, and requires nothing more than a steady hand and a bit of patience to execute beautifully.
Whether you prefer something minimal like a single line near the cuticle, or something bold and geometric covering the entire nail, there is a version of nail design with lines that fits your personal style and comfort level. My biggest advice, both as a nail artist and someone who genuinely enjoys this particular technique, is to start simple and build confidence gradually. A single clean line really can transform an entire manicure.
Frequently Asked Questions About Nail Design With Lines
What tools do I need for nail design with lines?
A fine striping brush and steady hand are the main requirements, though nail art striping tape can help beginners achieve straighter, cleaner lines.
Are line nail designs good for beginners?
Yes, simple linework is actually one of the most beginner friendly nail art techniques, since even a single clean line looks intentional and polished.
How do I keep my lines from smudging?
Make sure your base color is completely dry before adding any linework, and allow the lines themselves to dry fully before applying a topcoat.
Can nail design with lines work on short nails?
Absolutely. Simple linework often looks even cleaner on shorter nails, since there is less surface area competing for visual attention.
What is the best polish for fine line nail art?
A slightly thinner, fresh polish tends to glide more smoothly for detailed linework, since thick or older polish tends to drag and clump.
How do I make my nail lines straighter?
Using nail art striping tape as a guide, or resting your hand on a stable surface while painting slowly, both help achieve straighter, more consistent lines.
Can I do nail design with lines on acrylic nails?
Yes, acrylic extensions actually provide extra surface area, making them a great canvas for more detailed or elaborate linear patterns.
What nail shape works best for line designs?
Almond and coffin shapes complement vertical and diagonal linework particularly well, though this style looks great on virtually any nail shape
Do I need special tools to create geometric line patterns?
A thin striping brush and possibly nail art tape are helpful, though some artists achieve geometric patterns freehand with practice and a steady hand.
Pingback: Blue Winter Nail Ideas: Icy & Beautiful Nail Designs
Pingback: Cute Candy Corn Nail Ideas for a Sweet Halloween Look
Pingback: Best Baby Blue Winter Nails Ideas for a Chic Seasonal Look