
Some nail trends whisper and some nail trends shout, and neon orange and black nails definitely belong in the second category. The first time a client asked me for this exact combination, I remember thinking it sounded almost too intense to pull off well. Within minutes of finishing that set, I completely changed my mind. The contrast between a bright, electric orange and a deep, saturated black created something that looked more like a piece of wearable art than a simple manicure.
Since then, neon orange and black nails have become one of the most requested bold color combinations in my studio, especially among clients who want their hands to make a statement rather than blend into the background. This is not a shy, subtle color pairing. It demands attention, and honestly, that is exactly why so many people love it.
In this guide I want to share everything I have learned about neon orange and black nails after years of creating this look for clients with all kinds of nail shapes, lengths and personal styles. Whether you want a full neon look, a moody black base with orange accents, or something in between, this article will walk you through the entire process.
Also Read: Wine Red Nails Design: The Ultimate Guide to Rich, Bold and Timeless Beauty
Why Neon Orange And Black Nails Are Having A Major Moment
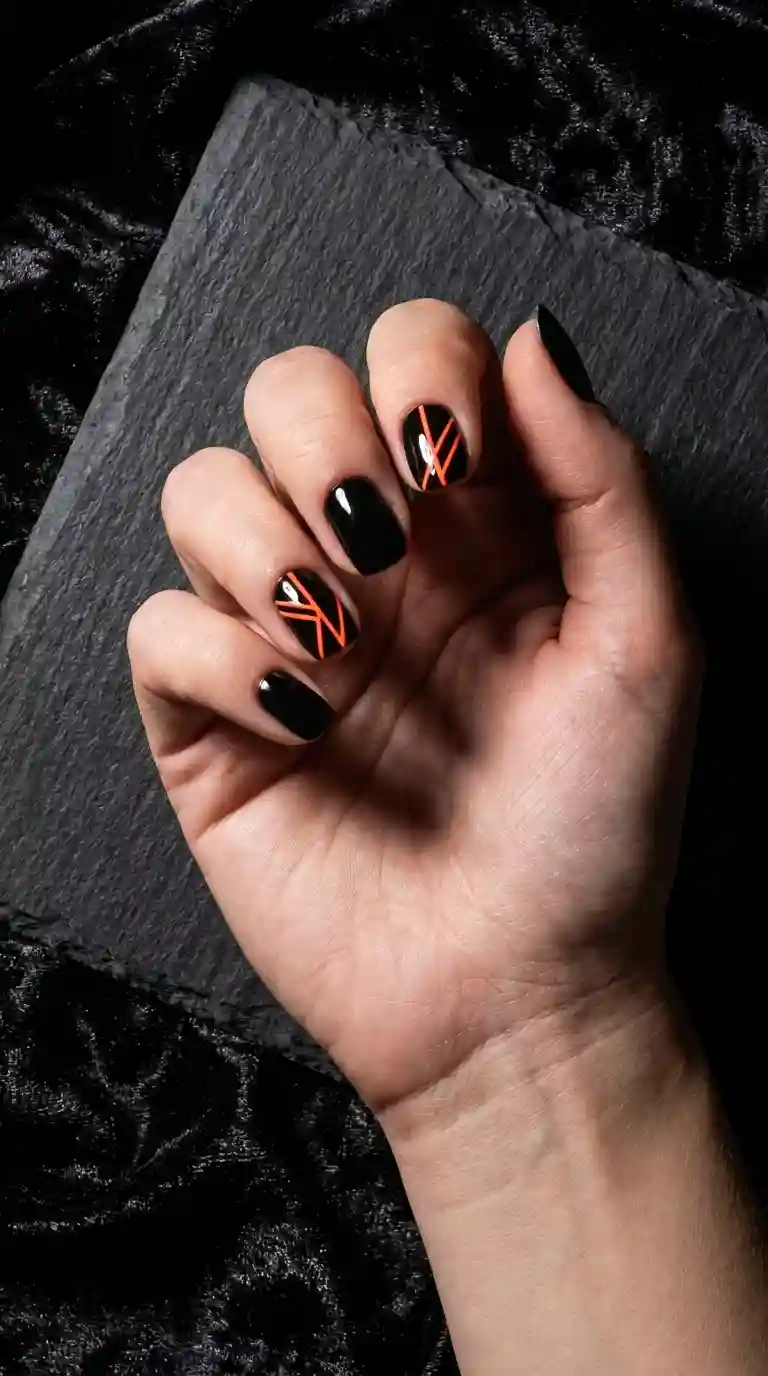
Neon orange and black nails have exploded across social media and salon requests over the past couple of seasons, and there are a few clear reasons behind that surge. Neon colors in general have made a strong comeback in fashion, and orange specifically has shifted from being an overlooked color to one of the most exciting shades in beauty right now.
Pairing that electric orange with black gives the color even more impact. Black acts almost like a frame, making the neon pop harder than it would against a lighter background. This combination also photographs incredibly well, which matters a lot in an era where nail art gets shared constantly online.
From a professional point of view, I also think neon orange and black nails have grown in popularity because they work across so many different aesthetics. They fit perfectly into a Halloween look, a punk inspired style, a summer festival outfit or even a high fashion editorial concept, depending on how the design gets styled.
My Experience Working With Neon Orange And Black Nails
Every time I create neon orange and black nails for a client, I notice how much confidence the color combination seems to bring out. People who choose this pairing tend to already know exactly what they want, and they are rarely looking for something safe or predictable.
What I find interesting is how differently clients interpret this same basic color pairing. Some want a clean, graphic look with sharp lines dividing the orange and black sections. Others want something more chaotic and artistic, like a splatter effect or an abstract blend between the two colors. Both approaches fall under the same umbrella of neon orange and black nails, yet the finished results can look completely different from one client to the next.
Over the years, working with neon orange and black nails has taught me a lot about color theory in a practical, hands on way. Getting the balance right between these two intense shades takes a bit of skill, since either color can easily overpower the other if the ratio is off.
Choosing The Right Neon Orange Polish For Black Nail Combinations
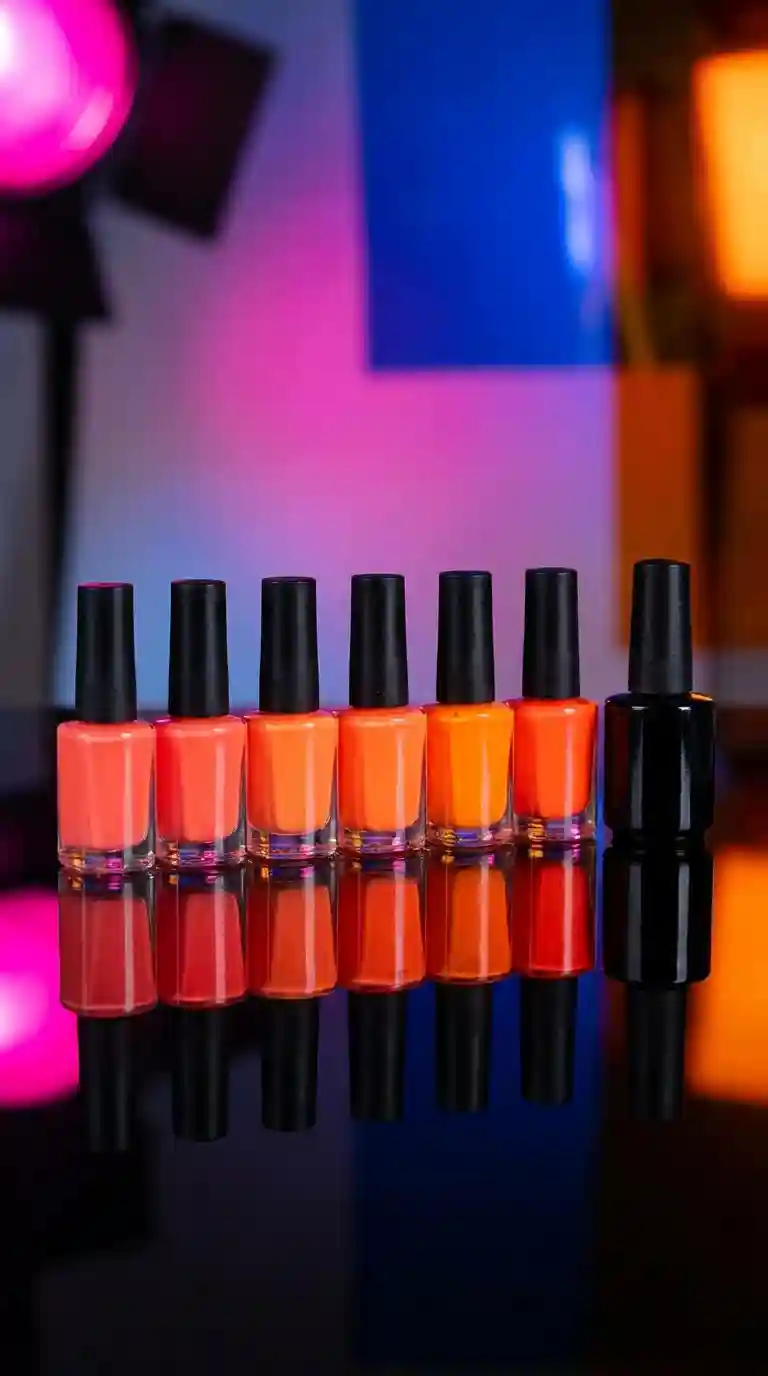
Not every orange polish qualifies as truly neon, and this distinction matters a lot when creating neon orange and black nails. A true neon shade should feel almost electric, bright enough that it seems to glow slightly under normal lighting, rather than reading as a standard warm orange.
I always test neon polishes on a nail wheel before using them on a client, checking for opacity, evenness and how well the color holds up against a stark black background. Some neon formulas require an extra coat or a white base underneath to really pop, since neon pigments can sometimes appear slightly muted without proper preparation.
Gel polish tends to be my preferred choice for neon orange and black nails, mainly because gel formulas typically offer richer pigment payoff and longer lasting vibrancy compared to some regular polishes, which can fade slightly over time with sun exposure.
Matte Versus Glossy Finishes For Neon Orange And Black Nails
A question I get constantly is whether matte or glossy finishes work better for this bold color combination. Glossy finishes tend to intensify the neon effect, making the orange practically glow under light, which is why I usually recommend gloss for clients who want maximum impact.
Matte black, on the other hand, creates a beautiful textural contrast against a glossy neon orange accent. I love combining a fully matte black base with one or two glossy neon orange accent nails, since the difference in texture adds another layer of visual interest to the overall design.
Must Read: Copper Nail Ideas That Turn Heads: The Ultimate Guide To Glowing, Gorgeous Copper Nails
Classic Split Design Neon Orange And Black Nails
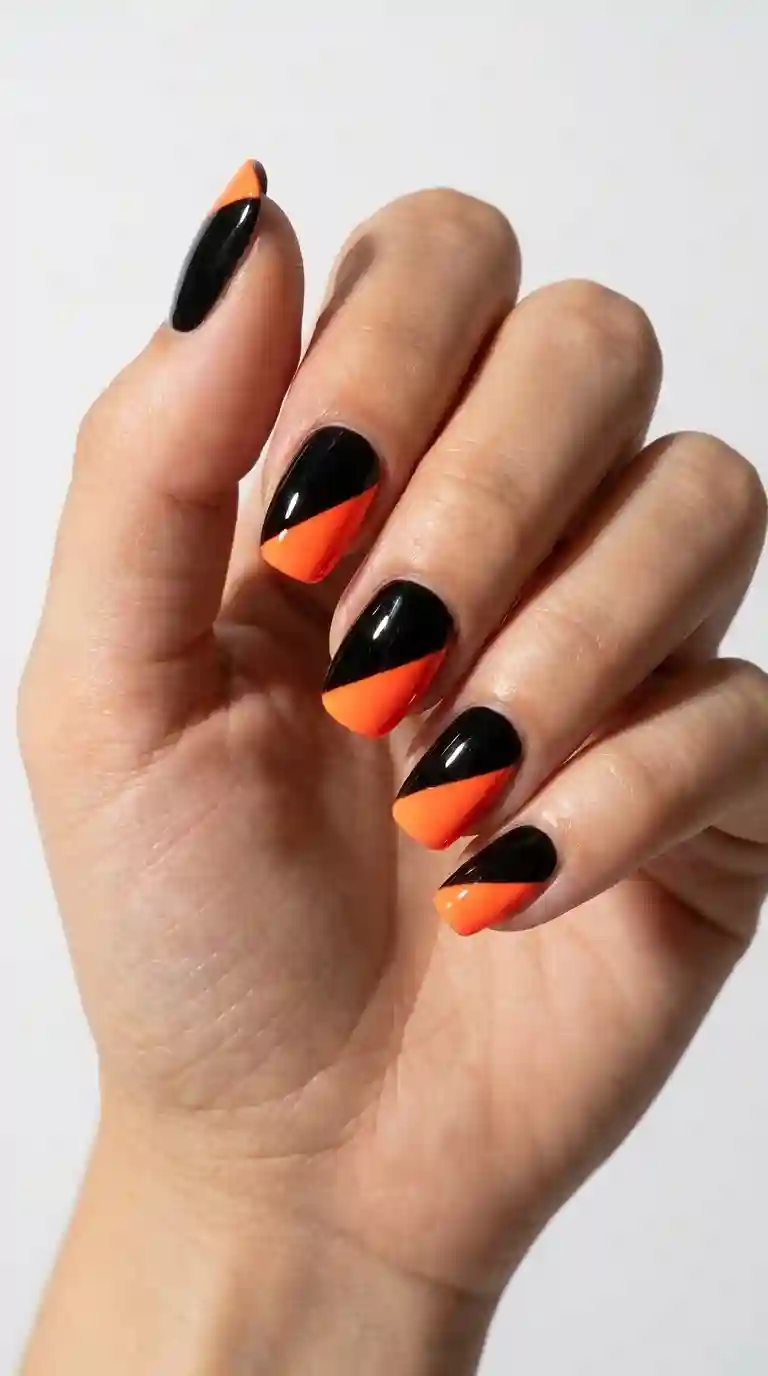
One of the most iconic ways to wear neon orange and black nails is through a clean, split design, where each nail is divided roughly in half between the two colors. This look feels graphic, modern and incredibly striking, especially when the line between colors is kept crisp and precise.
I usually create this effect using striping tape to mask off a clean diagonal or straight line before applying the second color. Patience matters a lot here, since any unevenness in the line becomes immediately noticeable given how much contrast exists between neon orange and black.
Some clients prefer alternating the split direction across different nails, creating a slightly more dynamic, asymmetrical version of neon orange and black nails, while others prefer keeping every nail consistent for a cleaner, more uniform look.
Neon Orange And Black Nails With Geometric Patterns
Geometric designs pair incredibly well with this color combination, since sharp lines and angular shapes complement the bold, graphic nature of neon orange and black nails. Triangles, zigzags and angular blocks all work beautifully within this palette.
I often use striping tape or a fine detail brush to create small triangle patterns near the cuticle or tip of the nail, alternating between the two colors for maximum contrast. Adding thin black outlines around each orange shape helps define the pattern even further, giving the design a polished, intentional appearance.
For clients who enjoy a bit of complexity, layering multiple small triangles or diamond shapes across a single nail creates a mosaic like effect that still fits comfortably within the theme of neon orange and black nails.
Neon Orange And Black Nails For Halloween
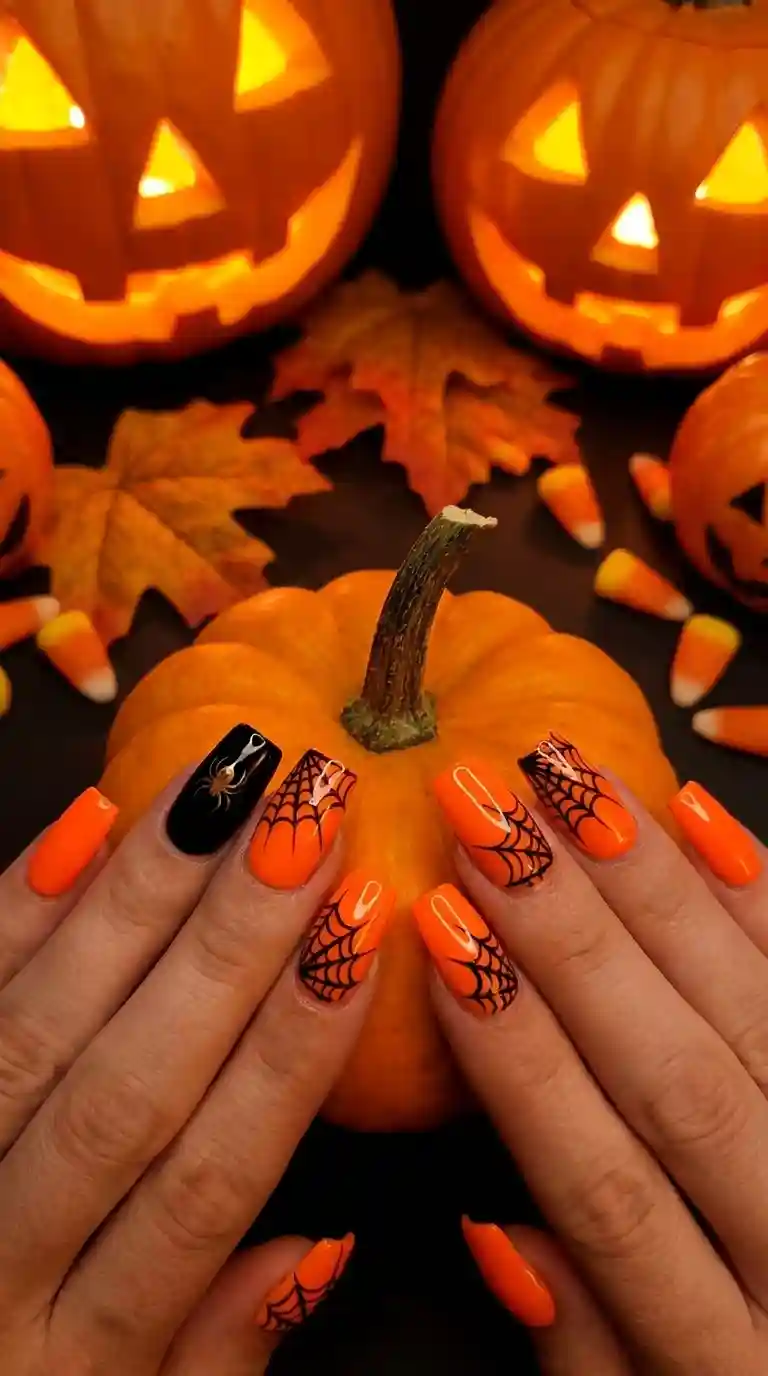
This color combination naturally lends itself to Halloween, and every October my studio gets flooded with requests for neon orange and black nails specifically tied to the spooky season. The palette already feels festive without needing much extra decoration.
For Halloween specific designs, I often add small details like spider webs, tiny bats or subtle jack o lantern faces painted in black over an orange base. Alternatively, keeping most nails a solid bold color and reserving detailed artwork for just one or two accent nails helps balance a busy design with a cleaner, more wearable overall look.
Neon orange and black nails also work beautifully as a base for glow in the dark topcoats during Halloween, adding a fun, playful element that feels perfect for costume parties or trick or treating with kids.
Ombre Neon Orange And Black Nails
Blending these two colors into a smooth gradient creates a completely different feel compared to sharp, graphic designs. Ombre neon orange and black nails have a softer, more artistic quality, almost like a sunset fading into a night sky.
I usually start by applying black polish near the cuticle, then gradually blend neon orange toward the tip using a makeup sponge dabbed lightly across the nail. Building up the color slowly in thin layers helps create a smoother transition rather than a harsh, abrupt line between the two shades.
This technique takes a bit of practice to master, but once you get comfortable with the sponge blending method, ombre versions of neon orange and black nails become one of the more forgiving techniques within this bold color palette, since minor imperfections tend to blend naturally into the gradient.
Also Read : Bright Orange Nail Designs That Will Steal the Spotlight This Season
Neon Orange And Black Nails With Glitter Accents
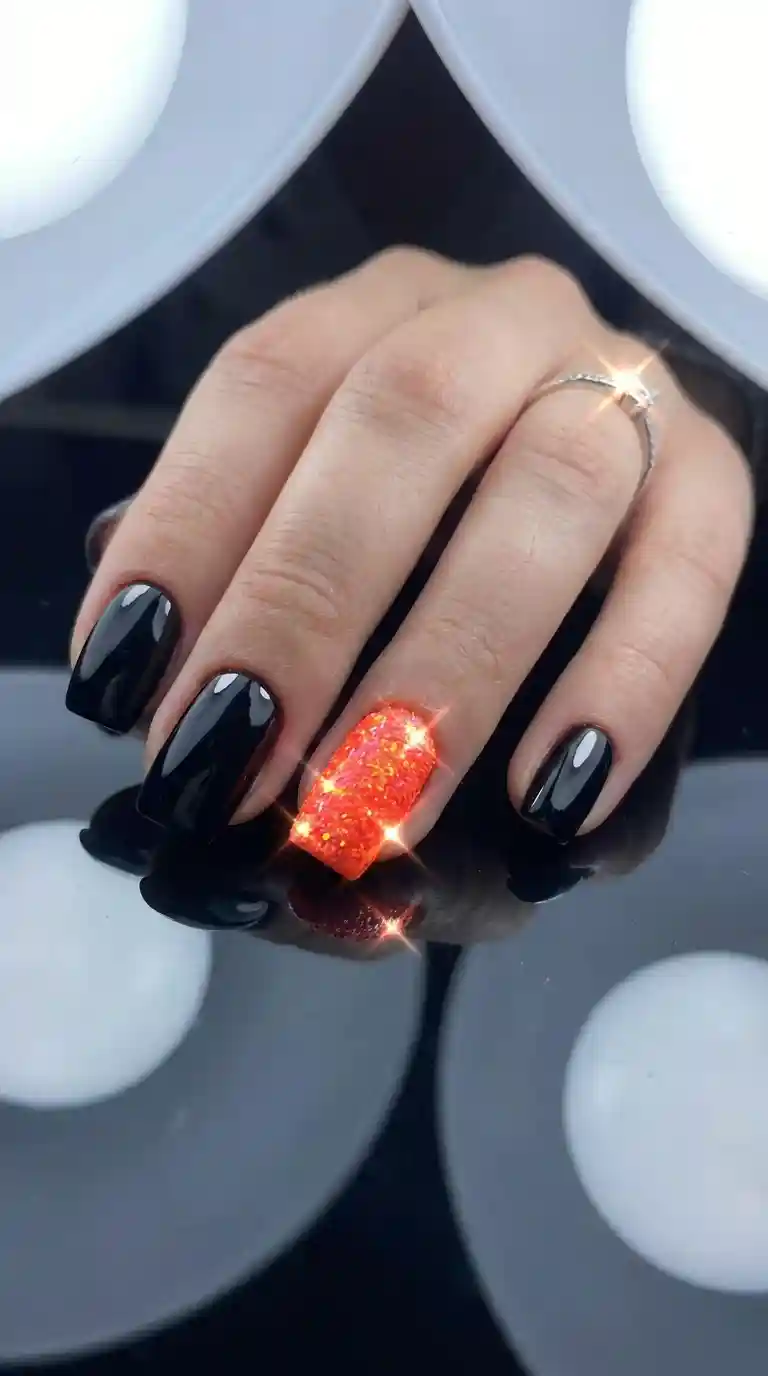
Adding glitter to neon orange and black nails takes the bold factor even further, especially when using fine orange glitter mixed with a bit of gold shimmer for extra dimension. I usually reserve glitter for one or two accent nails rather than the entire set, since the combination of neon color and heavy glitter can start to feel overwhelming if applied everywhere.
A popular technique involves applying a thin layer of neon orange glitter near the tips of otherwise solid black nails, creating a sparkling gradient effect that still keeps the overall look grounded and intentional. This subtle addition of shimmer works especially well for clients wanting neon orange and black nails for evening events or parties where extra sparkle feels appropriate.
Minimalist Neon Orange And Black Nails For Everyday Wear
Not everyone wants a fully bold, maximalist manicure every single day, and that is completely understandable. Some of my favorite minimalist takes on neon orange and black nails involve just a small pop of color rather than covering the entire nail in neon.
A simple black manicure with one thin neon orange line near the cuticle, sometimes called a reverse french accent, delivers just enough boldness without feeling overwhelming for daily wear. Another minimalist approach involves painting four nails black and just one nail solid neon orange, creating a striking accent effect that still feels wearable for work or school environments.
I often recommend this toned down version of neon orange and black nails to clients who love the color combination conceptually but need something a bit more subtle for their everyday lifestyle or workplace dress code.
Neon Orange And Black Nails For Short Nails
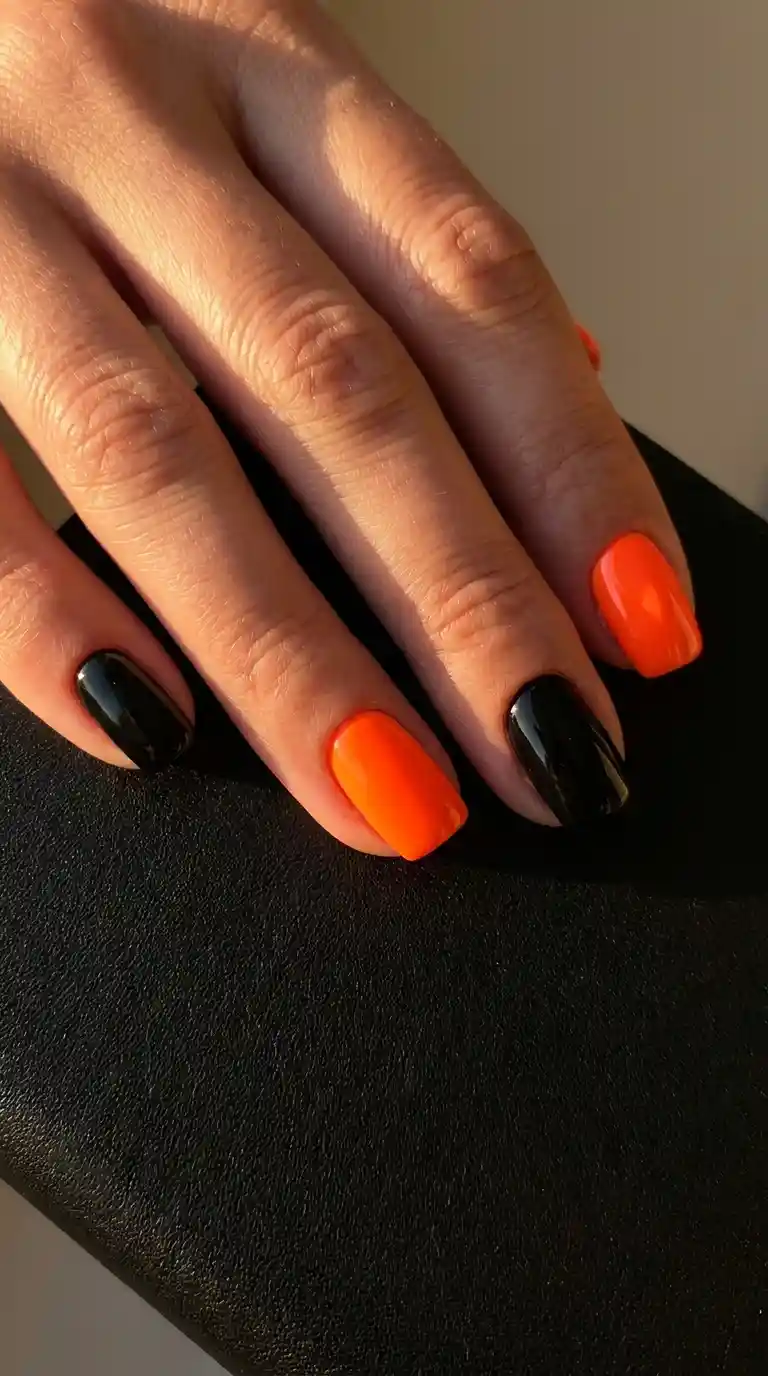
A common misconception is that bold color combinations only work on longer nails, but neon orange and black nails translate beautifully onto shorter nail beds as well. You simply need to adjust the scale of any patterns or details to fit the smaller canvas.
For shorter nails, I often recommend keeping designs simple, like alternating solid colors across different nails or adding a single thin stripe near the cuticle rather than attempting detailed patterns that might feel cramped on a smaller surface. Solid color blocking tends to look particularly clean and graphic on shorter nails, which works perfectly within this bold color theme.
Neon Orange And Black Nails For Long And Almond Shaped Nails
Longer, almond shaped nails give a lot more room to experiment with neon orange and black nails, allowing for bigger geometric patterns, detailed ombre blending or even small hand painted illustrations layered within the color scheme. The extended nail bed really lets both colors breathe and stand out individually before they interact with each other.
I love using negative space techniques on longer nails within this color palette, leaving small unpainted sections in interesting shapes between the orange and black areas. This creates a modern, editorial feel that still fits firmly within the concept of neon orange and black nails while adding an extra layer of visual sophistication.
French tips also look incredible on longer nails when reinterpreted with this bold palette. Swapping a traditional white tip for a bright neon orange tip against a solid black base gives a striking, contemporary twist that photographs beautifully.
Neon Orange And Black French Tip Nails
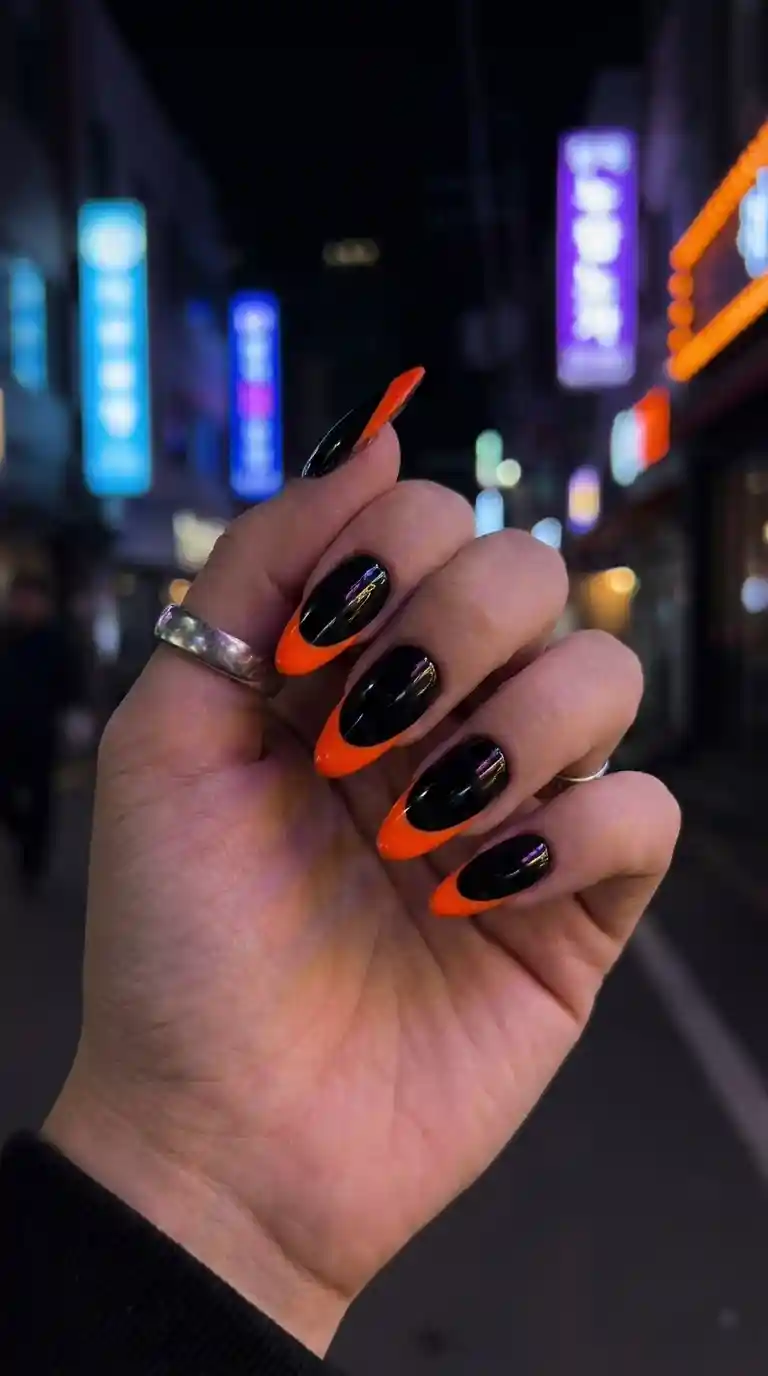
Reinventing the classic french manicure with this bold color combination creates something that feels edgy and modern rather than delicate or traditional. Neon orange and black nails work beautifully in this format, especially for clients who want a graphic look without a fully saturated neon nail.
I usually outline the tip shape first using striping tape to keep the line crisp, then fill it in carefully with neon orange polish over the black base. Adding a thin black outline directly beneath the orange tip helps define the shape even further, giving the whole design a clean, polished finish.
This particular style tends to appeal to clients who want something bold enough to stand out but still structured enough to feel intentional and put together for everyday situations.
Must Read : Plum Ombre Nails: The Ultimate Guide To Getting That Gorgeous Fading Gradient Look
Abstract And Artistic Neon Orange And Black Nails
For clients who want something a bit more experimental, abstract designs offer a lot of creative freedom within the neon orange and black nails color scheme. Swirls, splatters, brush strokes and organic shapes all work beautifully when contrasted against each other in these two bold colors.
I often use a dotting tool or the tip of a brush to flick small splatters of neon orange across a matte black base, creating a paint splatter effect that feels artistic and spontaneous. Alternatively, using loose, sweeping brush strokes to blend the two colors together creates a more painterly, abstract look that still clearly fits within this bold color theme.
This abstract approach to neon orange and black nails tends to be especially popular among creative clients, artists and anyone who wants their manicure to feel like a genuine piece of wearable art rather than a repeatable pattern.
Neon Orange And Black Nails For Acrylic And Gel Extensions
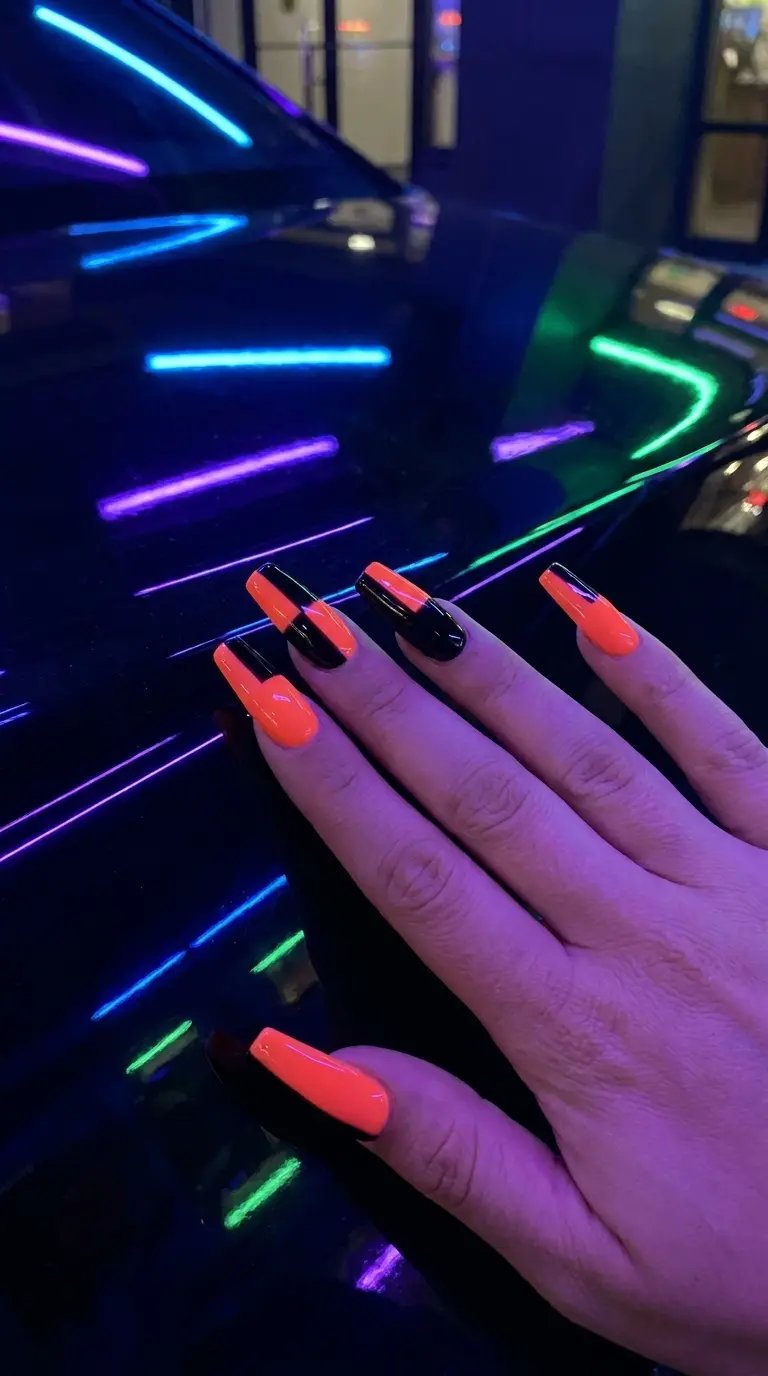
Clients frequently ask whether neon orange and black nails work well on acrylic or gel extensions, and the answer is absolutely yes. Extensions actually provide even more surface area to work with, making them ideal for detailed geometric patterns, larger abstract designs or dramatic ombre blending.
For acrylic sets, I typically recommend coffin or almond shapes, since the elongated, tapered surface really allows both colors to stand out individually while still working together cohesively. Gel extensions offer a slightly more natural, flexible option while still providing plenty of length for detailed nail art within this bold color scheme.
Regardless of which extension type you choose, achieving a smooth, even base color makes a significant difference in how crisp and professional the final design looks, especially given how much contrast exists between neon orange and black.
How To Create Neon Orange And Black Nails At Home
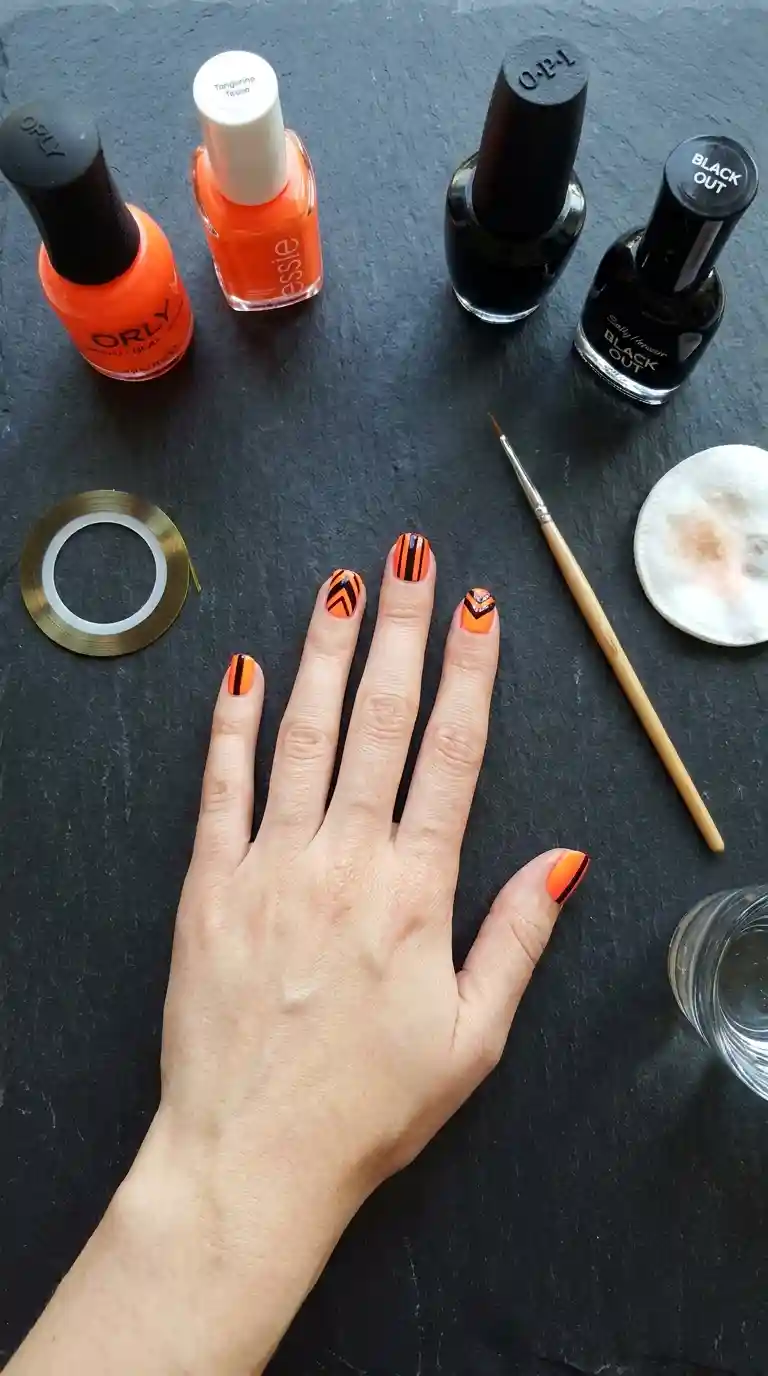
You do not need professional training to try neon orange and black nails at home, though a bit of patience definitely helps, especially for designs involving clean lines or patterns. Over the years I have picked up several tricks that make this process much easier for anyone attempting the look themselves.
Start with clean, properly prepped nails. Push back your cuticles gently, lightly buff the surface and wipe away any oils using rubbing alcohol before applying polish. This step matters significantly for neon shades in particular, since any unevenness on the natural nail can affect how smoothly the neon pigment applies.
Apply a good base coat first, followed by your chosen base color in two thin, even layers, allowing each one to dry completely before proceeding. Once your base color has fully set, that is when you can begin adding the second color, whether through a clean split design, geometric shapes or a blended ombre effect.
Step By Step Guide For Neon Orange And Black Nails
- Start with clean, dry nails and gently push back the cuticles.
- Apply a thin base coat and allow it to dry completely.
- Paint two thin coats of your chosen base color, letting each layer dry before adding the next.
- Add your second color using striping tape, a sponge or a fine detail brush depending on your chosen design.
- Seal everything with a glossy or matte topcoat depending on your preferred finish.
- Clean up any excess polish around the cuticles using a small brush dipped in acetone.
Taking your time through each of these steps really does make a noticeable difference in how clean and professional your finished neon orange and black nails end up looking.
Read Also : 60+ Gorgeous Black Birthday Nail Ideas To Make Your Big Day Unforgettable
Tools And Products For Neon Orange And Black Nails
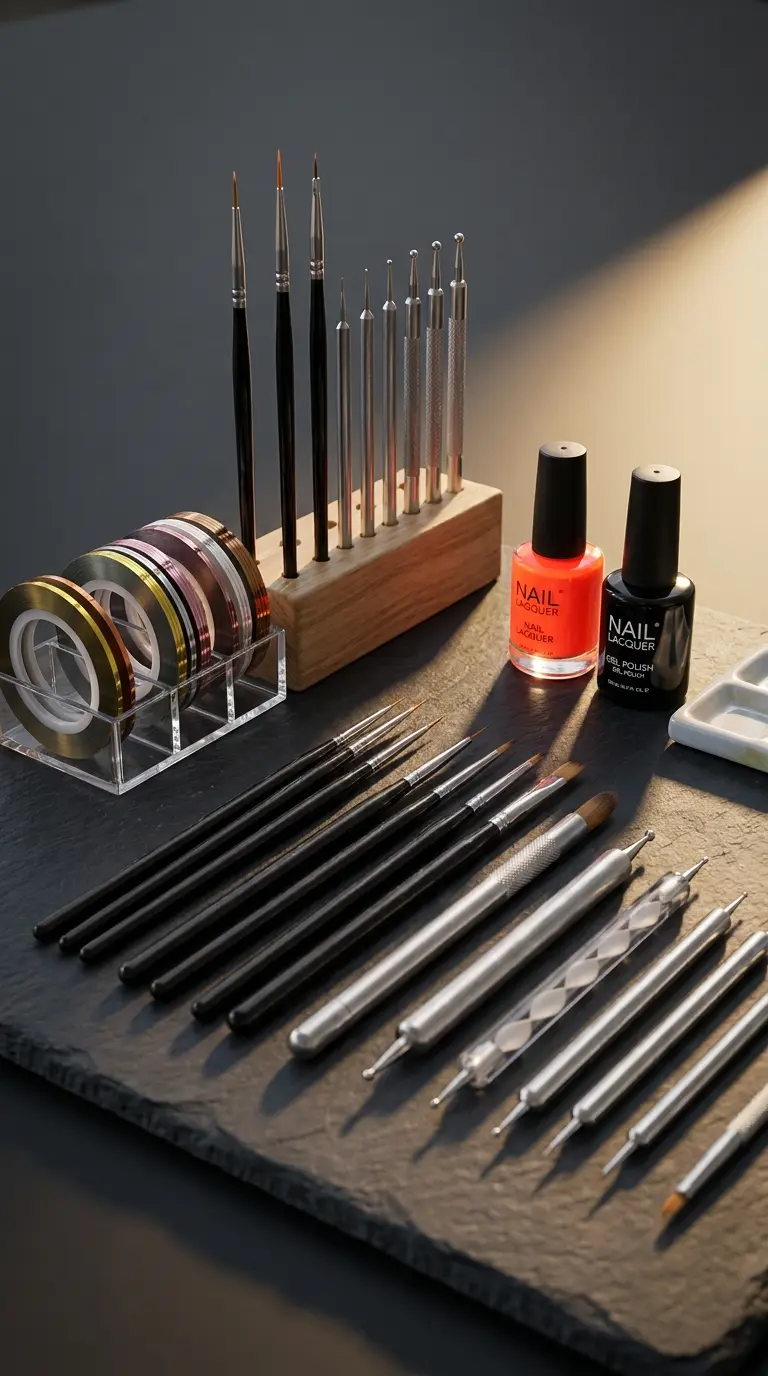
Over the years I have built up a small collection of tools that make creating neon orange and black nails much easier, both in a professional setting and for anyone trying the look at home. Striping tape is probably my most used tool for this particular color combination, since it allows for crisp, clean lines when creating split designs or geometric patterns.
A fine detail brush becomes essential for anything beyond a solid color base, allowing for precise linework, small triangle shapes or delicate outlining between the two colors. A makeup sponge also comes in handy for anyone wanting to try an ombre or gradient version of neon orange and black nails, helping blend the two shades smoothly without harsh lines.
Keeping a couple of different neon orange shades on hand, ranging from a slightly more muted coral orange to a truly electric neon, gives you flexibility depending on how bold you want your finished neon orange and black nails to look for any given occasion.
How To Make Neon Orange And Black Nails Last Longer
Bold color combinations deserve to last as long as possible, and there are a few habits that really help extend the wear time of neon orange and black nails. Wearing gloves while washing dishes or cleaning protects the polish from hot water and harsh soap, both of which weaken polish adhesion over time.
Applying cuticle oil daily keeps the surrounding skin healthy and helps prevent the polish from lifting prematurely at the edges. Using a gel based topcoat rather than a standard one also significantly improves wear time, which matters a lot for designs involving fine detail work like geometric patterns or clean split lines.
Avoiding the habit of using your nails as tools, whether that means opening packages or scratching labels, also helps preserve the crisp lines and vibrant color of your neon orange and black nails for as long as possible.
Neon Orange And Black Nails For Different Skin Tones
One of the great things about neon orange and black nails is how universally striking the combination looks across different skin tones. The high contrast between the two colors tends to draw attention to the nails themselves rather than relying heavily on matching skin undertones.
For warmer skin tones, a slightly more golden or fiery orange tends to blend beautifully with the natural warmth already present in the skin. For cooler skin tones, a brighter, more electric orange creates a striking pop of contrast that stands out even more dramatically against the black.
Regardless of skin tone, neon orange and black nails tend to look bold and confident, which is exactly why so many different clients gravitate toward this particular color combination.
Mistakes To Avoid When Trying Neon Orange And Black Nails
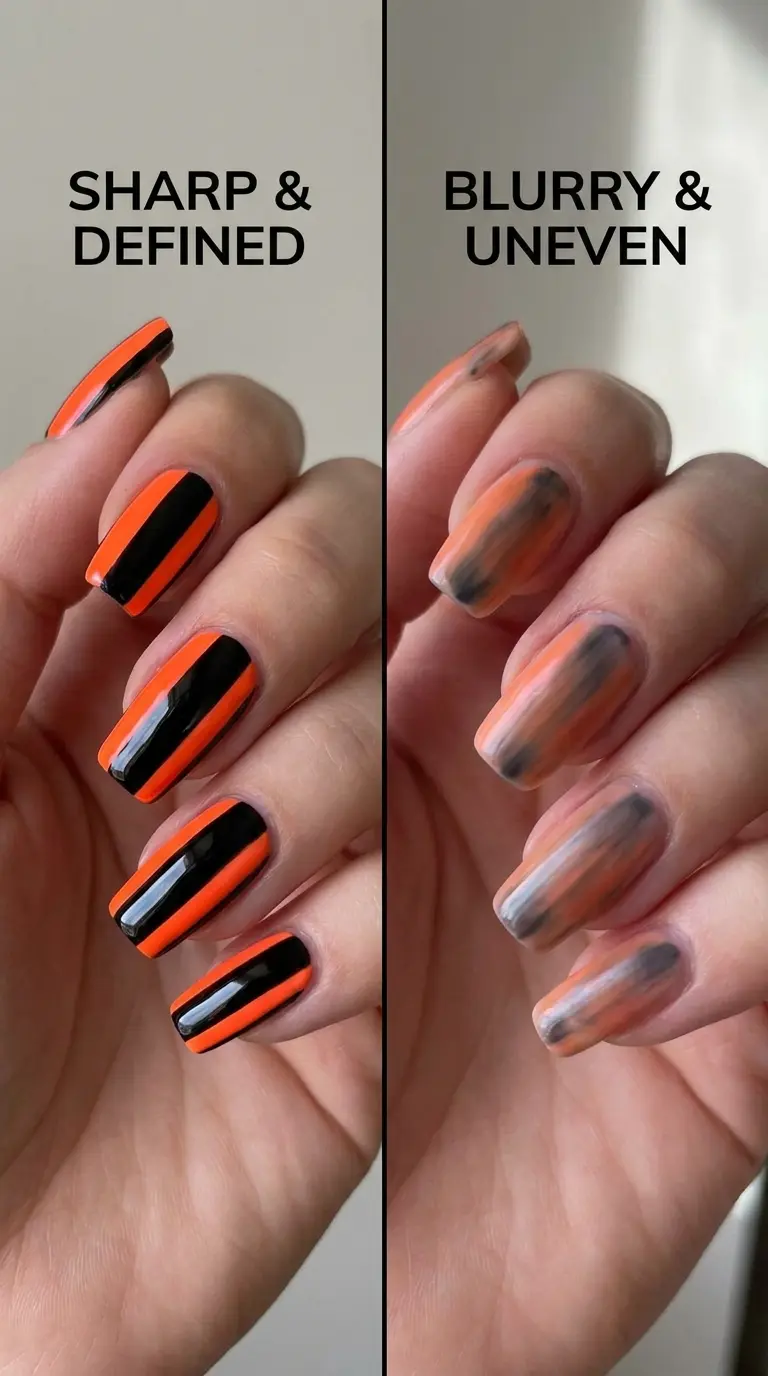
After creating neon orange and black nails for so many clients, I have noticed a handful of common mistakes that tend to come up repeatedly, especially among people trying this bold look for the first time. One frequent issue is not applying enough coats of neon orange, which can result in a slightly muted, streaky finish rather than the vibrant, opaque color the trend is known for.
Skipping striping tape when attempting a clean split design is another common mistake. Freehand lines can look great with practice, but for beginners, skipping this tool often results in uneven, wobbly borders between the orange and black sections, which becomes especially noticeable given how much contrast exists between the two shades.
Rushing the drying process between colors is another issue I see frequently. Neon orange and black nails often involve multiple layers and design elements, and moving too quickly between steps tends to cause smudging that ruins otherwise clean linework.
Neon Orange And Black Nails For Nail Art Beginners
If you are new to nail art, neon orange and black nails might feel intimidating given how bold the combination is, but there are plenty of simple entry points for beginners. Starting with a solid black manicure and just one neon orange accent nail is a great way to ease into this color palette without overwhelming yourself with complex patterns right away.
Once you feel more comfortable, you can slowly build up to slightly more advanced techniques like a clean split design or a simple sponge blended ombre. Practicing on a paper nail wheel before committing to your actual nails is always a smart way to build confidence and get comfortable working with two such contrasting colors.
Pairing Neon Orange And Black Nails With Your Outfit
I love encouraging clients to think about their neon orange and black nails as part of their broader outfit rather than an isolated detail. This bold combination pairs beautifully with all black outfits, allowing the nails to become the standout pop of color against an otherwise monochrome look.
For a more playful, casual outfit, neon orange and black nails work wonderfully alongside denim, graphic tees or streetwear inspired pieces, tying the whole look together with a cohesive, edgy vibe. Even a simple neutral outfit gets instantly elevated with this bold manicure, since the high contrast naturally draws the eye without requiring much additional styling effort.
Must Read : Pastel Yellow French Tip Nails: The Sunshine Manicure Every Nail Lover Needs This Season
Neon Orange And Black Nails For Festivals And Concerts
This color combination has become especially popular for festival season and concert going, where bold, statement making beauty choices tend to fit right in with the overall energy of the event. Neon orange and black nails photograph beautifully under stage lighting and blacklight setups, which makes them a favorite among festival goers looking for something eye catching.
For festival specific looks, I often add extra glitter, small rhinestones or even a bit of neon face paint inspired detailing to match the overall energy of the event. The boldness of neon orange and black nails naturally complements the vibrant, high energy atmosphere typically associated with festivals and live concerts.
Caring For Your Nails Underneath Neon Orange And Black Nails
A beautiful manicure always starts with healthy nails underneath, regardless of how bold or intricate the design on top happens to be. I always recommend applying cuticle oil nightly, since this simple habit keeps the nail bed properly hydrated and helps prevent premature lifting, especially around detailed areas like split lines or geometric patterns.
Taking short breaks between manicures, particularly if you regularly wear gel or acrylic extensions, gives your natural nails time to recover and stay strong. Healthy nails underneath not only help neon orange and black nails look more polished, they also extend how long the design lasts before requiring a touch up.
Final Thoughts On Neon Orange And Black Nails
After years of creating neon orange and black nails for clients with every kind of personal style, I can confidently say this trend has real staying power precisely because of how bold and versatile it is. It works for Halloween, festivals, everyday statement making and everything in between, adapting easily to whatever occasion calls for it.
Whether you prefer a subtle single accent nail, a clean graphic split design, or a fully saturated neon look across all ten nails, there is a version of neon orange and black nails that fits your comfort level and personal aesthetic. My biggest piece of advice, both as someone who creates this look constantly and someone who genuinely loves working with bold color, is to trust the contrast. These two colors were practically made to work together, and the boldness is exactly the point.
Frequently Asked Questions
What colors pair well with neon orange and black nails?
Gold accents, white detailing and touches of hot pink all complement this bold combination nicely, though the two core colors already create plenty of visual impact on their own.
Are neon orange and black nails good for Halloween?
Yes, this color combination naturally fits the Halloween season and works beautifully with added details like spider webs, bats or jack o lantern faces.
How do I make neon nail polish look more vibrant?
Applying a white base coat underneath neon shades helps boost pigment intensity, and using two to three thin coats ensures full, even opacity.
Can neon orange and black nails work for short nails?
Yes, short nails handle this combination beautifully. Simple color blocking or a single thin stripe tends to look cleanest on shorter nail beds.
What is the best way to create a clean split design?
Using striping tape to mask off a clean line before applying the second color gives the most precise, professional looking result for split nail designs.
Do neon orange and black nails suit every skin tone?
Yes, the high contrast between these two colors tends to look striking across a wide range of skin tones, regardless of warm or cool undertones.
How many coats of neon orange polish do I need?
Most neon orange polishes require two to three thin coats for full opacity, since neon pigments can sometimes appear slightly sheer with fewer layers.
Can I do neon orange and black nails on acrylic extensions?
Definitely. Acrylic extensions provide extra surface area, making them ideal for detailed geometric patterns or dramatic ombre blending within this color scheme.
What nail shape works best for this bold combination?
Almond and coffin shapes showcase detailed patterns beautifully, though the color combination looks striking on virtually any nail shape, including short and square nails.
How do I blend an ombre effect between orange and black?
Using a makeup sponge to gradually build up color in thin layers, starting with black near the cuticle and blending into orange near the tip, creates a smooth gradient.