
There is something about plum that just feels expensive on nails. It is not quite purple, not quite burgundy, and it sits in that rich in between space that photographs beautifully in every kind of light. Over the last few seasons plum ombre nails have quietly become one of the most requested looks in salons, and honestly, it makes sense once you see it in person. The soft blend from a pale lilac or nude base into a deep wine plum tip has this way of looking both understated and dramatic at the same time.
If you have been scrolling through nail inspiration lately, chances are you have already seen a dozen versions of plum ombre nails without even knowing the name for it. That moody gradient, sometimes glossy, sometimes matte, sometimes dusted with a little shimmer near the tip, is exactly what we are going to break down today.
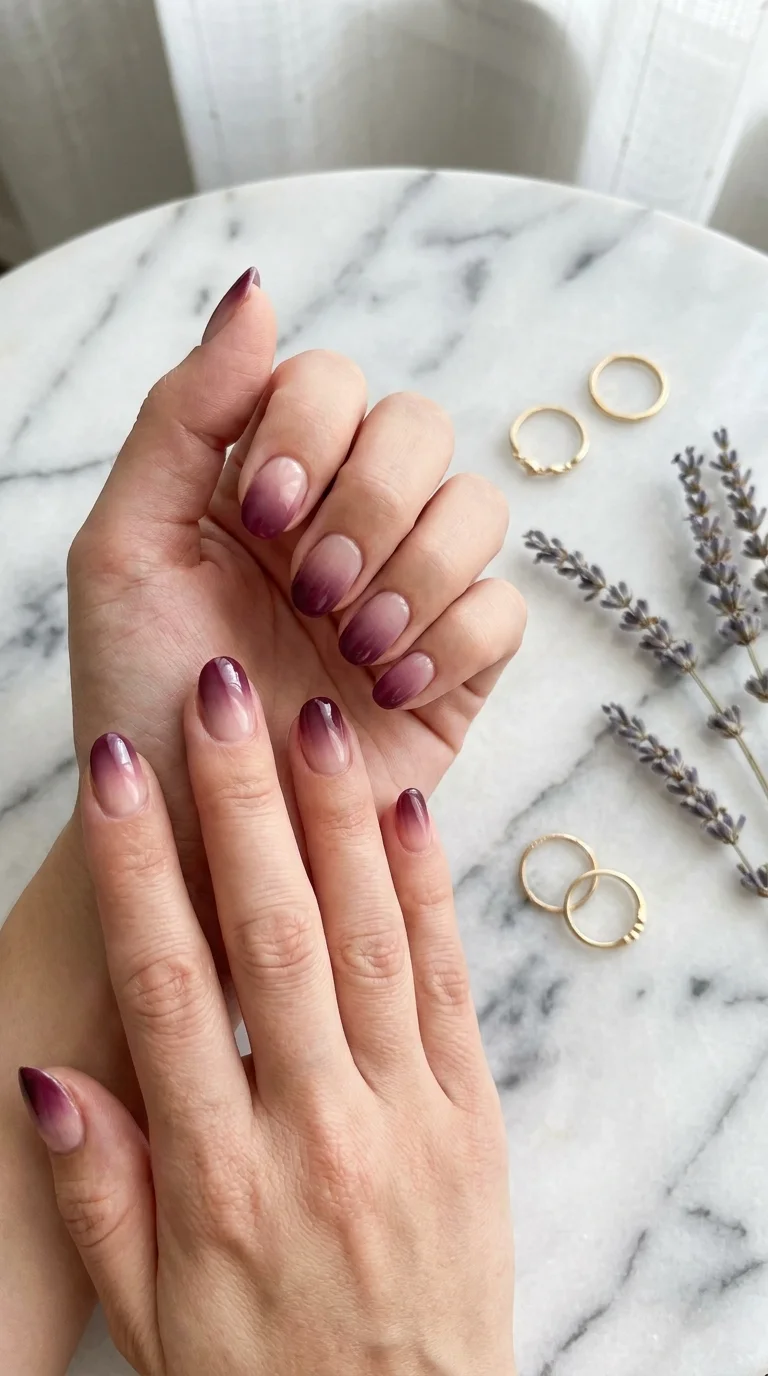
This guide covers everything from picking the right shade of plum, to the actual application technique, to shape specific advice, seasonal variations, mistakes people make, and how to keep the look fresh for as long as possible. Grab a cup of tea, because we are going deep on this one.
Also Read : 77 Stunning Cowgirl Nails Ideas That Will Make Your Manicure Absolutely Unforgettable
What Exactly Are Plum Ombre Nails
Plum ombre nails are a nail art technique where two or more shades of plum, or plum paired with a lighter neutral, are blended together on the nail so that the color transitions smoothly from one end to the other instead of stopping in a hard line. Most commonly the gradient runs from light at the base near the cuticle to dark at the free edge, though plenty of people flip it the other way for a softer everyday version.
The word ombre actually comes from a French term meaning shaded, and in the beauty world it refers to any gradual color fade, whether that is hair, makeup, or nails. When you apply that idea specifically to a plum color story, you get this dusky, romantic gradient that reads as sophisticated without trying too hard.
What makes plum such a good candidate for ombre work is the depth of the shade itself. Plum sits between red, purple and brown on the color wheel, which means it naturally has a lot of tonal range to play with. You can go from a barely there mauve all the way to an almost black eggplant and it still reads as part of the same family.
Why Plum Works So Well For A Gradient
Some colors just do not gradient nicely. Bright neon shades can look patchy when blended because the eye picks up on inconsistencies quickly. Plum, on the other hand, is forgiving. Because it already has warmth and coolness mixed into it, small imperfections in the blend tend to disappear into the overall richness of the color rather than standing out.
I have watched clients who were nervous about trying ombre for the first time relax once they saw a plum version on their nails, simply because the transition looked intentional even before it was fully smoothed out. That is not something every color offers.
Why Plum Ombre Nails Are Having A Real Moment
Trends in the nail world move fast, but plum ombre nails have shown real staying power for a few solid reasons. First, it works across seasons in a way that a lot of trendy nail looks simply do not. A bright orange ombre might feel out of place in January, but a plum gradient looks just as at home during a cold winter as it does during a warm September evening.
Second, plum ombre nails photograph incredibly well. With the rise of close up nail content on social platforms, colors that catch light in interesting ways tend to get shared more, and plum has that quality thanks to its depth.
Third, it flatters an enormous range of skin tones. Unlike some colors that only look good on certain undertones, plum tends to sit nicely against warm, cool, and neutral skin because it has both warm and cool pigments built into it depending on the exact formulation.
Lastly, plum ombre nails feel a little more grown up than some of the pastel or candy colored trends that dominate certain seasons. It reads as polished, which is exactly why so many people request it for weddings, job interviews, and other occasions where they want their hands to look put together without looking flashy.
Choosing The Right Shade Of Plum For Your Ombre
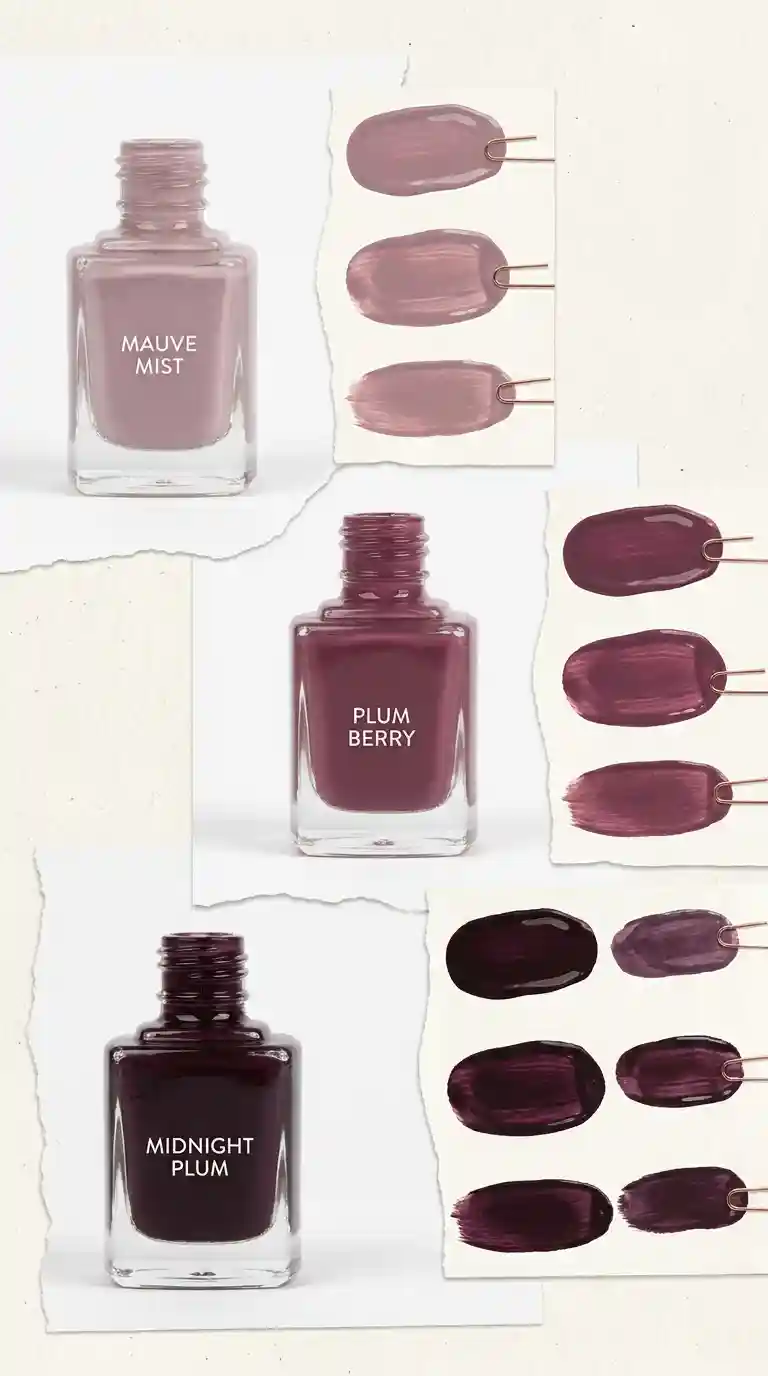
Not all plums are created equal, and picking the right pairing of shades is honestly half the battle when it comes to nailing this look. Plum ombre nails can lean several different directions depending on the exact polishes or gels you choose.
Light And Airy Plum Ombre
If you want something soft and wearable for daily life, start with a base close to your natural nail tone or a sheer pink, then fade into a dusty mauve rather than a true dark plum. This version of plum ombre nails is popular with people who want color without feeling like they are wearing a bold statement. It suits office settings and works beautifully for spring weddings or bridal parties who still want a hint of color.
Read Also: Blooming Gel Nail Ideas That Will Make Your Manicure Impossible to Ignore
Deep And Moody Plum Ombre
This is the version most people picture when they hear the phrase plum ombre nails. Think a rich mauve or lilac base fading into an almost black plum tip. It has serious drama and tends to be the most requested version during autumn and winter months. The deeper the shade at the tip, the more the gradient feels like it belongs to evening wear rather than daytime.
Plum Paired With Metallics
Some of the most eye catching plum ombre nails I have created involve blending plum with gold or rose gold shimmer rather than a second solid color. Instead of fading plum into a darker plum, you fade it into a metallic dust near the tip or cuticle. It gives the whole set a bit of glamour and works especially well for holiday parties or New Year celebrations.
Undertones Matter More Than People Think
When choosing your plum shades, it helps to know whether you are drawn to warm or cool undertones. Warm plums lean slightly toward brick red or terracotta, while cool plums lean toward blue or violet. Mixing a warm plum with a cool plum in the same ombre can sometimes create a muddy transition, so it is worth swatching your two shades side by side on a nail wheel before committing to a full set.
I always tell clients to hold both bottles against their skin in natural daylight before deciding. Salon lighting can be flattering in ways that daylight is not, and plum ombre nails that looked stunning under warm salon bulbs can sometimes look a little different once you step outside.
Tools And Products You Will Need
Before diving into the technique, let us talk supplies. Plum ombre nails can be done with regular polish, gel polish, or even acrylic powders, but the tools you need shift slightly depending on which method you pick.
For a classic gel ombre you will want a base coat, at least two shades of plum gel polish, a makeup sponge cut into small wedges, a small dish of alcohol or gel cleanser, a fine detail brush, and a good quality top coat. A UV or LED lamp is obviously necessary if you are working with gel.
For a regular polish version, the list is similar minus the lamp, though you will want a fast drying top coat since regular polish air dries and gives you a shorter working window to blend before it sets.
Acrylic ombre is a different animal entirely and usually involves blending colored acrylic powders while sculpting the nail, which is a technique better left to someone with acrylic experience since the timing window for blending powder is short.
The Sponge Technique Explained
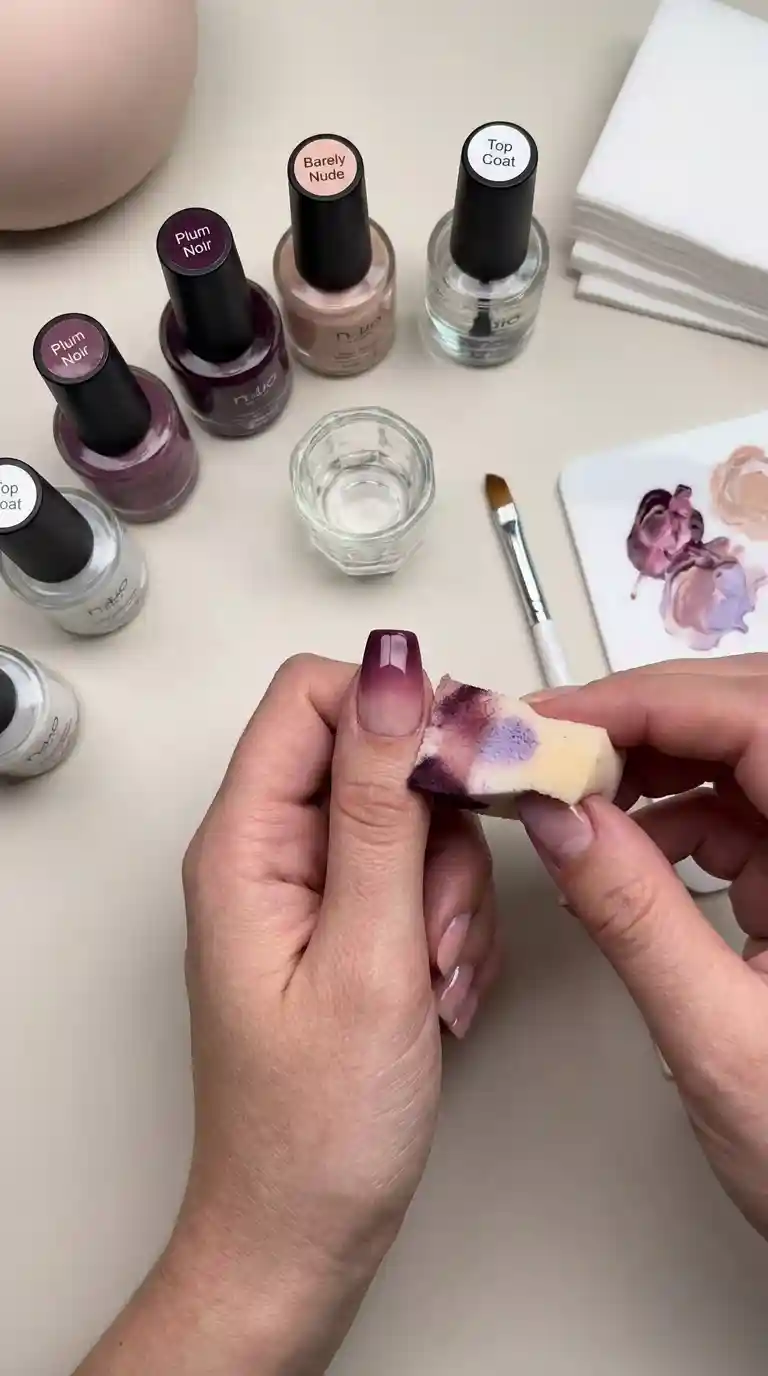
The most common way to achieve plum ombre nails is the sponge method. You apply your lighter shade first, let it dry slightly, then apply your darker plum shade only to the section of the sponge that will touch the tip of the nail. You dab, rather than swipe, the sponge onto the nail, moving it slightly with each dab so the colors blend into each other rather than sitting in hard stripes.
It sounds simple, and honestly it is one of the more forgiving nail art techniques out there, but there is definitely a learning curve to getting the transition smooth rather than patchy.
Step By Step Guide To Creating Plum Ombre Nails At Home
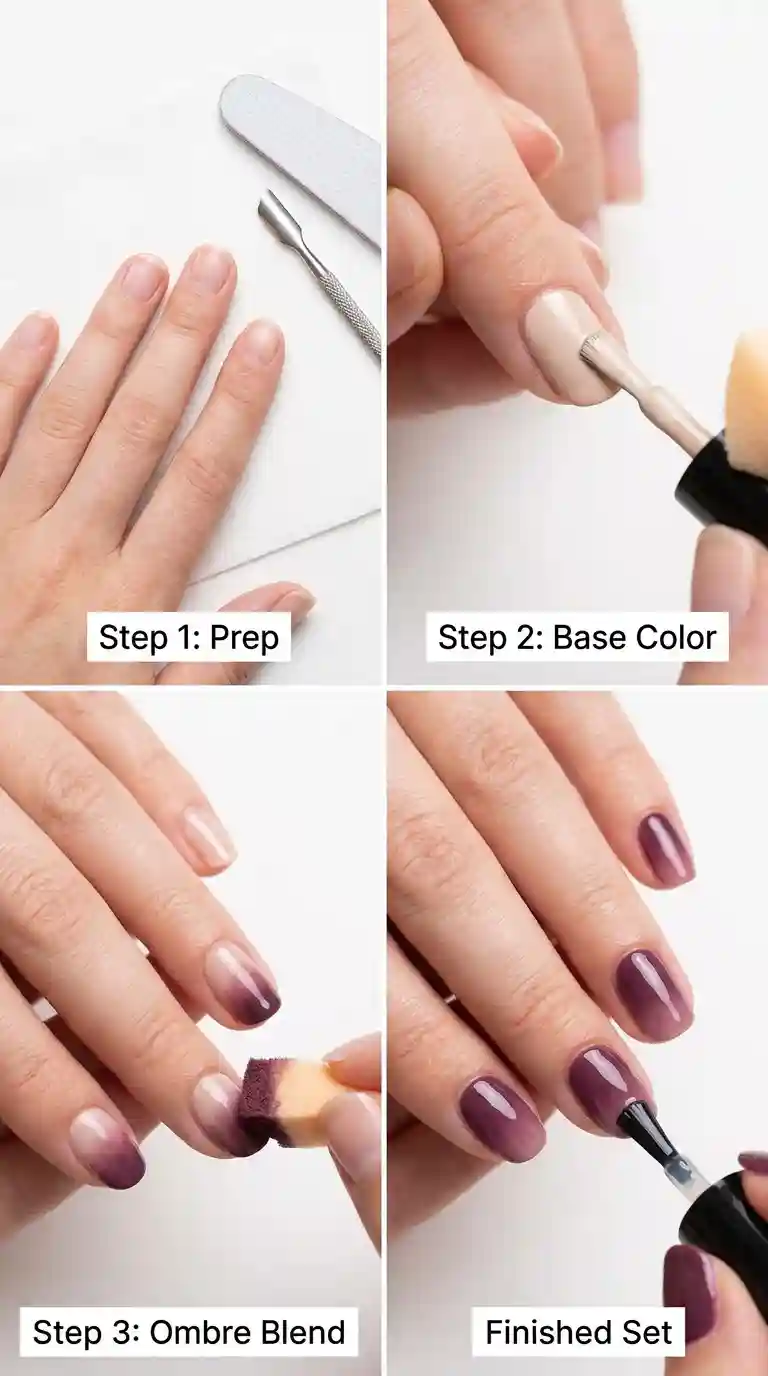
You do not need a salon appointment to get this look right. With a little patience, plum ombre nails are very achievable at home. Here is the process broken down into manageable steps.
Step One, Prep Your Nails Properly
Start with clean, shaped nails. Push back your cuticles gently, buff the surface lightly to remove shine, and wipe each nail with alcohol to remove any oils. This step gets skipped constantly and it is genuinely the reason so many at home manicures do not last. Plum ombre nails, or any nail art really, will only look as good as the surface underneath.
Step Two, Apply Your Base Coat
A thin layer of base coat protects your natural nail and helps the polish adhere evenly. Let it dry or cure fully before moving forward.
Must Read : Short Duck Nails: The Bold, Playful Shape Every Nail Lover Needs To Try This Year
Step Three, Apply Your Lightest Shade
Paint the entire nail with your lightest plum or nude shade. This becomes the foundation your gradient will build from. Let this layer dry to at least a tacky finish before moving to the next step, since applying the sponge too early will just smear the base.
Step Four, Prepare Your Sponge
Take a clean makeup sponge and apply a strip of your darker plum shade along one edge. If you want a three tone effect, add a third shade in between the first two colors directly on the sponge itself.
Step Five, Dab And Blend
Press the sponge onto the nail where you want the darkest part of your plum ombre nails to sit, usually the tip. Dab gently, lifting straight up rather than dragging sideways, and shift the sponge slightly with each press so the color spreads without leaving obvious sponge marks. Work your way toward the cuticle with lighter pressure so the color fades naturally rather than stopping abruptly.
Step Six, Clean Up The Edges
Using a small brush dipped in acetone or cleanser, clean up any polish that landed on your skin around the nail. This step makes a huge difference in how professional the final result looks.
Step Seven, Seal With Top Coat
Finish with a glossy or matte top coat depending on your preference. Glossy tends to make the color transition look more vivid, while matte gives plum ombre nails a softer, almost velvet finish that a lot of people love for autumn.
Plum Ombre Nails For Different Nail Shapes
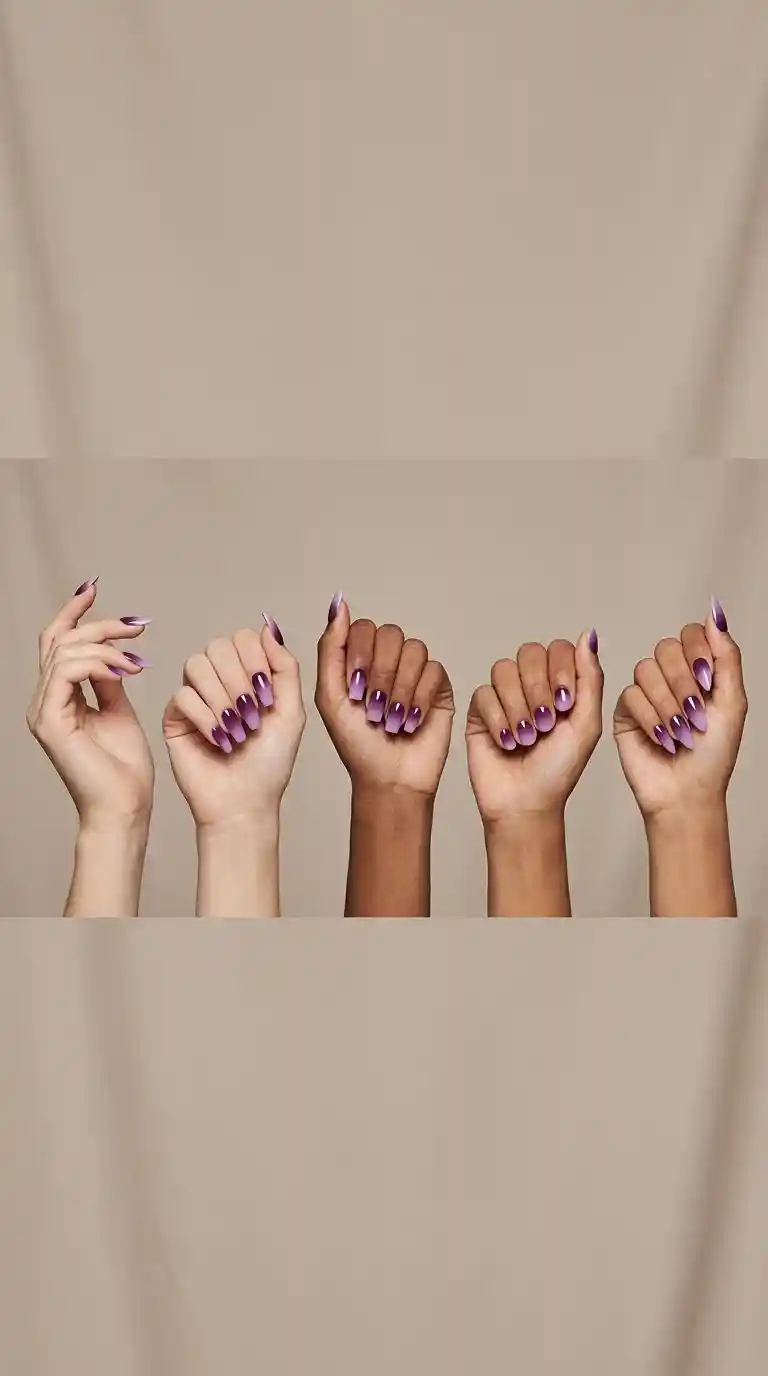
The base shape of your nail changes how the gradient reads visually, so it helps to think about your specific shape before deciding how dramatic to make the fade.
Almond Shaped Plum Ombre Nails
Almond nails have a naturally elongated look, which pairs beautifully with a subtle plum ombre since the gradient draws the eye along the length of the nail. A softer transition, rather than a hard contrast between shades, tends to look most elegant on this shape.
Coffin Shaped Plum Ombre Nails
Coffin or ballerina shaped nails have a flat tip, which actually makes them one of the easiest shapes to get a crisp ombre line on. Because there is more surface area near the tip, you have more room to work the darker plum shade before it fades into the lighter base. This shape tends to hold the most dramatic versions of plum ombre nails really well.
Square Shaped Plum Ombre Nails
Square nails give you a clean geometric canvas, and plum ombre nails on this shape often look best with a straighter, more defined transition line rather than a soft blur. It gives the whole look a slightly more structured, modern feel.
Round Shaped Plum Ombre Nails
Round nails are a classic, low maintenance shape, and a soft plum ombre suits them nicely for everyday wear. Because round nails are shorter in most cases, keeping the gradient subtle avoids the look feeling cramped on a smaller nail bed.
Stiletto Shaped Plum Ombre Nails
Stiletto nails are dramatic by nature, so pairing them with a deep, high contrast plum ombre creates one of the boldest versions of this trend. The pointed tip gives the darkest part of the gradient a natural focal point, almost like the nail is dipped in wine at the very end.
Gel Versus Acrylic Plum Ombre Nails
People often ask whether gel or acrylic gives a better result for plum ombre nails, and honestly the answer depends on what you are looking for.
Gel plum ombre nails tend to have a glassier, glossier finish straight off the bat, and the curing process between layers means each shade sets quickly, giving you more control over the blend. Gel also tends to be gentler on the natural nail during removal compared to acrylic, provided it is soaked off properly rather than picked at.
Acrylic plum ombre nails are usually chosen by people who want extra length or extra durability, since acrylic is a stronger overlay material. The ombre effect in acrylic is often achieved by blending colored powders during the sculpting process, which creates a slightly different texture, sometimes described as having more depth because the color is mixed into the material itself rather than sitting on top of it.
In my experience, gel is the friendlier option for anyone newer to nail art or anyone doing this at home for the first time, simply because there is less room for error and the products are easier to find at regular beauty stores.
Adding Nail Art On Top Of Your Plum Ombre
Once you have your base gradient down, plum ombre nails become a wonderful canvas for extra detail. Here are a few of the most requested add ons.
Glitter Accents
A light dusting of fine glitter near the tip, where the plum is darkest, adds sparkle without overwhelming the gradient underneath. Silver, gold, and rose gold glitters all pair beautifully with plum.
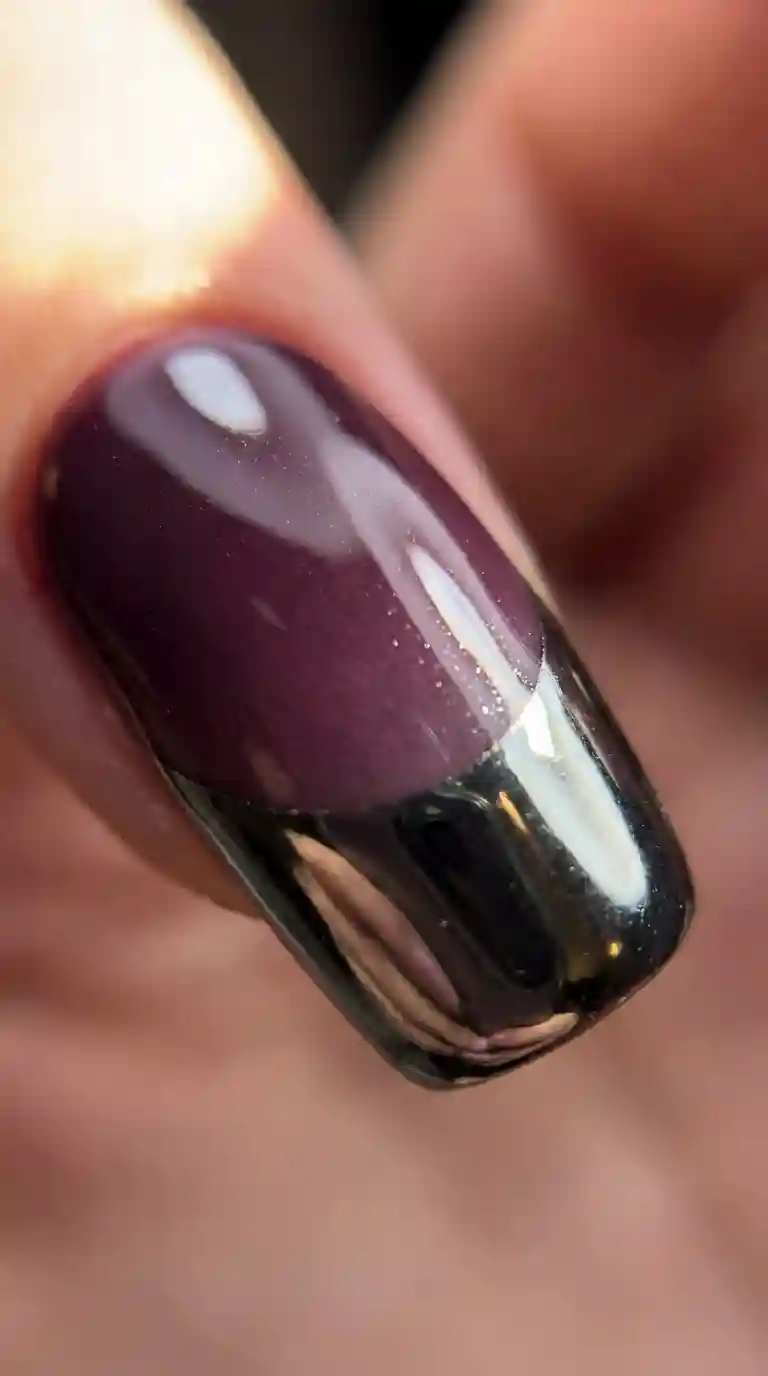
Chrome Powder Finish
Chrome powder applied over the darkest section of a plum ombre creates a mirror like shine that catches light dramatically. This version tends to be popular for special events since it photographs so well under flash.
Matte Top Coat
Swapping a glossy top coat for a matte one changes the entire personality of plum ombre nails. It softens the transition and gives the whole set a velvety, almost suede like texture that feels a little more understated and moody.
Rhinestones And Charms
A single rhinestone or tiny charm placed near the cuticle of one or two accent nails is a subtle way to dress up plum ombre nails without adding too much. This works especially well for bridal or holiday looks where you want a hint of sparkle but not a full glitter set.
Seasonal Variations Of Plum Ombre Nails
One of the best things about plum ombre nails is how easily the shade adapts across the calendar year.
Autumn Plum Ombre Nails
Autumn is really where plum ombre nails shine the brightest, no pun intended. Pair a warm nude base with a deep wine plum tip, maybe with a matte finish, and you have a set that matches falling leaves and cooler weather perfectly.
Winter Plum Ombre Nails
Winter versions tend to go darker and glossier, sometimes incorporating a near black plum with a touch of shimmer for holiday parties. This is the season where plum ombre nails often get the most dramatic treatment.
Spring Plum Ombre Nails
For spring, lighten things up. A soft lilac base fading into a muted mauve plum feels fresh without abandoning the color family entirely. This softer take on plum ombre nails suits garden parties, brunches, and lighter wardrobes.
Read Also: Simple Butterfly Nail Art: 15 Pretty Designs Anyone Can Paint At Home
Summer Plum Ombre Nails

Even in summer, plum has a place. Try pairing a sheer, almost translucent base with just a hint of plum at the very tip, sometimes called a reverse French ombre. It keeps hands looking light and breezy while still nodding to the trend.
Plum Ombre Nails For Weddings And Special Occasions
Brides and bridesmaids have increasingly gravitated toward plum ombre nails, especially for autumn and winter weddings. It offers a middle ground between a traditional soft pink bridal manicure and something with a little more personality.
For weddings specifically, I usually recommend keeping the gradient soft, blending a champagne or ivory base into a muted plum rather than the darkest, most saturated version. It photographs beautifully in wedding albums and complements most bouquet colors, especially deep florals like dahlias or ranunculus which are popular in autumn arrangements.
For holiday parties and New Year celebrations, this is where the boldest plum ombre nails come out to play. Deep plum with gold chrome accents, or plum paired with black at the very tip, feels celebratory and glamorous under evening lighting.
Prom season also sees a steady demand for plum ombre nails, particularly paired with matching eye makeup, since the color reads as elegant in photographs without needing to match a specific dress exactly.
Common Mistakes People Make With Plum Ombre Nails
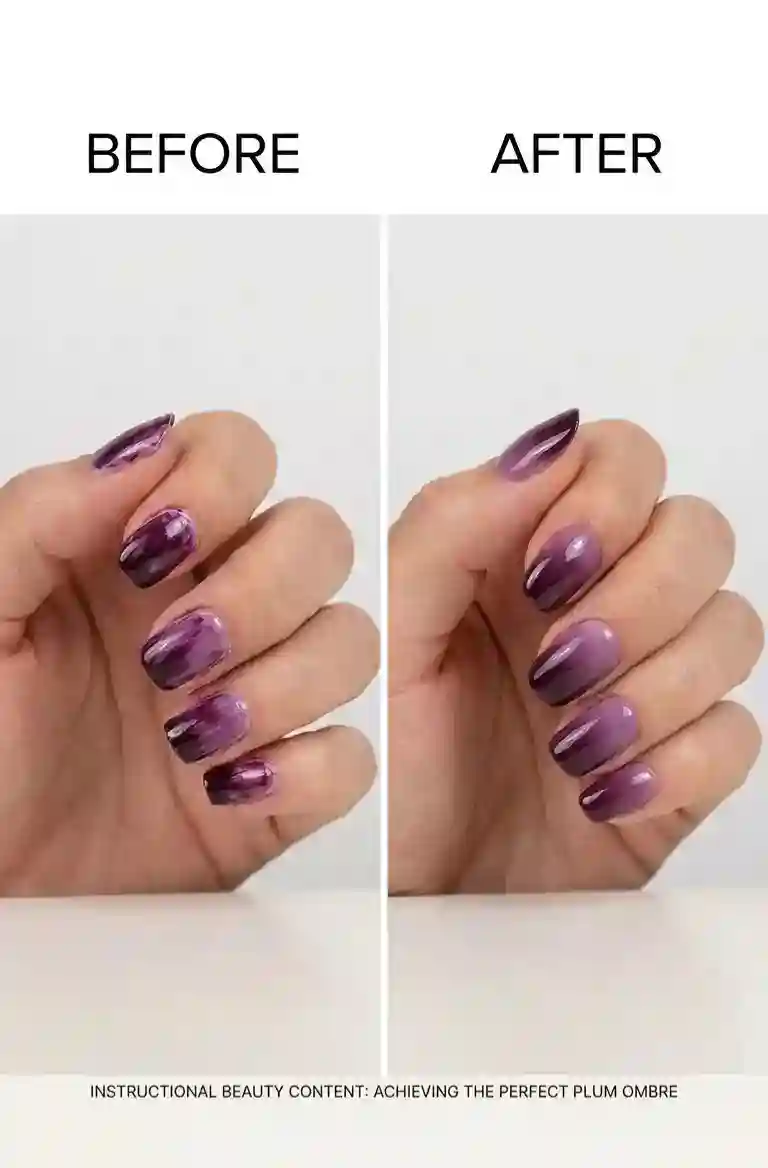
Having watched countless attempts at this look, both from clients trying it at home and from newer nail techs learning the technique, there are a handful of mistakes that come up again and again.
Rushing The Sponge Step
The single biggest mistake is rushing the dabbing process. Plum ombre nails need patience during application. If you drag the sponge instead of dabbing, you end up with streaks rather than a smooth gradient.
Using Colors That Are Too Similar
If your two shades of plum are too close in tone, the gradient will barely register and the whole effort ends up looking flat rather than intentional. You want enough contrast between your lightest and darkest shade that the eye can actually see the transition happening.
Skipping The Base Coat
Some people skip straight to color in the interest of saving time, but this leads to staining, especially with deep pigmented shades like plum. A proper base coat protects the natural nail and helps the final color look truer.
Not Cleaning Up The Cuticle Area
Sponge application tends to leave polish on the surrounding skin, and if that is not cleaned up carefully, plum ombre nails end up looking messy no matter how good the gradient itself turned out.
Applying Top Coat Too Early
If the layers underneath are not fully dry or cured, sealing too early with a top coat can smear the gradient or trap air bubbles. Patience at every stage really does pay off with this particular nail art style.
How To Maintain Plum Ombre Nails
Once you have your set done, a little maintenance goes a long way in keeping plum ombre nails looking fresh.
Apply cuticle oil daily. This keeps the surrounding skin hydrated and actually helps the polish or gel last longer by preventing lifting at the edges. Wear gloves for household chores involving water or cleaning products, since prolonged water exposure is one of the fastest ways to cause lifting, especially with gel applications.
Avoid using your nails as tools. It sounds obvious, but opening cans, scratching off stickers, or prying things apart puts a lot of stress on the tip of the nail, which happens to be exactly where the darkest, most delicate part of a plum ombre gradient usually sits.
Reapply top coat every few days if you are wearing regular polish rather than gel, since regular polish top coats naturally wear thin with friction from daily activities. This simple habit alone can add several extra days of wear to plum ombre nails.
Book fill appointments on time if you have gel or acrylic extensions, since growth at the base can start to make the gradient look uneven as the natural nail grows out beneath it.
How To Safely Remove Plum Ombre Nails
When it is time for a change, removal technique matters just as much as application did.
For regular polish, a standard acetone remover with cotton pads works fine, though because plum is such a deeply pigmented color, it can sometimes leave a temporary stain on the nail plate. Soaking a cotton pad and holding it against the nail for a few extra seconds before wiping helps lift pigment more thoroughly.
For gel plum ombre nails, proper soak off is essential. File away the top shine layer gently, soak cotton in acetone, wrap each nail in foil, and let sit for about ten to fifteen minutes before gently pushing off the softened gel with a cuticle stick. Never pick or peel gel off, since this removes layers of the natural nail along with it and leads to thin, weak nails afterward.
Acrylic removal follows a similar soaking method but usually takes longer given the thickness of the material, sometimes closer to twenty or thirty minutes of soaking time.
After any removal, give your natural nails a break with a nourishing oil and a strengthening base coat for a week or two before your next set, especially if you plan on rocking plum ombre nails again soon.
Plum Ombre Nails Compared To Other Popular Ombre Trends
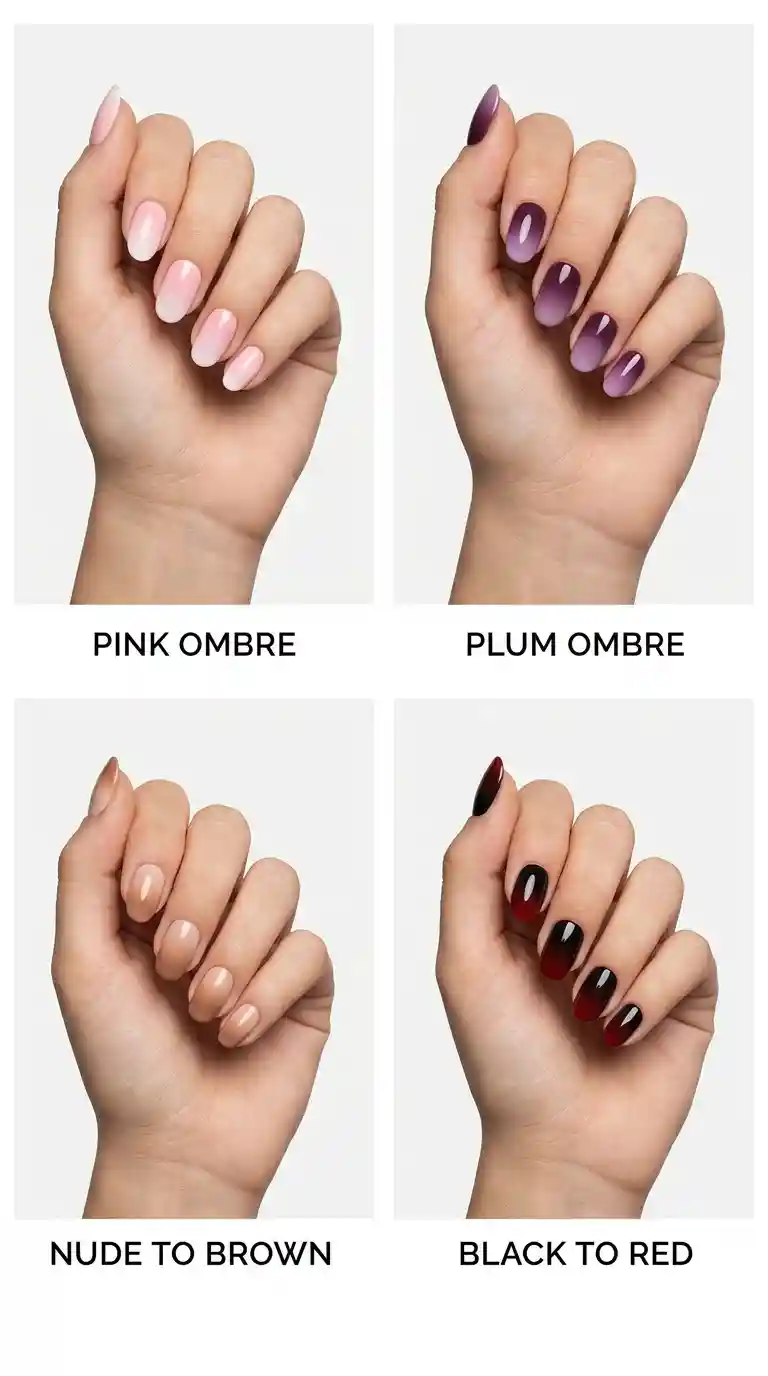
It is worth putting plum ombre nails side by side with a few other popular gradient trends to understand where it fits into the bigger picture.
Pink ombre nails tend to feel softer and more youthful, while plum ombre nails lean more sophisticated and mature. Nude to brown ombre, sometimes called a sunset ombre, shares some of plum’s earthy quality but lacks the same jewel toned richness. Black to red ombre is bolder and edgier compared to the more romantic feel of plum. French ombre, which fades a sheer base into white at the tip, is the polar opposite in terms of mood, being much more minimal and classic.
What sets plum ombre nails apart is really that in between quality. It has the depth of a dark, dramatic color choice but retains enough softness in the lighter shades to still feel wearable for daily life, which is a balance not every ombre trend manages to strike.
Cost Of Getting Plum Ombre Nails Done At A Salon
Pricing for plum ombre nails varies quite a bit depending on location, salon tier, and whether you are adding gel, acrylic, or extra nail art on top.
A basic regular polish ombre manicure typically falls into a mid range price bracket, similar to what you would pay for a standard gel manicure with an added art fee for the ombre technique itself, since it does take longer than a single solid color application. Gel plum ombre nails usually cost a bit more given the extra product and curing time involved. If you are adding extensions, chrome finishes, or hand placed rhinestones on top of your plum ombre nails, expect the price to climb further, since each additional element adds time to the appointment.
It is always worth asking your salon directly for their specific ombre pricing, since some charge a flat rate for the technique regardless of color while others charge based on how many shades are being blended.
Read Also : 90 Western Nail Ideas That Will Turn Your Manicure Into a Full Blown Cowgirl Statement
DIY Plum Ombre Nails Versus Getting Them Done Professionally
There is a real case to be made for both routes depending on your comfort level and how much time you want to spend.
DIY plum ombre nails save money and give you full creative control over your exact shade pairing, but they do require practice. Your first attempt might not look salon perfect, and that is completely normal. The sponge technique especially takes a few tries to get the hang of, particularly getting the pressure and timing right so the colors blend instead of smearing.
Professional application, on the other hand, gives you access to a technician’s steady hand, proper lighting, and years of muscle memory around blending technique. If you have an event coming up and want your plum ombre nails to look flawless, booking a professional appointment is generally the safer bet, especially if this is your first time trying the look at all.
That said, plenty of people successfully master plum ombre nails at home with enough patience, and honestly, the process of practicing the technique is kind of enjoyable once you stop expecting perfection on the first try.
Choosing The Right Products For Long Lasting Plum Ombre Nails
Product quality genuinely affects how well plum ombre nails hold up over time. Cheap polish formulas, particularly in deep pigmented shades like plum, tend to be thinner and require more coats to build opacity, which increases drying time between layers and makes the blending process trickier.
Look for polishes or gels specifically noted as having good pigment saturation, since this means you can achieve a rich plum color in fewer coats, giving you more control during the ombre blending stage. A quality top coat is equally important, both for shine and for protecting the gradient from chipping prematurely.
If you are working with gel, investing in a proper lamp with even coverage across all fingers helps ensure each shade cures fully and evenly, which prevents the smudging that can happen if one part of the gradient sets faster than another.
Plum Ombre Nails And Skin Tone Compatibility
A question that comes up constantly is whether plum ombre nails suit every skin tone, and the honest answer is yes, though the specific shade pairing might need slight adjustments.
For fair skin tones, a lighter base fading into a medium plum tends to look balanced rather than overwhelming the hand. For medium skin tones, almost any plum combination works beautifully, since the warmth in medium skin tends to complement both warm and cool plums equally well. For deeper skin tones, richer, more saturated plum shades, sometimes skipping the very light base altogether in favor of a medium to dark gradient, create a stunning contrast that really lets the color pop.
I always encourage clients to try swatching a few different plum shades against their own hand before committing, since seeing the color against your actual skin tells you far more than looking at a bottle or a photo online ever will.
Nail Health Considerations Before Trying Plum Ombre Nails
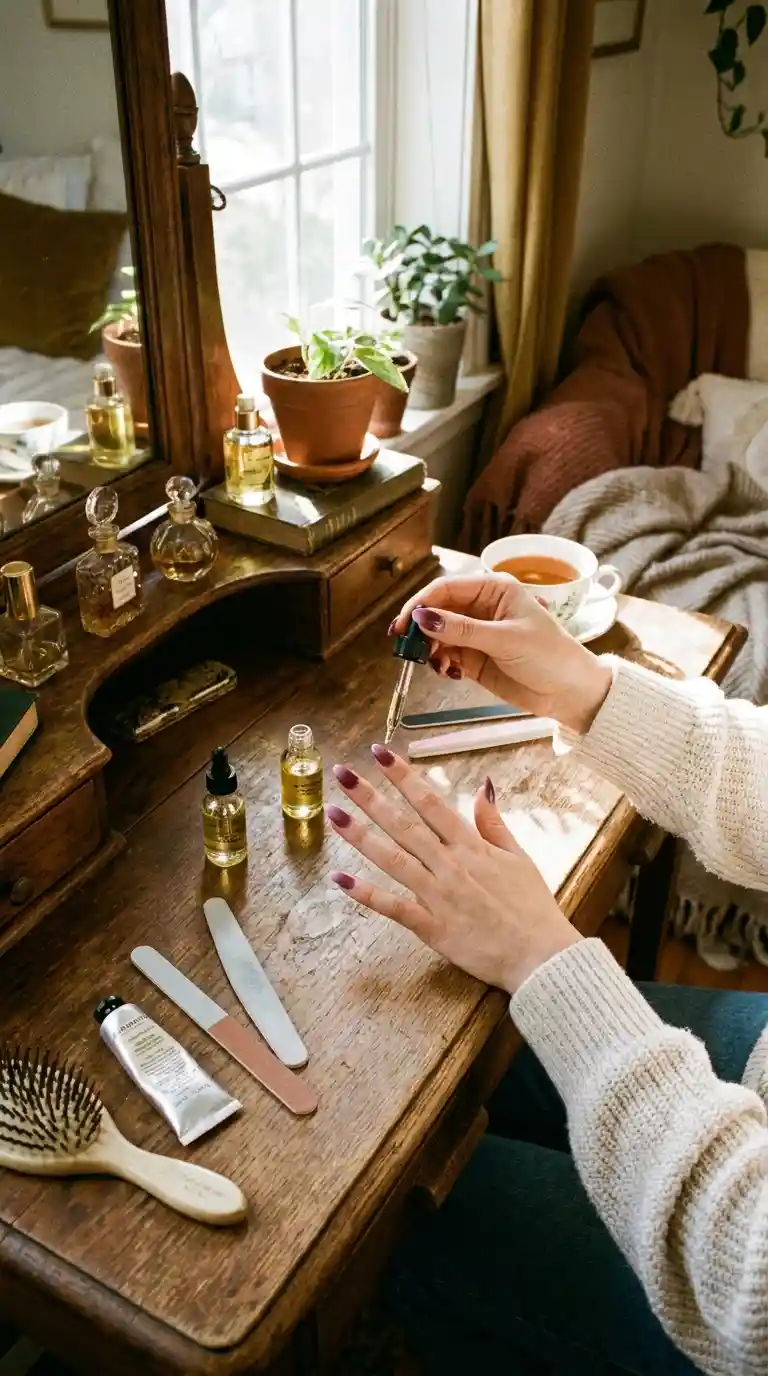
Before booking or attempting plum ombre nails, it is worth taking a moment to assess the health of your natural nails. If your nails are currently weak, peeling, or recovering from previous damage, it might be worth doing a short strengthening routine first, since layering multiple coats of pigmented polish or gel onto compromised nails can sometimes make existing damage more noticeable once you remove the color.
A simple routine of cuticle oil twice daily, a strengthening base coat, and giving your nails a short break between sets goes a long way toward keeping them healthy enough to support any nail art, plum ombre nails included.
Also Read : Cat Eye Nail Designs: The Mesmerizing Manicure Trend That Will Make Your Nails Impossible To Ignore
Final Thoughts On Plum Ombre Nails
Plum ombre nails have earned their popularity honestly. They offer the drama of a bold color choice with the versatility of a gradient that can be softened or intensified depending on the occasion. Whether you are trying this at home for the first time with a makeup sponge and a bottle of polish from the drugstore, or booking a full gel set at your favorite salon, the technique rewards patience and a little bit of practice.
What I love most about this particular trend is how personal it can feel. Two people can both ask for plum ombre nails and walk away with completely different looking sets, simply based on which specific shades they chose and how dramatic they wanted the fade to be. That flexibility is exactly why this trend has stuck around far longer than many other nail art fads, and honestly, I do not see plum ombre nails going anywhere anytime soon.
Frequently Asked Questions
What is a plum ombre nail?
A plum ombre nail is a manicure style where two or more shades within the plum color family, or plum paired with a neutral base, are blended together on the nail so the color fades gradually from one shade into another rather than stopping in a hard line.
How do you do ombre nails with a sponge?
You paint your base shade first, let it dry slightly, apply your darker shade to a makeup sponge, then dab the sponge onto the nail in the area where you want the color to be darkest, moving slightly with each dab to blend the transition smoothly.
Does plum nail polish suit every skin tone?
Yes, plum tends to flatter most skin tones because it contains both warm and cool pigments, though the exact shade of plum, lighter or deeper, can be adjusted to best complement individual undertones.
How long do plum ombre nails last?
Gel versions of plum ombre nails typically last two to three weeks with proper care, while regular polish versions usually last about five to seven days before chipping becomes noticeable.
Can I do plum ombre nails without gel?
Absolutely, plum ombre nails can be done entirely with regular polish using the sponge technique, though the working time is shorter since regular polish air dries faster than gel cures.
What colors go well with plum for an ombre look?
Nude, champagne, soft pink, lilac, and metallic gold or silver all pair beautifully with plum for an ombre gradient, depending on how subtle or dramatic you want the final look to be.
Is plum ombre good for short nails?
Yes, plum ombre nails work well on short nails too, though keeping the gradient subtle rather than highly contrasted tends to look more balanced on a smaller nail surface.
What nail shape looks best with plum ombre?
Coffin and stiletto shapes tend to showcase a dramatic plum ombre particularly well due to their flat or pointed tips, while almond and round shapes suit a softer, more subtle gradient version.
How do you remove gel ombre nails safely?
Gently file the top shine layer, soak cotton pads in acetone, wrap each nail in foil, wait about ten to fifteen minutes, then gently push off the softened gel using a cuticle stick rather than picking or peeling it off.
Can plum ombre nails be done at home?
Yes, plum ombre nails are very achievable at home with a makeup sponge, two or more shades of plum polish, and a bit of patience during the blending step, though it may take a few attempts to master the technique.
Pingback: 40 Trendy Denim Nails Ideas for a Stylish Manicure
Pingback: 50+ Copper Nail Ideas for a Chic, Metallic Manicure
Pingback: 30 Cute Purple Halloween Nails Ideas for a Spooky Look
Pingback: Best Black Christmas Nail Ideas for a Chic Holiday Look
Pingback: Barbie Pink Nails: 50+ Cute & Glamorous Nail Ideas