
I still remember the first time a client asked me for cat eye nail designs. It was a slow Tuesday afternoon at the salon, rain tapping on the window, and a young woman slid into my chair holding up a blurry Pinterest screenshot on her phone. She said, “I want my nails to look like they’re glowing from the inside.” I had done chrome nails, ombre nails, and every glitter combination you can imagine, but this was different. That single appointment turned into a small obsession that has now lasted years, and cat eye nail designs have become one of the most requested services at my station.
If you have ever seen a manicure that seems to shift and shimmer as the hand moves, almost like there is a tiny light source hiding inside the polish, you have seen cat eye nail designs in action. They are not a passing fad. They have stuck around season after season because they genuinely look different from every other manicure trend out there, and honestly, they photograph beautifully too.
In this guide I am going to walk you through everything I have learned about cat eye nail designs after years of doing them on real clients, in real salon conditions, not just in a perfectly lit studio. We will cover what they are, how the effect is created, the tools you actually need, step by step application, color and shape variations, seasonal ideas, mistakes to avoid, and a big FAQ section at the end because I know you probably have questions that Google keeps giving you vague answers to.
Grab a cup of tea. This is going to be a long, honest, detailed read.
Also Read : Short Duck Nails: The Bold, Playful Shape Every Nail Lover Needs To Try This Year
What Are Cat Eye Nail Designs
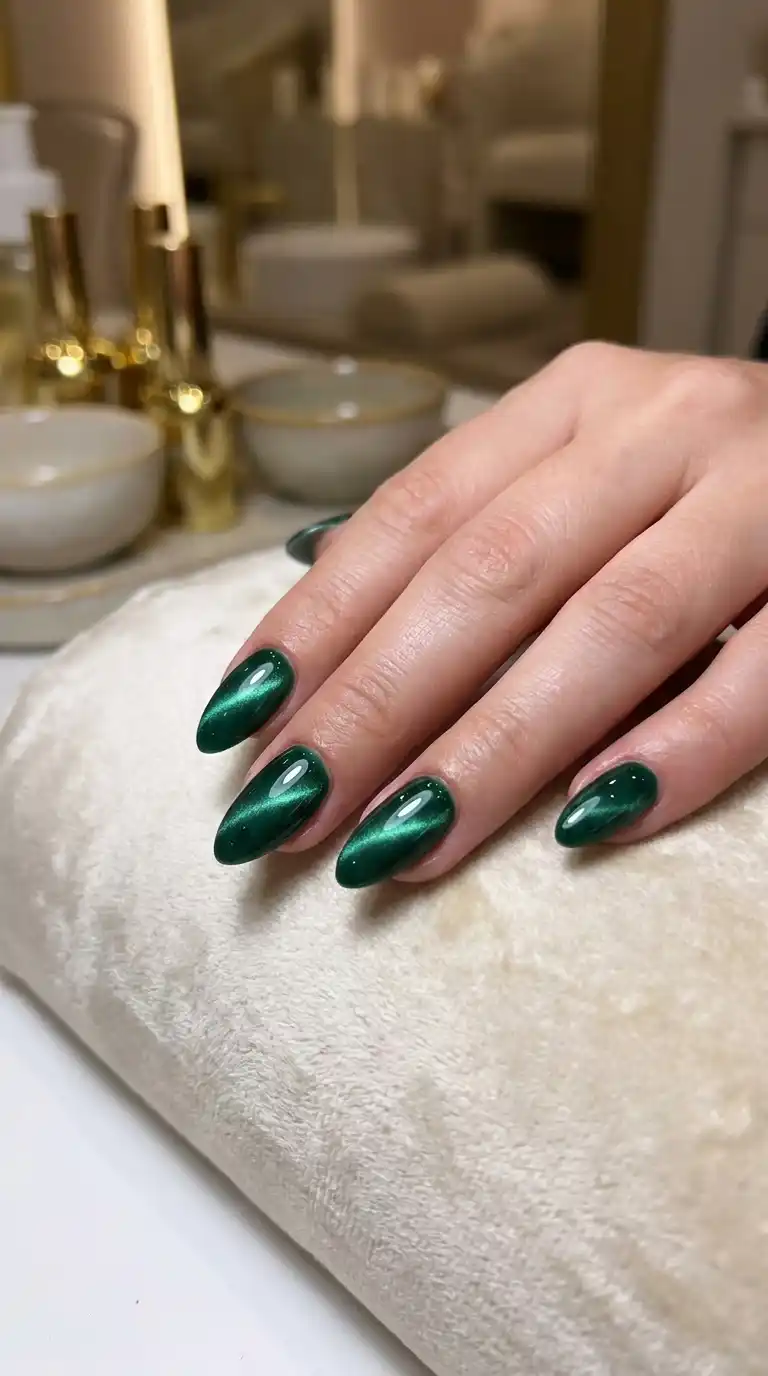
Cat eye nail designs get their name from the way the finished nail resembles the slit pupil of a cat’s eye when light hits it from a certain angle. There is a bright, narrow line of light that seems to move across the nail depending on how you tilt your hand, and the rest of the color fades into a rich, almost velvety depth around it.
This effect is created using a special gel polish that contains tiny metallic particles, usually iron oxide, suspended inside the polish itself. After the color is applied, a magnet is held close to the wet gel before curing. The magnet pulls the metallic particles toward it in a specific pattern, and once you cure the polish under a UV or LED lamp, that pattern is locked in place forever.
I always tell my clients that cat eye nail designs are basically magic you can wear on your fingertips. There is something deeply satisfying about watching the polish move in real time when the magnet passes over it. Even after doing hundreds of these sets, I still find myself pausing to watch the shimmer settle.
What makes cat eye nail designs stand out from regular shimmer or glitter polish is the directionality. Glitter polish sparkles randomly no matter which way you turn your hand. Cat eye nail designs have a controlled, almost hypnotic line of light that you can actually shape and steer using the magnet. That control is what gives nail artists like me so much creative freedom.
The Origin Story Behind Cat Eye Nail Designs
Cat eye nail designs did not appear out of nowhere. The technology actually comes from the world of automotive paint and jewelry finishes, where magnetic pigments have been used for decades to create shifting, light catching effects on car exteriors and certain gemstones like real cat’s eye chrysoberyl.
Nail brands eventually adapted this same magnetic pigment technology into gel polish formulas, and cat eye nail designs started showing up in Asian nail markets first, particularly in South Korea and parts of China, before spreading to salons in the United States, Europe, and beyond. I remember seeing early versions of cat eye nail designs at a trade show years ago and thinking the effect looked almost too good to be real under the show lighting. I bought a starter kit that same day.
Since then the formulas have improved dramatically. Early cat eye gels sometimes looked a bit muddy or the shimmer line was hard to control. Now the pigments are finer, the color range is enormous, and the magnets themselves have been redesigned specifically for nail use, which makes cat eye nail designs far more consistent and beginner friendly than they used to be.
Why Cat Eye Nail Designs Have Become So Popular
There are a few reasons I think cat eye nail designs have held onto their popularity instead of fading out like some trends do.
First, they look expensive without necessarily being expensive to maintain. A well done cat eye manicure has that luxurious, almost jewel like quality that makes people stop and ask where you got your nails done.
Second, they work on literally any nail shape and length. Whether you like short round nails or long stiletto tips, cat eye nail designs adapt beautifully because the shimmer effect scales with the size of the nail.
Third, social media has been kind to this trend. Cat eye nail designs film incredibly well because the light line actually moves when you rotate your hand on camera, which makes for satisfying content that people love to watch on repeat.
Fourth, and this is something I noticed in my own client base, cat eye nail designs feel personal. Because you control exactly where the magnet pulls the shimmer, no two sets ever look completely identical, even if two clients pick the exact same color.
Read Also: Classy Short Nail Designs That Never Go Out Of Style: A Nail Artist’s Honest Guide
The Science Behind The Shimmer
I get asked constantly how cat eye nail designs actually work, so let me break it down simply because understanding the mechanics genuinely helps you get better results, whether you are a nail tech or doing this at home.
Cat eye gel polish contains microscopic flakes of a magnetic material, most commonly a coated iron oxide, mixed evenly throughout a colored gel base. When the gel is wet and uncured, those particles are free to move. A magnet, usually built into a small tool or wand, is held a few millimeters above the nail without touching the wet polish. The magnetic pull drags the particles upward and toward the magnet, arranging them into whatever pattern the magnet’s shape dictates.
Once you are happy with the placement, the nail goes under a UV or LED lamp. The curing light hardens the gel almost instantly, freezing the metallic particles exactly where the magnet pulled them. That frozen arrangement is what creates the permanent light line in your cat eye nail designs.
Different magnet shapes create different effects. A straight line magnet gives you the classic single light streak. A dome shaped magnet gives you a soft, all over glow. Some brands even sell magnets with multiple lines cut into them so you can create starburst or wave patterns in one pass.
Tools And Products You Actually Need
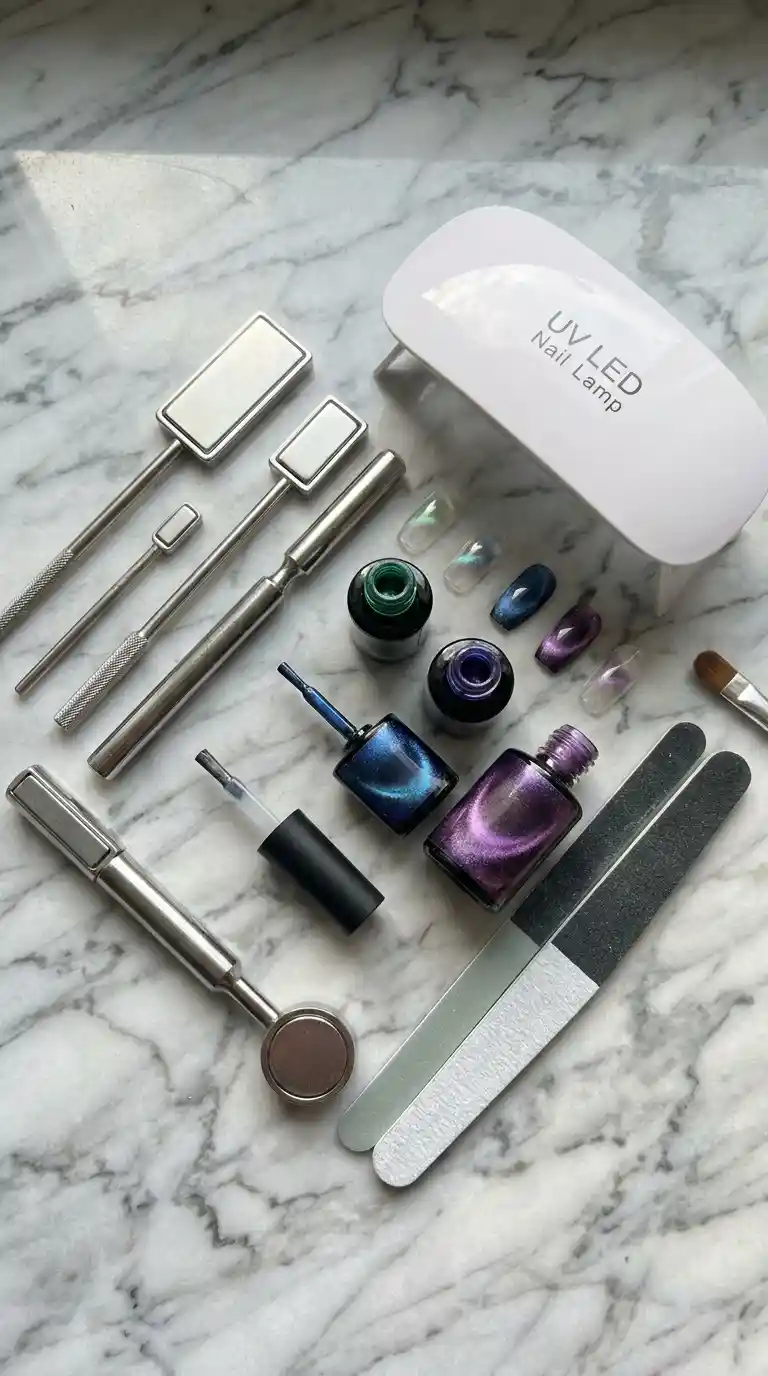
Before you attempt cat eye nail designs, whether professionally or as a hobby at home, you need the right supplies. I have tested more brands than I can count, and here is what genuinely matters.
Cat Eye Gel Polish
This is the star of the show. Not all gel polish will work, you specifically need formulas labeled as cat eye, magnetic, or sometimes called cateye gel. The pigment concentration varies between brands, and honestly the cheaper options often have a weaker shimmer response, so this is one area where I tell clients and students not to cut corners.
The Magnet Tool
Magnets come in different shapes including straight line, dome, wave, and multi pattern designs. I personally keep at least four different magnets in my kit because different clients want different effects for their cat eye nail designs, and having options saves so much time.
Base Coat And Top Coat
A quality base coat protects the natural nail and helps the gel adhere properly. Top coat seals in the shimmer and adds that glassy shine that makes cat eye nail designs look so polished. I always recommend a non wipe top coat for this technique because it locks in the magnetic pattern without disturbing it during the final wipe down.
UV Or LED Lamp
You need proper curing power. A weak or old lamp will not fully harden the gel, which can cause your cat eye nail designs to peel or lift within days. I replace my lamp bulbs regularly for this exact reason.
Nail Prep Tools
Standard nail prep applies here too. Buffer, cuticle pusher, nail dehydrator, and primer all matter just as much for cat eye nail designs as they do for any other gel manicure.
Step By Step How To Do Cat Eye Nail Designs
I am going to walk you through the exact process I use in my chair. This works whether you are a professional or doing your own nails at home, though I will note where beginners tend to struggle.
Step One Prep The Natural Nail
Push back the cuticles gently, shape the free edge to your preferred length and style, and lightly buff the surface of the nail to remove shine. This step is boring but skipping it is the number one reason cat eye nail designs fail to last.
Step Two Apply Base Coat
Apply a thin, even layer of base coat and cure it fully under your lamp. Do not rush this step. A properly cured base coat is the foundation everything else sits on.
Step Three Apply The Cat Eye Gel Color
Paint on a thin layer of your chosen cat eye gel polish. I always tell students thinner is better here because a thick layer makes it harder for the magnetic particles to move freely toward the magnet.
Step Four Use The Magnet Before Curing
This is the step that makes cat eye nail designs what they are. While the gel is still wet, hold your magnet close to the nail without touching the polish, usually about one to three millimeters above the surface. Hold it steady for around five to ten seconds. You will actually see the shimmer shift and gather into a line right before your eyes, which honestly never gets old no matter how many times I do it.
Step Five Cure Under The Lamp
Once you are happy with the pattern, place the nail under your UV or LED lamp immediately to lock everything in place. Moving the hand too much before curing can blur or ruin the effect, so I always warn clients to hold very still during this window.
Step Six Apply A Second Coat If Needed
Sometimes one coat is not opaque enough, especially with lighter shades. If you need a second layer, repeat the color and magnet steps again for a deeper, richer finish on your cat eye nail designs.
Step Seven Seal With Top Coat
Finish with a glossy or matte top coat depending on your preference, then cure one final time. The top coat is what gives cat eye nail designs that glassy, almost liquid looking shine that makes people do a double take.
Also Read : Nail Ideas Summer 2026: 50 Gorgeous Looks Every Nail Artist Swears By
Choosing The Right Colors For Cat Eye Nail Designs
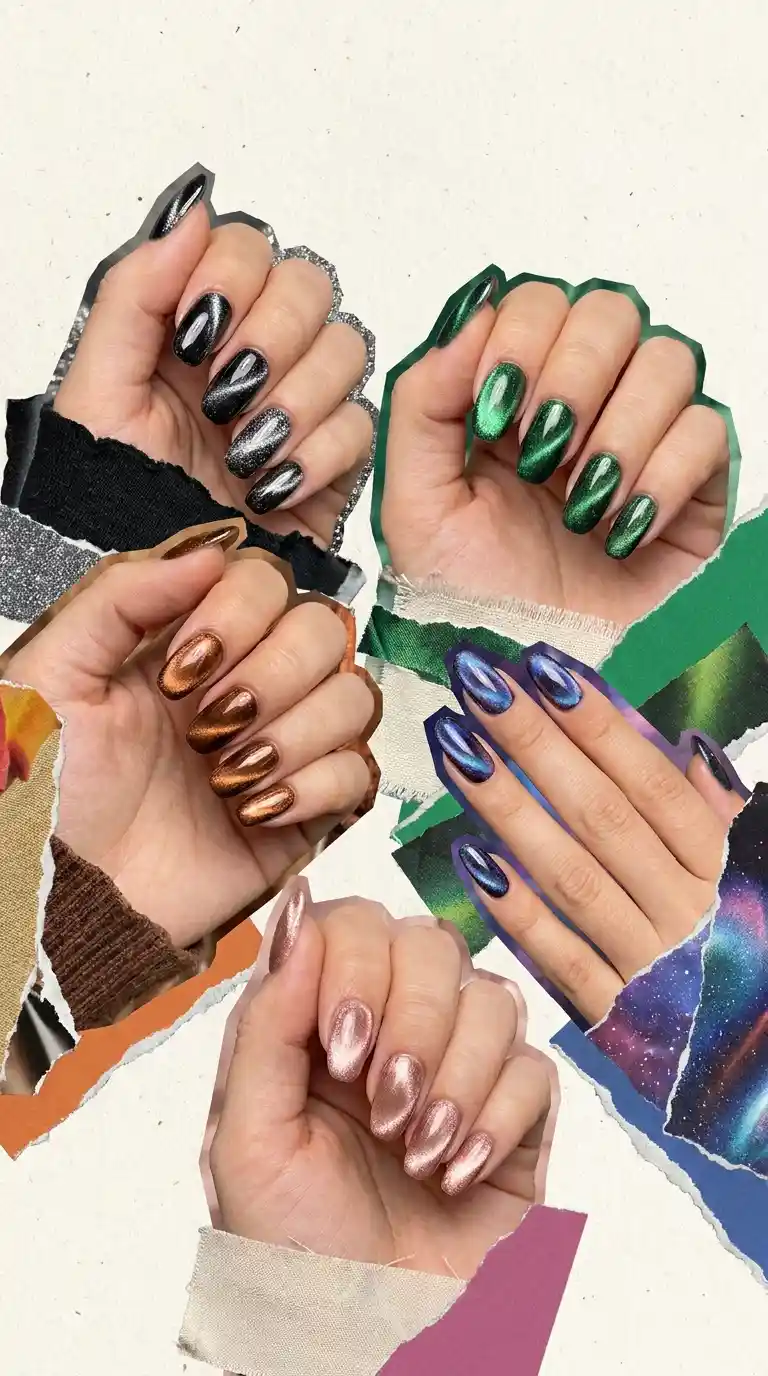
Color choice completely changes the personality of cat eye nail designs, and this is honestly my favorite part of the consultation with clients because the possibilities feel endless.
Classic Black And Silver Cat Eye Nail Designs
This was the original color combination that started the trend, and it still holds up beautifully today. Black cat eye gel with a silver magnetic line looks sleek, mysterious, and works with literally any outfit or occasion. I do this combination more than any other in the salon.
Deep Green Cat Eye Nail Designs
Emerald and forest green shades create a gemstone like effect that reminds me of real cat’s eye chrysoberyl stones. This is one of my personal favorite cat eye nail designs to create because the depth of color feels so luxurious.
Warm Brown And Bronze Cat Eye Nail Designs
Brown toned cat eye nail designs have become hugely popular over the past couple of years, especially paired with a gold shimmer line. They feel warm, earthy, and surprisingly versatile for both casual days and formal events.
Blue And Purple Cat Eye Nail Designs
These jewel tones create a cosmic, almost galaxy like appearance. I have had clients specifically request blue cat eye nail designs after seeing a starry night effect online, and honestly the comparison is accurate once the shimmer line settles in.
Pink And Rose Gold Cat Eye Nail Designs
Softer and more romantic, pink cat eye nail designs are a favorite for bridal clients and anyone wanting something elegant without being too dark or dramatic.
Multichrome Cat Eye Nail Designs
This is a newer development in the formula world where the shimmer itself shifts between two or more colors depending on the angle of light, on top of the classic cat eye line effect. These are more expensive and slightly harder to work with, but the payoff is genuinely stunning.
Cat Eye Nail Designs By Shape
The nail shape you choose has a real effect on how your cat eye nail designs read visually, so let me go through the most common shapes and how they interact with the magnetic effect.
Almond Shaped Cat Eye Nail Designs
Almond shapes elongate the finger and give the shimmer line a natural, flowing path from the cuticle to the tip. This is probably the most requested shape for cat eye nail designs in my chair because it looks elegant without being extreme.
Coffin Or Ballerina Cat Eye Nail Designs
The flat, squared off tip on coffin nails gives you more surface area to work with, which means you can create wider, more dramatic light patterns. Coffin shaped cat eye nail designs tend to look bolder and more editorial.
Square Cat Eye Nail Designs
Square nails give the shimmer a clean, geometric feel. I find that straight line magnets work especially well on square shapes because the edges of the nail complement the straight light streak.
Round Cat Eye Nail Designs
Shorter round nails are perfect for anyone who wants the cat eye effect without a lot of length. Dome shaped magnets tend to look best here since the rounded pattern echoes the natural curve of the nail.
Stiletto Cat Eye Nail Designs
Long, pointed stiletto nails create a dramatic runway effect with cat eye nail designs. The shimmer line can be dragged nearly the full length of the nail, creating an almost laser like streak of light.
Combining Cat Eye Nail Designs With Other Nail Art
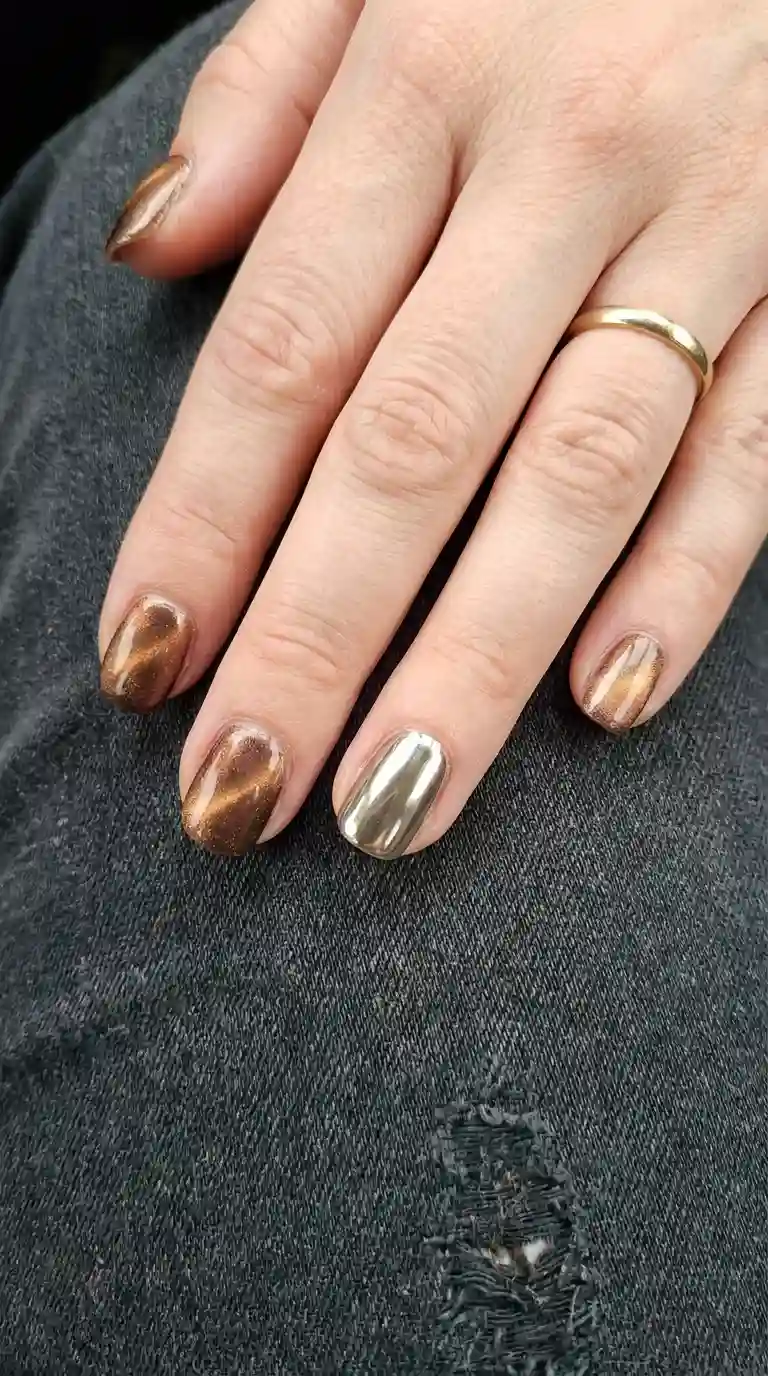
One thing I love telling newer nail techs is that cat eye nail designs do not have to stand alone. They combine beautifully with other techniques.
Cat Eye French Tips
Instead of a plain white tip, imagine a shimmering cat eye line running through a soft nude or pink base with a classic French tip on top. This combination has become one of my most booked services this year.
Ombre Cat Eye Nail Designs
Blending two or three cat eye colors from the cuticle to the tip creates a gradient effect that still catches light beautifully because each shade retains its own shimmer line.
Glitter Accent Cat Eye Nail Designs
Adding one or two glitter accent nails alongside a full set of cat eye nail designs gives extra sparkle for special occasions like weddings or holiday parties without overwhelming the overall look.
Cat Eye With Chrome Accents
Pairing a cat eye base with a small chrome powder accent nail creates contrast between the soft, glowing shimmer and the mirror like chrome finish. It is a striking combination that photographs incredibly well.
Also Read : September Nail Ideas That Will Make Your Manicure Impossible To Ignore This Fall
Seasonal Cat Eye Nail Designs
Nail trends shift with the seasons, and cat eye nail designs adapt beautifully to almost every time of year.
Spring Cat Eye Nail Designs
Soft pastels like lavender, mint, and baby pink work wonderfully for spring. I like adding tiny floral accents on one or two nails to balance the shimmer with something delicate.
Summer Cat Eye Nail Designs
Bright turquoise and ocean blue cat eye nail designs are extremely popular in the warmer months. The shimmer line mimics the way sunlight dances on water, which clients absolutely love for beach vacations.
Fall Cat Eye Nail Designs
Warm burgundy, deep brown, and burnt orange shades dominate my bookings every autumn. These colors feel cozy while still having that eye catching shimmer quality.
Winter And Holiday Cat Eye Nail Designs
Deep red and emerald green cat eye nail designs paired with silver or gold shimmer lines make for gorgeous holiday looks. I also see a lot of icy silver and white cat eye nail designs requested for a frosty, wintery aesthetic.
Common Mistakes People Make With Cat Eye Nail Designs
After years of doing this technique, I have seen almost every mistake possible, so let me save you some frustration.
Applying The Color Too Thick
A thick layer of gel makes it much harder for the metallic particles to move freely toward the magnet, which results in a dull or barely visible shimmer line. Thin, even coats always work better for cat eye nail designs.
Holding The Magnet Too Far Away
If the magnet is not close enough to the wet gel, the pull will be weak and the pattern will look faint. I generally keep my magnets within one to three millimeters of the nail surface for the strongest effect.
Moving The Hand Before Curing
Even a small shake or bump before you get the nail under the lamp can smudge the pattern you just created. I always ask clients to keep their hand completely still during this part of the appointment.
Skipping The Non Wipe Top Coat
Using a standard top coat that requires wiping can sometimes disturb the delicate shimmer pattern during cleanup. A non wipe formula avoids this problem entirely for cat eye nail designs.
Using An Old Or Weak Lamp
If your curing lamp is not strong enough, the gel will not fully harden, which leads to premature peeling, lifting, or a tacky texture on your cat eye nail designs. Replace bulbs regularly and invest in a good quality lamp.
How Long Do Cat Eye Nail Designs Last
With proper application and aftercare, cat eye nail designs typically last just as long as any other quality gel manicure, usually between two and four weeks depending on how fast your natural nails grow and how much wear and tear your hands go through daily.
I always tell clients that the shimmer itself does not fade or wear away since it is locked inside the cured gel. What eventually causes a manicure to look worn is natural nail growth creating a gap near the cuticle, or minor chipping at the free edge from daily activities.
To extend the life of your cat eye nail designs, I recommend wearing gloves for dishwashing and cleaning, applying cuticle oil daily to keep the surrounding skin healthy, and avoiding using your nails as tools to open cans or scratch off labels.
At Home Cat Eye Nail Designs Versus Salon Application
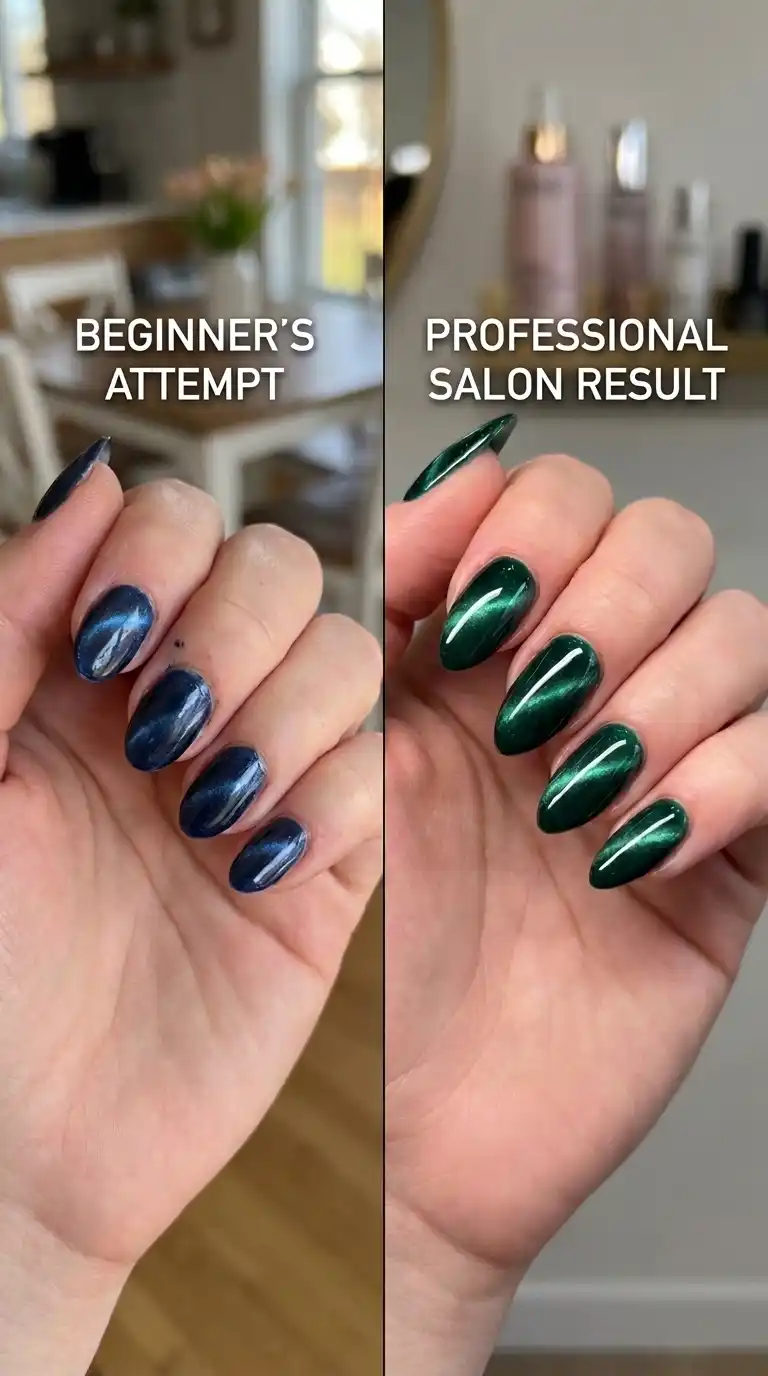
I get this question constantly, so let me be honest about both sides since I have done this technique professionally for years but I also understand the appeal of trying it yourself.
Doing cat eye nail designs at home is absolutely possible with a decent starter kit, and I have seen beginners create genuinely beautiful results within a few practice attempts. The learning curve mostly involves getting comfortable with layer thickness and magnet timing.
That said, salon application tends to produce more even, symmetrical results because a trained nail tech has practiced the timing and pressure hundreds of times. We also have access to professional grade lamps that cure faster and more thoroughly than many at home devices.
My honest advice is that if you are curious and want to experiment, buy a small starter kit and try it on yourself first. If you want a flawless, long lasting set for a special event, book with a professional who has experience specifically with cat eye nail designs, since not every nail tech offers this specialty.
How Much Do Cat Eye Nail Designs Cost
Pricing varies significantly depending on your location, the salon’s reputation, and how elaborate the design is. In my experience, a standard full set of cat eye nail designs typically falls somewhere between a regular gel manicure price and a more detailed nail art price, since the magnetic technique does add extra time to the service.
Simple single color cat eye nail designs are usually priced similarly to a standard gel manicure with a small upcharge. More elaborate versions involving multiple colors, combination techniques like French tips or chrome accents, or intricate magnet patterns will cost more due to the additional time and skill required.
I always recommend asking your salon directly for their specific pricing since it truly does vary so much by region and by the individual artist’s experience level.
Cat Eye Nail Designs For Different Occasions
Wedding Cat Eye Nail Designs
Soft champagne, blush pink, or ivory cat eye nail designs are increasingly popular with brides who want something elegant that still catches the light in wedding photos without being as loud as full glitter.
Cat Eye Nail Designs For Work
Neutral tones like taupe, soft gray, or muted mauve give you that subtle shimmer effect while still looking professional and appropriate for an office setting.
Cat Eye Nail Designs For A Night Out
This is where I encourage clients to go bold. Deep jewel tones, dramatic magnet patterns, and even multichrome formulas really shine, literally, under club or restaurant lighting.
Cat Eye Nail Designs For Everyday Wear
Simple, single color cat eye nail designs in a versatile shade like warm brown or soft gray work with nearly any outfit, which makes them a fantastic everyday option that never feels boring thanks to the shifting shimmer.
Advanced Techniques For Cat Eye Nail Designs
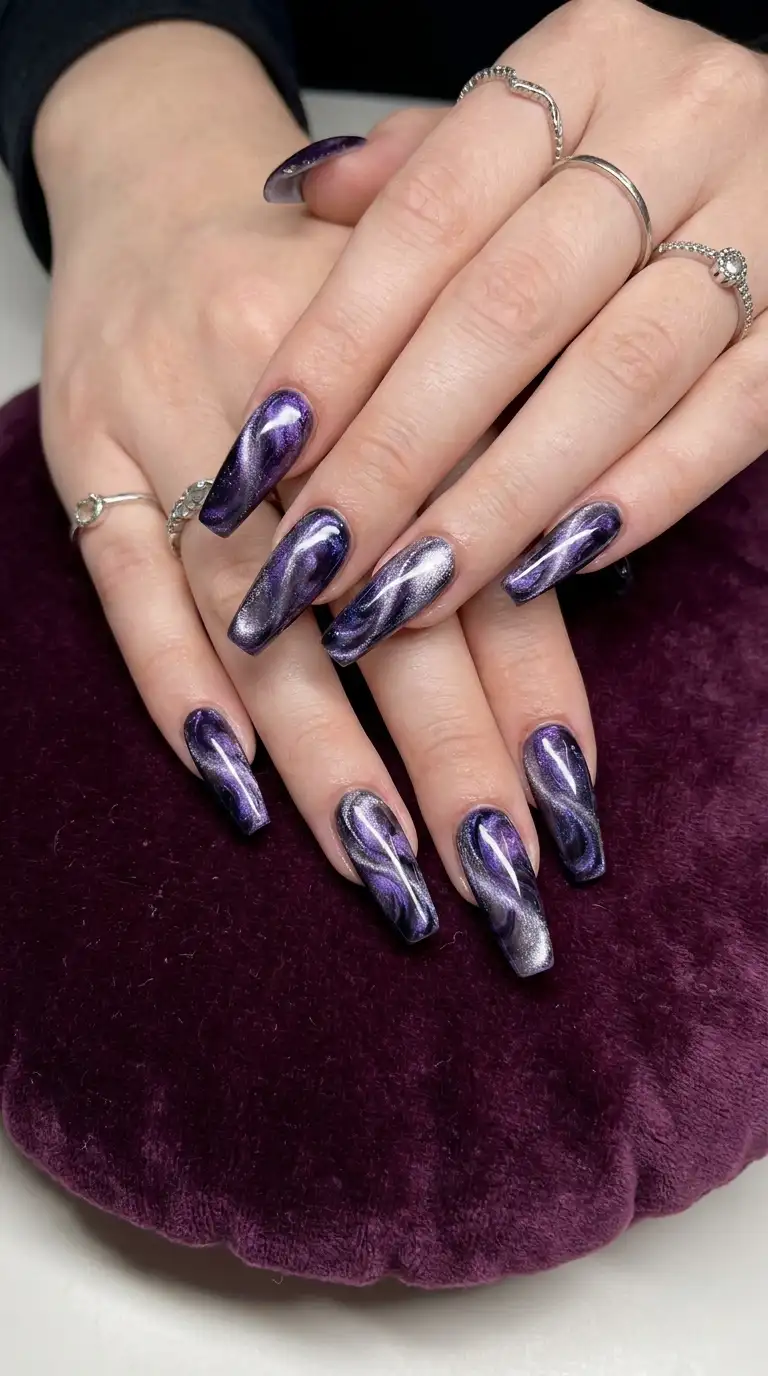
Once you have the basics down, there are several advanced techniques experienced nail artists use to elevate cat eye nail designs even further.
Must Read : Simple Butterfly Nail Art: 15 Pretty Designs Anyone Can Paint At Home
Double Magnet Technique
Using two magnets simultaneously, sometimes in different shapes, can create layered or crossing light patterns that look far more complex than a single straight line.
Encapsulated Cat Eye Nail Designs
This involves sealing the cat eye shimmer between two layers of clear gel, creating a sense of depth as though the shimmer is floating inside the nail rather than sitting on the surface.
3D Cat Eye Accents
Some artists sculpt small 3D elements, such as tiny gel flowers or geometric shapes, and place them on top of a cured cat eye base for added texture and dimension.
Marble Cat Eye Nail Designs
Combining two or three cat eye colors in a swirled marble pattern before curing creates a one of a kind, almost cosmic looking nail that never turns out the same way twice.
Removing Cat Eye Nail Designs Safely
Since cat eye nail designs are done in gel, removal should always be done properly to protect the health of your natural nails. I never recommend picking or peeling gel polish off, as this can strip layers of the natural nail plate and cause long term damage.
The proper method involves lightly buffing the top shine off the cured gel, soaking a cotton pad in acetone, placing it directly on the nail, wrapping it in foil, and letting it sit for about ten to fifteen minutes. After soaking, the softened gel should gently slide or scrape off with a cuticle pusher. Any stubborn residue should be removed slowly and gently rather than forced.
Following removal, I always recommend a nourishing cuticle oil and a short break before your next set, especially if you plan on doing back to back cat eye nail designs regularly.
The Health Of Your Natural Nails
As much as I love creating cat eye nail designs, I always prioritize the health of the natural nail underneath. Overfiling, skipping proper curing, or removing gel incorrectly can weaken nails over time regardless of how beautiful the design looks.
I recommend giving your nails periodic breaks between gel sets, using a strengthening base coat, and keeping cuticles moisturized with oil daily. Healthy nails actually hold color and shimmer better anyway, so taking care of the foundation genuinely improves the final look of your cat eye nail designs.
Cat Eye Nail Designs And Nail Shape Longevity
Longer nail shapes like stiletto or long almond do carry a slightly higher risk of breakage simply due to physics, more length means more leverage and more stress on the nail bed. If you love the dramatic look of long cat eye nail designs but worry about durability, consider a medium length almond or coffin shape as a compromise that still shows off the shimmer beautifully while being more resistant to everyday bumps and knocks.
Choosing A Nail Tech Who Specializes In Cat Eye Nail Designs
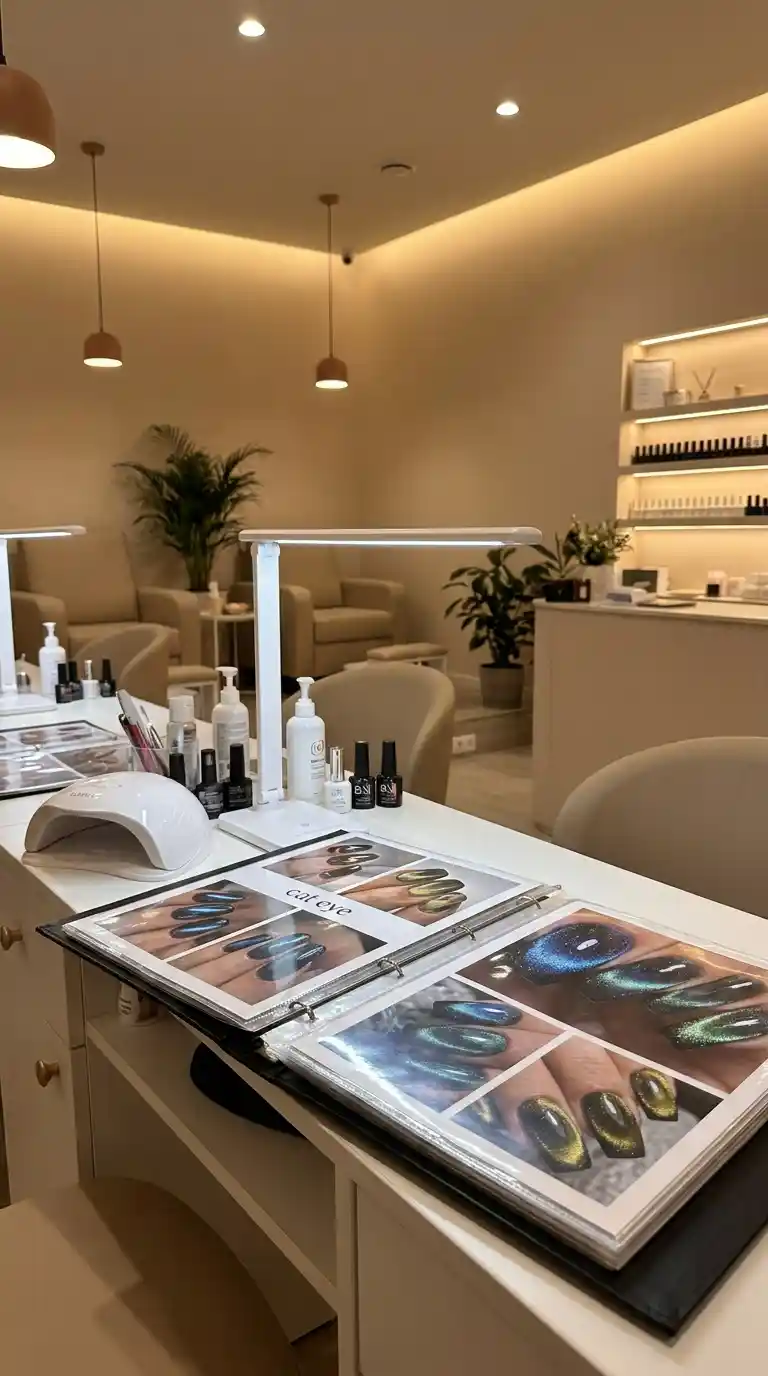
Not every nail technician has experience with the magnetic gel technique, so I always suggest looking through a salon’s portfolio specifically for cat eye nail designs before booking. Ask how long they have been doing this particular technique, and do not be afraid to bring reference photos to your appointment so you are both on the same page about the color and pattern you want.
A good sign of an experienced artist is variety in their portfolio, meaning you can see different colors, shapes, and magnet patterns rather than the exact same look repeated on every client.
My Personal Favorite Cat Eye Nail Designs Combinations
After years behind the chair, I do have favorites I keep coming back to, and I think sharing them might help you decide what to ask for.
My absolute top pick is a deep forest green cat eye base with a gold shimmer line pulled diagonally across the nail, finished with a high gloss top coat. It looks like a polished piece of jewelry and works for nearly any season.
A close second is a warm terracotta brown with a soft copper shimmer, which has become my go to recommendation for clients who want something warm and understated but still eye catching.
For clients wanting something more daring, I love a deep navy cat eye base with a silver dual line pattern using two magnets at once, which creates an almost starry night sky effect that never fails to get compliments.
Frequently Asked Questions
What are cat eye nail designs?
Cat eye nail designs are a type of gel manicure created using magnetic polish that contains metallic particles. A magnet is used on the wet gel before curing to pull the particles into a pattern that resembles the reflective slit of a cat’s eye, creating a shimmering line of light across the nail.
How long do cat eye nail designs last?
With proper application and curing, cat eye nail designs typically last between two and four weeks, similar to a standard gel manicure, though this depends on your nail growth rate and daily wear.
Can I do cat eye nail designs at home?
Yes, cat eye nail designs can absolutely be done at home with a starter kit that includes magnetic gel polish, a magnet tool, base coat, top coat, and a UV or LED lamp. Beginners may need a few practice attempts to get the timing and layer thickness right.
What magnet is best for cat eye nail designs?
The best magnet depends on the effect you want. Straight line magnets create the classic single streak, dome shaped magnets create an all over glow, and multi pattern magnets can create wave or starburst effects.
Do cat eye nail designs damage your natural nails?
Cat eye nail designs themselves do not damage nails, but improper removal, such as peeling or picking, can weaken the nail plate over time. Always remove gel polish using the proper acetone soak method.
How much do cat eye nail designs cost at a salon?
Pricing varies by location and salon, but cat eye nail designs are generally priced similarly to a standard gel manicure with a small upcharge for the specialized technique, with more elaborate designs costing more.
What colors work best for cat eye nail designs?
Popular colors include black, deep green, brown, blue, purple, and pink, though truly any shade can work as long as it is formulated as a cat eye or magnetic gel polish.
Can cat eye nail designs be combined with other nail art?
Yes, cat eye nail designs pair beautifully with French tips, ombre effects, glitter accents, and chrome powder accents for a more layered and personalized manicure.
Why is my cat eye nail design not showing the shimmer line?
This usually happens when the gel layer is too thick, the magnet was held too far from the nail, or the polish was not a genuine magnetic formula. Thin layers and close magnet placement produce the strongest effect.
Are cat eye nail designs good for short nails?
Absolutely. Cat eye nail designs look beautiful on short and round nail shapes, especially when paired with a dome shaped magnet that echoes the natural curve of a shorter nail.
How do you remove cat eye nail designs safely?
Buff the top shine, soak a cotton pad in acetone, wrap it in foil against the nail for ten to fifteen minutes, then gently scrape or slide the softened gel off without forcing or peeling it.
What is the difference between cat eye and chrome nails?
Cat eye nail designs create a directional shimmer line using magnetic particles within colored gel, while chrome nails use a mirror like powder applied over a cured base to create an all over metallic reflective finish
Final Thoughts
After everything I have shared here, I hope it is clear why I still get excited every time a client requests cat eye nail designs, even after doing this technique more times than I can count. There is something genuinely special about a manicure that responds to light and movement the way this one does.
Whether you decide to try cat eye nail designs at home with a simple starter kit or book an appointment with an experienced nail tech, I truly believe this is one trend worth trying at least once. The shimmer, the depth, and the personal touch you can add through color and magnet pattern choices make every set feel unique.
If you take one thing away from this guide, let it be this. Thin layers, a close magnet, and proper curing are the real secrets behind flawless cat eye nail designs. Everything else is just creative freedom waiting for you to explore it.