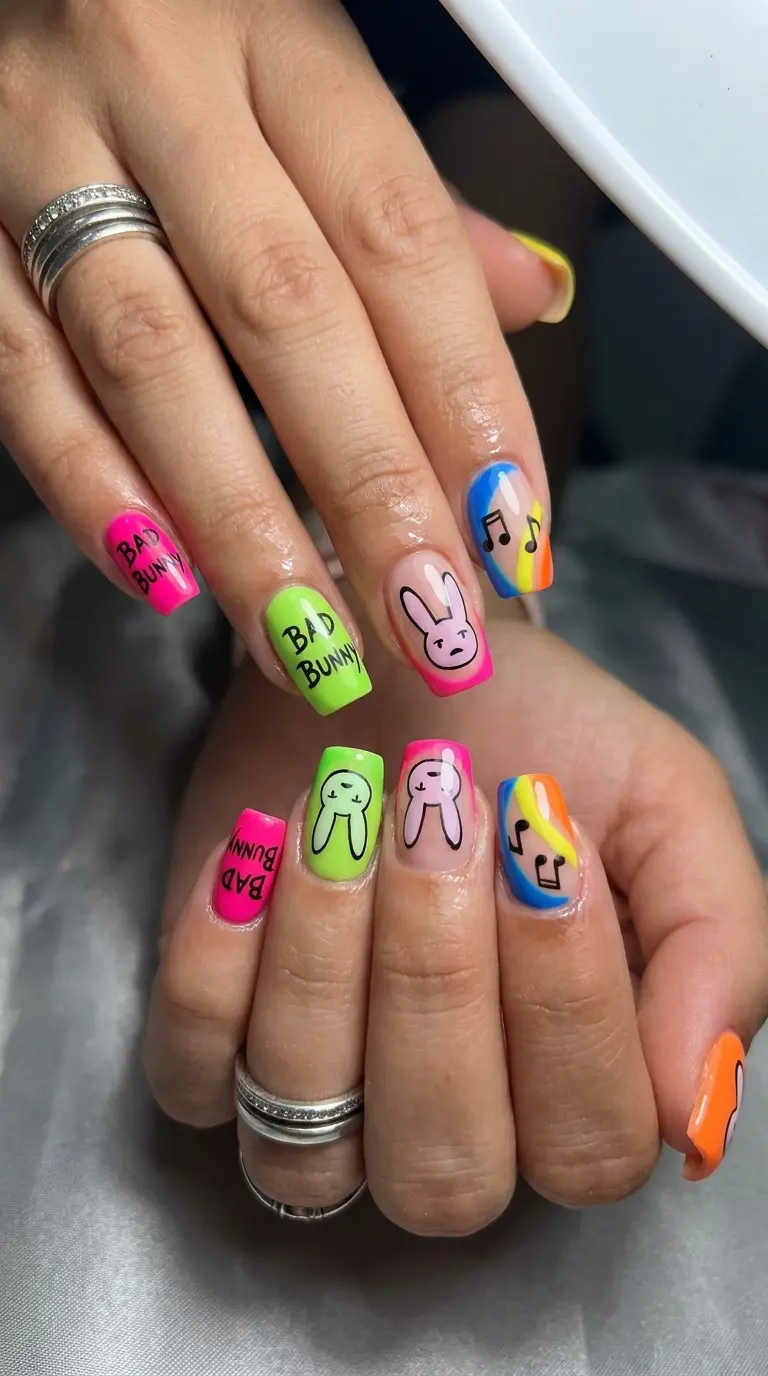
There is something about bad bunny nails that stops people mid scroll. Maybe it is the color combinations that should not work together but somehow do. Maybe it is the confidence of the whole look. Whatever it is, this trend has taken over salons, TikTok feeds, and group chats where friends send each other nail inspiration pictures at midnight.
As a nail artist who works with clients every single week, I get asked about bad bunny nails almost daily now. Clients walk in with screenshots, some blurry, some perfectly saved from Pinterest, and they all say some version of the same thing. They want nails that feel fun, loud, and a little rebellious, but still wearable enough for real life.
This article is going to walk you through everything about bad bunny nails. We will talk about what the style actually means, how to choose the right colors and shapes, how to recreate it at home if you are not visiting a salon, what mistakes to avoid, and how to keep the look lasting longer than a week. I am writing this the way I would explain it to a client sitting in my chair, because that is exactly how this trend deserves to be explained.
Also Read: 50 Cool Nail Designs That Will Make Your Manicure Absolutely Unforgettable
What Are Bad Bunny Nails Exactly
Bad bunny nails are not a single design. That is the first thing people get confused about. It is more of an attitude than a strict template. The name comes from the global music artist Bad Bunny, whose personal style has always leaned into bold colors, playful patterns, and a rejection of the idea that certain looks are only for one gender or one occasion.
When his fans and stylists started translating that same energy into nail art, the result was a style that mixes bright color blocking, chrome finishes, glossy jelly textures, and sometimes a bit of graffiti style linework. Bad bunny nails borrow from Latin street style, from Y2K nostalgia, and from a general mood of not caring what anyone thinks.
In my chair, when clients ask for bad bunny nails, they usually mean one of three things. They want extremely saturated color, they want a mismatched set where each nail is a little different, or they want that glassy chrome look with a pop of neon underneath. Sometimes they want all three combined, and honestly, that combination usually looks the best.
The Cultural Roots Behind Bad Bunny Nails
I think it helps to understand where a trend comes from before you commit your nails to it. Bad Bunny himself has worn nail polish publicly for years, long before it became a mainstream headline. He wore it on red carpets, in music videos, and in everyday paparazzi photos, and he never explained it or apologized for it. That quiet confidence is really the soul of bad bunny nails.
The trend picked up serious speed after his 2022 world tour, where fans started noticing his manicures in almost every photo. Nail artists in Puerto Rico, Miami, and Los Angeles began posting recreations, and from there it spread across TikTok like wildfire. What started as fan tribute art slowly became its own recognizable category in the nail world.
I remember the first time a client asked me for this look. She showed me a picture of chrome green nails with tiny hand painted flames on the ring finger. I had done chrome finishes before and flame art before, but never together in that exact combination. That request pushed me to experiment more, and honestly, it made me a better artist.
Why Bad Bunny Nails Are Taking Over Salons Everywhere
There is a reason this trend has not faded after a few months like some viral nail styles do. Bad bunny nails work because they are flexible. You can go extremely bold or keep it subtle while still capturing the spirit of the look.
Clients love that bad bunny nails do not require perfect symmetry. Traditional nail art often demands precision, matching each nail carefully. This trend flips that expectation. A little bit of imperfection actually adds to the charm.
Another reason is social media visibility. Short videos showing the color changing under different lighting, or showing the glossy chrome catching sunlight, perform incredibly well online. People want nails that photograph beautifully, and bad bunny nails are basically designed for that kind of visual impact.
Must Read : 45 Spirited Hippy Nails Ideas That Bring Groovy Vibes Back To Life
Bad Bunny Nails and the Rise of Gender Neutral Nail Art
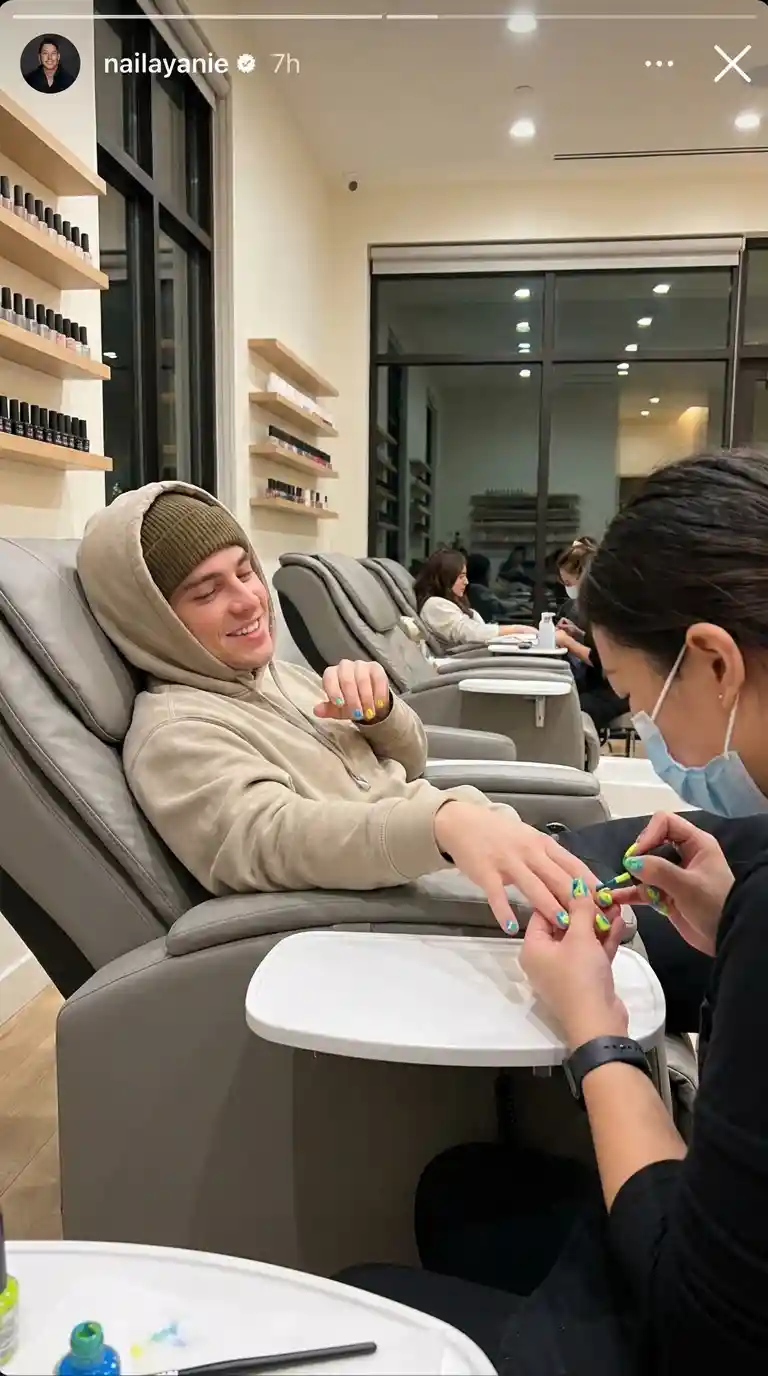
One thing I have noticed working in this industry is how much bad bunny nails have opened the door for men to feel comfortable getting manicures. I have had more male clients in the last two years than in the previous eight years combined, and a huge number of them specifically mention wanting something similar to what Bad Bunny wears.
This shift matters. Nail art used to be seen as strictly feminine in a lot of communities, and that limited a lot of people who genuinely wanted to express themselves through color and design. Bad bunny nails, because of their direct connection to a globally famous male artist who wears them unapologetically, have helped normalize the idea that anyone can enjoy a fresh manicure.
Best Colors for Bad Bunny Nails
Color is really the heart of this trend. If you get the color palette right, you are already halfway to nailing the look, no pun intended.
Neon and Electric Shades for Bad Bunny Nails
Neon green, hot pink, electric blue, and highlighter yellow are the backbone colors of most bad bunny nails I create. These shades feel loud and joyful, and they show up incredibly well on camera, which matters if your client wants to post their new manicure.
I usually recommend layering two coats of a neon color over a white base. This is a small technique that a lot of at home nail painters skip, but it makes a huge difference. Neon polishes tend to be slightly translucent on their own, and a white undercoat makes the color pop the way you see it in inspiration photos.
Chrome and Metallic Finishes in Bad Bunny Nails
Chrome nails have been popular for a while now, but bad bunny nails use chrome in a specific way. Instead of a full chrome set in one neutral color, this trend often uses chrome powder over a bright colored base, creating a holographic effect that shifts between colors depending on the light.
My favorite combination is a chrome powder applied over a deep purple gel base. Under regular light it looks almost black with purple undertones, but under sunlight or camera flash, it explodes into blues, greens, and pinks. Clients are always shocked the first time they see it change like that.
Pastel and Soft Tones for a Subtle Bad Bunny Nails Look
Not everyone wants to walk around with neon fingertips, and that is completely fine. Bad bunny nails can absolutely be done in a softer way. Pastel pink with a small chrome accent nail, or baby blue with tiny silver foil flecks, still captures the same rebellious playfulness without being overwhelming.
I often suggest this softer version to clients who work in more conservative office environments but still want to feel connected to the trend. It lets them enjoy bad bunny nails without worrying about workplace dress codes.
Bad Bunny Nails Designs You Can Try at Home
You do not need a professional salon appointment to try bad bunny nails. A lot of the designs I do in my chair can be recreated at home with some patience and the right tools.
Bad Bunny Nails with Rhinestones and Charms
Adding rhinestones is probably the easiest way to elevate a simple manicure into something that feels closer to the bad bunny nails aesthetic. You do not need to cover the whole nail. A cluster of three or four stones near the cuticle on one accent nail often looks more intentional than scattering stones everywhere.
I like using a small dab of nail glue or clear gel polish to place the stones, then curing under a UV lamp if using gel. If you are working with regular polish at home, a fast drying top coat works as a decent substitute for holding the stones in place, though it will not last quite as long.
French Tip Reinvented for Bad Bunny Nails
The classic French manicure gets a complete makeover in this trend. Instead of white tips on a natural pink base, bad bunny nails often use neon tips on a black base, or chrome tips on a bright colored base. It keeps the familiar structure of a French manicure but injects the boldness that defines this style.
To create this at home, paint your base color first and let it dry completely. Then use a thin nail art brush or a French tip guide sticker to paint the tip in your contrasting color. Clean up any mistakes with a small brush dipped in acetone before applying your top coat.
Read Also : 77 Stunning Cowgirl Nails Ideas That Will Make Your Manicure Absolutely Unforgettable
Mismatched Nail Sets in the Bad Bunny Nails Style
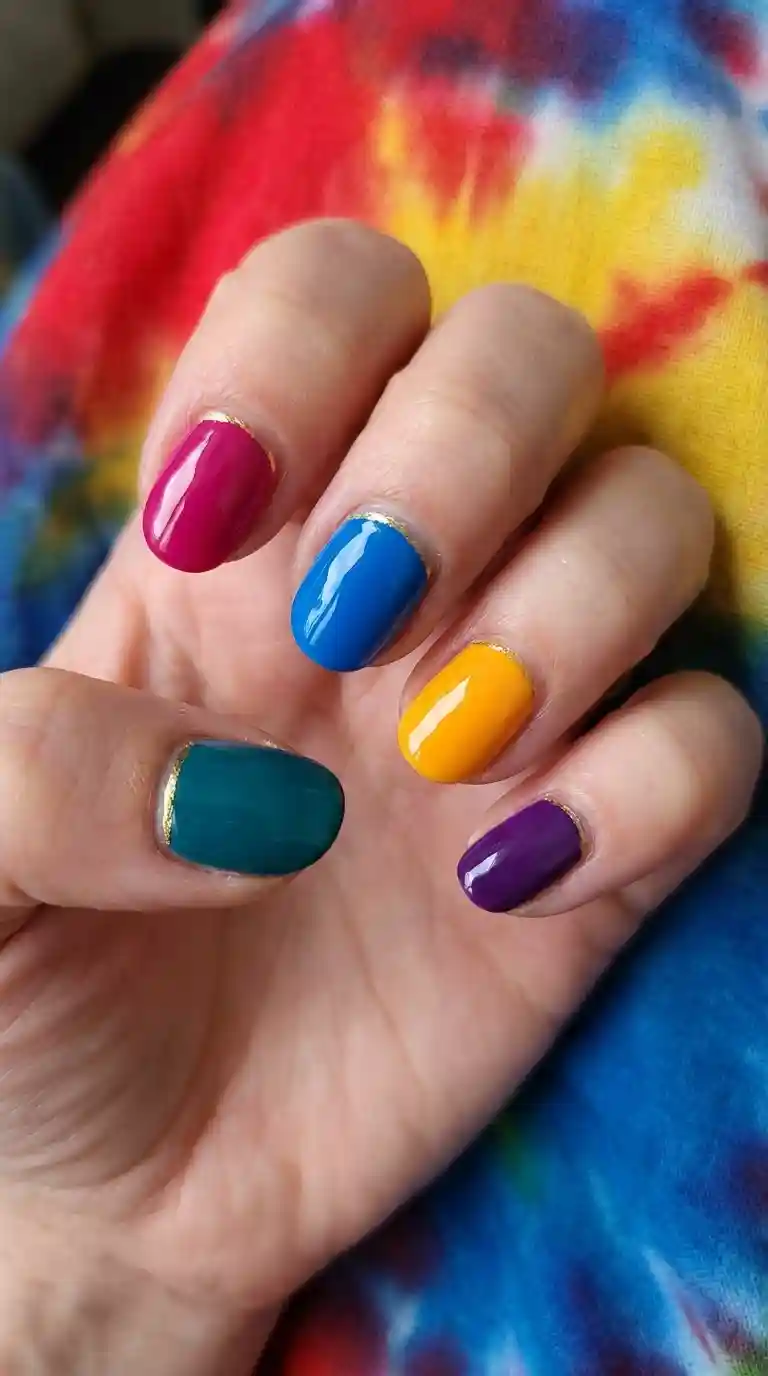
One of the most recognizable features of bad bunny nails is the mismatched set, where no two nails look exactly alike. This might sound chaotic, but there is usually a loose theme holding it together, like a shared color family or a repeated small detail such as a star or a heart.
When I design a mismatched set for a client, I pick three or four colors from the same palette and then decide on one small recurring element, maybe a thin gold line near the cuticle on every nail. That single repeated detail ties the whole set together even though each nail has its own personality.
How to Get Bad Bunny Nails Done at a Salon
If you are heading to a salon for the first time to get this look, a little preparation goes a long way. Bring reference photos. I cannot stress this enough. Describing a color verbally rarely matches what someone actually pictures in their head, but a photo removes almost all guesswork.
When clients bring me clear reference images for bad bunny nails, the appointment goes so much smoother. I can immediately tell them which parts are realistic to recreate exactly and which parts might need slight adjustment based on their natural nail shape or length.
Questions to Ask Your Nail Artist About Bad Bunny Nails
Before you sit down, it helps to ask a few things. Ask how long the design is expected to last, especially if it involves chrome powder, which can sometimes wear differently than standard gel polish. Ask whether the design requires gel extensions or can be done on your natural nails. Ask about touch up policies in case a stone falls off within the first week.
I always tell my clients that asking questions does not slow down the appointment, it actually speeds things up because we are on the same page before I even pick up a brush.
How Long Bad Bunny Nails Typically Last
With proper application, bad bunny nails done in gel polish typically last between two and three weeks before you start seeing noticeable growth or chipping. Chrome finishes can be slightly more delicate around the edges, so I usually recommend a slightly earlier touch up, closer to the two week mark, if your design relies heavily on chrome powder.
Regular polish versions, without gel, tend to last three to five days before chipping becomes visible, which is standard for any regular polish manicure regardless of the design.
Bad Bunny Nails for Different Nail Shapes
Not every nail shape suits every design the same way, and this trend is no exception. Understanding your shape helps you pick a version of bad bunny nails that will look proportionate and flattering.
Almond Shape and Bad Bunny Nails
Almond shaped nails have a tapered tip that naturally elongates the fingers. This shape works beautifully with bad bunny nails because the pointed tip gives extra room for tip designs like the reinvented French tip mentioned earlier. Chrome finishes also tend to catch light nicely on the curved surface of an almond nail.
Square Shape and Bad Bunny Nails
Square nails have flat tips and straight sides, which creates a wider canvas for bold color blocking. If you want a design where two or three colors meet in geometric shapes rather than soft curves, square nails give you the cleanest lines to work with.
Coffin Shape and Bad Bunny Nails
Coffin shaped nails, sometimes called ballerina shape, are tapered like almond nails but end in a flat tip instead of a point. This shape is popular for longer sets and gives plenty of space for detailed hand painted art, which suits the more elaborate versions of bad bunny nails that include flames, stars, or small cartoon style graphics.
Short Natural Nails and Bad Bunny Nails
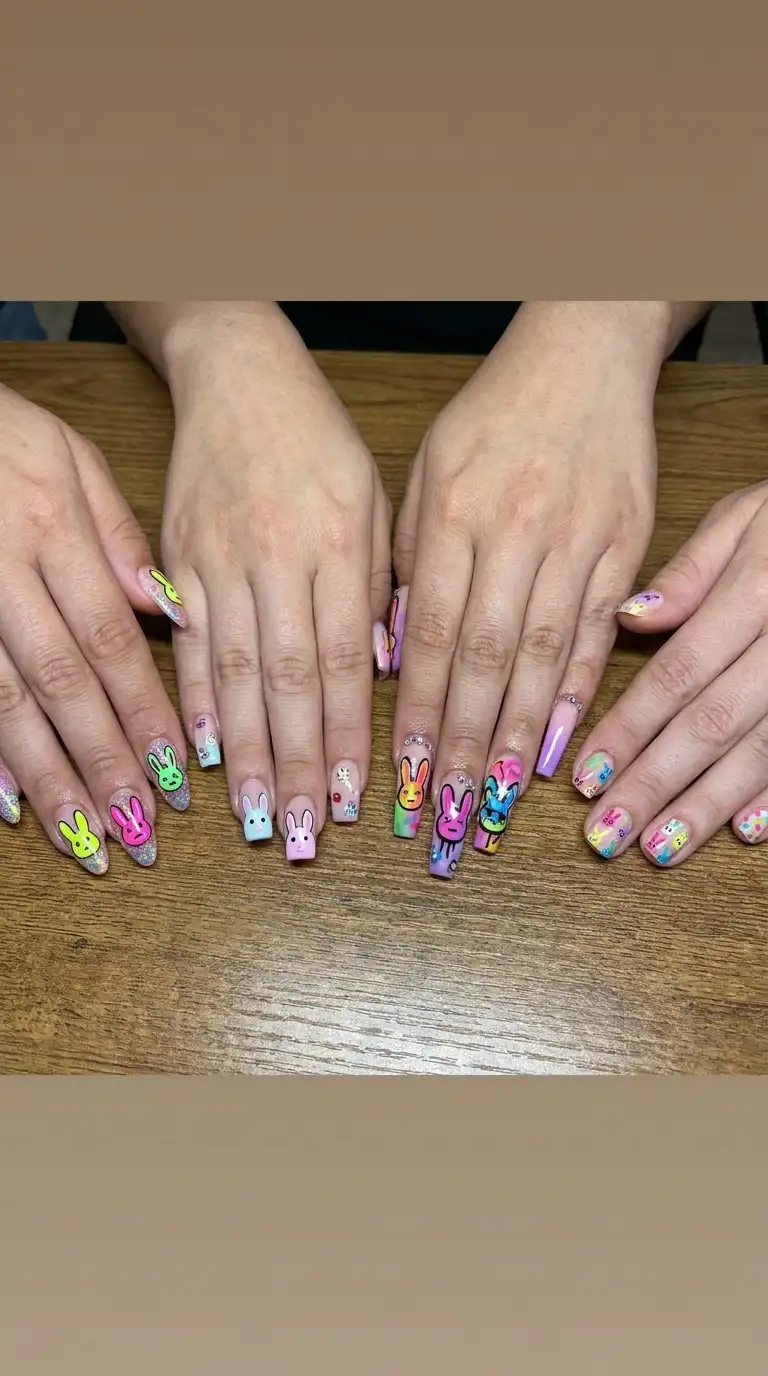
You absolutely do not need long nails to enjoy this trend. Short natural nails can carry bad bunny nails just as confidently, especially with simple color blocking or a single accent nail featuring chrome or rhinestones. I actually enjoy designing for short nails because it forces more thoughtful placement rather than relying on extra length to fill space.
Also Read: Boho Nail Ideas: The Ultimate Guide To Effortless, Free Spirited Manicures That Actually Turn Heads
Step by Step Guide to Bad Bunny Nails at Home
Let me walk you through a simple version of bad bunny nails that you can try at home this weekend, even if you consider yourself a beginner.
What You Will Need
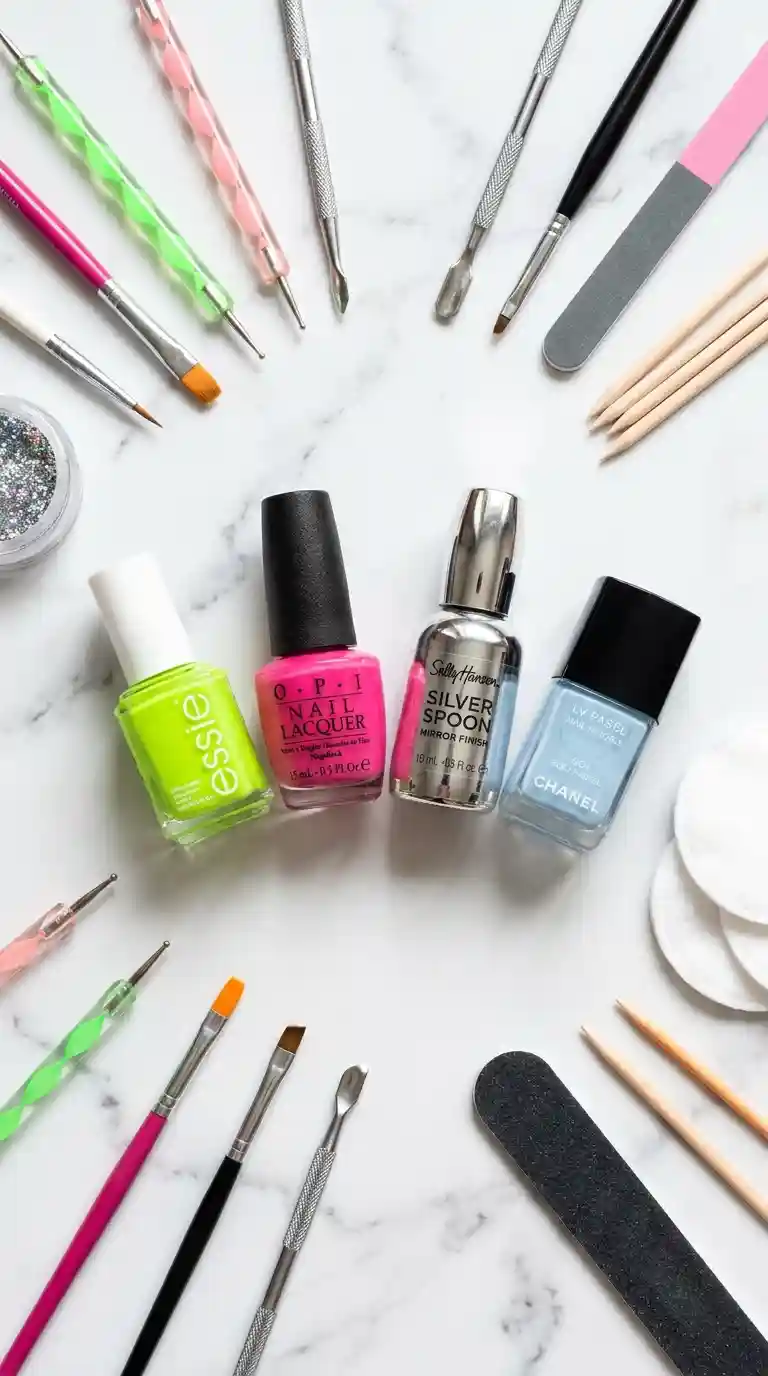
Gather a base coat, two bright polish colors of your choice, a small dotting tool or bobby pin for detail work, a thin nail art brush, a top coat, and some cotton swabs dipped in acetone for cleanup. If you want to add chrome, you will also need chrome powder and a small applicator sponge or brush.
Step One, Prepare Your Nails
Push back your cuticles gently, shape your nails with a file, and buff the surface lightly to remove shine. This helps the polish adhere better and last longer. Wipe your nails with an alcohol pad to remove any oils before starting.
Step Two, Apply Your Base Coat
A thin, even layer of base coat protects your natural nail from staining and helps everything else go on smoothly. Let it dry fully before moving to the next step.
Step Three, Choose Your Bad Bunny Nails Color Story
Pick your main color and paint two thin coats, allowing each coat to dry before applying the next. If you are doing a mismatched set, repeat this process with different colors on different nails, keeping one element consistent across all of them, like the same top coat finish or a repeated small design.
Step Four, Add Your Detail Work
This is where the personality of bad bunny nails really comes through. Use your dotting tool to add small circles, your thin brush to paint tiny lines or stars, or apply chrome powder over a tacky top coat layer for that shifting metallic effect.
Step Five, Seal With Top Coat
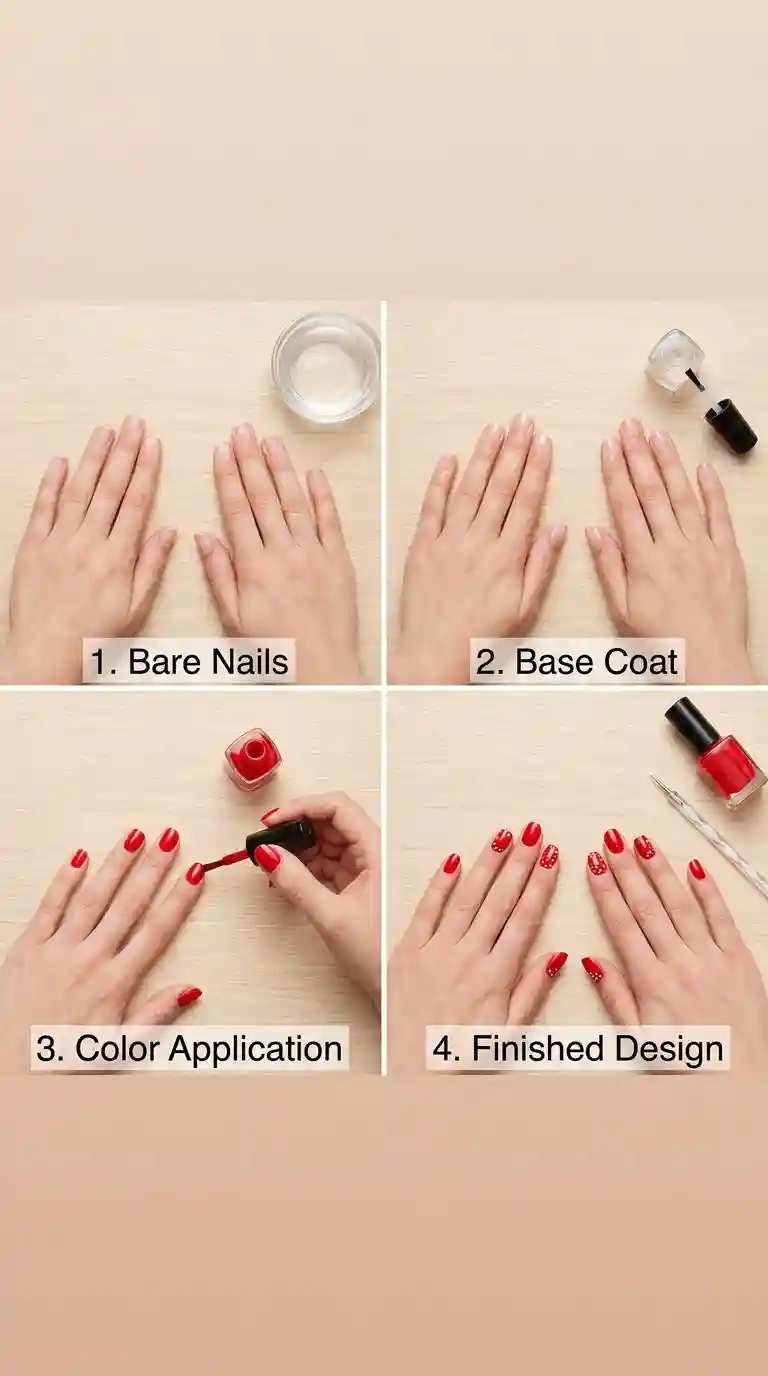
A glossy top coat is almost always the right choice for this trend, since bad bunny nails thrive on shine and vibrancy. Apply a thin even layer over each nail, being careful to cap the free edge to prevent early chipping.
Products I Recommend for Bad Bunny Nails
Over the years I have tried more polish brands and tools than I can count, and I have developed some genuine favorites for this specific trend.
Best Base Coats for Longevity
A strong ridge filling base coat makes a noticeable difference in how smooth your final color looks, especially with bright neon shades that tend to show every imperfection on the nail surface. I always recommend investing in a quality base coat even if you are shopping on a budget for everything else.
Best Neon Polishes for Bad Bunny Nails
Look for polishes labeled as highly pigmented or one coat coverage neon formulas. These tend to require fewer coats to reach full opacity, which saves time and reduces the risk of the polish becoming too thick and prone to chipping.
Best Chrome Powders for the Trend
Chrome powder quality varies a lot between brands. Cheaper powders sometimes look dull or patchy, while higher quality powders give that mirror like shine that defines the best bad bunny nails looks. A small pot of good chrome powder lasts a long time since you only need a tiny amount per application.
Best Top Coats for Shine and Protection
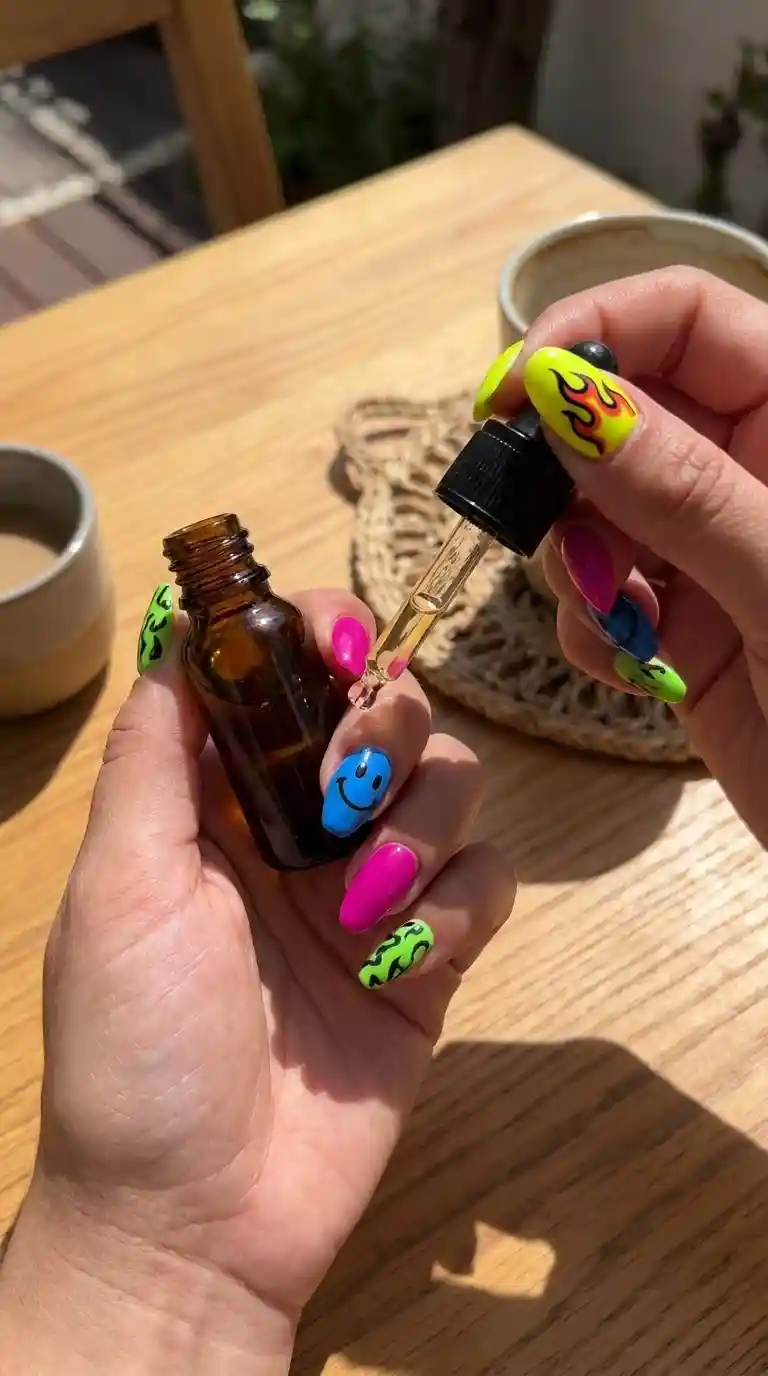
A gel top coat, even if the rest of your manicure is regular polish, adds durability and an incredible glossy finish. Some brands offer no light needed gel top coats that dry with regular air exposure, which is perfect for at home use without a UV lamp.
Read Must : Daisy Nail Design: 27 Stunning Ideas That Will Make Your Manicure Bloom All Year Long
Bad Bunny Nails Maintenance Tips
Getting bad bunny nails done is only half the equation. Keeping them looking fresh requires a bit of ongoing care.
Moisturize Your Cuticles Daily
Dry cuticles do not just look unpolished, they can actually cause your polish to peel away from the edges faster. I recommend a small cuticle oil applied every night before bed, gently massaged in for about thirty seconds per hand.
Avoid Harsh Chemicals Without Gloves
Cleaning products, dish soap, and even some skincare products contain ingredients that break down nail polish over time. Wearing rubber gloves while cleaning protects both your bad bunny nails and your skin.
Reapply Top Coat Every Few Days
A fresh layer of top coat every three to four days can extend the life of your manicure significantly. This is especially helpful for chrome finishes, which can dull slightly with daily wear and tear.
Be Gentle With Chrome and Foil Details
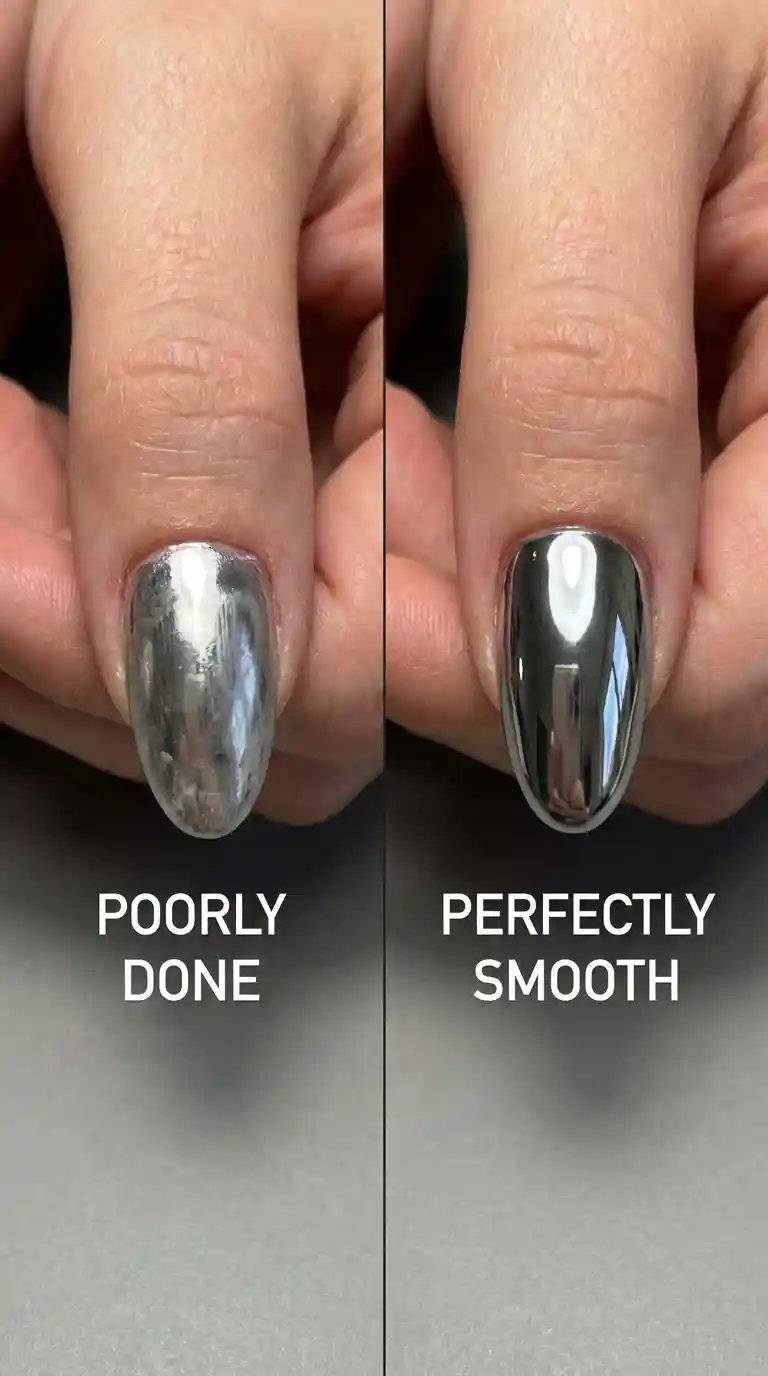
Chrome and foil accents are more delicate than solid polish. Avoid picking at your nails or using them as tools to open cans or scratch labels, since this is the fastest way to damage the metallic finish.
Common Mistakes to Avoid With Bad Bunny Nails
I have seen a lot of at home attempts at this trend, and there are a few recurring mistakes that are easy to fix once you know what to look for.
Skipping the White Base Under Neon Colors
As mentioned earlier, neon polishes are often slightly sheer on their own. Skipping the white base layer results in a washed out color that does not match the vibrant look most people are going for with bad bunny nails.
Applying Chrome Powder Too Early or Too Late
Chrome powder needs to be applied to a top coat that is tacky but not fully wet and not fully dry. Applying it too early smears the color, while applying it too late means the powder will not stick properly. This timing takes a little practice, so do not get discouraged if your first attempt is not perfect.
Overloading the Design With Too Many Elements
Because bad bunny nails allow for a lot of creative freedom, it is tempting to add every element you like all at once, rhinestones, chrome, flames, glitter, and dots all on the same nail. Sometimes less really is more. Choosing two or three focal elements per set usually looks more polished than trying to include everything.
Not Allowing Layers to Dry Between Steps
Rushing between coats is one of the most common reasons manicures do not last. Each layer, from base coat to color to top coat, needs adequate drying time. Patience genuinely pays off with this trend since the layered techniques involved need each step to set properly.
Bad Bunny Nails for Special Occasions
Bad bunny nails are not just for everyday wear. This trend has become a popular choice for concerts, festivals, birthdays, and even weddings for those who want something less traditional.
Concert Ready Bad Bunny Nails
If you are heading to a concert, especially a Bad Bunny concert itself, going all out with neon colors, glitter, and bold patterns feels completely appropriate. Concerts are one of the few settings where extremely loud nail art fits the entire atmosphere rather than standing out awkwardly.
Festival Style Bad Bunny Nails
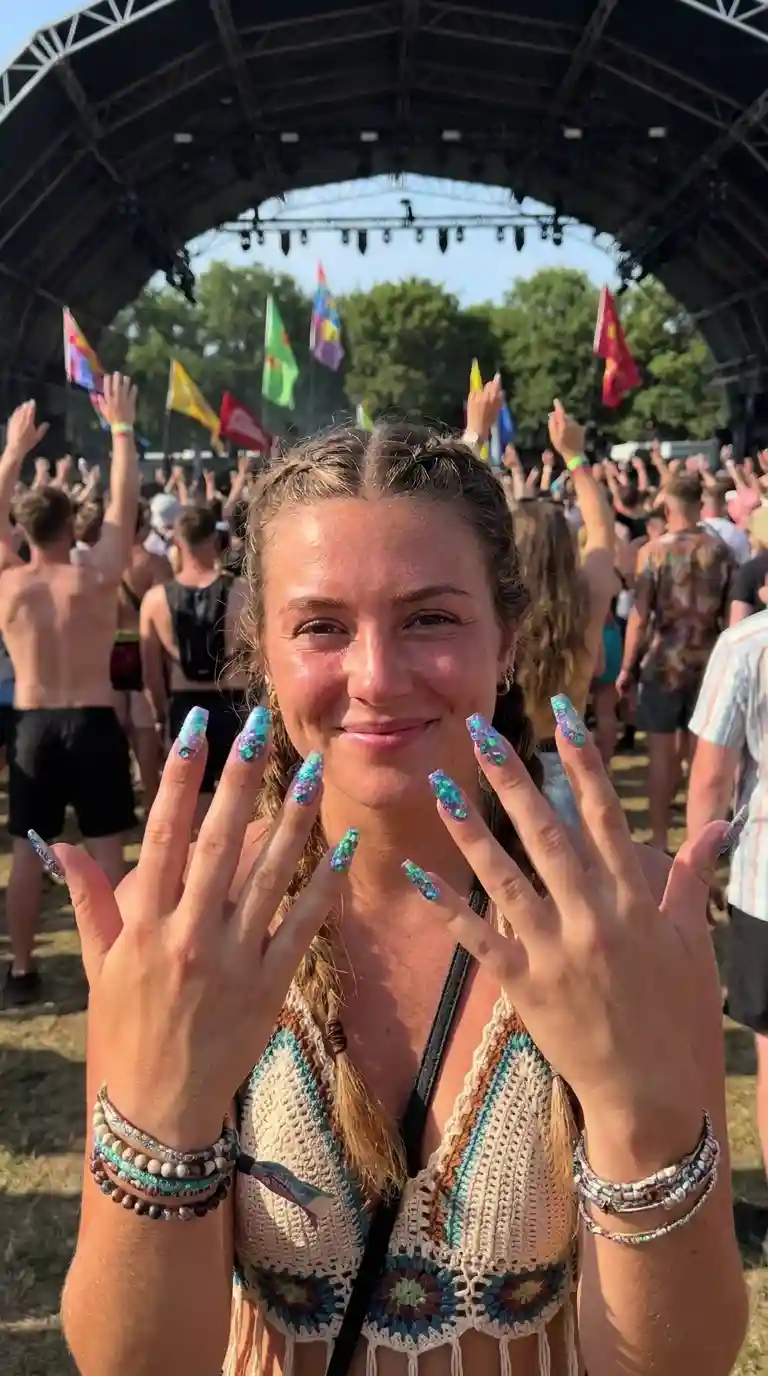
Music festivals call for durability alongside style, since you will likely be dancing, sweating, and spending long hours outdoors. I recommend gel based bad bunny nails for festivals since they hold up better against moisture and movement compared to regular polish.
Bad Bunny Nails for Weddings and Guests
For those attending weddings rather than being the bride, a toned down version of bad bunny nails, like soft pastel colors with a single chrome accent nail, allows guests to feel connected to the trend without clashing with the formality of the event.
Cost of Bad Bunny Nails at a Salon
Pricing for bad bunny nails varies depending on your location, the complexity of the design, and whether you are adding extensions. On average, a full set with basic bold color blocking might run similarly to a standard gel manicure, while adding chrome, rhinestones, or detailed hand painted art typically adds an additional charge per hand or per nail.
I always encourage clients to ask for pricing upfront, especially if they want multiple design elements combined. Most salons, including mine, are happy to give a rough estimate once we look at the reference photo together.
Is It Worth Paying Extra for Detailed Bad Bunny Nails
In my honest opinion, if the design genuinely makes you excited every time you look at your hands, it is worth it. Nail art is one of the more affordable forms of self expression, and a manicure that lasts two to three weeks often works out to a reasonable daily cost when you break it down.
Also Read : Bow Nail Design: The Ultimate Guide To Getting Gorgeous, Trendy And Show Stopping Nails
Bad Bunny Nails Aftercare for Longer Lasting Results
Taking care of your hands overall supports the longevity of any manicure, including bad bunny nails.
Hand Hydration Matters More Than People Think
Dry skin around the nail bed can lead to hangnails, which sometimes catch on fabric and cause polish to lift prematurely. A good hand cream used consistently keeps the entire area healthy and helps your manicure look intentional rather than neglected as the days pass.
Sleep Position Can Affect Your Manicure
This might sound unusual, but the way you sleep, particularly if you tend to clench your hands or press them against surfaces, can contribute to small chips forming overnight. Being mindful of this, especially in the first two nights after a fresh set of bad bunny nails, can help preserve the design longer.
Removing Bad Bunny Nails Properly
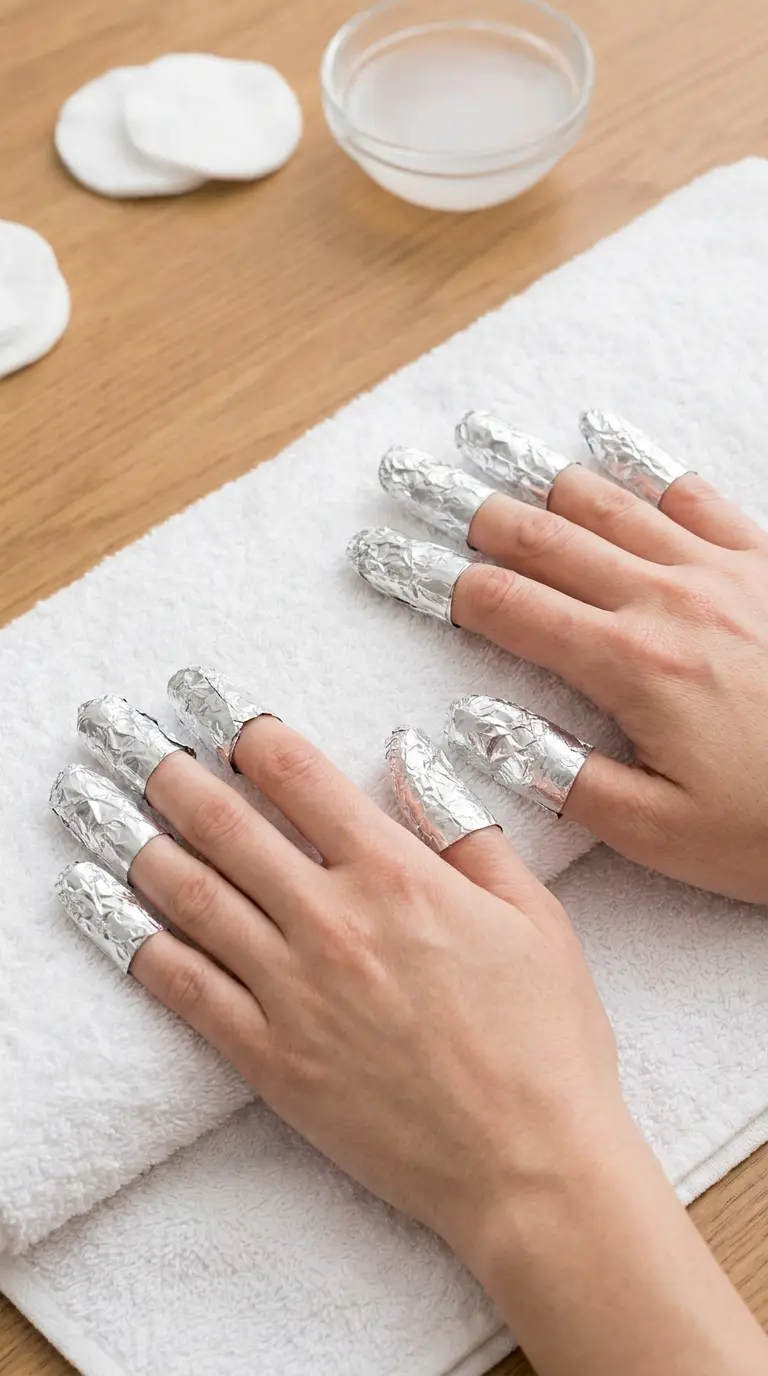
When it is time to remove your gel bad bunny nails, resist the urge to peel them off. Peeling can damage the natural nail bed underneath. Instead, gently file the top shine layer, soak cotton pads in acetone, wrap them around each nail with foil, and let them sit for about ten to fifteen minutes before gently pushing the softened polish away with a cuticle stick.
My Personal Take on the Bad Bunny Nails Trend
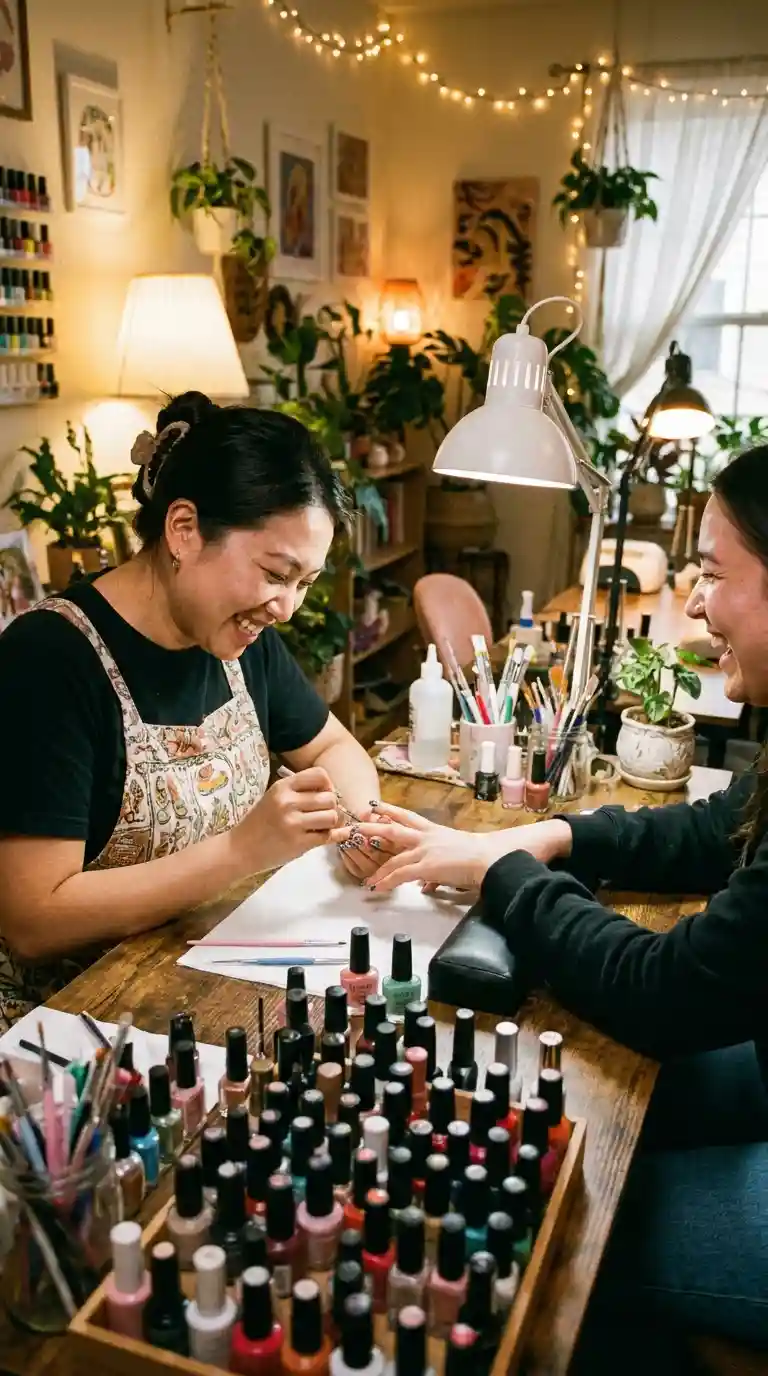
Working with this trend over the past couple of years has genuinely changed how I approach color in my everyday appointments. Before bad bunny nails became popular, a lot of clients stuck to safe neutrals, soft pinks, classic reds, and the occasional French manicure. Now I see people willing to experiment with combinations I never would have suggested a few years ago.
What I appreciate most is the emotional shift behind it. Clients tell me they feel more like themselves with bold color on their hands. There is a specific kind of joy that comes from glancing down during a boring meeting and seeing something bright and playful looking back at you. Bad bunny nails, more than most trends I have worked with, seem to genuinely improve people’s mood.
I also think this trend has taught a lot of nail artists, myself included, to loosen up on perfectionism. Not every line needs to be perfectly straight. Not every nail in a set needs to match exactly. There is real freedom in that, both for the artist and the client.
Read Also: Square Nail Inspo: 87 Gorgeous Ideas To Steal For Your Next Manicure
Bad Bunny Nails Inspiration for Your Next Appointment
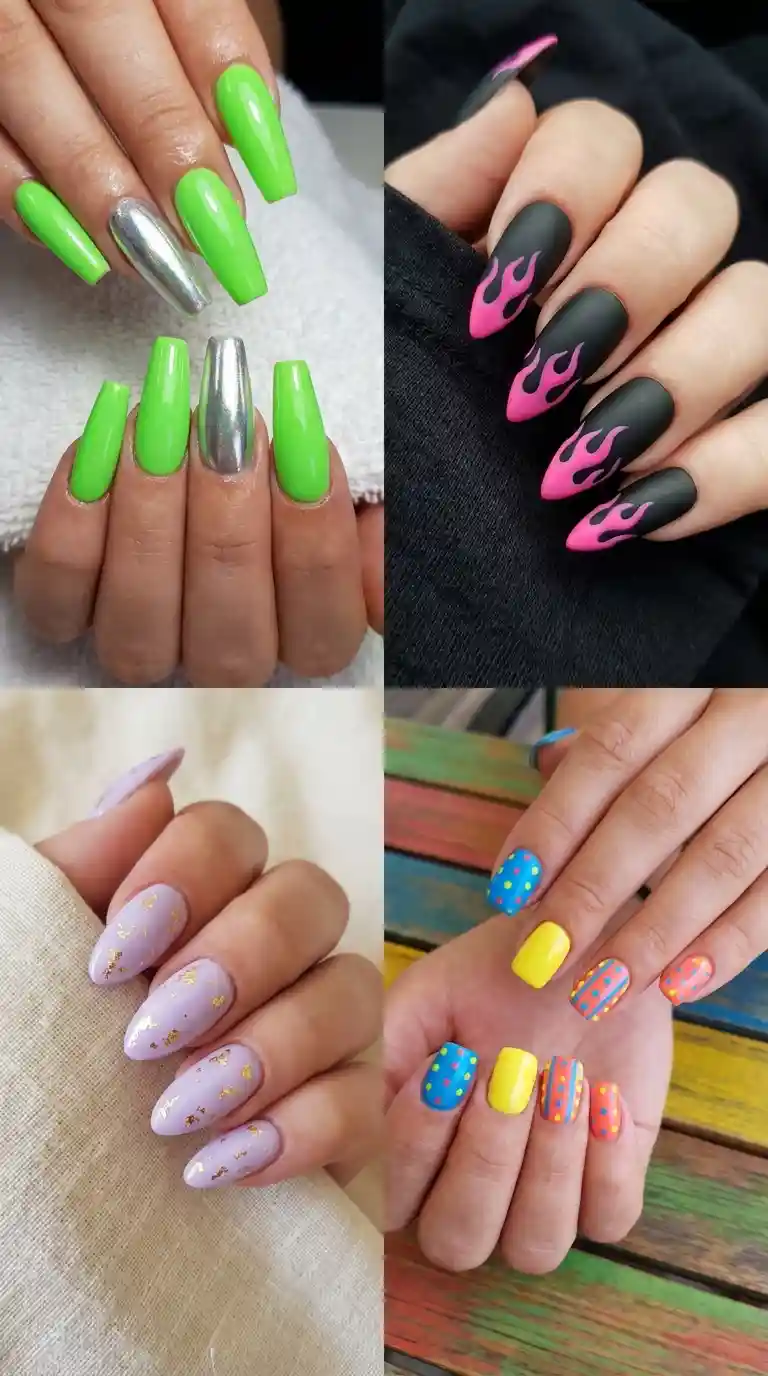
If you are still deciding on your exact design, here are a few combinations I have personally created that clients loved.
The first is a full neon green set with one accent nail in chrome silver covered in tiny black stars. This combination feels playful without being overwhelming.
The second is a black base with hot pink flame details on the ring finger and thumb, keeping the other nails solid black with a glossy top coat. This version leans more edgy and works well for clients who prefer darker colors but still want to participate in the trend.
The third is a pastel lavender set with gold foil flecks scattered near the cuticle line on each nail. This softer take on bad bunny nails works beautifully for clients in professional settings.
The fourth is a mismatched set combining hot pink, electric blue, and neon yellow, each nail solid colored, tied together with a single thin white line painted horizontally near the tip of every nail.
Frequently Asked Questions About Bad Bunny Nails
What are bad bunny nails?
Bad bunny nails refer to a bold, colorful nail art trend inspired by the personal style of the musician Bad Bunny, who is known for wearing vibrant, expressive manicures. The style typically includes bright colors, chrome finishes, and playful mismatched designs.
How do you get bad bunny nails?
You can get bad bunny nails by visiting a nail salon with reference photos of the specific colors and elements you want, or by recreating simplified versions at home using bright polish, a white base coat under neon shades, and optional chrome powder for a metallic finish.
What colors are used for bad bunny nails?
Common colors include neon green, hot pink, electric blue, highlighter yellow, and chrome silver. Softer pastel versions also exist for those who want a more subtle interpretation of the trend.
How long do bad bunny nails last?
With gel polish application, bad bunny nails typically last two to three weeks before noticeable regrowth appears. Regular polish versions usually last between three and five days before chipping begins.
Are bad bunny nails only for women?
No, bad bunny nails have become popular among people of all genders, largely because Bad Bunny himself wears nail polish publicly and confidently, which has helped normalize colorful manicures for men as well.
What nail shape works best for bad bunny nails?
Almond, square, coffin, and short natural nails can all work well for bad bunny nails, depending on the specific design. Almond shapes suit tip designs nicely, while square shapes offer a wider canvas for geometric color blocking.
Do bad bunny nails require gel polish?
No, bad bunny nails can be done with regular polish, though gel polish tends to last longer and holds up better against chipping, especially for chrome finishes.
Final Thoughts
Bad bunny nails represent something bigger than a passing trend to me. They represent a shift toward color positivity and self expression in an industry that has, for a long time, leaned heavily on subtlety as the default definition of good taste. Whether you choose to go fully bold with neon and chrome or ease into it with a single pastel accent nail, this trend offers something for almost everyone willing to try it.
If you decide to bring this look to your next salon appointment, remember to communicate clearly with your nail artist, bring reference photos, and be open to small adjustments based on your natural nail shape. And if you are trying this at home, be patient with yourself. Every nail artist, including me, had a first attempt that did not go perfectly. What matters is enjoying the process and ending up with something on your hands that genuinely makes you smile.
Pingback: Hibiscus Nail Art: 35+ Gorgeous Tropical Nail Designs
Pingback: Best Winnie The Pooh Nails ideas for a Cute Manicure
Pingback: Stunning Plant Nails Ideas for Nature-Inspired Nails
Pingback: 50+ Exotic Nail Ideas for a Bold & Glamorous Look
Pingback: Leo Nails: 50+ Bold & Glamorous Nail Designs
Pingback: Stunning Peacock Nail Designs for a Glamorous Look