There is something about a hand painted flower on a tiny canvas that makes people stop and stare. Out of every floral design I have painted on clients over the years, hibiscus nail art is the one that gets the most compliments in the salon chair. It is bold, it is colorful, and it carries that instant vacation feeling even when you are stuck at your office desk in the middle of winter.
If you have been scrolling through Pinterest or Instagram lately, you have probably noticed hibiscus nail art popping up everywhere. Brides are choosing it for beach weddings, teenagers are asking for it before summer break, and even my regular clients who usually stick to plain nude nails are suddenly requesting a little hibiscus flower on their ring finger. It is that popular right now.
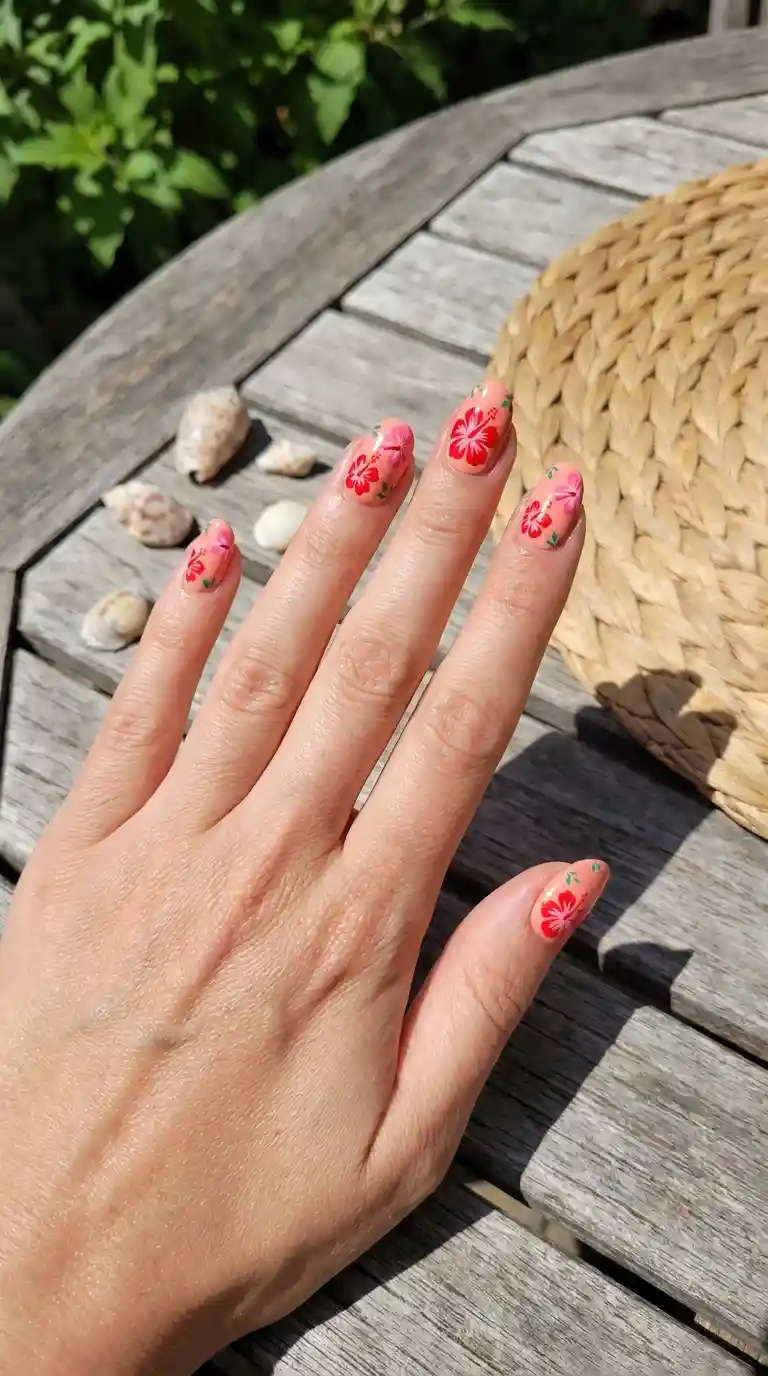
In this guide, I want to walk you through everything I know about hibiscus nail art. Not the copy paste tutorial you find everywhere online, but the real tricks, the mistakes I made when I was learning, and the little details that separate a hibiscus nail art design that looks amateur from one that looks like it belongs in a magazine.
Also Read : Bad Bunny Nails: The Ultimate Bold Nail Trend Guide Every Nail Lover Needs to Try
What Is Hibiscus Nail Art and Why Everyone Is Obsessed With It
Hibiscus nail art is a style of nail decoration where the hibiscus flower, known for its large, trumpet shaped petals and bright colors, is hand painted or applied using stickers, decals, or gel art onto the nail surface. The flower originally comes from tropical and subtropical regions, and it is often associated with places like Hawaii, the Caribbean, and parts of Southeast Asia.
What makes hibiscus nail art so appealing is the shape of the flower itself. Unlike a rose or a daisy, the hibiscus has these dramatic, open petals that almost look like they are reaching outward. That shape translates beautifully onto a small nail bed because it fills space in a way that feels natural rather than cramped.
When I first started offering hibiscus nail art at my station, clients would come in with a screenshot from a resort trip or a wedding they attended and simply say, I want that flower. Most of the time they did not even know the name of it. Once I explained it was a hibiscus, they got even more excited because the flower has such a fun, breezy reputation attached to it.
Hibiscus nail art works for almost every nail shape and length. Whether you have short nails or long stiletto nails, the flower can be scaled down or enlarged to fit perfectly. That flexibility is part of the reason hibiscus nail art has stayed popular season after season instead of being a passing trend.
The Symbolism Behind Hibiscus Nail Art
There is actually a deeper meaning behind choosing hibiscus nail art beyond it just looking pretty. In many cultures, the hibiscus flower represents beauty, femininity, and even delicate power because the bloom only lasts for a single day before wilting. Some of my clients have told me they choose hibiscus nail art specifically because it reminds them to enjoy the present moment.
In Hawaiian culture, a hibiscus flower worn behind the ear can signal relationship status, and the flower is also the state flower of Hawaii. That cultural richness adds another layer to why hibiscus nail art feels special rather than just being another floral pattern.
I always share a bit of this background with clients when they book a hibiscus nail art appointment. It makes the whole experience feel more meaningful, and honestly, most people love learning a little story behind the design they are wearing on their hands.
Also Read: 50 Cool Nail Designs That Will Make Your Manicure Absolutely Unforgettable
My Personal Journey Learning Hibiscus Nail Art
I remember the very first time I attempted hibiscus nail art on a real client instead of a practice tip. My hands were shaking a little because the flower looked so complicated compared to the simple dots and swirls I was used to painting. The petals kept coming out uneven, and the center of the flower looked more like a smudge than the delicate stamen a real hibiscus has.
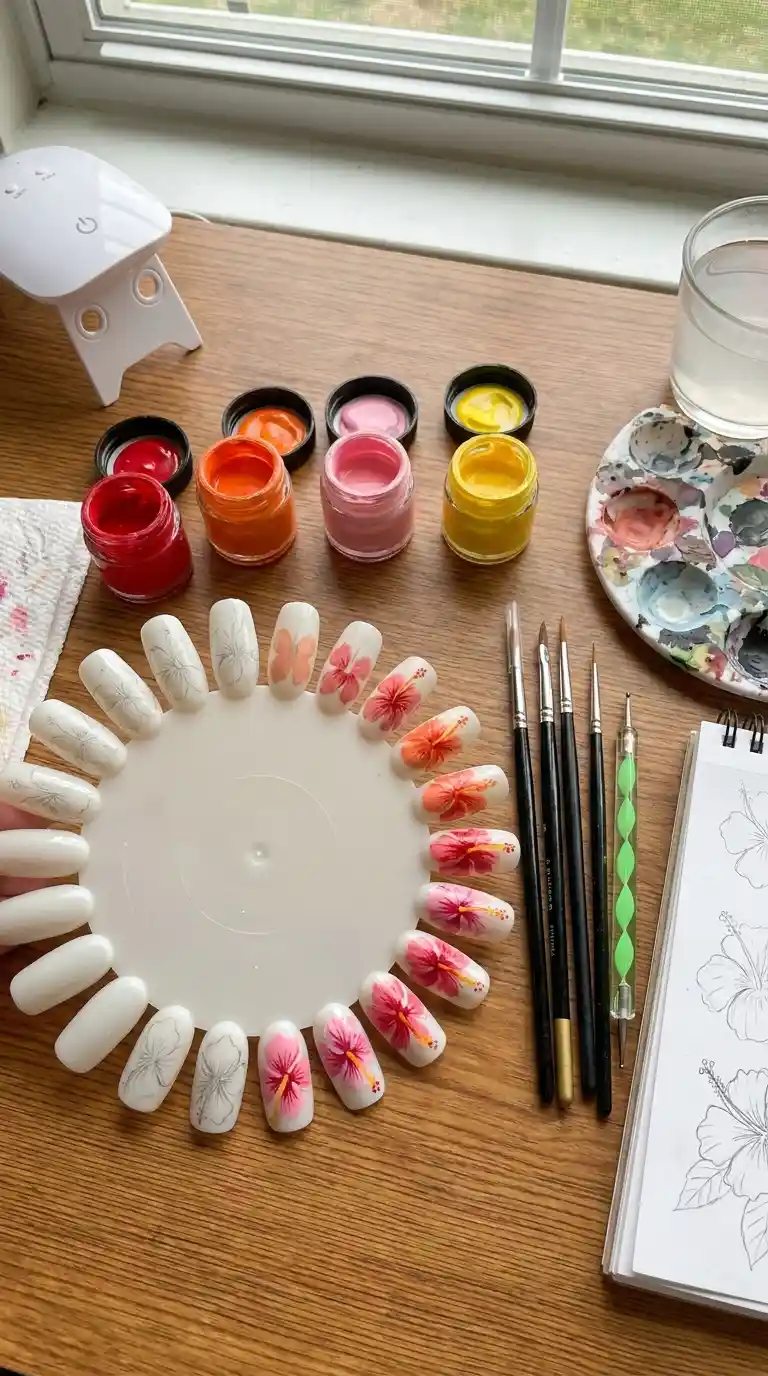
It took weeks of practicing on nail wheels before I felt confident enough to charge full price for hibiscus nail art. I remember filling up an entire practice wheel with nothing but hibiscus petals in different colors just to train my hand to move in that curved, sweeping motion the flower requires.
What changed everything for me was slowing down. Hibiscus nail art is not a design you can rush. Every petal needs its own moment, its own pressure control, and its own drying time before you add the next layer. Once I accepted that this style takes patience, my results improved dramatically.
Now, hibiscus nail art is one of the designs I am most requested for, and clients specifically search my portfolio for it before booking. I say this not to brag but to reassure you that if your first few attempts at hibiscus nail art do not look perfect, that is completely normal. Every nail artist who is good at hibiscus nail art today once had petals that looked lopsided too.
Tools and Products You Need for Hibiscus Nail Art
Before you even think about painting your first hibiscus nail art design, you need the right tools sitting in front of you. I cannot stress this enough because using the wrong brush alone can make or break your entire design.
Here is what I personally keep on my desk whenever I am doing hibiscus nail art for a client.
Detail brushes. You need at least two sizes. A slightly wider flat brush for laying down the petal shapes, and a very thin liner brush for the center details and vein lines on the petals.
Acrylic paint or gel paint. I prefer using gel paint for hibiscus nail art because it holds its shape better and does not run the way regular polish can. Colors you absolutely need include red, coral, hot pink, yellow, white, and a deep green for the leaves.
A dotting tool. This is essential for creating the little stamen dots in the center of the hibiscus flower.
Base coat and top coat. Never skip these. A good base coat protects the natural nail, and a strong top coat seals in your hibiscus nail art so it does not chip within two days.
Cuticle oil. Not directly used in the painting process, but keeping the surrounding skin hydrated makes the finished hibiscus nail art photograph so much better.
A UV or LED lamp. If you are working with gel products, you need this to cure each layer of your hibiscus nail art properly.
I know it can feel overwhelming seeing this list, especially if you are just starting out and doing hibiscus nail art at home for fun. My advice is to start with the basics, a red, a yellow, a white, and a green, plus one good detail brush. You can build your collection as you fall deeper into loving hibiscus nail art.
Step by Step Hibiscus Nail Art Tutorial for Beginners
This is the section I get asked about the most. So let me break down exactly how I approach hibiscus nail art from start to finish, the same way I would walk a new nail tech through it in the salon.
Prepping the Nails Before Hibiscus Nail Art
Every great manicure starts long before the paint touches the nail. Push back the cuticles gently, shape the nail to your preferred length and style, and buff the surface lightly so the polish has something to grip onto.
Skipping prep is the number one reason hibiscus nail art chips early. If the nail surface has natural oils or a shiny top layer, your base coat will not bond properly, and no amount of beautiful painting will save a manicure that lifts within a day.
Creating the Base Color for Your Hibiscus Nail Art
Choose a background color that will make your hibiscus nail art pop. Soft nude tones, warm coral, deep navy, and even black all work beautifully as a backdrop. I personally love pairing hibiscus nail art with a milky white or a soft peach base because it lets the bright petal colors take center stage.
Apply two thin coats of your base color, curing or drying between each layer. Do not rush this step. A streaky base ruins the clean look that good hibiscus nail art needs.
Painting the Hibiscus Flower Petals
This is the heart of hibiscus nail art. Using your wider detail brush, dip into your petal color and create a teardrop shape, thin at the top near where the petals will meet, and wider toward the outer edge.
A traditional hibiscus has five petals, but for nail art purposes, three to five petals work depending on how much space you have on the nail. Place your first petal slightly off center, then build the remaining petals around it in a fan shape, slightly overlapping at the base.
Do not worry about making every petal identical. Real hibiscus flowers are not perfectly symmetrical either, and a little natural variation actually makes your hibiscus nail art look more organic and less like a sticker.
Read Also: Wild and Wonderful: The Complete Guide to Animal Print Nail Designs That Turn Heads Everywhere
Adding Shading and Depth to Hibiscus Nail Art
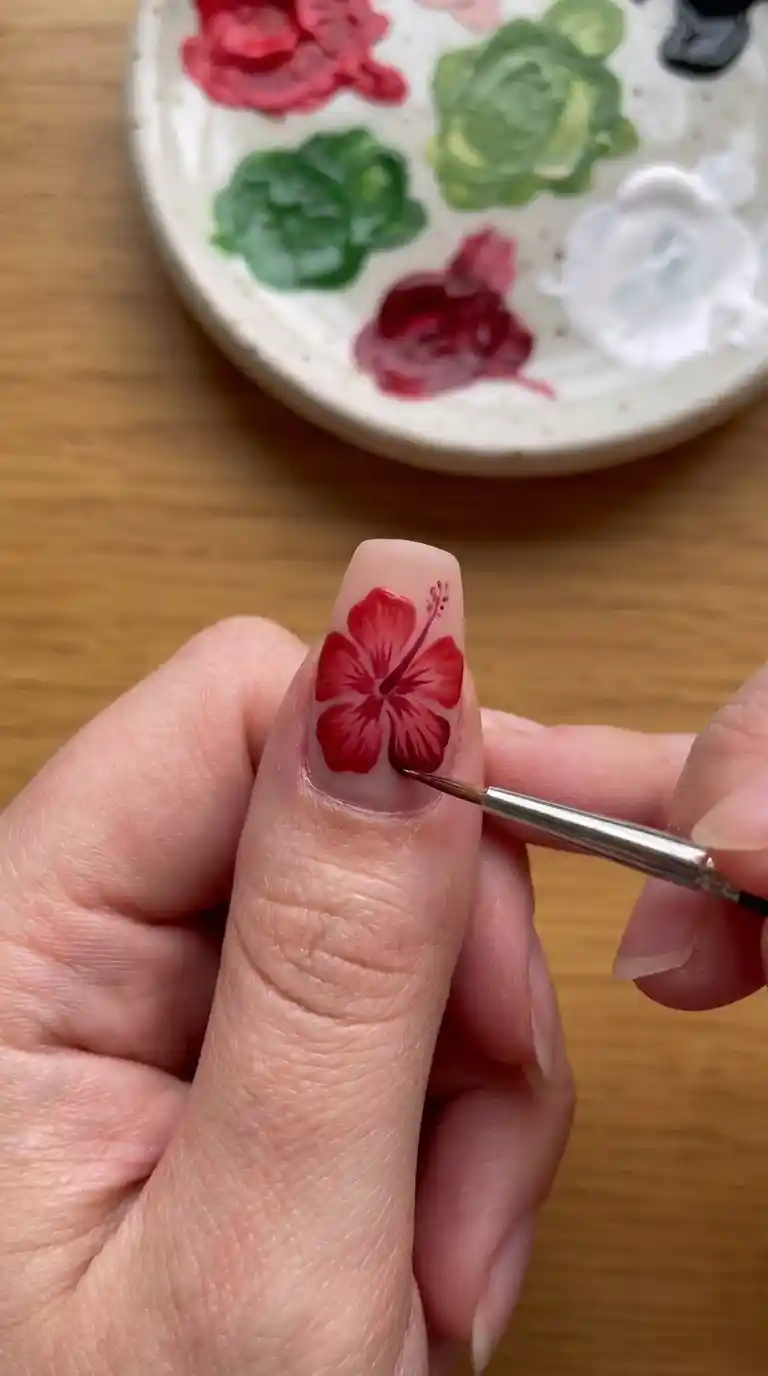
Once your base petals are dry, this is where hibiscus nail art transforms from flat to dimensional. Take a slightly darker shade of your petal color and add small strokes near the base of each petal, right where it meets the center of the flower. This shadow effect creates depth and makes the flower look like it is actually curving outward.
On the opposite end, near the tip of each petal, add a tiny highlight using a lighter shade or white. This contrast between shadow and highlight is what separates beginner hibiscus nail art from advanced, professional looking designs.
Painting the Center and Stamen
The center of the hibiscus is what gives the flower its signature look. Using your thin liner brush and a contrasting color, usually yellow or white, paint a slightly curved line extending from the center of the petals outward. At the tip of this line, use your dotting tool to add small round dots representing the pollen.
This detail is small, but it is the part that makes people say wow, that looks so real. Do not skip it even if your nail space is tiny. You can shrink the size but keep the element present.
Adding Leaves and Final Touches
Around your hibiscus flower, add a few small green leaves using a similar teardrop technique to the petals but in a longer, narrower shape. This grounds the flower and gives the overall hibiscus nail art design a sense of place within a tropical scene.
Some artists, myself included, like to add a scattering of tiny dots or a subtle glitter accent nail alongside the hibiscus flower nail to complete the set. This is optional but it does elevate the finished look.
Sealing Your Hibiscus Nail Art
Finish with a glossy or matte top coat depending on your preference. A glossy finish tends to make the colors in hibiscus nail art look richer and more vibrant, almost like the petals are wet with morning dew. Cure or dry fully before touching anything.
Different Hibiscus Nail Art Styles You Can Try
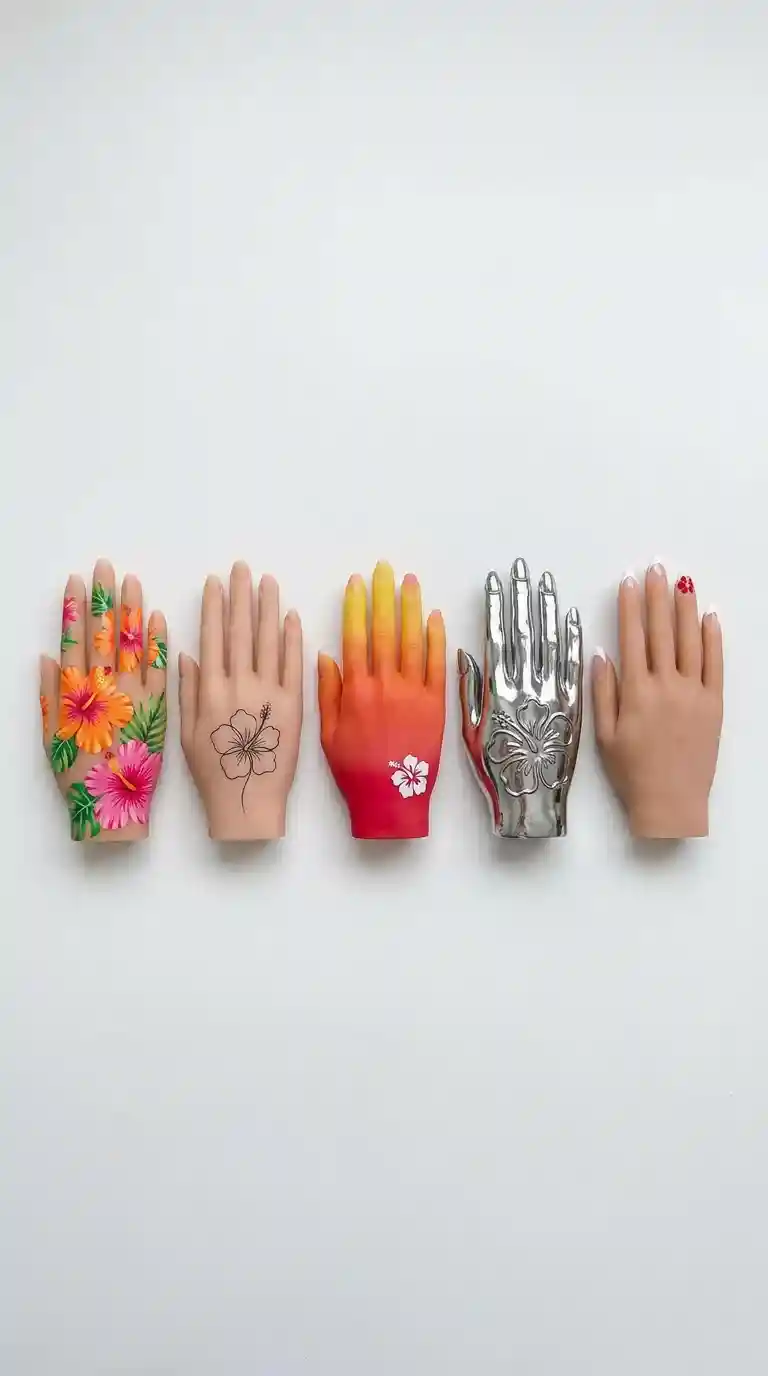
One of the best things about hibiscus nail art is how many different directions you can take it. I have painted this flower probably hundreds of different ways over the years, and I still find new variations to try.
Tropical Hibiscus Nail Art
This is the classic version most people picture. Bright red or coral hibiscus flowers paired with green palm leaves, sometimes accented with small dots to mimic sand or water droplets. Tropical hibiscus nail art is perfect for vacations, pool parties, and anyone who wants their nails to feel like a mini getaway.
Minimalist Hibiscus Nail Art
Not everyone wants a full, busy design. Minimalist hibiscus nail art usually features just one small flower on a single accent nail, with the rest of the nails left in a simple nude or soft pastel shade. This style works great for office environments or anyone who prefers understated elegance.
Ombre Hibiscus Nail Art
Combining an ombre gradient background with a hand painted hibiscus flower on top creates a stunning effect. I often use a sunset inspired gradient, orange fading into pink, then add a single white or coral hibiscus over it for contrast.
Chrome Hibiscus Nail Art
For clients who want something more modern, I sometimes paint the hibiscus flower in a chrome or metallic finish rather than traditional matte colors. This gives hibiscus nail art a futuristic, high fashion edge that still keeps the romantic floral shape.
French Tip Hibiscus Nail Art
A newer trend I have noticed gaining popularity is combining classic French tips with a small hibiscus flower placed right at the base or corner of the tip line. It is a beautiful way to blend a timeless manicure style with a fun floral detail.
Read Also: Heart Nails: The Ultimate Guide to Falling in Love With Your Manicure
Best Color Combinations for Hibiscus Nail Art
Color choice can completely change the mood of your hibiscus nail art. Here are combinations I return to again and again because clients love them every single time.
Classic red and green. The traditional hibiscus colors, bold red petals against deep green leaves on a white or cream base. This combination never goes out of style.
Sunset coral and yellow. A softer, warmer take on hibiscus nail art that feels perfect for spring and summer. The coral petals with a yellow center glow beautifully against tanned skin.
Deep purple and gold. For clients who want something more dramatic, this combination gives hibiscus nail art a luxurious, almost jewel toned feel.
Pastel pink and white. Extremely popular for bridal hibiscus nail art. Soft, romantic, and photographs beautifully for wedding pictures.
Black background with neon hibiscus. Bold and eye catching, this version of hibiscus nail art tends to attract younger clients or anyone attending a summer festival.
I always ask clients about their skin tone, the occasion, and their personal style before recommending a color palette for hibiscus nail art. What looks stunning on one person might feel too loud or too muted on another, so this step really matters.
Hibiscus Nail Art for Different Occasions
Over the years I have noticed clients requesting hibiscus nail art for very specific moments in their lives, and each occasion tends to call for a slightly different approach.
Hibiscus Nail Art for Weddings
Brides having a destination or beach wedding often choose hibiscus nail art because it fits the tropical theme without feeling too casual. I usually recommend keeping the base soft, a nude, blush, or ivory, and adding delicate, smaller hibiscus flowers rather than oversized ones so the design still feels elegant.
Hibiscus Nail Art for Vacations
This is honestly the most requested reason clients come in for hibiscus nail art. Before a trip to Hawaii, Mexico, Bali, or any beach destination, people want their nails to match the energy of their vacation. Bold colors and full coverage designs tend to be the most popular choice here.
Hibiscus Nail Art for Everyday Wear
Not every client wants a loud, full set every day. For everyday hibiscus nail art, I often suggest a single accent nail featuring the flower, paired with neutral shades on the remaining nails. It keeps things wearable for work while still adding a personal touch.
Hibiscus Nail Art for Summer Parties and Festivals
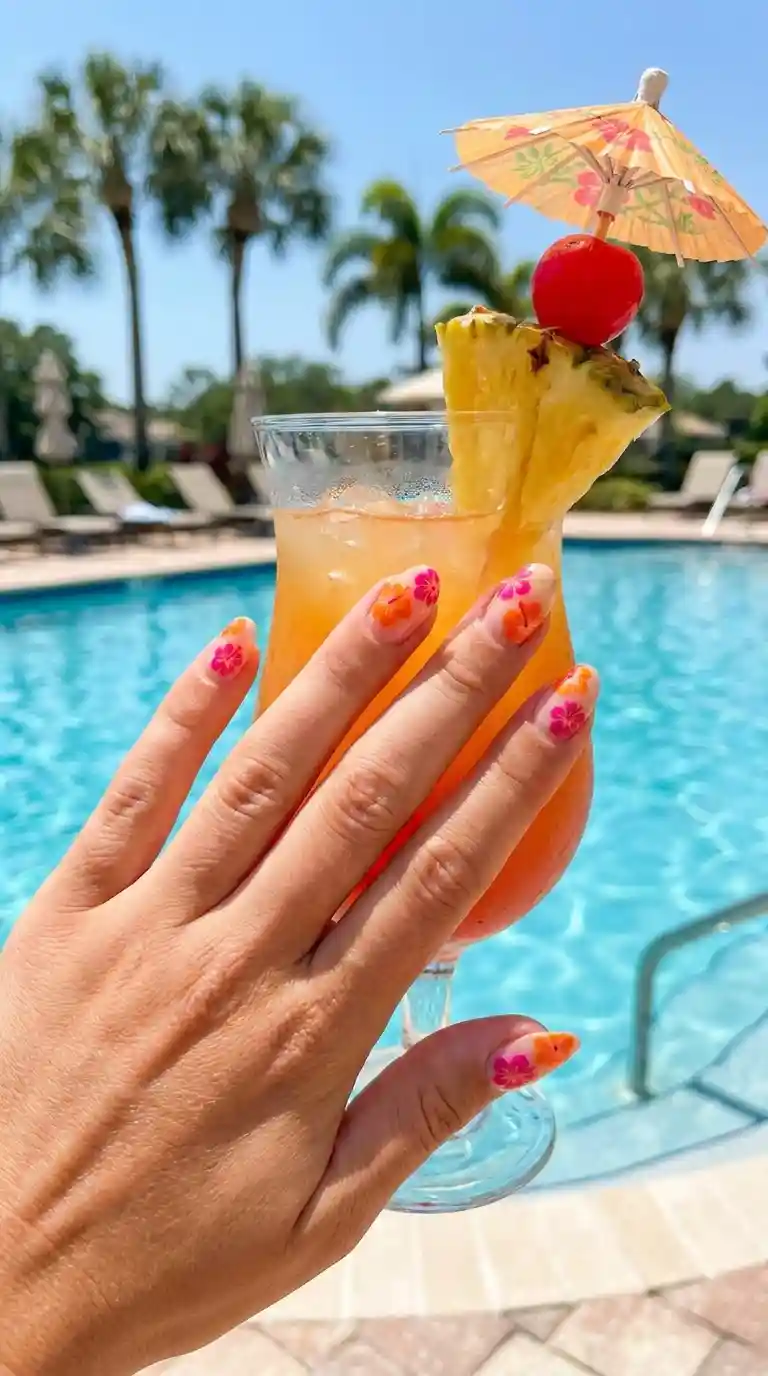
For pool parties, birthday celebrations, or music festivals, clients tend to go bigger and brighter with hibiscus nail art. This is where neon colors, glitter accents, and even rhinestones come into play.
Common Mistakes to Avoid in Hibiscus Nail Art
I have seen plenty of mistakes over the years, both from beginners learning the craft and occasionally from my own early attempts. Here are the ones that come up the most.
Using too much paint at once. Overloading your brush leads to blobby, uneven petals. Always start with a small amount and build up if needed.
Skipping the drying time between layers. If you paint your shading or center details before the base petal is fully dry, colors will bleed into each other and ruin the clean lines that make hibiscus nail art look polished.
Making every petal identical. As I mentioned earlier, slight variation actually makes hibiscus nail art look more natural. Overly perfect symmetry can sometimes look stiff and artificial.
Ignoring the nail shape. A design that works beautifully on a long almond nail might look cramped and awkward on a short round nail. Always adjust the size and placement of your hibiscus nail art based on the actual canvas you are working with.
Forgetting the top coat. Even the most beautiful hibiscus nail art will chip within a day or two without a strong, protective top coat sealing everything in.
Rushing the center detail. The stamen and pollen dots are small but they matter. Skipping them or rushing them makes the flower look unfinished.
Also Read : 45 Spirited Hippy Nails Ideas That Bring Groovy Vibes Back To Life
Tips From My Salon Experience to Make Hibiscus Nail Art Last Longer
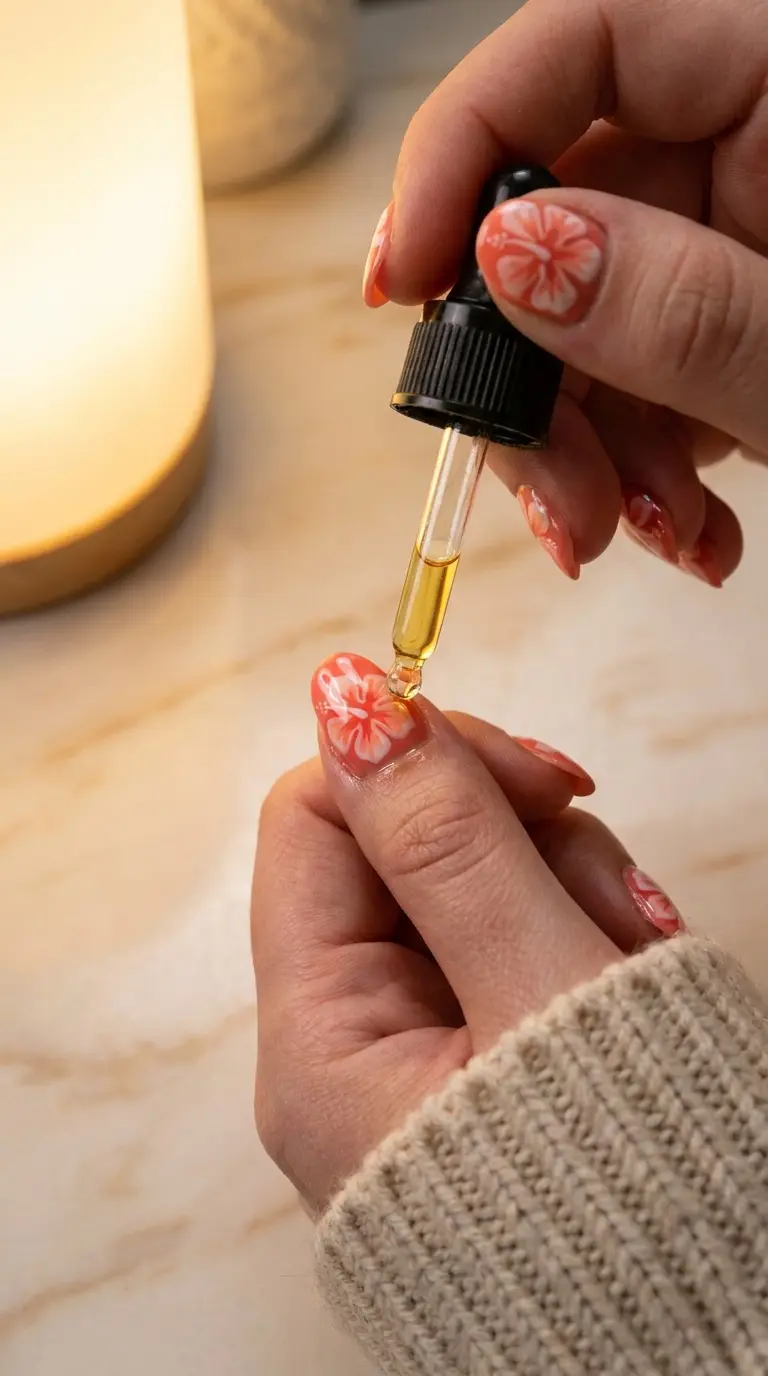
Clients often ask me how to make their hibiscus nail art last as long as possible, especially before a big trip or event. Here is what I always tell them, and what I personally do with my own nails.
Always start with clean, oil free nails before any polish goes on. Any trace of lotion or cuticle oil on the nail plate will cause lifting within days.
Use a gel system rather than regular polish if you want your hibiscus nail art to survive a full one to two week vacation without chipping. Gel cures hard and resists water damage far better than air dried polish.
Apply cuticle oil daily after the manicure is complete, but only around the cuticle area, not directly on the nail plate itself. This keeps the surrounding skin healthy without compromising the seal of your hibiscus nail art.
Wear gloves when doing dishes, cleaning, or gardening. Water exposure and harsh chemicals are two of the biggest enemies of long lasting hibiscus nail art.
Avoid using your nails as tools. I know it is tempting to open a can or scratch off a sticker with your nail, but this is one of the fastest ways to chip or crack even the sturdiest hibiscus nail art.
Get a fresh top coat applied every four to five days if you want your hibiscus nail art to stay glossy and vibrant for an extended period.
[IMAGE PROMPT 6: A close up of a hand applying cuticle oil with a small dropper onto fingers with hibiscus nail art, warm cozy lighting, marble countertop background]
Hibiscus Nail Art Ideas for Short Nails Versus Long Nails
A question I get constantly is whether hibiscus nail art works on short nails or if it is only meant for long, dramatic nail shapes. The honest answer is that it works beautifully on both, but the approach changes.
Hibiscus Nail Art on Short Nails
For short nails, less is more. I recommend a single, simplified hibiscus flower using three petals instead of five, placed slightly off center to avoid looking crowded. Keep the leaf details minimal, maybe just one small leaf rather than a full cluster. This keeps the design clean and prevents it from looking cluttered on a smaller canvas.
Hibiscus Nail Art on Long Nails
Long nails, especially almond, coffin, or stiletto shapes, give you so much more room to play with. I love using long nails to create a full scene, a large hibiscus flower as the focal point, smaller buds trailing along the side, and leaves wrapping around the base of the nail. You can also layer in extra elements like tiny beach waves or sand textures for a more elaborate, story telling design.
Regardless of nail length, the key principle stays the same. Scale your hibiscus nail art to match the space you have, and never force a design that is too big or too small for the canvas.
How to Maintain Hibiscus Nail Art at Home
Getting hibiscus nail art done professionally is one thing, but keeping it looking fresh between salon visits requires a little extra effort from you at home.
Moisturize your hands regularly, but avoid getting excess lotion directly on the nail surface, as this can dull the shine of your hibiscus nail art over time.
If you notice a small chip, resist the urge to peel or pick at it. Instead, gently file the rough edge and apply a fresh layer of top coat to seal it until you can get a proper touch up.
Store any leftover polish or gel colors used for your hibiscus nail art in a cool, dry place away from direct sunlight so they stay usable for touch ups.
If you did your hibiscus nail art yourself at home, keep a small kit with your exact shades on hand. This makes it so much easier to fix small imperfections without needing to redo the entire nail.
Must Read : 40 Trendy Denim Nails Ideas That Will Make Your Manicure Look Effortlessly Cool
Hibiscus Nail Art Trends for 2026
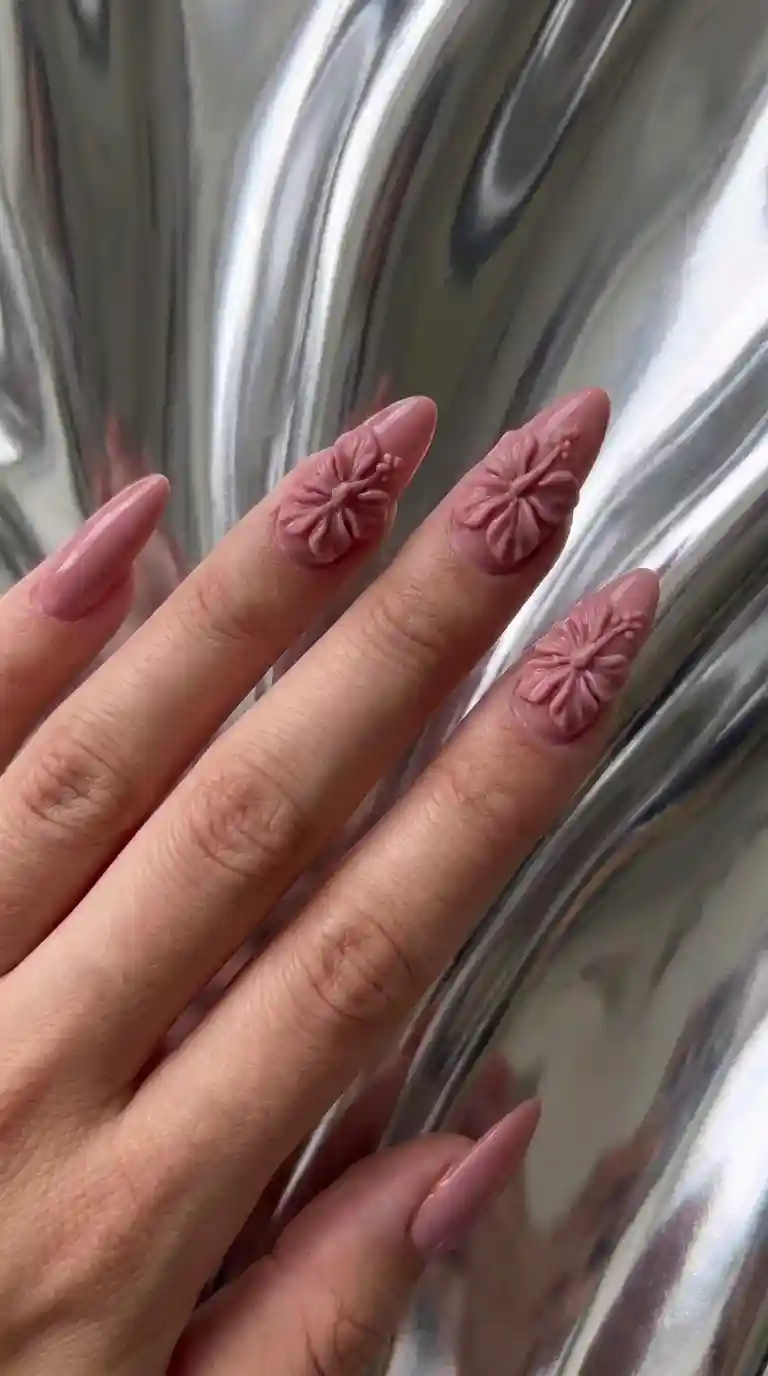
Every year, nail trends shift slightly, and hibiscus nail art has evolved along with them. Right now, I am seeing a huge rise in three dimensional hibiscus nail art, where the petals are sculpted using acrylic or gel to create a raised, textured flower rather than a flat painted one.
Another trend gaining momentum is combining hibiscus nail art with encapsulated dried flowers, where a tiny real or faux hibiscus petal is sealed inside layers of clear gel for a botanical, almost preserved in amber effect.
Soft, muted color palettes are also becoming popular alongside the traditional bright tropical colors. Instead of fire engine red, clients are asking for dusty rose or terracotta hibiscus nail art, which feels more sophisticated and pairs well with fall and autumn aesthetics too, not just summer.
Chrome and cat eye finishes combined with hibiscus nail art details are also trending, giving the design a modern, almost holographic shimmer that catches the light beautifully.
Hibiscus Nail Art Products I Personally Recommend
Over the years I have tested countless brands and products while perfecting hibiscus nail art, and there are a few that have earned a permanent spot in my kit.
For paint, I lean toward gel based acrylic paints because they hold detail exceptionally well and do not dry out as quickly as regular acrylics, which matters a lot when you are working slowly and carefully on hibiscus nail art.
For brushes, a good quality nylon detail brush in a size 00 or 000 gives you the fine control needed for the delicate lines in hibiscus nail art, especially around the stamen and petal edges.
A quality dotting tool set with multiple sizes is worth the investment. You will use the smallest size constantly for the pollen dots in hibiscus nail art.
Finally, invest in a strong, chip resistant top coat. This single product makes the biggest difference in how long your finished hibiscus nail art actually survives day to day wear.
Read Also : Blooming Gel Nail Ideas That Will Make Your Manicure Impossible to Ignore
Hibiscus Nail Art on Different Nail Shapes
The shape of the nail itself changes how hibiscus nail art should be composed. I want to break this down because it is something a lot of tutorials skip over entirely.
Almond shaped nails. These give a naturally elegant canvas for hibiscus nail art. The tapered tip works beautifully for placing a single flower that flows with the curve of the nail.
Square nails. The flat, wide surface of square nails is ideal for a fuller hibiscus nail art scene, since you have more horizontal space to work with compared to a tapered shape.
Coffin or ballerina nails. Long and flat with a squared off tip, these are probably my favorite shape for detailed hibiscus nail art because they offer the most surface area without sacrificing an elegant silhouette.
Round nails. Best suited for smaller, simplified hibiscus nail art designs since the rounded edges naturally draw the eye inward, making an oversized flower look a bit squished.
Stiletto nails. Dramatic and pointed, stiletto nails work well with an elongated hibiscus flower design that stretches from the base to the tip, following the natural taper of the shape.
Frequently Asked Questions
What does hibiscus nail art symbolize?
Hibiscus nail art often symbolizes beauty, femininity, and living in the present moment, since the flower itself typically blooms for only a single day before wilting.
Is hibiscus nail art hard to do at home?
It can be challenging at first because the petal shapes and shading require a steady hand, but with practice on a nail wheel before attempting it on real nails, most people can learn basic hibiscus nail art within a few tries.
What colors are traditionally used in hibiscus nail art?
Traditional hibiscus nail art uses red, coral, pink, orange, and yellow for the petals, paired with green for the leaves, though modern variations experiment with purple, black, and pastel shades too.
How long does hibiscus nail art last?
With proper gel application and a strong top coat, hibiscus nail art can last anywhere from two to three weeks before needing a touch up or full redo.
Can hibiscus nail art be done on short nails?
Yes, hibiscus nail art works well on short nails as long as the design is simplified, using fewer petals and smaller leaf details to avoid overcrowding the smaller nail surface.
What tools do I need to start hibiscus nail art?
You need a couple of detail brushes in different sizes, a dotting tool, acrylic or gel paint in red, yellow, white, and green, plus a good base and top coat to complete your hibiscus nail art.
Is hibiscus nail art only for summer?
Not at all. While hibiscus nail art is extremely popular in summer, muted color versions using terracotta, dusty rose, or deep burgundy make it a great fit for fall and winter as well.
Can I use stickers instead of hand painting hibiscus nail art?
Yes, nail decals and stickers featuring hibiscus flowers are a great alternative if you want the look of hibiscus nail art without the freehand painting skills required.
What nail shape works best with hibiscus nail art?
Almond, coffin, and square shapes tend to offer the best canvas for hibiscus nail art, though the design can be adapted to fit any nail shape with the right sizing adjustments.
How much does professional hibiscus nail art cost at a salon?
Pricing varies widely depending on location and complexity, but hand painted hibiscus nail art typically costs more than a standard manicure due to the detailed, time intensive process involved.
Does hibiscus nail art work for wedding manicures?
Yes, many brides choose hibiscus nail art for destination or beach weddings, often opting for softer color palettes like blush, ivory, or pastel pink to keep the look elegant and photo ready
What is the difference between hibiscus and other floral nail art?
Hibiscus nail art is distinguished by its large, open, trumpet shaped petals and prominent center stamen, giving it a bolder, more tropical look compared to smaller florals like daisies or roses.
Can beginners attempt hibiscus nail art without much experience?
Hibiscus nail art is distinguished by its large, open, trumpet shaped petals and prominent center stamen, giving it a bolder, more tropical look compared to smaller florals like daisies or roses.
Final Thoughts on Hibiscus Nail Art
After spending years perfecting hibiscus nail art, both for myself and for hundreds of clients who have sat in my chair, I can honestly say it remains one of the most rewarding designs to create. There is something deeply satisfying about watching a plain, bare nail transform into a tiny, detailed flower that makes someone smile the moment they see their finished hands.
Whether you are a nail artist looking to add hibiscus nail art to your service menu, or someone who simply wants to try painting it themselves at home for the first time, remember that patience and practice matter far more than perfection. Every artist who creates flawless hibiscus nail art today started with uneven petals and smudged centers, myself included.
If you take one thing away from this guide, let it be this. Slow down, layer your colors with intention, and let each petal in your hibiscus nail art tell a small part of the story. That is what turns a simple manicure into a genuine piece of art that people cannot stop admiring.
Pingback: Best Black Christmas Nail Ideas for a Chic Holiday Look
Pingback: Barbie Pink Nails: 50+ Cute & Glamorous Nail Ideas
Pingback: Stunning Plant Nails Ideas for Nature-Inspired Nails
Pingback: Stunning Peacock Nail Designs for a Glamorous Look