
Plant nails have quietly taken over my appointment book this year, and honestly, I did not see it coming. One client would come in asking for a small fern on her ring finger, and by the following week three more clients wanted the same thing. Plant nails are not a passing fad anymore. They have become one of the most requested nail art styles in salons across the country, and I want to walk you through everything I have learned about them, mistake by mistake, success by success.
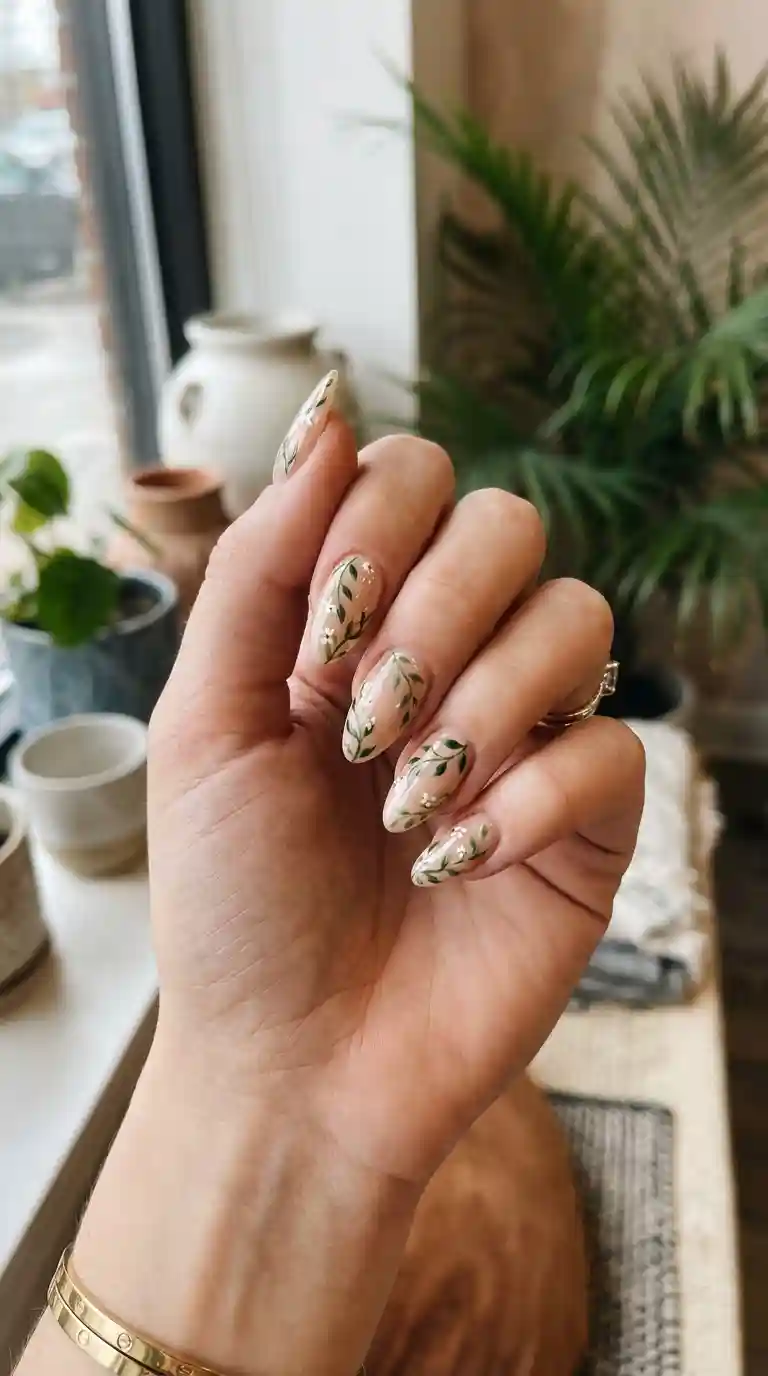
This guide is long because plant nails deserve a proper explanation. I am not going to rush through the basics and leave you guessing about the details that actually matter. By the time you finish reading, you will understand what plant nails are, how to choose the right design for your hands, which tools actually work, and how to keep your plant nails looking fresh for weeks instead of days.
Also Read: Hibiscus Nail Art: The Ultimate Guide to Gorgeous Tropical Nails That Steal the Spotlight
What Are Plant Nails And Why Everyone Is Obsessed With Them
Plant nails are a style of nail art where small botanical elements such as leaves, vines, flowers, succulents, or tiny cacti are hand painted or applied onto the nail surface. Instead of loud glitter or bold geometric shapes, plant nails lean into something softer. They bring a slice of nature onto your fingertips.
I think the appeal is simple. People are spending more time thinking about wellness, greenery, and slow living, and plant nails reflect that mindset. When a client asks me for plant nails, she usually tells me she wants something calm, something that feels grounded rather than flashy.
Plant nails also work for almost every age group. I have painted plant nails for teenagers who wanted something cute for a school event, and I have painted the same style for a woman in her sixties who wanted a subtle design for her granddaughter’s wedding. That kind of versatility is rare in nail art.
The Difference Between Plant Nails And Floral Nails
People often confuse plant nails with floral nails, but they are not the same thing. Floral nails focus purely on flowers, usually with bold petals and bright colors. Plant nails include a wider variety of greenery such as leaves, stems, ferns, succulents, and even tiny cactus shapes.
In my experience, plant nails tend to feel more grounded and earthy compared to floral nails, which often feel more romantic and delicate. Both styles are beautiful, but if you want something that feels a little more unique and less common, plant nails are the way to go.
My Personal Journey With Plant Nails As A Nail Artist
When I first started experimenting with plant nails, I struggled with proportion. My leaves looked too big for the nail bed, and my stems looked shaky because my hand was not used to painting such fine lines. It took weeks of practice on nail tips before I felt confident enough to try plant nails on an actual client.
The turning point for me was slowing down. Plant nails are not about speed. They are about small, careful strokes that build up gradually. Once I stopped rushing, my plant nails started looking realistic instead of cartoonish.
I remember one client who came in for a simple manicure and casually mentioned she loved gardening. On a whim, I suggested plant nails, and she agreed. That set turned into one of my favorite pieces of work, and she has been booking plant nails every month since then. That single appointment taught me how personal this style can feel for people who love plants in their real life.
The Beauty Behind Plant Nails Designs
Plant nails come in so many variations that no two sets ever look exactly alike. This is part of what keeps clients coming back. They know they can request plant nails again and again without repeating the same look twice.
Below are the styles I get asked for most often, along with my honest take on each one.
Leaf Nail Art
Leaf designs are usually the easiest entry point into plant nails. A single leaf on an accent nail, painted in a soft green with a darker vein running through the center, already looks polished and intentional.
I often recommend leaf plant nails to first time clients because they do not overwhelm the hand. A few scattered leaves across two or three nails, paired with a neutral base on the rest, creates a balanced and wearable look.
Floral Plant Nails
Floral plant nails combine small flowers with leafy stems, giving the design more depth. I like using tiny daisies, wildflowers, or even abstract blooms depending on what the client wants.
This version of plant nails works beautifully for spring and summer, though I have also done winter versions using deep burgundy flowers paired with darker green leaves for a moodier feel.
Succulent Plant Nails
Succulent plant nails are more advanced because they require layering to create that plump, rounded look succulents naturally have. I usually build these up with dotting tools, adding shadow and highlight in stages so the succulent almost looks three dimensional.
Clients who love houseplants tend to gravitate toward succulent plant nails specifically. It makes sense since succulents are one of the most popular indoor plants right now.
Must Read : Bad Bunny Nails: The Ultimate Bold Nail Trend Guide Every Nail Lover Needs to Try
Cactus Plant Nails
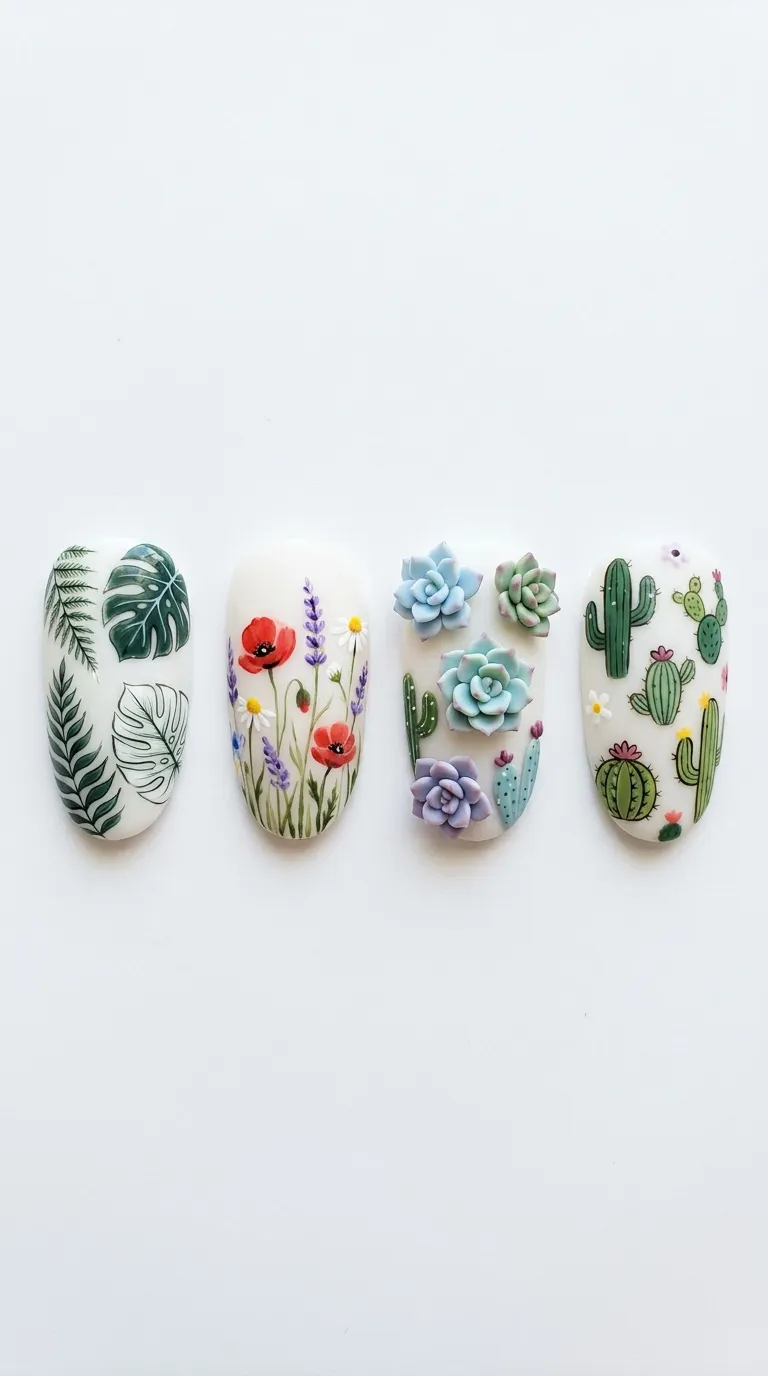
Cactus plant nails are playful without being childish. A small cactus painted on an accent nail, sometimes with a tiny pink flower on top, adds personality without taking over the whole set.
I find that cactus plant nails work especially well for clients who want something fun for a vacation or a themed event, like a desert wedding or a summer festival.
Tools And Products You Need For Plant Nails
You do not need an enormous collection of supplies to create beautiful plant nails, but a few specific tools make the process much easier. Over the years I have narrowed my kit down to what actually matters.
Brushes For Plant Nails
A detail brush with a very fine tip is essential for plant nails. I personally use a size 000 brush for stems and veins, and a slightly wider flat brush for filling in larger leaves or petals.
Cheap brushes tend to shed bristles or lose their shape after a few uses, which makes precise plant nails almost impossible. Investing in two or three good quality brushes will save you a lot of frustration.
Gel Polish Versus Regular Polish For Plant Nails
I almost always use gel polish for plant nails because it gives me more control. Gel does not dry as quickly as regular polish, which means I have time to build up layers and fix small mistakes before curing.
Regular polish can still work for plant nails, especially if you are practicing at home, but be prepared to work faster since it dries on its own timeline.
Dotting Tools And Striping Brushes
Dotting tools help create small round leaves, flower centers, and tiny buds that appear throughout plant nails. Striping brushes are useful for long, thin vines that wrap gracefully around the nail.
I keep a set of dotting tools in various sizes because plant nails often need multiple dot sizes within a single design, especially for succulents and layered florals.
Top Coat And Sealant
A strong top coat is non negotiable for plant nails. Since the designs are delicate, a glossy or matte sealant protects the artwork from chipping and keeps the fine lines crisp for longer.
I always apply two thin layers of top coat rather than one thick layer, because thick layers tend to smudge the delicate plant nails design underneath.
Step By Step Guide To Create Plant Nails At Home
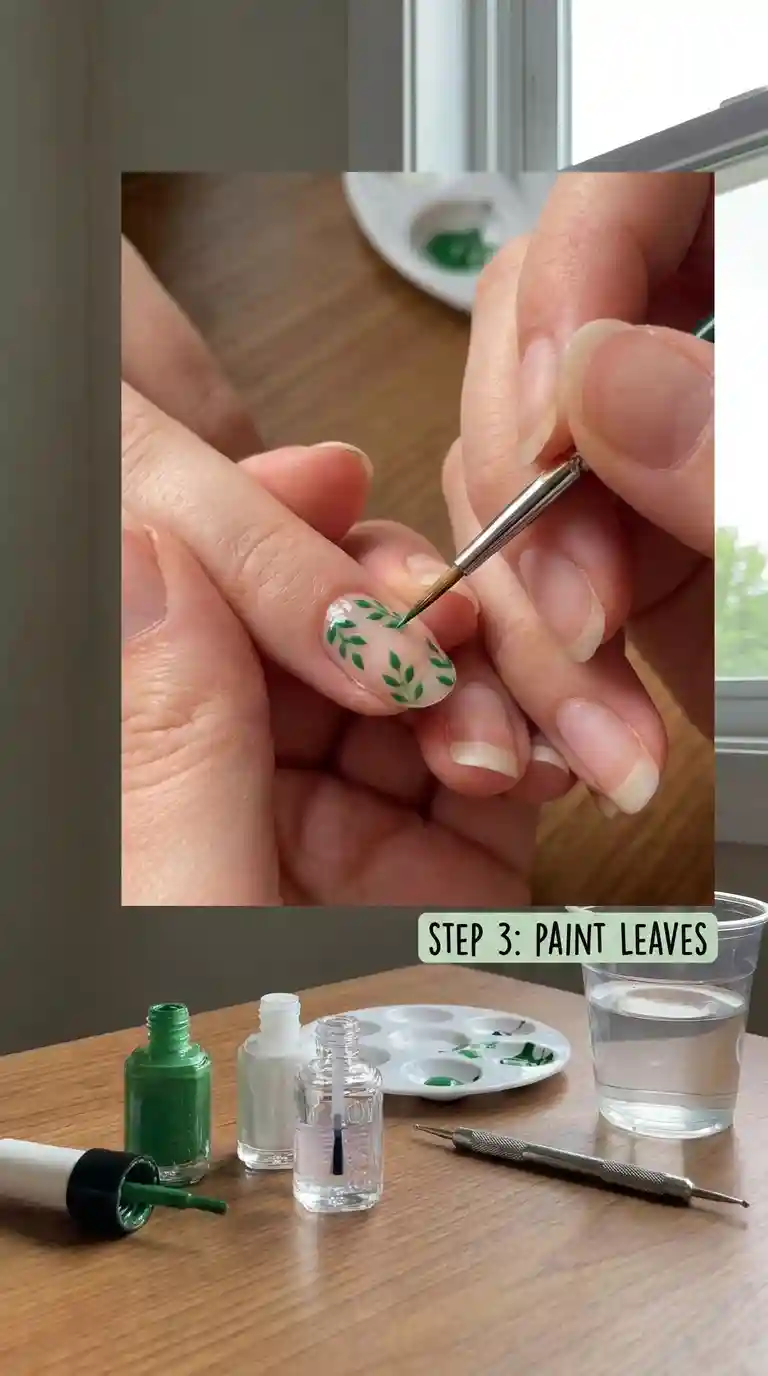
If you want to try plant nails yourself, I am going to walk you through the exact process I use in the salon. This method works whether you are doing your own nails or practicing on a friend.
Preparing Your Nails
Before any plant nails design begins, your nails need to be properly prepped. Push back your cuticles, shape your nails, and buff the surface lightly so the polish has something to grip onto.
Skipping this step is one of the biggest reasons plant nails chip early. A smooth, clean nail bed is the foundation of any long lasting manicure, plant nails included.
Base Color Application
Choose a base color that complements your planned plant nails design. Nude, white, soft pink, and sage green are the most popular choices I see requested, since they let the botanical details stand out clearly.
Apply two coats of your base color, letting each layer dry fully before moving forward. Rushing this step will cause smudging once you start adding the plant details.
Painting The Plant Details
This is where the actual plant nails artistry happens. Start with the stems using your fine detail brush, drawing thin curved lines rather than straight ones, since real plants rarely grow in perfectly straight patterns.
Once the stems are in place, add small leaves along the sides using gentle brush strokes. For flowers, use your dotting tool to create petals around a central dot. Take your time here. Plant nails are not meant to be rushed.
Sealing And Finishing
Once your plant nails design is fully dry, apply your top coat in two thin layers. Cure under a UV or LED lamp if you are using gel polish, or allow extra drying time if using regular polish.
Finish by applying cuticle oil around the nail bed. This small step makes a noticeable difference in how polished and complete your plant nails look.
Best Colors For Plant Nails
Color choice can completely change the mood of plant nails. Over the years, certain combinations have proven themselves as client favorites, and I want to share the ones that consistently work.
Green Tones For Plant Nails
Sage green, olive, and forest green are the backbone of most plant nails designs. These shades feel natural and give the leaves and stems an authentic, earthy appearance.
I often mix two shades of green within the same set of plant nails, using a lighter tone for highlights and a darker tone for shadow, which adds realistic depth.
Neutral Bases For Plant Nails
Nude, beige, and soft white bases are extremely popular for plant nails because they let the green and floral details take center stage. These neutral tones also make plant nails appropriate for work environments that prefer subtle nail art.
Bold Bases For Plant Nails
For clients who want a statement look, a black or deep burgundy base paired with bright green leaves creates a striking contrast. This version of plant nails tends to attract attention immediately and works well for evening events.
Must Read : Heart Nails: The Ultimate Guide to Falling in Love With Your Manicure
Plant Nails For Different Seasons
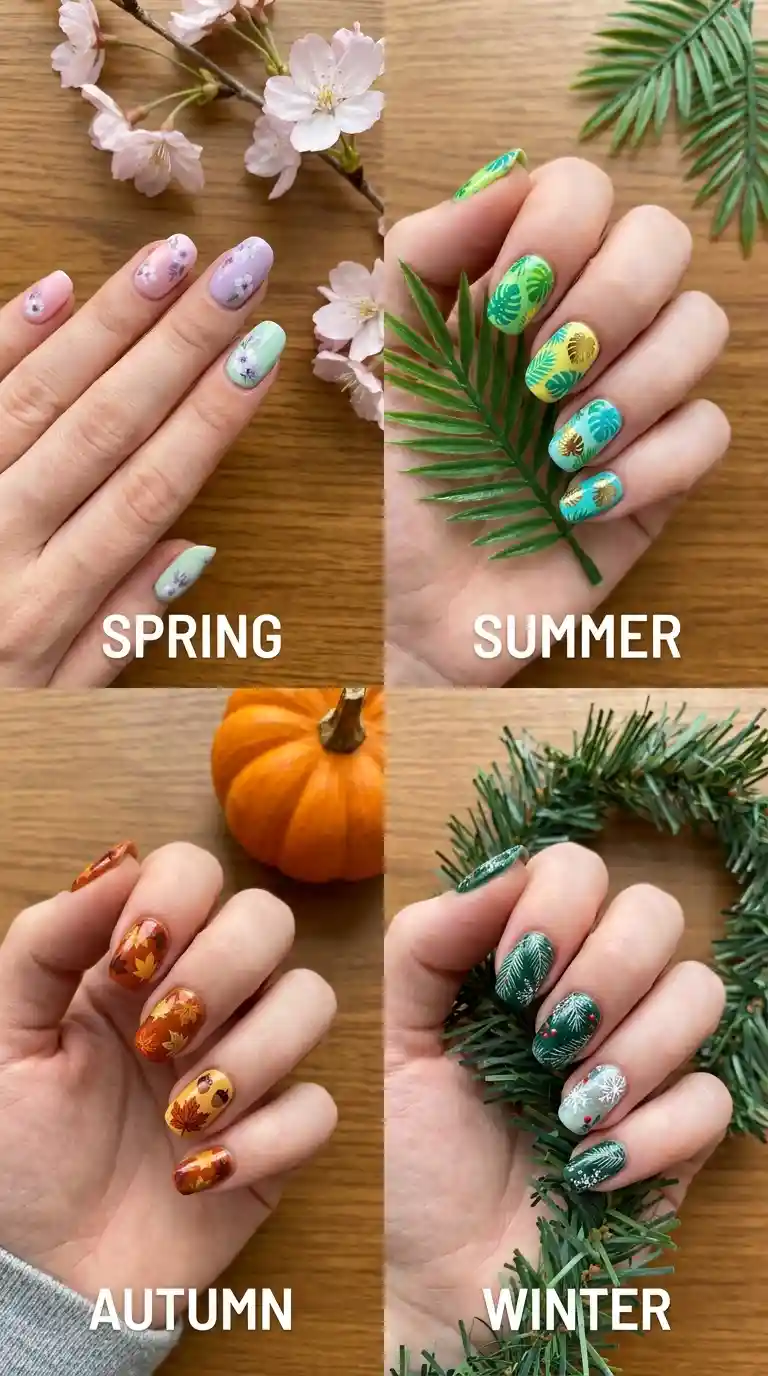
One thing I love about plant nails is how easily they adapt across the year. The same basic technique can be styled to match every season, which is why so many of my regular clients keep coming back for updated versions.
Spring Plant Nails
Spring is the easiest season to design plant nails for. Soft pastel flowers, fresh green leaves, and light backgrounds capture that new growth feeling perfectly.
I usually recommend pairing spring plant nails with a milky white or baby pink base, since it makes the greenery pop without feeling overwhelming.
Summer Plant Nails
Summer plant nails lean tropical. Think palm leaves, monstera shapes, and brighter greens paired with a tan or coral base. These designs feel fresh and vacation ready.
Clients heading on beach trips almost always request this version of plant nails, and I understand why. It captures that relaxed, sun soaked feeling perfectly.
Autumn Plant Nails
Autumn plant nails shift toward warmer tones. I swap out bright greens for olive and deep amber, sometimes adding tiny orange or burgundy leaves to reflect the changing season outside.
This version of plant nails tends to feel cozy and grounded, which matches the general mood most people want during the fall months.
Winter Plant Nails
Winter plant nails often take inspiration from evergreen branches and pine needles rather than flowers. Deep green tones on a white or icy blue base create a design that feels festive without being overly holiday themed.
I have also created winter plant nails using dried floral inspiration, with muted, faded colors that mimic pressed flowers. Clients seem to love this understated approach during the colder months.
Plant Nails For Short Nails
A common concern I hear is that plant nails only work on long nails. This is simply not true. Some of the most elegant plant nails I have created were on short, practical nail lengths.
For short nails, I recommend scaling down the design significantly. Instead of a full branch with multiple leaves, a single small leaf or a tiny flower near the cuticle line works beautifully.
Simplicity is key here. Short nail plant designs should never feel cramped, so I usually limit the botanical details to one or two nails per hand, keeping the rest in a solid, complementary color.
Tips For Short Nail Plant Designs
Use a smaller dotting tool for any flower centers, since a large dot can overwhelm a short nail bed. Keep stems short and slightly curved rather than long and winding.
Choose an accent nail strategically. I usually place the plant nails detail on the ring finger, since it draws the eye without competing with the rest of the hand.
Plant Nails For Long And Acrylic Nails
Long nails and acrylics give you much more room to get creative with plant nails. I have painted entire vines that wrap from the cuticle all the way to the tip, with leaves branching off at different points along the way.
Acrylic extensions also allow for more dramatic designs, including three dimensional elements. I have used acrylic powder to sculpt small raised leaves before painting them, giving the plant nails a textured, almost sculptural quality.
Advanced Techniques For Long Plant Nails
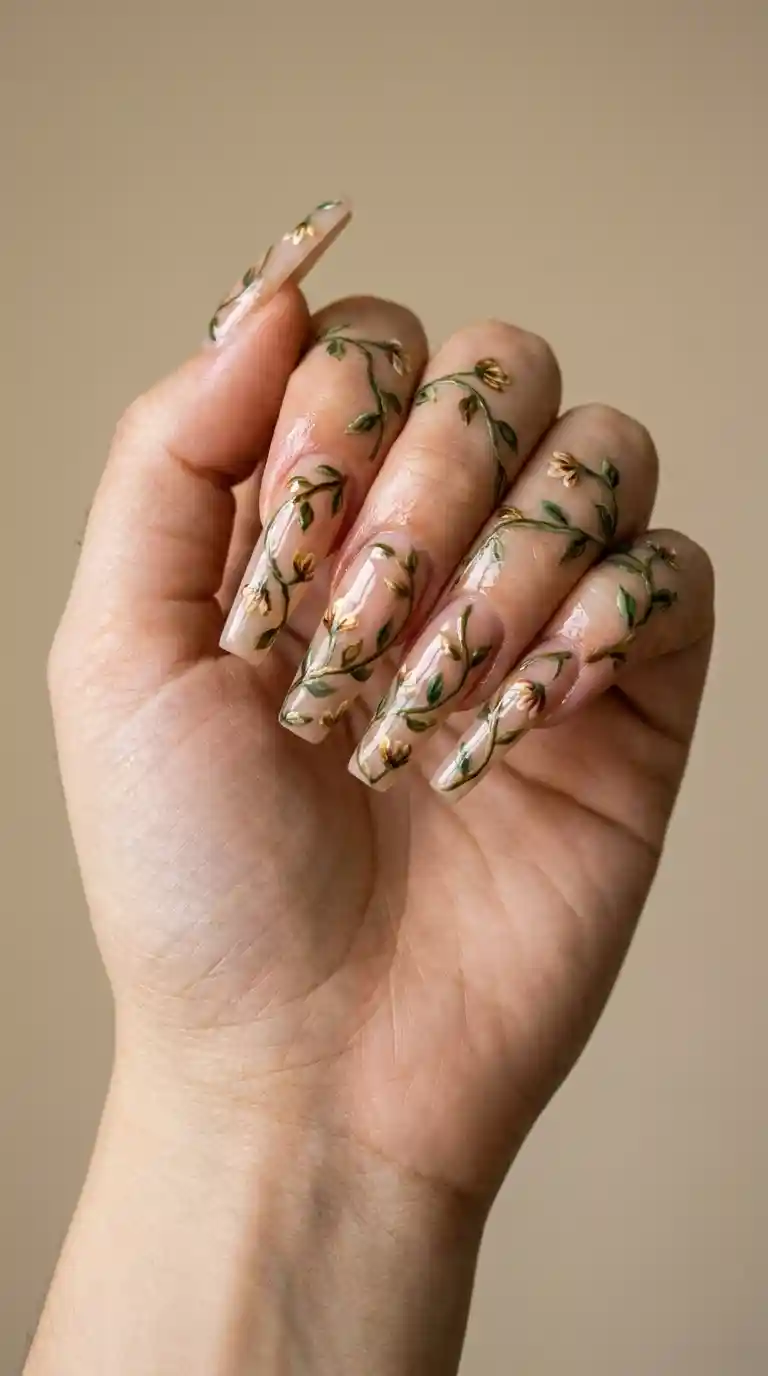
Ombre backgrounds work exceptionally well with plant nails on longer nail beds. A gradient from light green at the cuticle to a deeper shade at the tip gives the botanical details a natural backdrop to sit against.
Encapsulated designs are another option I offer for long plant nails. Pressed dried flowers or tiny leaf charms can be sealed under a layer of clear gel, giving the plant nails a genuine, organic texture that painted designs cannot fully replicate.
Common Mistakes To Avoid With Plant Nails
I have made nearly every mistake possible while learning plant nails, so let me save you some time by pointing out the errors I see most often, both in my own early work and in client requests gone wrong.
Overcrowding The Design
One of the biggest mistakes with plant nails is trying to fit too much detail onto one nail. When every inch of the nail is covered in leaves and flowers, the design starts to look messy rather than elegant.
I always tell clients that negative space is your friend with plant nails. Letting some of the base color show through actually makes the botanical elements stand out more clearly.
Using The Wrong Brush Size
A brush that is too thick will make your stems and veins look clumsy. Plant nails rely heavily on fine detail work, so using an appropriately sized brush is non negotiable if you want a clean result.
Skipping The Curing Or Drying Time
Rushing between layers is a common shortcut that ruins plant nails. If you move to the next step before the previous layer has fully dried or cured, you risk smudging the delicate details you just spent time creating.
Ignoring Nail Health Before Application
Applying plant nails on weak, damaged, or overly dry nails sets the design up to fail early. Healthy nail prep is just as important as the artwork itself.
Read Also : Wild and Wonderful: The Complete Guide to Animal Print Nail Designs That Turn Heads Everywhere
How To Make Plant Nails Last Longer
Clients often ask me how to extend the life of their plant nails, and the answer comes down to a combination of application technique and daily habits.
Proper Sealing Technique
I always cap the free edge of the nail with top coat, meaning I run the brush along the very tip of the nail as well as the top surface. This small step prevents lifting, which is one of the main reasons plant nails start chipping at the edges first.
Avoiding Harsh Chemicals
Household cleaning products, especially those containing bleach or strong solvents, can break down the polish layers protecting your plant nails. I recommend wearing gloves during cleaning tasks to protect the design underneath.
Moisturizing Regularly
Dry cuticles and brittle nails cause polish to crack more easily. Applying cuticle oil daily keeps the nail bed flexible, which helps plant nails resist chipping for a longer stretch of time.
Scheduling Timely Fills Or Touch Ups
If you are wearing acrylic or gel extensions with plant nails, staying on top of your fill appointments prevents lifting at the base, which can otherwise damage the artwork closer to the cuticle.
Plant Nails Aftercare Tips
Aftercare is where a lot of people drop the ball, even after investing time and money into a beautiful set of plant nails. I always send clients home with a short list of habits to follow.
Wash dishes and clean surfaces with gloves on whenever possible, since prolonged water exposure softens the nail and polish bond. Avoid using your nails as tools to open cans, scratch labels, or pry things apart, since this puts direct pressure on the tips where plant nails are most vulnerable.
Reapply cuticle oil every night before bed. This single habit alone can add several extra days of wear to any manicure, plant nails included. If you notice a small chip, resist the urge to peel at it. Instead, gently file the area smooth and apply a fresh layer of top coat to prevent it from spreading.
Plant Nails Trends For 2026
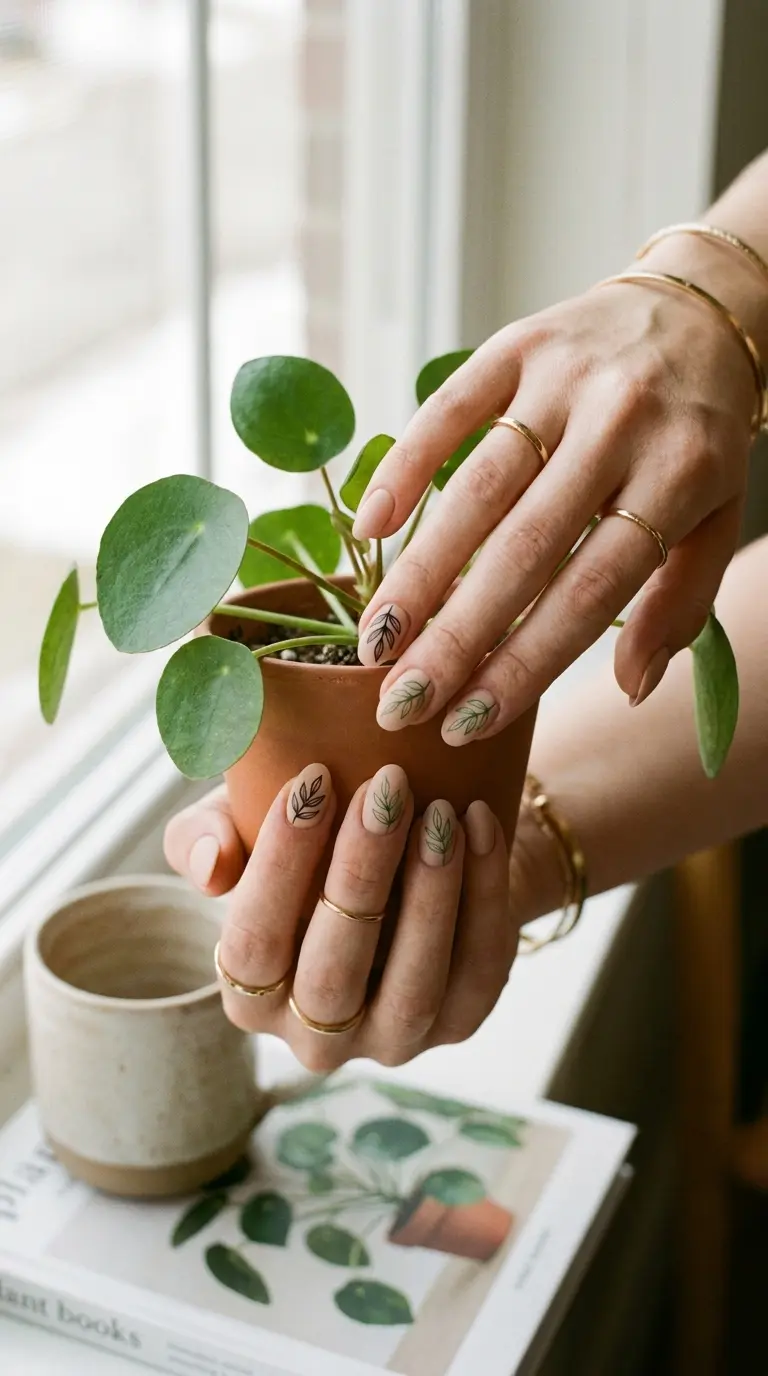
Trends shift every year, and plant nails have evolved alongside broader nail art movements. Based on what I am seeing requested in the salon right now, here are the directions plant nails are heading toward this year.
Minimalist Plant Nails
Instead of full botanical scenes covering every nail, many clients now prefer a single, small leaf or flower on just one or two nails, with the rest left in a clean solid color. This minimalist approach to plant nails feels modern and understated.
Matte Finish Plant Nails
Matte top coats have become increasingly popular with plant nails this year. The soft, non reflective finish gives the design an earthy, natural texture that pairs beautifully with botanical themes.
Mixed Media Plant Nails
Some clients are now requesting plant nails combined with tiny pressed flowers, chrome accents, or subtle glitter placed sparingly among the leaves. This mixed media approach adds dimension without overwhelming the overall design.
Plant Nails For Special Occasions
Plant nails are not limited to everyday wear. I have created plant nails for weddings, garden parties, baby showers, and even corporate events where a client wanted something professional yet distinctive.
Wedding Plant Nails
Brides often request plant nails that echo their bouquet or venue decor. A soft, romantic design with tiny white flowers and delicate greenery complements most bridal looks without competing with the dress or jewelry.
Bridesmaid Plant Nails
For bridal parties, I usually coordinate a simplified version of the bride’s plant nails design across all bridesmaids, adjusting the color palette slightly to match each individual’s preference while keeping the overall theme consistent.
Garden Party And Outdoor Event Plant Nails
Outdoor events call for plant nails that feel effortless and fresh. I lean toward lighter greens and softer florals for these occasions, avoiding overly bold colors that might clash with an outdoor setting.
Plant Nails And Nail Health
As a nail artist, I care deeply about the health of the nail underneath any design, including plant nails. Beautiful artwork means nothing if it damages the natural nail in the process.
Choosing Breathable Products
I try to use polish and gel formulas that allow some level of breathability, especially for clients who wear plant nails regularly. Constant exposure to non breathable products without breaks can weaken the nail plate over time.
Taking Breaks Between Sets
I recommend clients take a short break between extended wear of gel or acrylic plant nails, giving the natural nail time to recover. Even a week without polish can make a noticeable difference in nail strength.
Strengthening Treatments
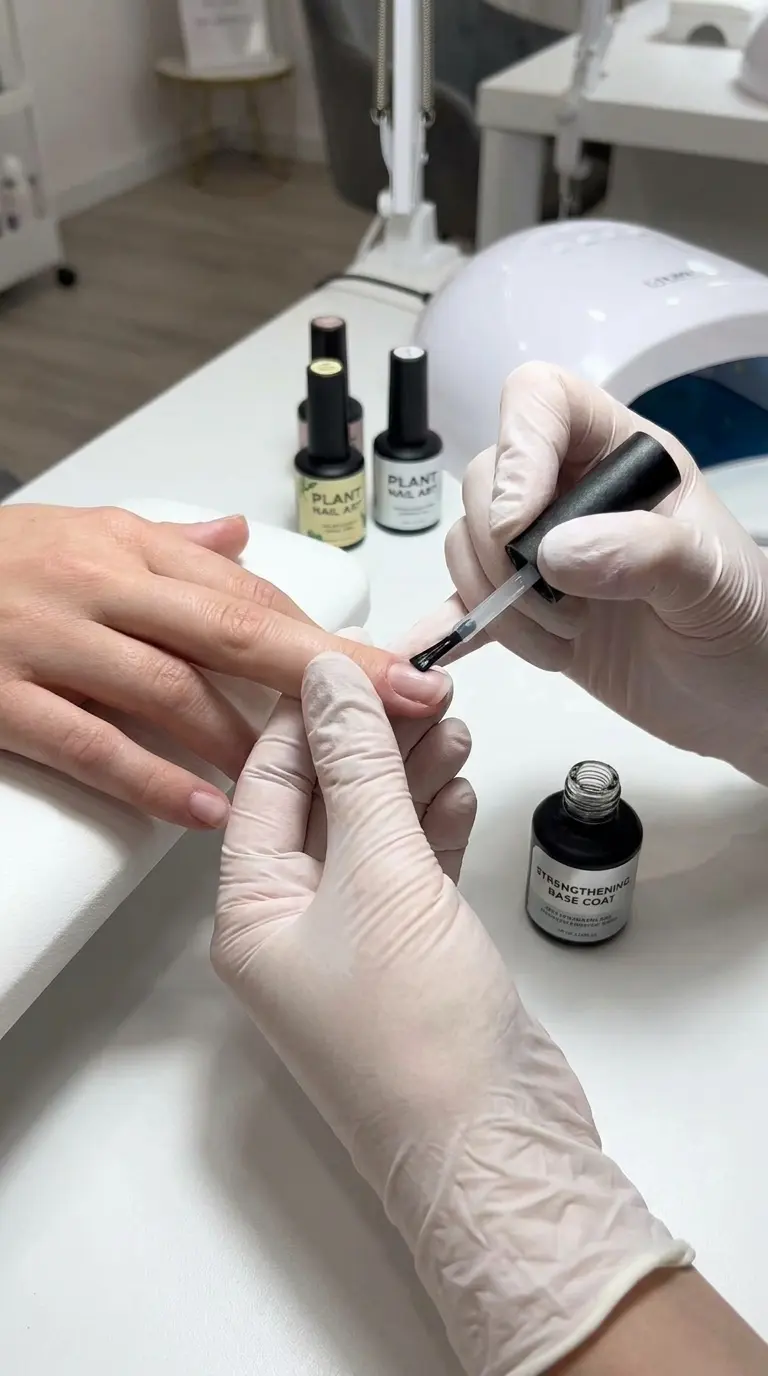
For clients whose nails are naturally thin or peeling, I suggest a strengthening base coat before applying any plant nails design. This protects the nail while still allowing for beautiful, detailed artwork on top.
Read Also : 45 Spirited Hippy Nails Ideas That Bring Groovy Vibes Back To Life
Plant Nails For Beginners Practicing At Home
If you are new to nail art and want to try plant nails without a salon visit, start small. Practice on nail tips or paper before attempting your actual nails, since this removes the pressure of getting it right on the first try.
Begin with a single leaf shape. Once you feel confident drawing consistent leaves, move on to adding a simple stem. Only after mastering these two elements should you attempt a full plant nails design with multiple components.
Practice Exercises For Plant Nails
Draw ten leaves in a row on a practice sheet, focusing on consistent size and shape. Repeat this exercise daily for a week before moving to actual nails.
Practice thin, curved lines for stems separately from the leaves. Combining shaky stems with otherwise clean leaves will still make your plant nails look unfinished, so both elements need equal attention.
Plant Nails Color Combinations I Personally Recommend
Over the years, certain color pairings have consistently impressed my clients more than others. Here are combinations I return to again and again when designing plant nails.
Sage green leaves on a warm ivory base create a soft, sophisticated look that works for almost any occasion. Deep forest green paired with a black base gives plant nails a bold, dramatic edge that suits evening events.
Dusty pink flowers with olive green leaves on a nude base feels romantic without being overly sweet. Bright white florals on a pale blue base create a fresh, almost coastal feeling that clients love during summer months.
Plant Nails Versus Other Nail Art Trends
I sometimes get asked how plant nails compare to other popular styles like marble nails, French tips, or abstract line art. Each style has its place, but plant nails offer something the others cannot easily replicate.
Marble nails rely on fluid, unpredictable patterns, while plant nails require intentional, controlled brushwork. French tips are classic but static, whereas plant nails can be adjusted endlessly depending on season, mood, or occasion. Abstract line art tends to feel modern and edgy, while plant nails lean softer and more organic.
I do not think one style is objectively better than another. It really comes down to personal taste, and I encourage clients to choose whatever design makes them feel most like themselves.
How Much Do Plant Nails Typically Cost
Pricing for plant nails varies depending on complexity, location, and whether you are adding extensions. A simple accent nail with a single leaf design might only add a small fee on top of a regular manicure price.
A full set of detailed plant nails across all ten fingers, especially with layered succulents or elaborate vines, takes significantly more time and therefore costs more. I always recommend asking your nail artist for a quote based on the specific design you have in mind, since prices differ widely between salons.
Also Read : 77 Stunning Cowgirl Nails Ideas That Will Make Your Manicure Absolutely Unforgettable
Removing Plant Nails Safely
When it is time to remove your plant nails, proper technique matters just as much as application. Soaking off gel polish with acetone, rather than picking or peeling, protects the natural nail underneath from damage.
If you have acrylic extensions with a plant nails design, I strongly recommend having them removed professionally rather than attempting it at home. Improper removal can thin the natural nail plate and cause long term damage.
Frequently Asked Questions About Plant Nails
What Are Plant Nails Called In Nail Art Terminology
Plant nails are often referred to as botanical nail art or leaf nail art within the nail industry. Some artists also call specific variations by their plant type, such as succulent nails or cactus nails, but they all fall under the broader plant nails category.
How Long Do Plant Nails Usually Last
With gel polish and proper aftercare, plant nails typically last between two and three weeks before needing a touch up or full redo. Regular polish versions usually last about a week before chipping becomes noticeable.
Can I Do Plant Nails Myself At Home
Yes, plant nails can absolutely be done at home with practice. Start with simple leaf designs on an accent nail before attempting more complex patterns like succulents or full vines.
What Nail Shape Works Best For Plant Nails
Almond and oval shapes tend to showcase plant nails beautifully because the curved surface mimics the natural flow of leaves and stems. That said, plant nails can be adapted to any nail shape, including square and coffin.
Do Plant Nails Work On Short Natural Nails
Yes, plant nails work well on short natural nails as long as the design is scaled down appropriately. A single small leaf or flower usually looks more elegant than a busy pattern on a shorter nail bed.
What Colors Are Most Popular For Plant Nails
Sage green, olive, nude, and soft white are among the most requested colors for plant nails, since they create a natural, earthy aesthetic that suits most skin tones.
How Much Does A Plant Nails Manicure Cost
The cost of plant nails depends on design complexity and salon location, but it typically ranges from a small added fee for simple accent designs to a higher premium for full, detailed sets across all nails.
Are Plant Nails In Style Right Now
Yes, plant nails have remained consistently popular over recent seasons and continue to trend, especially as minimalist and nature inspired aesthetics grow in popularity across fashion and beauty.
What Tools Do I Need To Create Plant Nails
A fine detail brush, a dotting tool, gel or regular polish in your chosen colors, and a good quality top coat are the essential tools needed to create plant nails.
Can Plant Nails Be Done With Gel Polish
Yes, gel polish is actually preferred by many nail artists for plant nails because it dries slower during application, giving more control over fine details before curing under a lamp.
Final Thoughts On Plant Nails
Plant nails have earned their place as one of my favorite styles to create, both for the technical challenge they offer and the joy clients feel when they see the finished result. There is something genuinely satisfying about turning a blank nail into a tiny piece of nature.
If you are considering trying plant nails for the first time, whether at home or in a salon chair, my honest advice is to start simple. Master one leaf before attempting an entire garden. The patience pays off, and the compliments that follow are always worth the extra care.
Plant nails are not just a trend that will disappear next season. They tap into something people genuinely connect with, a small reminder of nature carried with them throughout their day. And as long as clients keep asking for that little touch of green on their fingertips, I will keep happily painting it on.
Pingback: 50+ Exotic Nail Ideas for a Bold & Glamorous Look
Pingback: Leo Nails: 50+ Bold & Glamorous Nail Designs
Pingback: Stunning Peacock Nail Designs for a Glamorous Look
Pingback: Blue Jean Nail Designs: Trendy Denim-Inspired Nail Ideas
Pingback: Best Business Nail Ideas for a Chic Professional Look