
There is something about a daisy nail design that never gets old. Trends come and go every season, chrome nails take over one month, then everyone moves on to something else, but the daisy always finds its way back onto the nail table. It is simple, it is cheerful, and it looks good on almost every skin tone, every nail shape, and every occasion you can think of.
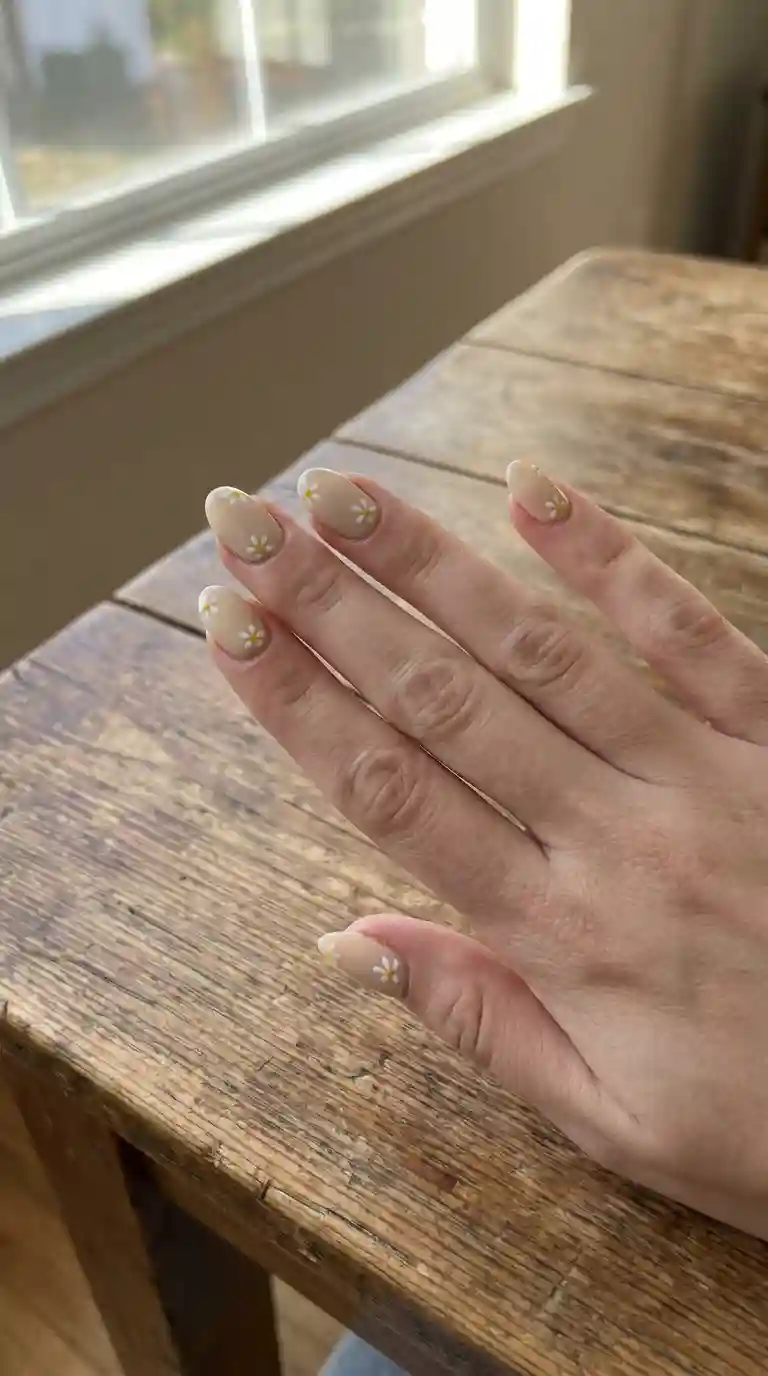
I work behind the nail desk almost every single day, and I can tell you that clients who walk in asking for a daisy nail design usually have one thing in common. They want something that feels fresh but not fussy. They want flowers, but not the kind that scream at you from across the room. The daisy nail design gives them exactly that balance, and that is probably why it keeps trending on Pinterest, TikTok, and Instagram year after year.
In this guide I am going to walk you through everything related to daisy nail design, from the tools you need, to step by step tutorials, to seasonal variations, nail shapes, common mistakes, and even how to make the design last longer without chipping in three days. By the end of this article you should feel confident enough to try a daisy nail design at home, or at least know exactly what to ask for the next time you sit in a nail chair.
Also Read : Moon Nail Design: The Ultimate Guide To Timeless Celestial Nails That Never Fade From Style
What Makes Daisy Nail Design So Popular Right Now
If you scroll through any nail inspiration page today, you will notice daisy nail design pops up constantly, and there is a real reason behind that popularity. Daisies are one of the easiest flowers to recreate on a small nail surface. Unlike roses or peonies that need shading and layering, a daisy is basically a few petals around a center dot. That simplicity makes it approachable for beginners while still looking polished when done by a professional.
Another reason daisy nail design has stayed relevant is versatility. You can paint a single daisy as an accent nail, or cover every nail in tiny daisies for a full garden effect. You can go bold with bright yellow centers on a white base, or keep things soft with pastel daisies on nude polish. The design adapts to whatever mood or season you are working with, which is rare for a nail trend.
There is also an emotional side to this. Daisies represent innocence, new beginnings, and simple happiness in a lot of cultures. Clients often tell me they picked daisy nail design because it reminds them of childhood, of picking flowers in a backyard, or of a specific person in their life. That emotional connection keeps people coming back to this design over and over.
Why Daisy Nail Design Became My Personal Favorite
Every nail artist has that one design they secretly enjoy painting the most, even if they never say it out loud. For me, it is the daisy. There is something calming about the repetitive motion of painting small petals one after another, watching a plain nail slowly turn into something that looks like a tiny garden.
The first time I painted a full set of daisy nail design for a client, it was for a bride who wanted something simple for her outdoor spring wedding. She did not want lace patterns or rhinestones, she just wanted white daisies on a sheer pink base. Watching her reaction when she saw the finished set, the way her face lit up, that moment stuck with me. It reminded me why this job matters, not because of trends or likes online, but because of small moments like that.
Since then I have painted daisy nail design on hundreds of clients, from teenagers wanting something cute for prom, to grandmothers who wanted a subtle touch of flowers for a family reunion. Each time the design changes slightly based on the person, but the core idea of the daisy stays the same, and that consistency is what makes it such a timeless choice.
Also Read : 65 Leopard Print Nail Ideas That Will Make Your Manicure Absolutely Unforgettable
Tools And Products You Need For Daisy Nail Design
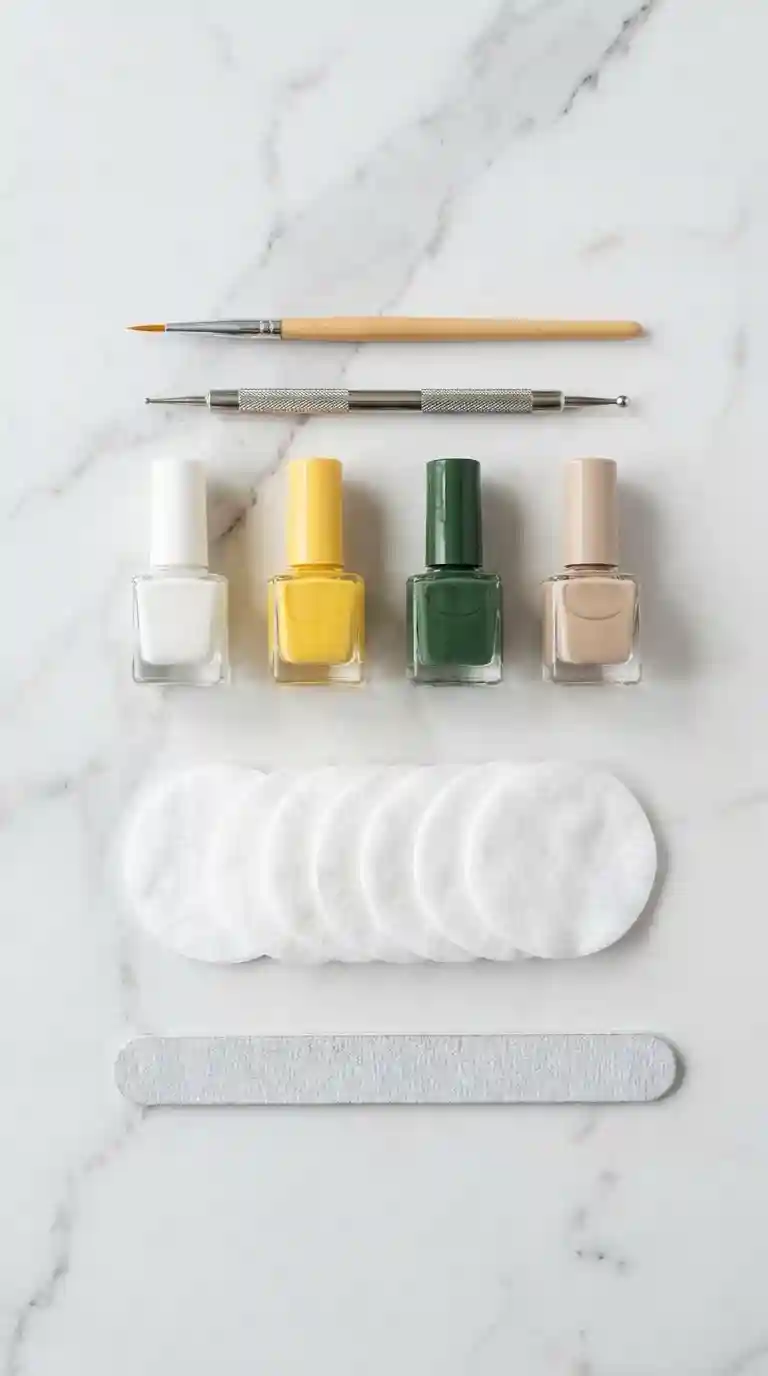
Before jumping into the actual painting steps, let us talk about what you actually need to create a clean daisy nail design. You do not need a professional studio full of equipment. Most of these tools can be found at your local beauty supply store or ordered online for a small price.
Base Polish Colors For Daisy Nail Design
The base color sets the tone for your entire daisy nail design, so picking the right one matters. Nude and soft pink tones are the most popular because they let the white petals stand out clearly. Sky blue and lavender work beautifully for spring looks. If you want something bolder, a deep green base can make the daisy petals pop in a completely different way, almost like the flower is growing right out of the polish.
Brushes And Dotting Tools
A thin liner brush, sometimes called a detail brush, is the most important tool for painting daisy petals. Look for one with a fine tip so you can control the shape of each petal. A dotting tool, or even the rounded end of a bobby pin in a pinch, works perfectly for creating the yellow centers of the daisies. Some nail artists also use a small fan brush for adding texture, but that is optional depending on how detailed you want the design to be.
Top Coat And Sealant
This step gets skipped by a lot of beginners, and it is the number one reason a daisy nail design chips within a day. A good quality top coat seals in the hand painted details and adds shine. Without it, the tiny raised petals can catch on fabric or hair and peel off much faster than expected.
Step By Step Daisy Nail Design Tutorial For Beginners
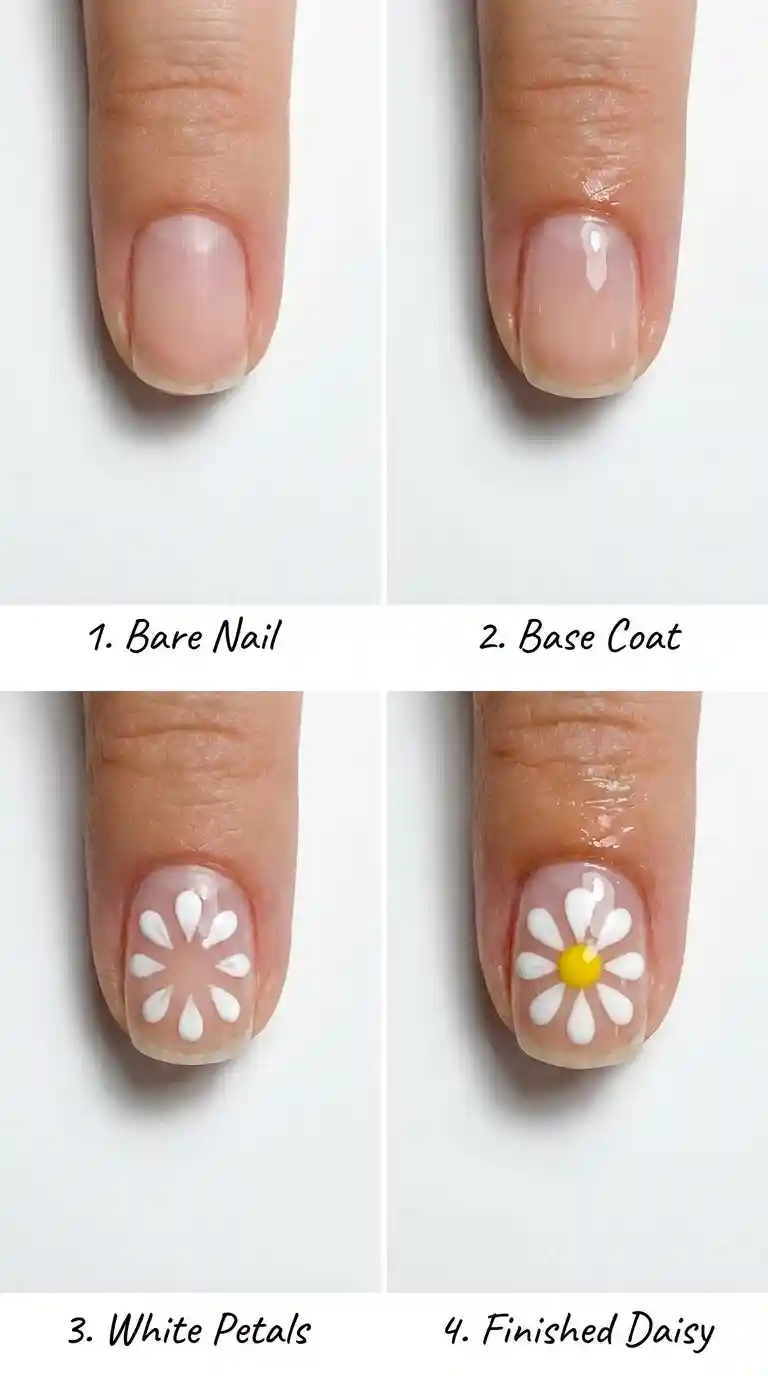
Now let us get into the actual technique. This is the same basic method I teach to nail school students who are just starting to learn floral work, and it applies to almost every version of daisy nail design you will see online.
Must Read : Bright Orange Nail Designs That Will Steal the Spotlight This Season
Step One Prep The Nail
Start with clean, dry nails. Push back your cuticles gently, shape the nail to your preferred length, and buff the surface lightly so the polish has something to grip onto. Skipping this step is one of the biggest reasons polish lifts early.
Step Two Apply Base Coat
A thin layer of base coat protects your natural nail from staining and helps the color polish glide on smoothly. Let it dry fully before moving to the next step, this usually takes about a minute or two depending on the brand.
Step Three Paint Your Chosen Base Color
Apply two thin coats of your chosen base color, whether that is nude, pink, blue, or any other shade you picked for your daisy nail design. Thin coats dry faster and look smoother than one thick coat, so resist the urge to rush this part.
Step Four Paint The Daisy Petals
Once your base color is completely dry, dip your detail brush lightly into white polish. Starting from a center point, paint five to seven small oval shaped petals in a circle, almost like drawing a little sun. Do not worry if the petals are not perfectly symmetrical, real daisies are not perfectly symmetrical either, and a slightly imperfect daisy nail design actually looks more natural and hand drawn.
Step Five Add The Yellow Center
Using your dotting tool, place a small yellow dot right in the middle of the petals. This is the step that instantly turns random white shapes into a recognizable daisy nail design. You can also add tiny dots of darker yellow or orange on top of the center for extra dimension if you want a more detailed look.
Step Six Add Extra Details
This is optional but it takes your daisy nail design to another level. Thin green lines can represent stems or leaves near the base of the nail. Tiny white dots scattered around the daisy can mimic falling petals or add a sense of movement to the design.
Step Seven Seal With Top Coat
Finish with a generous layer of top coat over the entire nail. This locks in the design, adds shine, and protects the delicate hand painted petals from chipping. Let it fully dry before touching anything, patience here really pays off.
Daisy Nail Design Ideas For Every Season
One of the best things about daisy nail design is how easily it adapts to different times of the year. I always tell clients that a daisy is not just a spring flower, it can be reimagined for any season with the right color palette.
Spring Daisy Nail Design
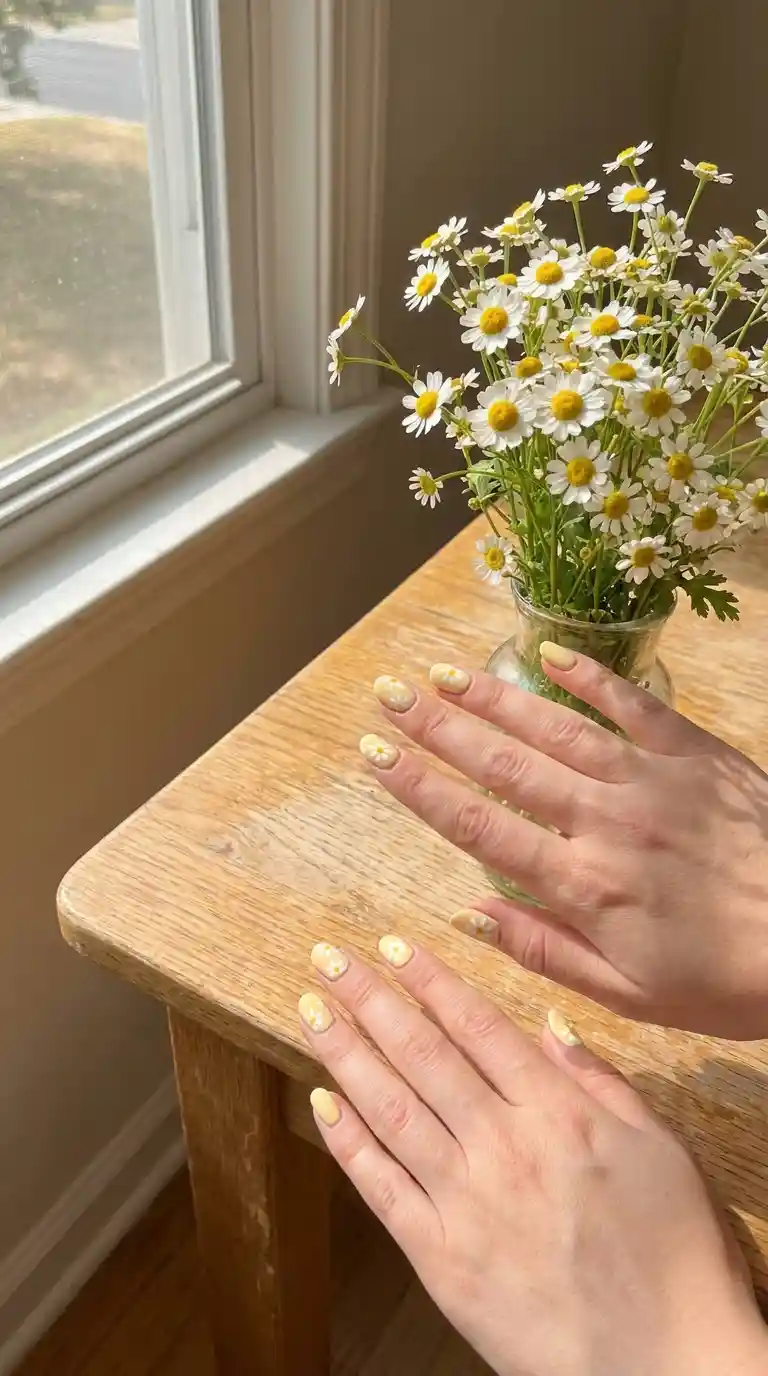
Spring is the most obvious season for daisy nail design, and honestly, it might be the most popular time of year to book this style at the salon. Pastel yellow, baby blue, and soft lavender bases work wonderfully here. I like pairing the classic white daisy with tiny butterflies or dew drop details for clients who want an extra spring touch.
Summer Daisy Nail Design
For summer, I usually push clients toward brighter, more saturated colors. A coral or bright orange base with white daisies looks incredibly fresh against tan skin. Some clients also request daisy nail design with a glossy, almost wet looking finish, which mimics the feeling of sunshine and beach days.
Fall Daisy Nail Design
Fall daisy nail design surprises a lot of people because they assume flowers only belong in spring and summer. But swapping the white petals for a warm burgundy or burnt orange, paired with a deep brown or olive green base, creates a completely different mood. It still reads as a daisy, but it feels cozy and seasonal rather than bright and fresh.
Winter Daisy Nail Design
Winter is where daisy nail design gets a little more elegant. Think icy white daisies on a deep navy or black base, sometimes with a touch of silver glitter dusted near the cuticle line. It feels less like a garden flower and more like a delicate winter bloom, which works beautifully for holiday parties.
Daisy Nail Design For Different Nail Shapes
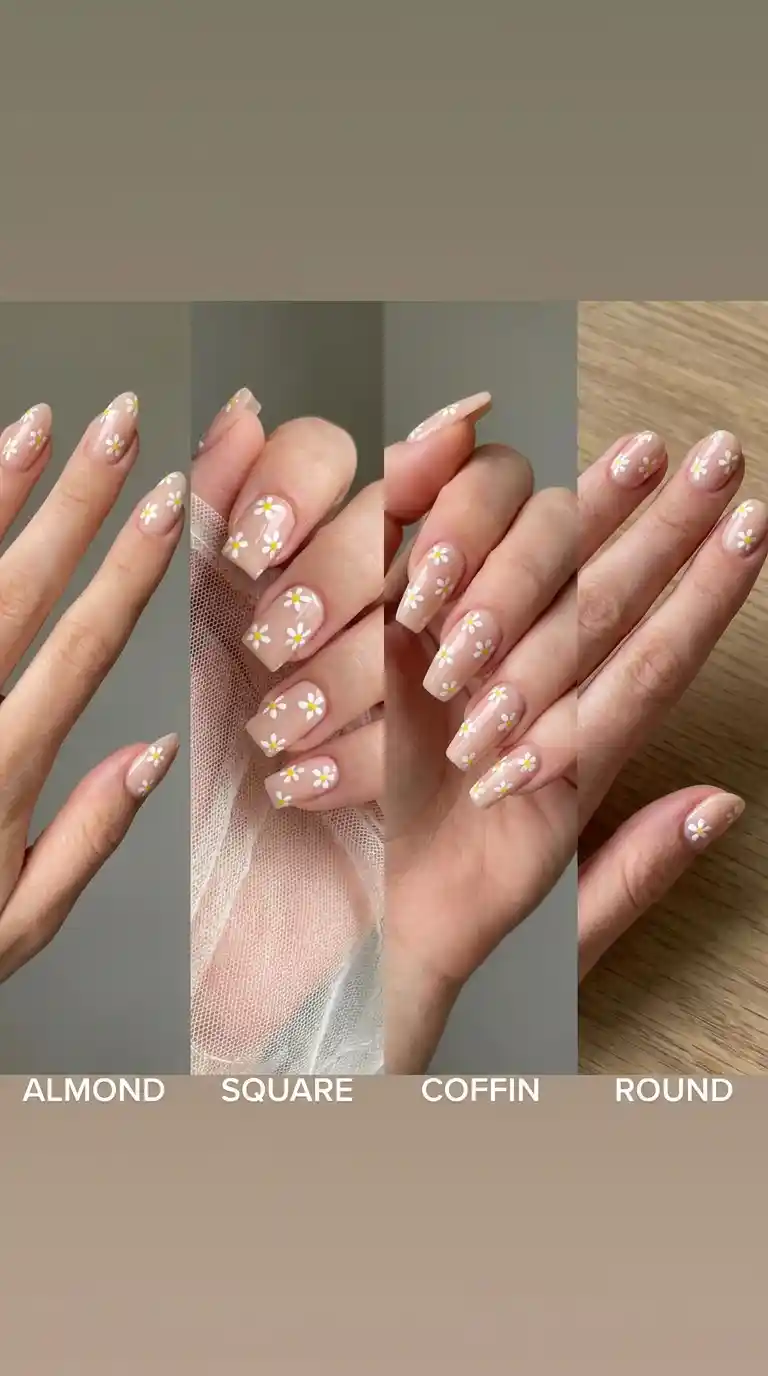
A design that looks stunning on one nail shape does not always translate perfectly to another, and daisy nail design is no exception. Over the years I have adjusted the way I paint daisies depending on what shape I am working with.
Read Also: Duck Nails Design: The Bold, Beautiful Trend Every Nail Lover Needs To Try
Almond Shaped Nails
Almond nails give you a nice curved canvas that works beautifully with a single large daisy placed slightly off center. The natural taper of the shape draws the eye upward, so I usually place the daisy toward the tip rather than the base.
Square Shaped Nails
Square nails have more flat surface area, which makes them perfect for a full daisy nail design covering the entire nail bed. I often use this shape when a client wants a busier, more garden like pattern with multiple flowers instead of just one accent daisy.
Coffin Shaped Nails
Coffin, sometimes called ballerina shaped nails, have a long straight edge that works great for a trailing vine style daisy nail design. Small daisies connected by thin green stems running from the cuticle to the tip create a really elegant, elongated look.
Round Shaped Nails
Round nails are more common on clients who keep their length short, and they suit a minimalist daisy nail design best. A single small daisy near the cuticle, without overcrowding the rest of the nail, tends to look the cleanest on this shape.
Daisy French Tip Nail Design
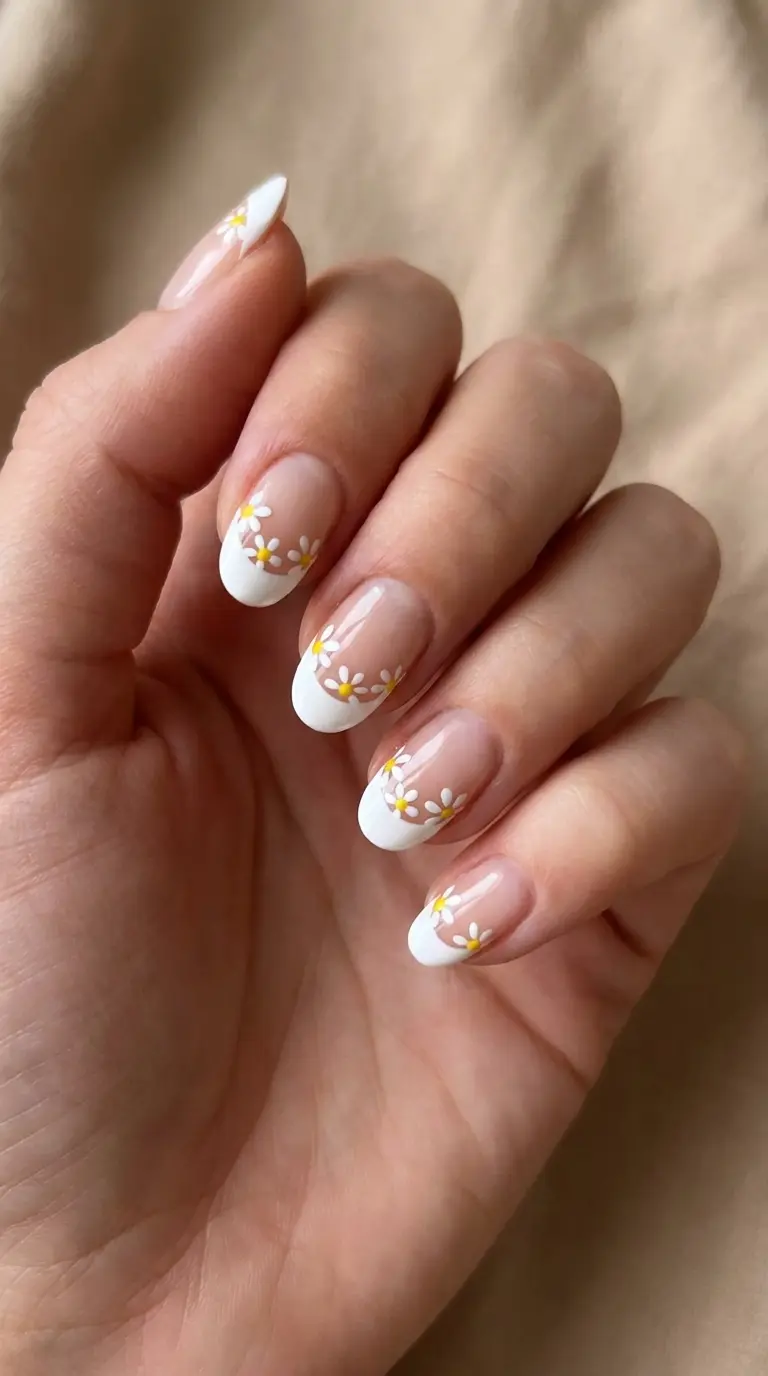
One of the most requested variations in my chair lately has been the daisy French tip nail design. Instead of the traditional straight white tip line, tiny daisies are painted right along the smile line, replacing the classic look with something far more playful.
This style works especially well for clients who love the timeless look of a French manicure but want a slight twist without going too far from the classic elegance. I usually recommend a sheer pink or nude base with the daisy tips in white and yellow, though some clients have asked for colored tips like lilac or baby blue with white daisies layered on top, which also looks stunning.
Minimalist Daisy Nail Design
Not everyone wants a full garden on their nails, and that is completely fine. Minimalist daisy nail design has become one of my go to recommendations for clients who work in more formal environments or simply prefer a subtle look.
The idea here is restraint. Instead of covering every nail, you might paint one small daisy on just the ring finger, leaving the rest of the nails in a plain, glossy nude or soft pink. This single accent nail approach lets the daisy nail design stand out without overwhelming the overall look, and it is also faster to apply, which clients on a budget or tight schedule really appreciate.
Daisy Nail Design With Rhinestones And Gems
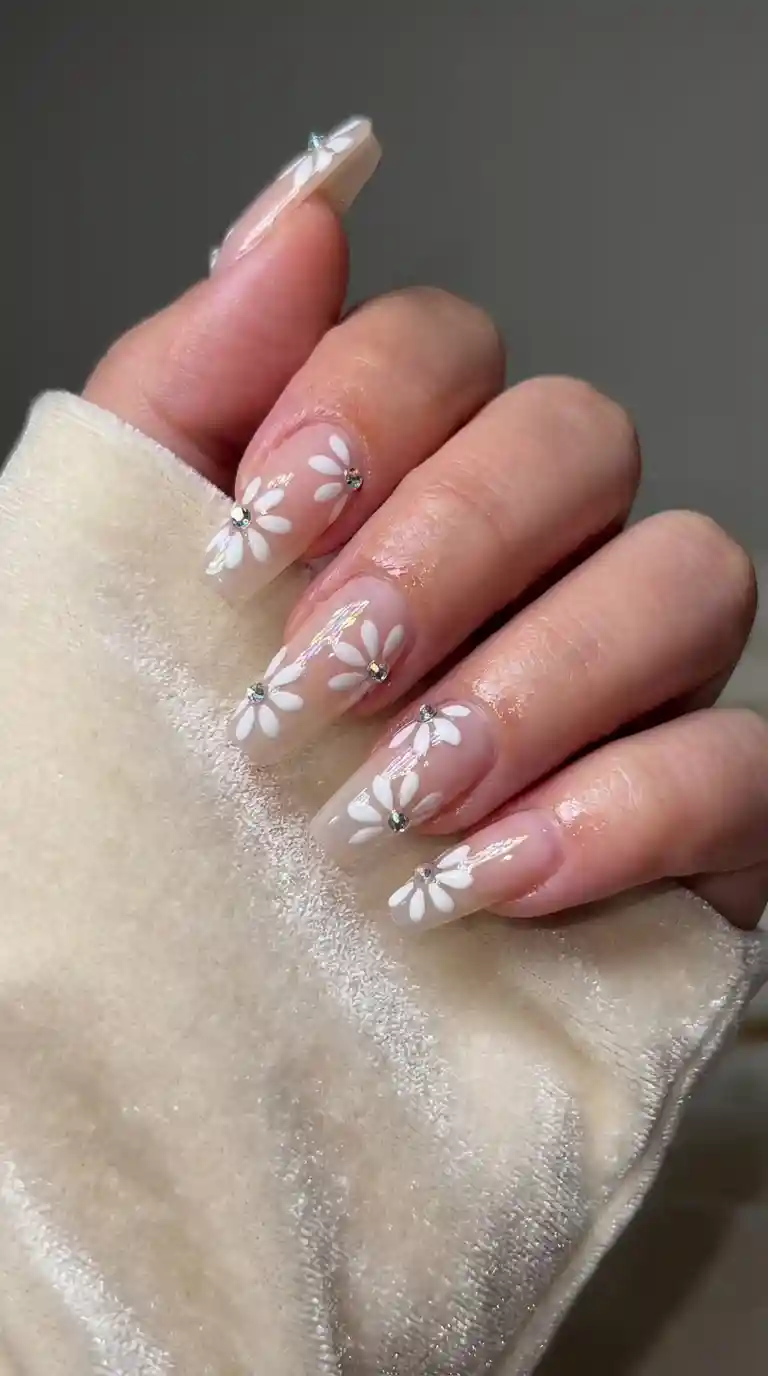
For clients wanting something a bit more glamorous, adding rhinestones to a daisy nail design instantly elevates the whole look. Instead of a plain yellow dot for the center, a small round rhinestone catches the light beautifully every time the hand moves.
I usually reserve this version for special occasions like weddings, birthdays, or holiday parties, since the added texture from the gems can sometimes catch on clothing during everyday wear. A thick, durable top coat is essential here to keep the rhinestones secure for as long as possible.
Daisy Nail Design For Weddings
Bridal nail requests have shifted a lot over the past few years, and daisy nail design has become a genuinely popular choice for brides who want something soft and romantic without the heaviness of full lace or crystal encrusted sets.
I have done daisy nail design for brides going for a boho outdoor wedding, where the tiny white flowers matched their actual bouquet perfectly. I have also done it for more traditional brides who wanted just a hint of daisy detail on the ring finger, paired with classic French tips on the rest of the hand. Either way, this design photographs beautifully, which matters a lot when you consider how many close up hand shots happen during a wedding day.
Also Read: Mermaid Ocean Nails: The Ultimate Guide To Dreamy, Show Stopping Ocean Inspired Nail Art
Daisy Nail Design For Short Nails
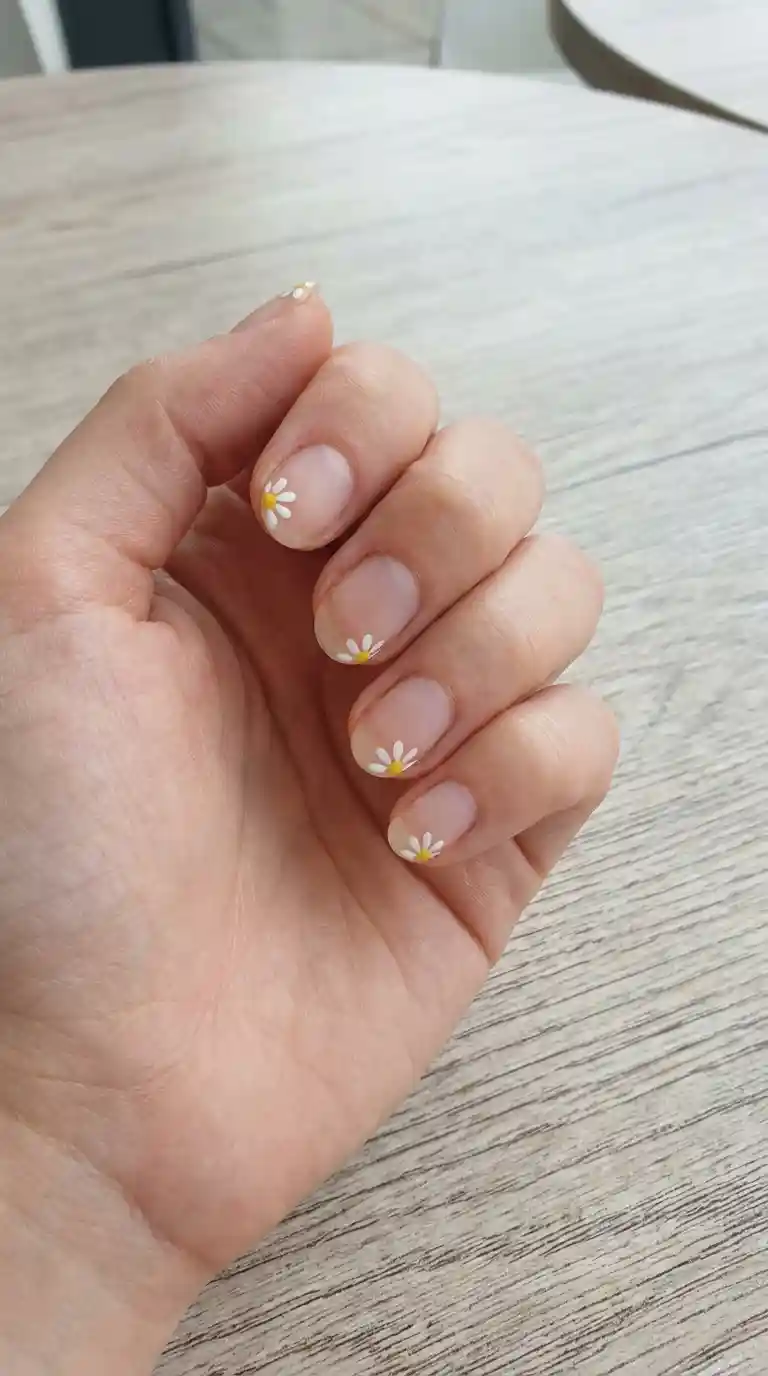
A common misconception is that intricate nail art only works on longer nails, but daisy nail design actually translates really well onto short, natural nails too. The key is scaling down the details. Instead of large petals, you work with tiny, precise strokes near the cuticle area, leaving the rest of the nail clean.
Clients with shorter nails, whether by personal preference or because of their job requirements like nursing or food service, often assume they cannot enjoy nail art. I always encourage them to try a scaled down daisy nail design because it proves that even a small canvas can hold something beautiful and detailed.
Common Mistakes To Avoid In Daisy Nail Design
Over the years I have seen plenty of daisy nail design attempts go wrong, usually because of a few repeated mistakes. Knowing these ahead of time can save you a lot of frustration if you are trying this at home.
Using Polish That Is Too Thick
Thick polish drags when you try to create fine petal shapes, resulting in blobby, uneven daisies instead of clean ones. If your white polish feels gloopy, thin it slightly with a few drops of polish thinner before starting your daisy nail design.
Rushing Between Layers
Painting the daisy petals before the base color is fully dry causes the colors to smear together, ruining the crisp contrast that makes daisy nail design look so clean. Always wait a full few minutes between layers, even if it feels like it is taking forever.
Overcrowding The Nail
More daisies does not always mean a better result. Cramming too many flowers onto one small nail can make the design look cluttered rather than elegant. Leaving some negative space actually makes each individual daisy stand out more.
Skipping The Top Coat
I mentioned this earlier, but it deserves repeating because it is genuinely the most common mistake I see. A daisy nail design without a proper top coat will chip within a day or two, no matter how well the actual painting was done.
How To Make Daisy Nail Design Last Longer
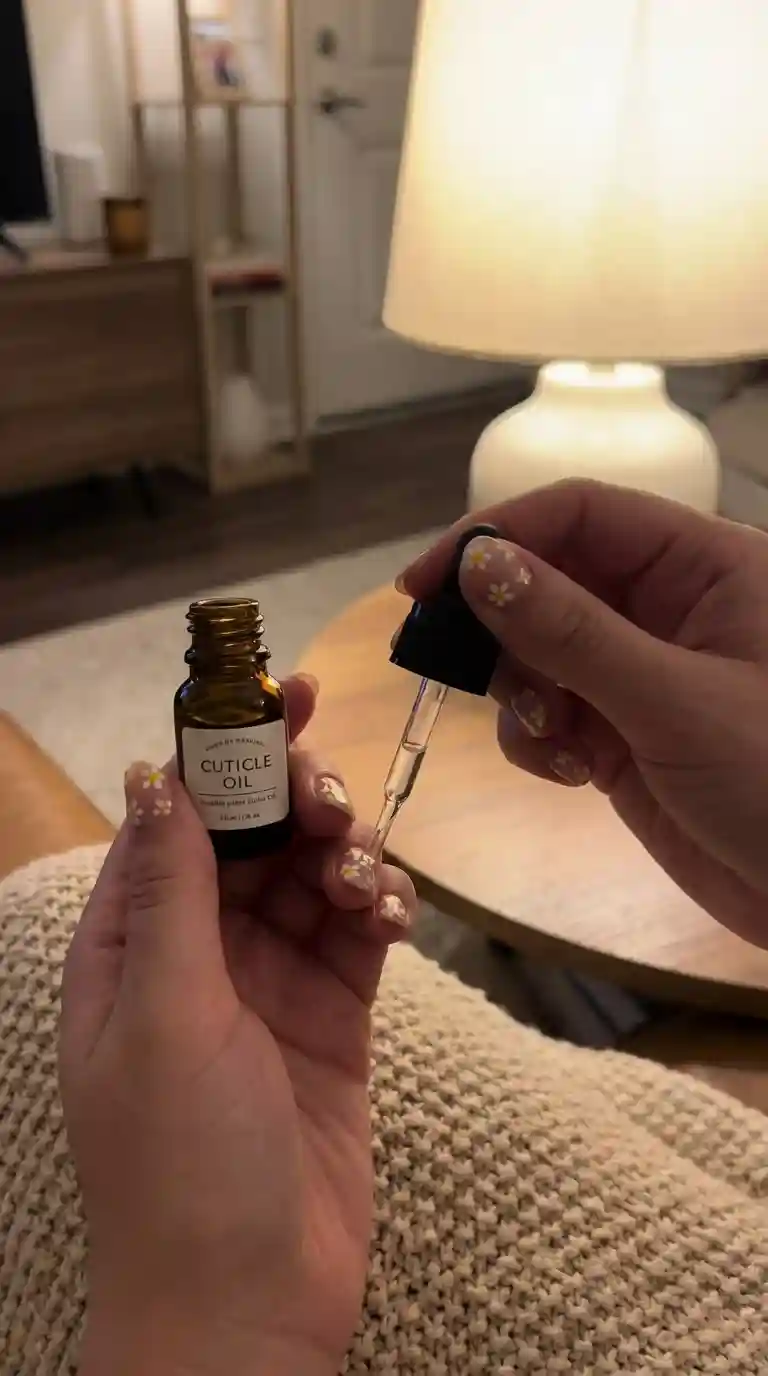
Getting a fresh daisy nail design is exciting, but keeping it looking good for as long as possible takes a bit of aftercare. Here are the habits I always recommend to clients leaving the salon.
Apply cuticle oil daily. This keeps the skin around your nails hydrated and actually helps the polish itself stay flexible, reducing the chance of chipping at the edges.
Wear gloves for cleaning or dishwashing. Hot water and harsh chemicals are two of the fastest ways to break down nail polish, especially hand painted details like a daisy nail design that rely on multiple thin layers.
Avoid using your nails as tools. I know it is tempting to use a nail to open a can or scratch off a sticker, but this is exactly how chips start, and once one petal chips, the whole design starts to look worn.
Reapply top coat every few days. A thin fresh layer of top coat every three to four days extends the life of your manicure significantly and keeps the shine looking fresh.
Read Also : Rose Nail Design Magic: 50+ Gorgeous Ideas Every Nail Lover Needs To Try
DIY Daisy Nail Design Versus Salon Daisy Nail Design
A question I get asked constantly is whether people should attempt daisy nail design at home or book an appointment with a professional. Honestly, the answer depends on your goals and your patience level.
Doing daisy nail design yourself is a great option if you enjoy the process and do not mind a slightly imperfect result. Practice really does make a difference here, and your third or fourth attempt will look noticeably better than your first.
Going to a salon makes sense if you want a flawless, symmetrical daisy nail design, especially for a special event like a wedding or graduation. Professional nail artists have steadier hands from years of practice, plus access to higher quality tools and products that make the final result more polished and longer lasting.
Daisy Nail Design Trends For 2026
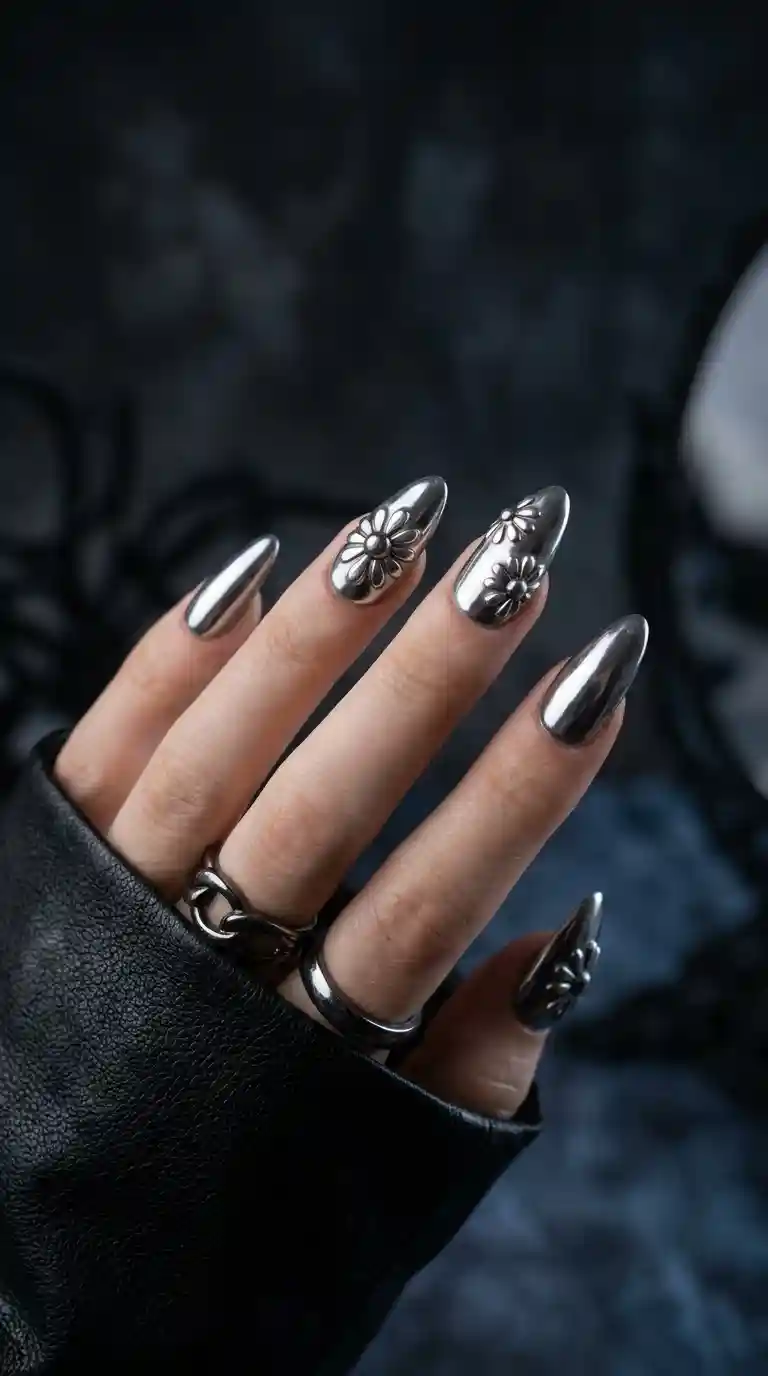
Trends within daisy nail design keep evolving, and this year I have noticed a few interesting shifts happening in the salon.
Chrome and metallic daisies are gaining popularity, replacing the traditional white petals with silver or gold chrome polish for a more futuristic take on the classic flower. This works especially well paired with dark, moody base colors instead of the usual pastel tones.
Mismatched daisy nail design, where each nail features a slightly different color combination instead of one uniform look, has also become a favorite among younger clients who want variety without committing to one single palette.
Micro daisies, tiny clusters of miniature flowers instead of one large bloom per nail, are showing up more often too, giving the design a more textured, detailed appearance without needing extra colors or elements.
Read Also : Swirl Nail Designs: The Complete Guide To Painting Gorgeous, Head Turning Swirls On Every Nail Shape
Final Thoughts On Daisy Nail Design
Daisy nail design has earned its place as a genuine classic in the nail world, not just a passing trend. It works across seasons, nail shapes, skin tones, and personal styles, which is rare for any single design to accomplish. Whether you prefer a minimalist single accent daisy or a full garden covering every nail, there is a version of this design that fits your personality.
If you are trying it at home for the first time, be patient with yourself. Nobody paints a perfect daisy on the first attempt, and honestly, the slightly imperfect ones tend to look more charming anyway. If you are heading to a salon, bring reference photos so your nail artist understands exactly the style, size, and color palette you have in mind.
Either way, daisy nail design is one of those styles that proves simple things can still be beautiful, and that a small flower painted with care can genuinely brighten your entire day.
Frequently Asked Questions
Is daisy nail design hard to do at home?
Daisy nail design is actually one of the more beginner friendly nail art styles because the petal shapes are simple ovals arranged in a circle. With a thin detail brush and some practice, most people can create a decent version within their first few tries.
What colors work best for daisy nail design?
White petals with yellow centers are the traditional choice, but daisy nail design can be adapted to almost any color scheme. Pastel bases work well for spring, while deeper tones like burgundy or navy suit fall and winter looks.
How long does daisy nail design usually last?
With proper base coat, top coat, and regular aftercare like cuticle oil, a daisy nail design can last anywhere from two to three weeks on gel polish, or about one week on regular polish before needing a touch up.
Can I get daisy nail design on short nails?
Yes, daisy nail design translates well onto short nails as long as the petals are scaled down slightly. Many clients with short, practical nail lengths still enjoy this design without any issues.
What tools do I need to paint daisies on my nails?
A thin detail brush, a small dotting tool, white and yellow polish, and a good top coat are the essential tools needed for daisy nail design. Everything else, like rhinestones or extra colors, is optional.
Does daisy nail design work on gel polish?
Absolutely, gel polish actually tends to hold up daisy nail design details even better than regular polish because it does not chip as easily and maintains its glossy finish longer.
Is daisy nail design only for spring and summer?
Not at all. While daisies are commonly associated with spring, the design can be reimagined with darker, richer color palettes to suit fall and winter aesthetics just as easily.
How many daisies should I paint per nail?
This really depends on personal preference and nail size. A single accent daisy works for minimalist styles, while smaller nails can fit two or three tiny daisies for a fuller garden effect.
Can daisy nail design be done with acrylic nails?
Yes, daisy nail design works on acrylics, gel extensions, and natural nails equally well. The technique for painting the petals stays the same regardless of the base material underneath.
What is the difference between daisy nail design and other floral nail art?
Daisy nail design specifically features the recognizable five to seven petal flower shape with a round center, making it more simple and structured compared to other floral styles like roses which require more shading and layering.
Pingback: Best Blooming Gel Nail Ideas for a Gorgeous Manicure
Pingback: 40 Trendy Denim Nails Ideas for a Stylish Manicure
Pingback: 45 Hippy Nails Ideas: Colorful, Retro & Boho Designs
Pingback: Animal Print Nail Designs: Best Wild & Stylish nails Ideas
Pingback: Western Fall Nails: Cute & Trendy Cowgirl Nail Ideas