
There is something about mermaid ocean nails that stops people in their tracks. You know the feeling. You are standing at a coffee shop counter, or maybe scrolling through your phone at the salon, and suddenly you spot a set of nails that look like they were dipped straight into the sea. Swirls of teal and turquoise, tiny flecks of gold that catch the light like sunshine on waves, and maybe even a little shimmer of chrome that looks like foam on the shore. That is the magic of mermaid ocean nails, and once you fall for them, it is genuinely hard to go back to plain polish.
I have worked behind the nail desk for many years now, and if there is one trend that clients keep asking about season after season, it is this one. Mermaid ocean nails are not just a passing fad. They have become a staple request, right up there with French tips and classic nudes, because they simply never stop looking fresh. Every time I think the trend might be cooling off, someone walks in with a new Pinterest screenshot showing a fresh twist on the same beautiful idea, and I get excited all over again.
In this guide, I am going to walk you through everything you need to know about mermaid ocean nails. We will talk about the colors, the tools, the techniques, and the little tricks that separate an okay set from a jaw dropping one. Whether you are a nail tech looking to add this service to your menu or someone who wants to try mermaid ocean nails at your kitchen table on a Sunday afternoon, this article has you covered.
Also Read : Cherry Blossom Nail Design: The Dreamy Spring Manicure Every Nail Lover Needs To Try
What Are Mermaid Ocean Nails Exactly
Let’s start with the basics. Mermaid ocean nails are a nail art style that mimics the look of the sea. Think blues, greens, teals, and purples blended together in a way that feels fluid and organic, almost like you are looking down into deep water. Add in some shimmer, chrome powder, or holographic flakes and suddenly your nails look like they belong on an actual mermaid’s tail.
The beauty of mermaid ocean nails is that there is no single fixed formula. Some people prefer a soft, watercolor style blend of pastel blues and greens. Others go bold with deep navy, emerald, and violet swirled together with metallic accents. Both versions fall under the mermaid ocean nails umbrella, and honestly, that flexibility is part of why the trend has stuck around for so long.
I always tell my clients that mermaid ocean nails are less about following strict rules and more about capturing a feeling. You want your nails to feel like the ocean looks on a good day. Calm but powerful. Sparkly but a little mysterious. That is the energy we are going for.
Why Mermaid Ocean Nails Are So Popular Right Now
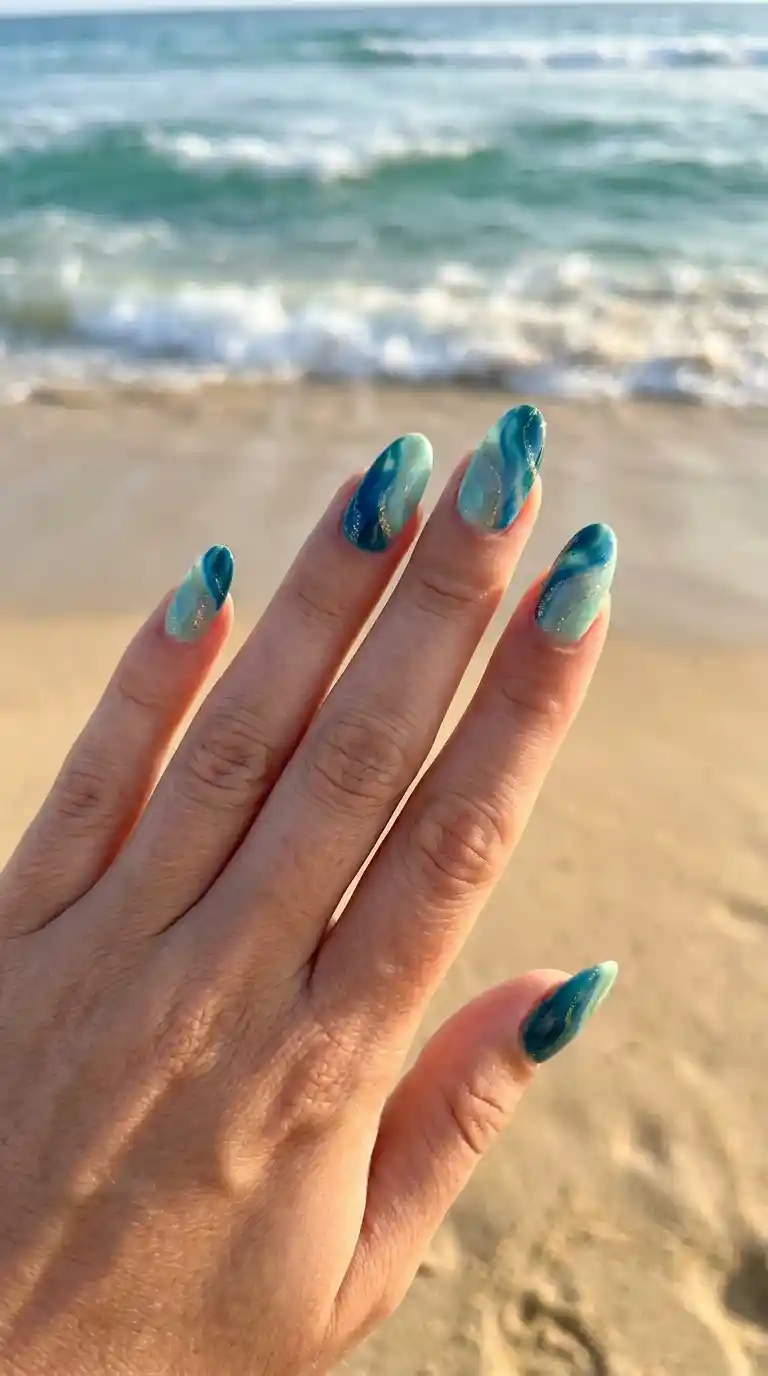
There are a few reasons mermaid ocean nails have taken over social media feeds and salon request lists. First, they photograph beautifully. The color blending and shimmer catch light in a way that looks stunning on camera, which matters a lot in a world where everyone is snapping photos of their manicure before they leave the chair.
Second, mermaid ocean nails work for almost every skin tone and nail shape. Because the design relies on a mix of colors rather than one flat shade, there is usually a combination that flatters everyone. I have done this style on short natural nails, long acrylics, square tips, almond shapes, you name it, and it always finds a way to look good.
Third, and this is something I have noticed personally, mermaid ocean nails feel like a little vacation for your hands. Even on a gray Tuesday in the middle of winter, looking down at nails that remind you of warm beaches and clear water gives you a small boost. Clients tell me this all the time. They say their mermaid ocean nails make them feel like they just came back from a trip, even if the closest they got to the ocean that month was a bath.
Fourth, the rise of chrome powders, cat eye gels, and holographic top coats has made it easier than ever to achieve that shimmering, otherworldly effect that makes mermaid ocean nails so special. A few years ago, getting that deep, glassy shimmer required a lot more skill and patience. Now, with the right products, even nail art beginners can create something that looks professionally done.
Read Also : Rose Nail Design Magic: 50+ Gorgeous Ideas Every Nail Lover Needs
The Essential Supplies You Need For Mermaid Ocean Nails
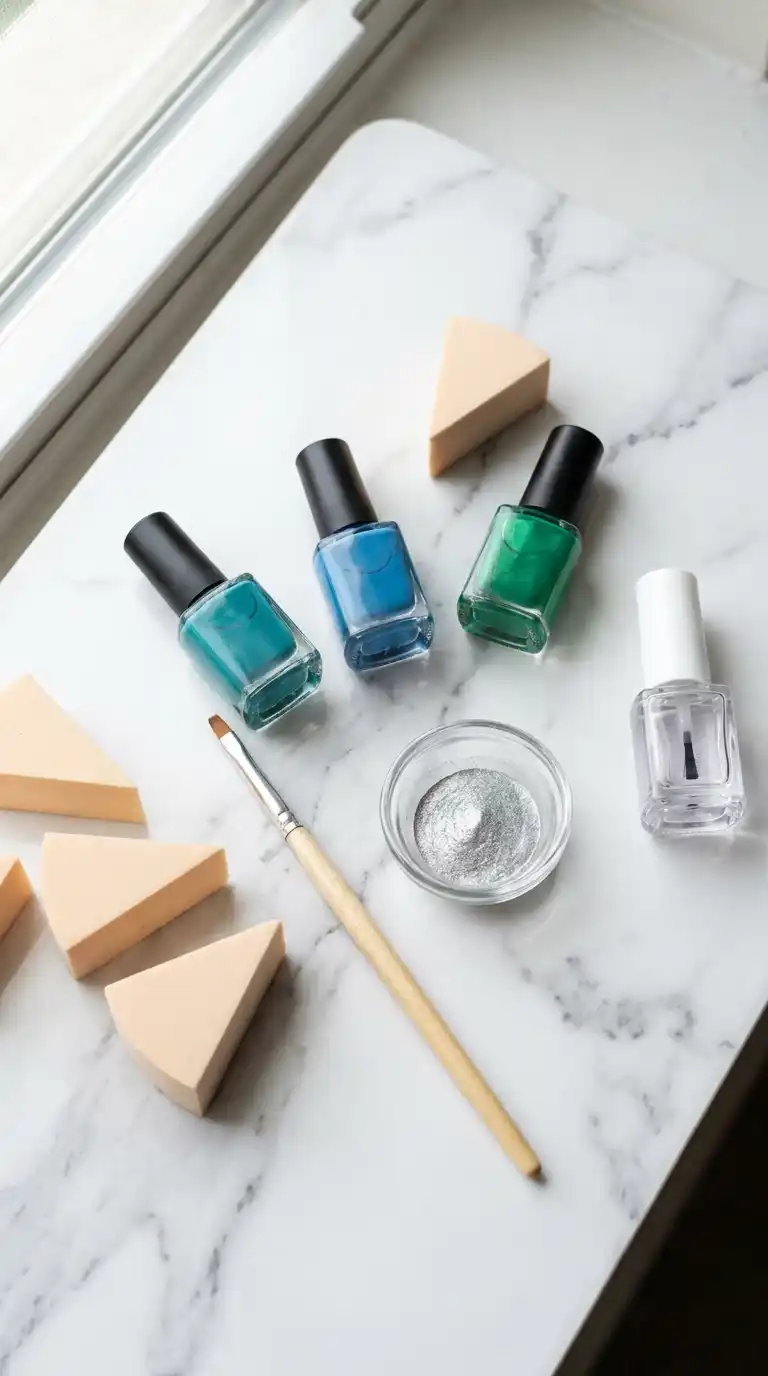
Before we get into technique, let’s talk supplies. Having the right tools makes a massive difference when you are trying to create mermaid ocean nails, whether you are doing them on yourself or on a client.
Base Coat And Prep Products
Every good manicure starts with proper prep. You need a gentle nail file, a cuticle pusher, cuticle oil, and a dehydrator or prep solution if you are using gel polish. Skipping prep is the number one reason mermaid ocean nails do not last as long as they should. I cannot stress this enough. Even the most gorgeous ocean design will lift and chip early if the nail bed was not properly cleaned and prepped first.
Polish Or Gel Colors
For mermaid ocean nails, you want a range of blues, teals, greens, and sometimes purples or navy. My personal go to palette includes a soft seafoam, a rich teal, an ocean blue, a deep emerald, and a hint of violet for depth. You do not need every color under the sun. Three to five complementary shades is usually plenty to create that blended, watery effect.
Shimmer And Chrome Products
This is where mermaid ocean nails really come to life. Chrome powders, holographic flakes, and cat eye magnetic gel polish all add that signature shimmer that makes the design pop. A good mermaid effect topper or flake polish can also do wonders if you want something quick and easy.
Tools For Blending
A makeup sponge cut into small pieces is honestly one of the best tools for mermaid ocean nails. You dab the colors onto the sponge and then press it onto the nail to create that soft, blended, watercolor look. A thin detail brush is also useful for adding fine lines, waves, or little dots that mimic sea foam and bubbles.
Top Coat
Never skip a strong, glossy top coat. It seals everything in, adds shine, and protects your design from chipping. For gel mermaid ocean nails, a no wipe top coat cured properly under a lamp will give you that glassy, wet look finish that really sells the ocean theme.
Choosing The Right Color Palette For Mermaid Ocean Nails
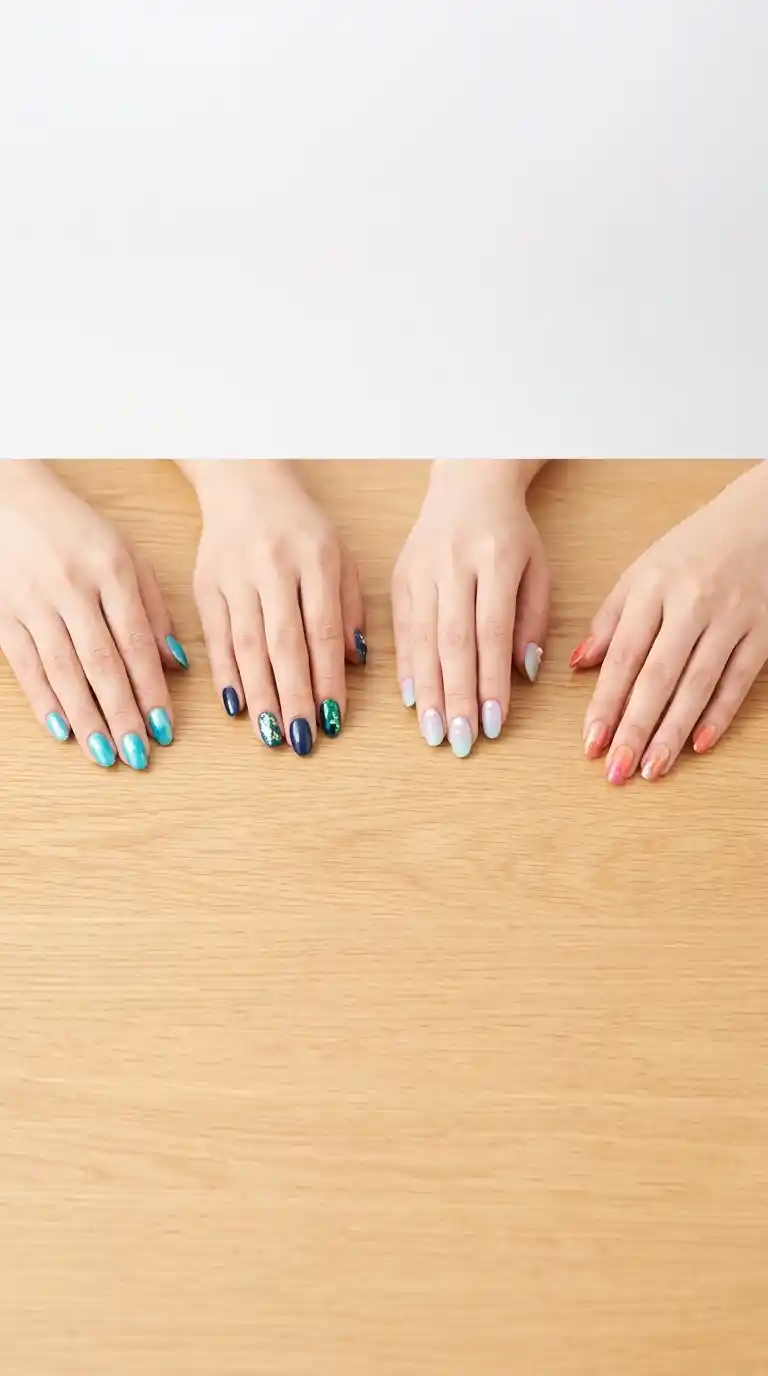
Color choice makes or breaks mermaid ocean nails. I have seen people try to use every color in their collection at once, and honestly it just turns into a muddy mess. The trick is restraint mixed with the right undertones.
Cool Toned Mermaid Ocean Nails
This is the classic approach. Think sky blue, turquoise, teal, seafoam green, and a touch of silver shimmer. This palette gives you that clear, tropical water look, similar to what you would see in the Caribbean or the Maldives. It is bright, fresh, and works beautifully for spring and summer.
Deep Sea Mermaid Ocean Nails
For a moodier, more dramatic take, go deeper. Navy blue, dark emerald, plum, and a hint of black shimmer create a design that feels like the deep, mysterious parts of the ocean where sunlight barely reaches. I love doing this palette in the fall and winter months because it still feels connected to the ocean theme but fits a cozier season.
Pastel Mermaid Ocean Nails
Soft lilac, baby blue, mint, and pale pink blended together give a gentler, more whimsical version of mermaid ocean nails. This palette is especially popular with younger clients or anyone who wants a subtle nod to the trend without going too bold.
Sunset Ocean Mermaid Nails
A slightly different spin, this palette blends warm oranges and pinks with cool blues and teals, mimicking the way the sky and ocean blend together during a beach sunset. It is a stunning option if you want your mermaid ocean nails to feel a little more unique and less like everyone else’s Pinterest board.
I always ask clients a simple question before we start. Do you want your mermaid ocean nails to feel like a sunny beach day or a mysterious deep sea dive? Their answer usually tells me exactly which palette direction to take.
Must Read : Rainbow Ombre Nails: The Ultimate Guide To Stunning Salon Quality Color Blends At Home
Step By Step Guide To Creating Mermaid Ocean Nails At Home
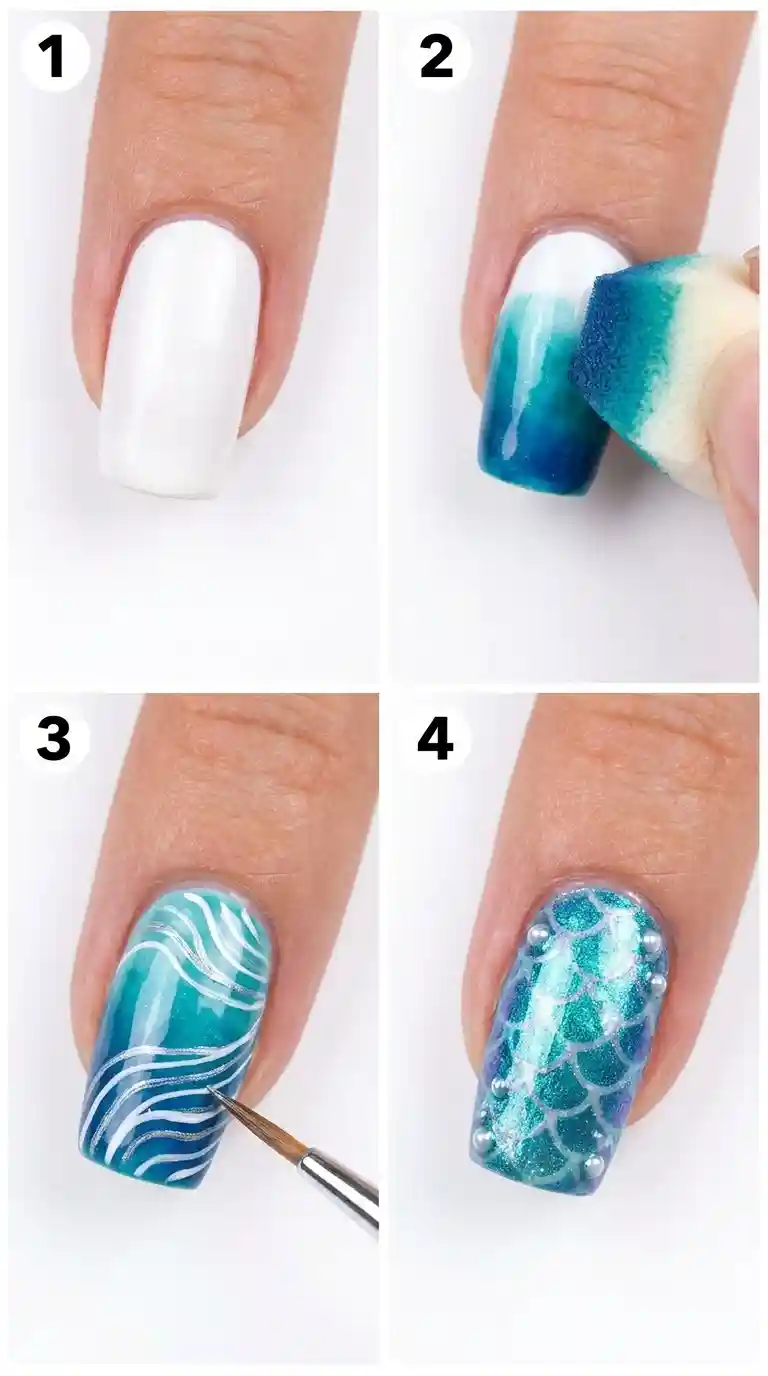
You do not need to be a professional to create beautiful mermaid ocean nails at home. I have taught plenty of clients how to do a simplified version themselves for touch ups between salon visits. Here is the process I recommend.
Step One Prep Your Nails
Start by removing any old polish, then shape your nails to your preferred length and style. Push back your cuticles gently and buff the surface of the nail lightly so your base coat has something to grip onto. Wipe each nail with a lint free pad and a bit of alcohol or nail prep solution to remove oils.
Step Two Apply A Base Coat
Apply a thin, even layer of base coat and let it dry or cure fully. This step protects your natural nail and helps your mermaid ocean nails colors go on smoothly.
Step Three Choose Your Base Shade
Most mermaid ocean nails start with a light, solid base color, often a pale blue, white, or soft seafoam. This acts like a canvas for the rest of your design. Apply two thin coats and let each one dry completely.
Step Four Sponge Blend Your Colors
This is the fun part. Dab small amounts of your chosen colors, maybe three or four shades, directly onto a cut piece of makeup sponge. Press the sponge onto your nail in a gentle dabbing motion, layering the colors so they blend into each other. Do not press too hard or drag the sponge, just light, repeated dabs. You will start to see that classic watery, blended mermaid ocean nails effect appear right before your eyes.
Step Five Add Depth With A Detail Brush
Once your base blend is dry, use a thin detail brush dipped in a slightly darker shade to add subtle wave lines or shadow areas near the cuticle. This adds dimension and makes the design look more like moving water rather than a flat blend of color.
Step Six Apply Shimmer Or Chrome
Now it is time to bring in the sparkle. You can use a chrome powder applied with a small sponge applicator, a holographic flake polish brushed on thin, or even a bit of loose glitter dabbed onto specific areas like the tips or the center of the nail. This step is what gives mermaid ocean nails that signature glow.
Step Seven Seal With Top Coat
Finish with a thick, glossy top coat. Make sure you cap the free edge of the nail to prevent early chipping. If you are using gel, cure fully under your lamp according to the product instructions.
Step Eight Clean Up And Moisturize
Wipe away any excess polish around the cuticles with a small brush dipped in acetone, then finish by massaging cuticle oil into the skin around your nails. This last step matters more than people think. It gives your whole manicure a polished, professional look.
Mermaid Ocean Nails Designs For Short Nails
A lot of people assume you need long nails to pull off mermaid ocean nails, but that is simply not true. Some of my favorite sets I have ever done were on short, natural nails. In fact, I sometimes think mermaid ocean nails look even more elegant on a shorter length because the design feels more wearable for everyday life.
For short nails, I recommend keeping the blending simple and focusing on just two or three colors rather than five or six. A shorter nail bed has less room, so too many colors can look busy and cramped. A soft teal to seafoam blend with a touch of gold shimmer near the tip is a beautiful, understated option.
Another idea for short mermaid ocean nails is to only feature the ocean design on one or two accent nails, usually the ring finger, while keeping the rest a simple solid shade that matches one of the colors in your blend. This gives you the mermaid ocean nails look without overwhelming a smaller canvas.
Short square or squoval shapes tend to work particularly well with this style because the flat surface gives the sponge blending technique a nice even area to work with. Rounded short nails also look lovely, especially with a softer pastel palette.
Mermaid Ocean Nails Designs For Long Nails
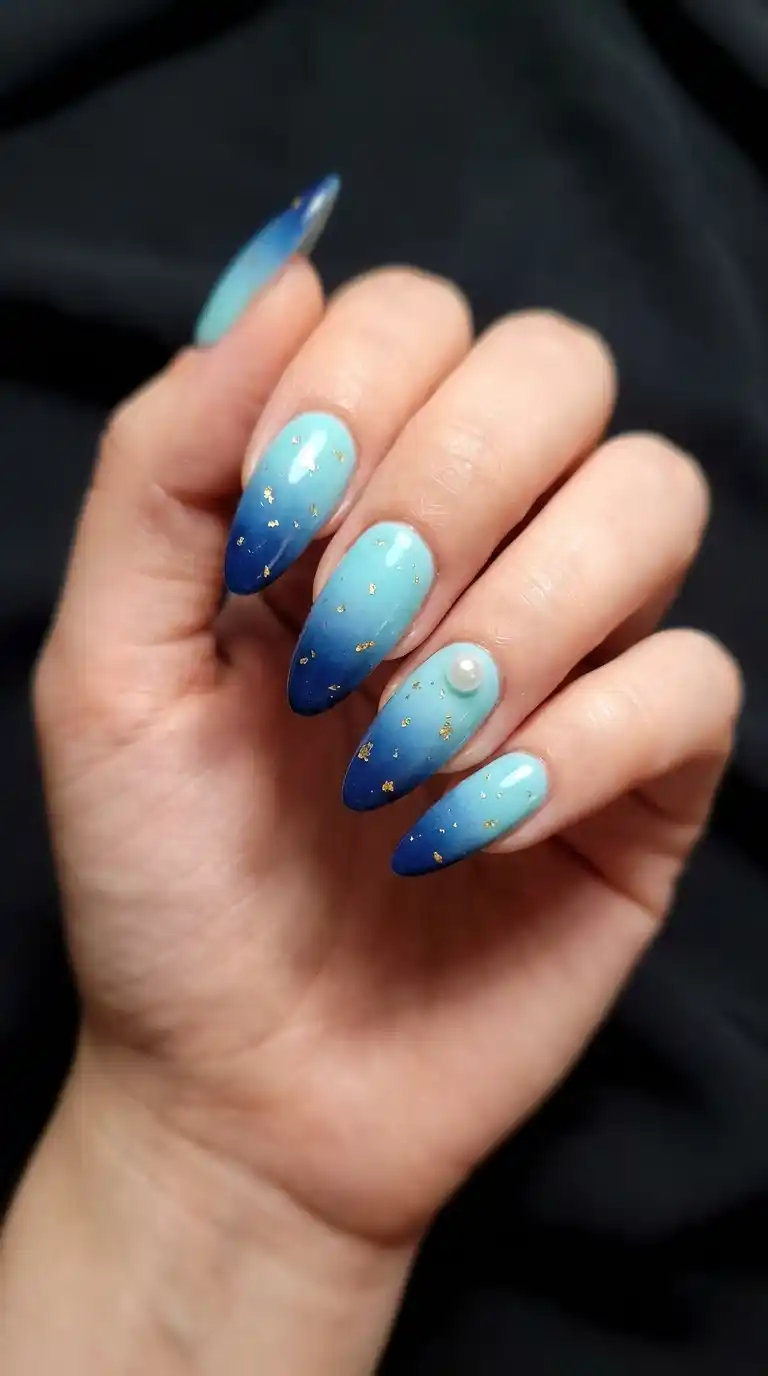
On the flip side, long nails give you a much larger canvas, which means you can get more creative and detailed with your mermaid ocean nails. I love doing full scale ocean scenes on long almond or coffin shaped nails, sometimes even adding tiny hand painted waves, bubbles, or a delicate mermaid scale pattern near the base.
With longer nails, you have room to do a gradient that shifts from a lighter shade near the cuticle to a darker, richer shade near the tip, mimicking how the ocean gets deeper and darker the further out you go. This ombre effect combined with chrome shimmer is one of the most requested mermaid ocean nails styles I do in the salon.
You can also experiment with 3D elements on longer nails. Tiny pearl beads, small seashell charms, or delicate gold foil flakes placed strategically can take your mermaid ocean nails from beautiful to absolutely showstopping. Just be mindful that too many embellishments can make the nails heavier and slightly more prone to snagging, so I usually recommend saving the heavier decorations for special occasions rather than everyday wear.
Also Read : Red and Gold Nail Design: The Ultimate Guide to Bold, Glamorous Nails That Turn Heads
Glitter And Chrome Techniques For Mermaid Ocean Nails
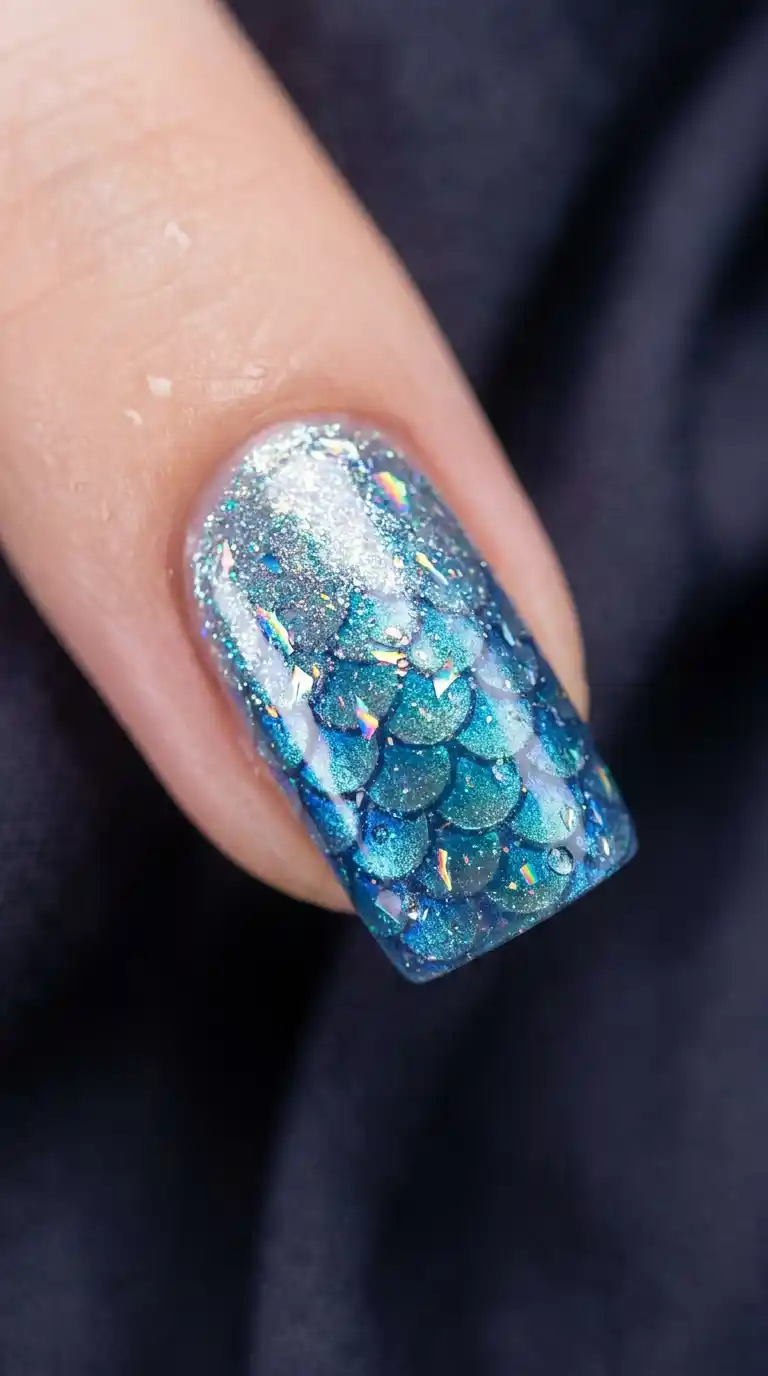
Let’s talk more about the shimmer side of things, because honestly, this is the detail that makes people stop and stare at mermaid ocean nails.
Chrome Powder Application
Chrome powder is a finely milled pigment that you buff onto a fully cured, tacky gel top coat using a small sponge applicator or soft brush. For mermaid ocean nails, a silver or pearl white chrome gives you that liquid, mercury like shine that looks exactly like light reflecting off water. Apply it in circular motions and you will see the shine build up in seconds.
Holographic Flakes
Holographic flakes are thin, reflective pieces that scatter light into little rainbow flashes. When pressed into wet top coat over your mermaid ocean nails design, they create tiny sparkles that shift color as you move your hand, similar to how sunlight dances on the surface of the sea.
Cat Eye Gel Polish
Cat eye gel polish contains magnetic particles that you can shape using a special magnet tool before curing. For mermaid ocean nails, running the magnet in a wave pattern across the nail creates a shimmering line that looks like light rippling through water. This technique takes a little practice but the results are absolutely worth it.
Fine Glitter Placement
Sometimes simple is best. A bit of fine iridescent glitter dabbed only near the tips or scattered lightly across the whole nail can add just enough sparkle without overwhelming the design. I often use this technique on clients who want mermaid ocean nails for everyday wear rather than a big event, since it tends to be a bit more subtle
Adding Shells, Pearls And Ocean Charms To Your Mermaid Ocean Nails
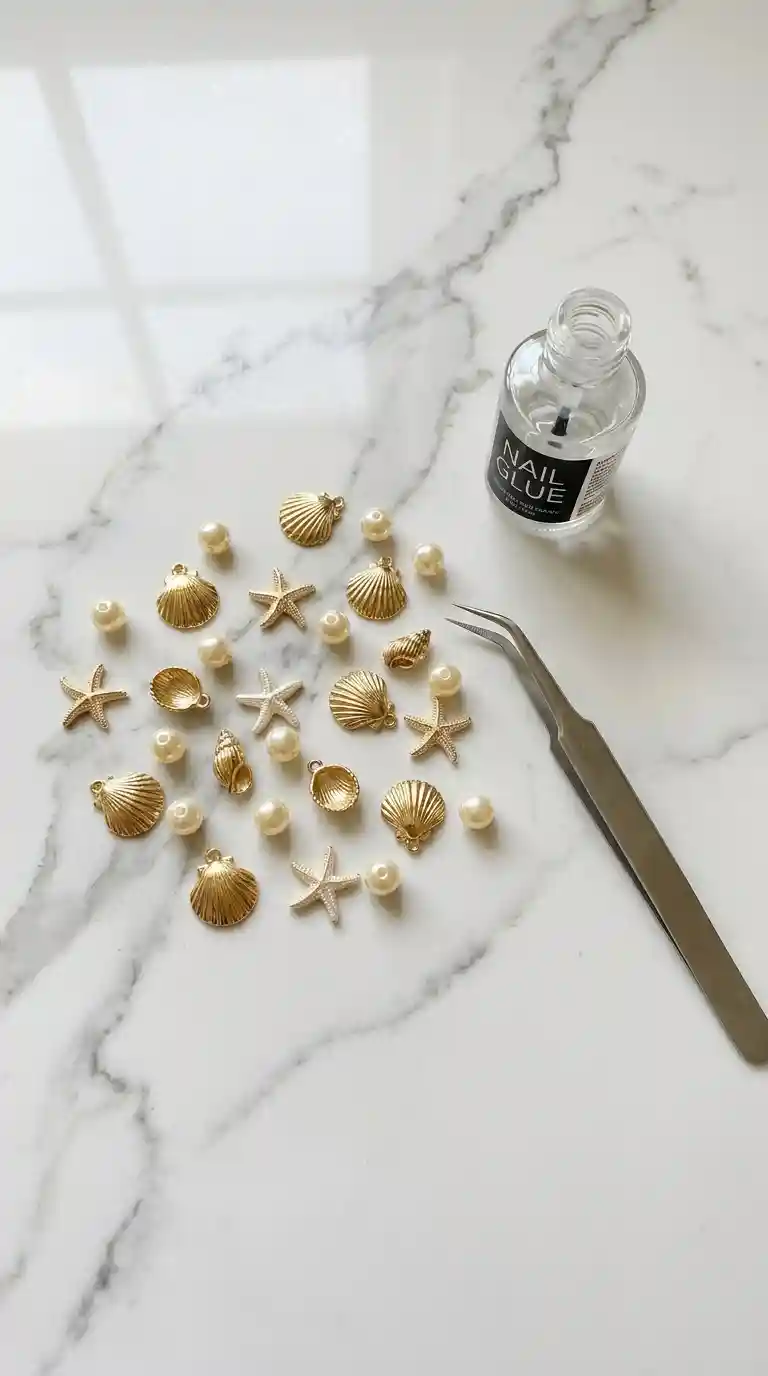
If you really want to lean into the theme, small decorative charms can take your mermaid ocean nails to another level entirely. This is one of my favorite parts of the process because it feels like putting the final jewelry touch on a tiny piece of art.
Tiny seashell charms, available in nail supply stores or online, can be placed on one or two accent nails using nail glue or pressed into wet gel before curing. Pearl beads in white, cream, or soft pink add a delicate, luxurious touch that mimics the treasures you might imagine finding at the bottom of the sea.
Gold or silver foil flakes scattered across the nail give a subtle sparkle that looks like sunlight breaking through water. Some nail artists also use tiny starfish or seahorse charms for a more playful, whimsical take on mermaid ocean nails, which is especially popular for beach vacations or bridal parties.
A word of caution here. Charms and 3D elements do add a bit of bulk to the nail, so if you lead an active lifestyle or work with your hands a lot, you might want to save the heavier decorations for just one accent nail rather than covering all ten. I always tell clients this during the consultation so there are no surprises later
Mermaid Ocean Nails For Every Season
One thing I always tell my clients is that mermaid ocean nails are not just a summer trend. With a few small tweaks, you can wear this style all year round and it still feels appropriate and fresh.
Spring Mermaid Ocean Nails
For spring, lean into pastel shades and lighter shimmer. Soft aqua, mint, and lilac blends with a touch of silver flake feel light and fresh, perfect for the season of new beginnings.
Summer Mermaid Ocean Nails
Summer is peak mermaid ocean nails season. Bright turquoise, tropical teal, and sunny gold shimmer capture that beach vacation energy perfectly. This is when I get the most requests for this style in my chair.
Fall Mermaid Ocean Nails
For autumn, I like to deepen the palette. Emerald green, deep teal, and a touch of burgundy or plum mixed in gives the design a cozier, richer feel while still keeping that ocean inspired blend.
Winter Mermaid Ocean Nails
In winter, go for the deep sea approach. Navy, black shimmer, and a hint of icy silver chrome create a design that feels elegant and a little mysterious, almost like moonlight on dark water. It pairs beautifully with the darker clothing and cozy vibe of the season.
Also Read : Silver Nail Inspo: 60 Dazzling Ideas That Will Instantly Upgrade Your Manicure Game
Mermaid Ocean Nails For Weddings And Special Occasions
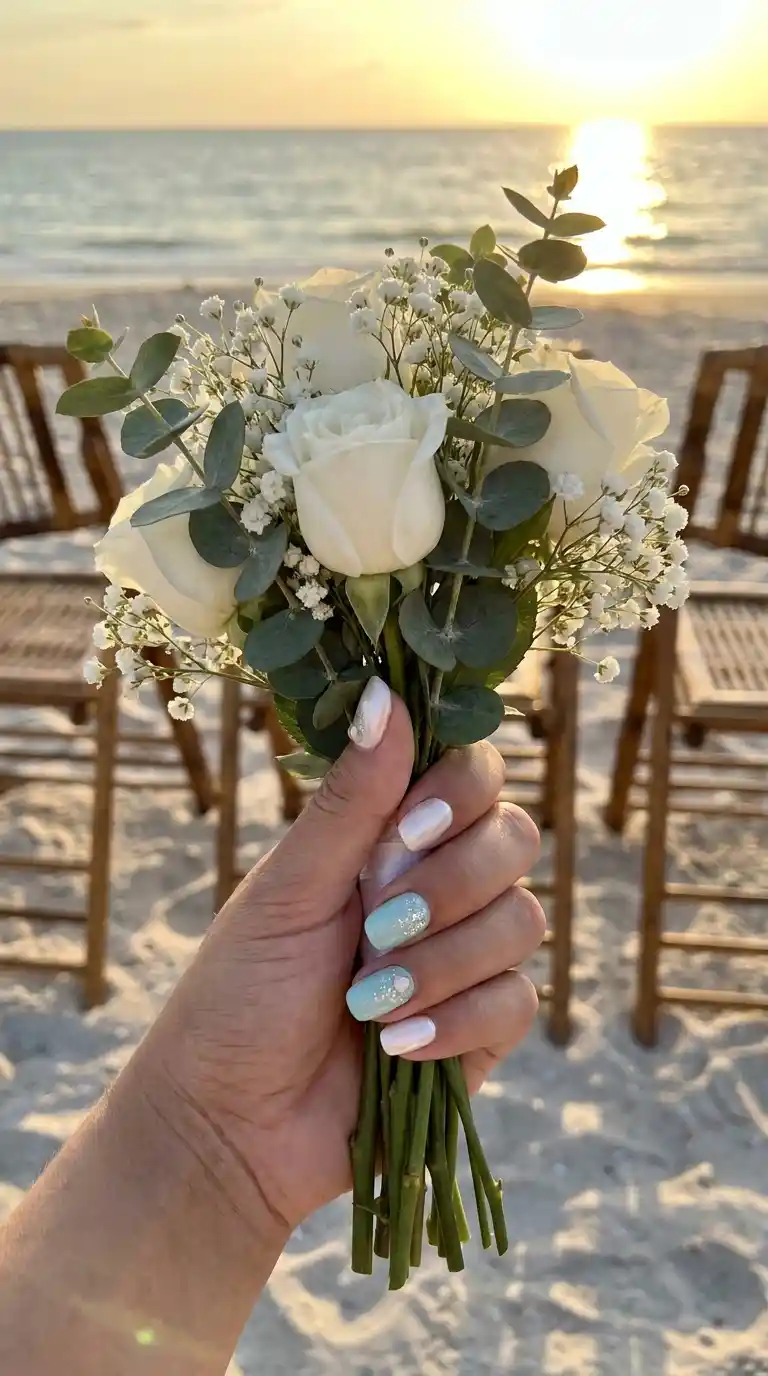
I have done more bridal mermaid ocean nails than I can count, especially for beach weddings and destination ceremonies. There is something so fitting about a bride walking down a sandy aisle with nails that echo the water behind her.
For bridal mermaid ocean nails, I usually suggest a softer, more refined palette. Pale aqua, soft pearl white, and delicate silver shimmer keep things elegant without straying too far from a traditional bridal look. Adding tiny pearl accents on the ring finger ties in beautifully with the jewelry most brides already wear.
Bridesmaids often go for a slightly bolder version of the same palette, which creates a cohesive look across the whole wedding party without everyone having identical nails. I find this approach photographs beautifully in wedding albums, especially in outdoor or beach settings where the natural light really makes the shimmer pop.
Mermaid ocean nails are also a popular choice for bachelorette parties, especially beach or tropical themed ones. Groups of friends getting matching or coordinating ocean inspired nails has become one of my favorite services to offer because everyone leaves feeling like they are already on vacation.
Common Mistakes To Avoid With Mermaid Ocean Nails
Over the years I have seen plenty of mermaid ocean nails go wrong, and it usually comes down to a handful of avoidable mistakes.
The first mistake is using too many colors at once. It is tempting to want every shade of blue and green you own on the nail, but this often results in a muddy, brownish blend instead of the clean, layered look you are going for. Stick to three to five complementary shades for the best result.
The second mistake is skipping proper prep. Mermaid ocean nails involve several layers of product, and if the base is not properly cleaned and prepped, the whole design is more likely to peel or lift early.
The third mistake is applying colors too thick during the sponge blending step. A thick layer of polish on the sponge will transfer unevenly and can create clumpy, uneven texture instead of a smooth gradient. Light, thin layers built up gradually always look better than one heavy application.
The fourth mistake is overdoing the chrome or glitter. While shimmer is a huge part of what makes mermaid ocean nails special, too much can actually hide the beautiful color blending underneath. I usually recommend focusing shimmer on specific areas, like the tips or center of the nail, rather than covering the entire surface.
The fifth mistake is rushing the drying or curing process. Mermaid ocean nails have multiple layers, and if you move too fast between steps, you risk smudging your design or trapping air bubbles under the top coat, which affects both the look and the longevity of the manicure.
How To Make Your Mermaid Ocean Nails Last Longer
A gorgeous set of mermaid ocean nails deserves to last as long as possible, and there are definitely things you can do to help extend the wear time.
Always start with a clean, oil free nail bed before applying any polish or gel. Even a small amount of natural oil on the nail plate can prevent proper adhesion and lead to early lifting.
Use a quality base coat suited to your nail type, and if you are prone to chipping, consider a gel or hybrid system rather than regular polish, since gel tends to hold up better against daily wear and tear.
Cap the free edge of the nail with every layer, including your colors and top coat. This means running your brush along the very tip of the nail to seal the edge, which helps prevent the polish from peeling up from the tip first, which is usually where chipping starts.
Wear gloves when doing dishes, cleaning, or any task involving harsh chemicals or a lot of water exposure. Prolonged water exposure is one of the biggest culprits behind lifting nails, mermaid ocean nails included.
Moisturize your cuticles daily with cuticle oil. Keeping the skin around your nails healthy helps the polish maintain a cleaner, more polished look for longer, and it also just feels nice.
Finally, avoid using your nails as tools. I know it is tempting to open a can or scrape off a sticker with your nail, but this is often how chips and cracks start, especially near the tips where mermaid ocean nails designs tend to be the most detailed.
Read Also : Leaf Nail Design: The Ultimate Guide To Gorgeous Botanical Nail Art That Actually Lasts
Mermaid Ocean Nails On A Budget
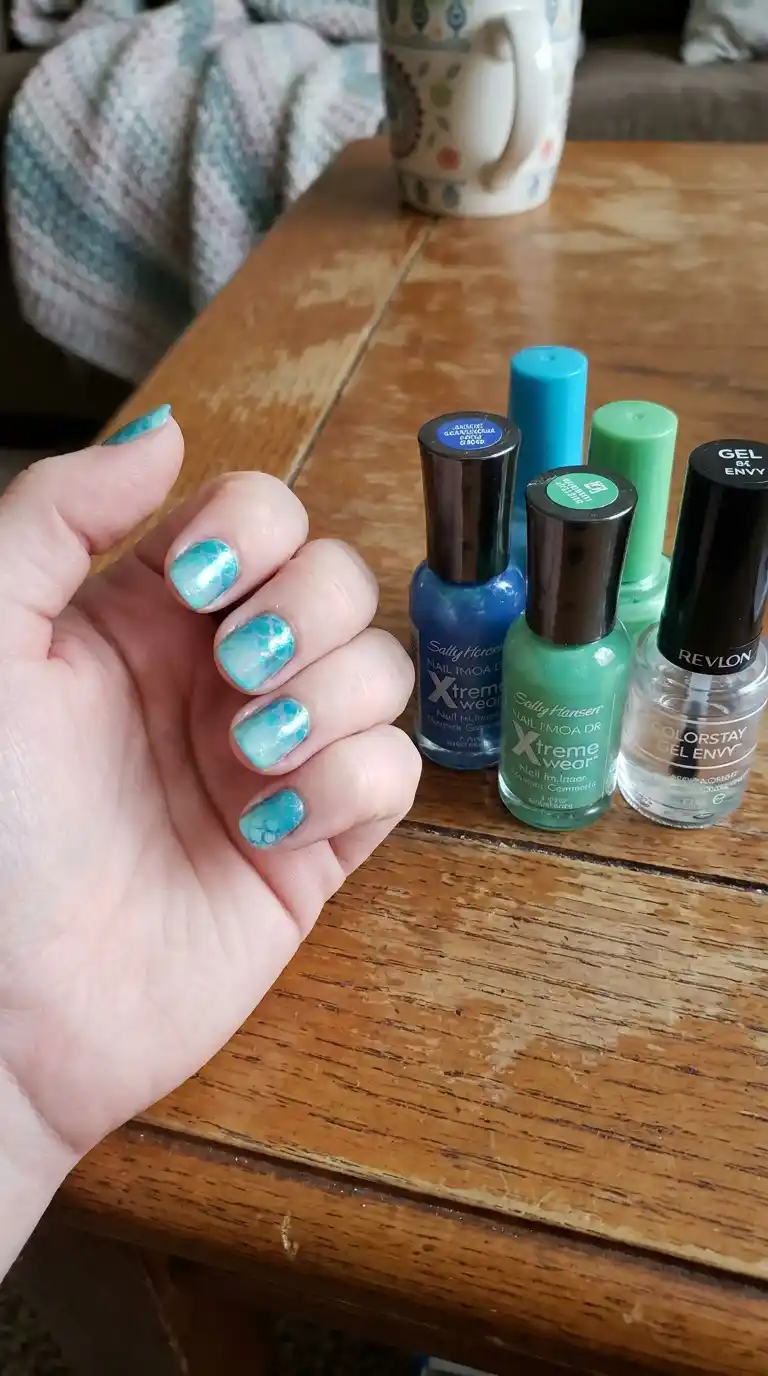
You do not need to spend a fortune to enjoy mermaid ocean nails. A lot of people assume this style requires expensive salon visits or a huge collection of specialty products, but that is not the case at all.
If you are doing your mermaid ocean nails at home, you likely already have a makeup sponge lying around, which is really all you need for the blending technique. A basic set of three to five affordable polishes in blue, teal, and green tones will get you very far. Many drugstore and budget nail brands now offer beautiful shimmer and chrome effect polishes that rival more expensive salon products.
If you are getting mermaid ocean nails done professionally, ask your nail tech about simpler versions of the design that use fewer colors or skip the extra charms and 3D elements. A two color blend with a touch of shimmer still captures that ocean inspired look beautifully and usually costs less than a fully loaded design with pearls, chrome, and hand painted details.
Another budget friendly tip is to only feature the mermaid ocean nails design on one or two accent nails rather than the full set, with the remaining nails in a simple solid color that matches the palette. This gives you the trendy look without the extra time and product cost of a full ten nail design.
Salon Mermaid Ocean Nails Versus DIY Mermaid Ocean Nails
I get asked all the time whether it is worth going to a salon for mermaid ocean nails or whether people should just try it at home. Honestly, the answer depends on what you are looking for.
Salon mermaid ocean nails typically involve more precise blending, professional grade products, and access to techniques like cat eye gel or intricate hand painted details that take years of practice to master. If you have a special event coming up, like a wedding or a milestone birthday, I always recommend going to a professional so the design looks flawless and lasts through the celebration.
DIY mermaid ocean nails, on the other hand, are a wonderful option for everyday wear or for anyone who genuinely enjoys the creative process of doing their own nails. With a bit of practice and the steps outlined earlier in this article, you can absolutely create a beautiful ocean inspired design at home. It might not be as precise as salon work at first, but there is something really satisfying about creating your own mermaid ocean nails from scratch.
My honest advice is this. If you are new to nail art, practice the sponge blending technique on paper first before moving to your actual nails. It helps you get a feel for how much product to use and how the colors blend together before committing to your final look.
Aftercare Tips For Mermaid Ocean Nails
Once your mermaid ocean nails are complete, a little aftercare goes a long way in keeping them looking fresh.
Apply cuticle oil daily, ideally both morning and night. This keeps the skin around your nails hydrated and gives the whole manicure a healthier, more polished appearance over time.
Avoid soaking your nails in water for long periods, such as extended baths or swimming sessions, without some kind of protection. Water exposure can cause gel polish to lift at the edges over time.
If you notice a small chip, resist the urge to pick at it. Picking at a chip often pulls off more polish than necessary and can even damage the natural nail underneath. Instead, gently file the rough edge or visit your nail tech for a quick fix.
Wear gloves for household chores, especially anything involving cleaning products, dishwashing, or gardening. This one small habit genuinely extends the life of any manicure, mermaid ocean nails included.
Schedule a fill or touch up appointment every two to three weeks if you have gel or acrylic mermaid ocean nails, since regrowth can start to affect the overall look of the design as your natural nail grows out.
Must Read : Sun Nail Design Ideas That Will Make Your Manicure Glow All Summer Long
Mermaid Ocean Nails Inspiration You Can Try Next
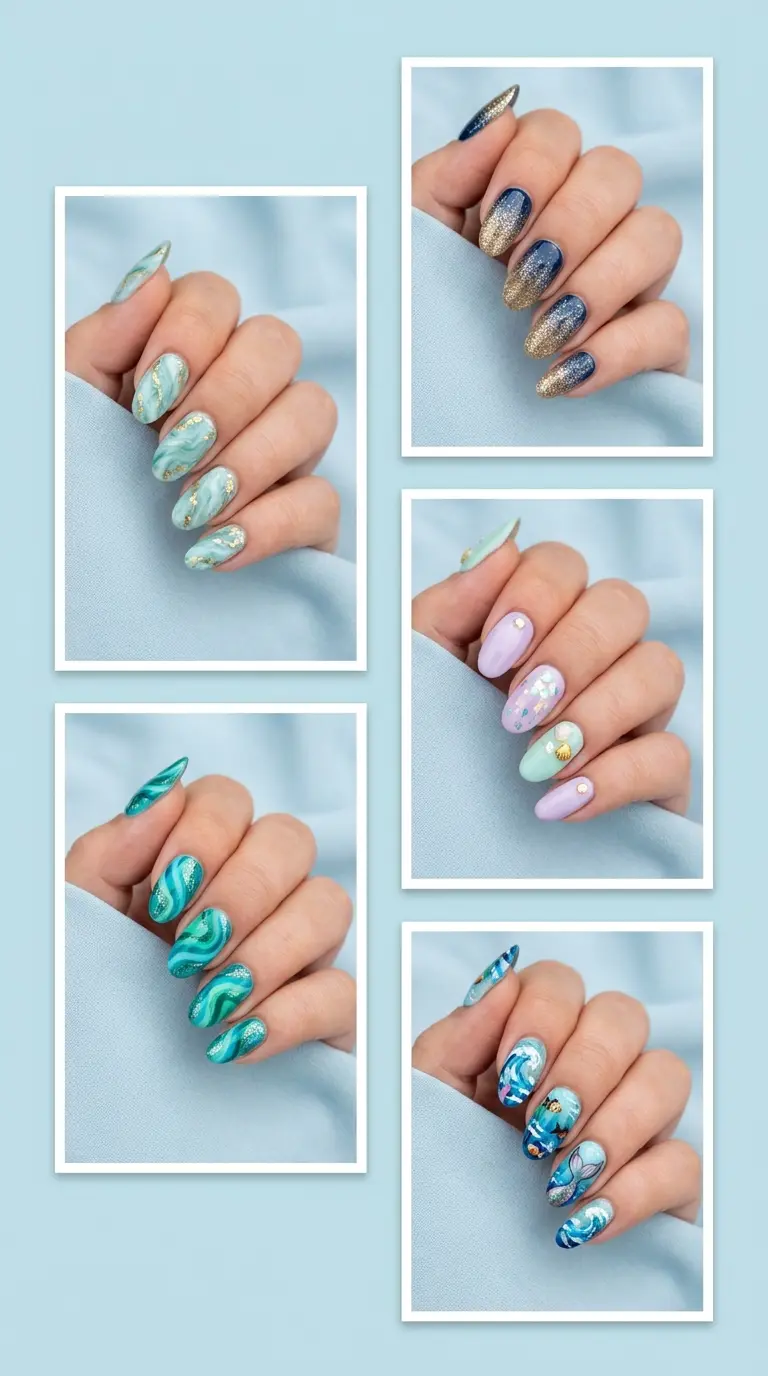
If you are still deciding which version of mermaid ocean nails to try, here are a few combinations I personally love creating in the salon.
A soft seafoam and white marble blend with silver chrome accents gives a light, airy take on the trend that feels fresh and modern. A deep teal and navy ombre with gold foil flakes creates a rich, luxurious look that feels perfect for evening events. A pastel lilac and mint blend with iridescent glitter tips is playful and soft, ideal for someone easing into nail art for the first time.
A bold turquoise and emerald swirl with holographic flakes captures that classic tropical mermaid ocean nails vibe that never seems to go out of style. And for something truly special, a full hand painted ocean scene with tiny waves, bubbles, and a single pearl accent on the ring finger makes for an absolutely unforgettable set
Final Thoughts On Mermaid Ocean Nails
After years of creating mermaid ocean nails for clients of every age, style, and occasion, I can honestly say this trend has staying power because it taps into something universal. We all love the ocean, whether it is a childhood memory of a beach vacation or simply the calm feeling that comes from looking at water. Wearing that feeling on your hands, even for a few weeks, is a small but genuine joy.
Whether you go for a subtle pastel version or a bold, chrome loaded deep sea design, mermaid ocean nails offer something for everyone. My best advice is to not overthink it. Pick a palette that speaks to you, gather your supplies, and give yourself permission to experiment. Some of the most beautiful mermaid ocean nails I have ever created started as a happy accident during the blending process.
If you try this style at home, be patient with yourself. Like any new skill, it takes a bit of practice to get the blending just right. And if you decide to leave it to the professionals, come prepared with a color palette in mind so your nail tech can bring your vision to life exactly the way you imagined it.
Frequently Asked Questions
What are mermaid ocean nails?
Mermaid ocean nails are a nail art style inspired by the colors and movement of the sea, typically featuring blended shades of blue, teal, and green combined with shimmer, chrome, or holographic effects to mimic the look of ocean water.
How do you get the mermaid effect on nails?
The mermaid effect is usually achieved using a sponge blending technique with multiple polish colors, then finished with chrome powder, holographic flakes, or a shimmer top coat to create that shiny, water like appearance.
What colors are used for mermaid ocean nails?
Common colors include turquoise, teal, seafoam green, ocean blue, navy, and sometimes purple or plum for a deeper look. Silver or gold shimmer is often added for extra sparkle.
Can you do mermaid ocean nails on short nails?
Yes, mermaid ocean nails look beautiful on short nails. It is often best to keep the color palette simple, using two or three shades, so the design does not feel too busy on a smaller nail bed.
How long do mermaid ocean nails last?
With gel polish and proper aftercare, mermaid ocean nails can last two to three weeks before needing a fill or touch up. Regular polish versions typically last about a week with careful wear.
What is the sponge technique for mermaid ocean nails?
The sponge technique involves dabbing small amounts of different polish colors onto a piece of makeup sponge, then pressing the sponge onto the nail in a gentle patting motion to blend the shades together into a smooth, gradient effect.
Do mermaid ocean nails work for short nails and long nails equally well?
Both lengths work beautifully, though longer nails allow for more detailed designs like hand painted waves or 3D charms, while short nails tend to look best with a simpler two to three color blend.
What chrome powder is best for mermaid ocean nails?
Silver and pearl white chrome powders work especially well because they mimic the reflective quality of water. Some nail artists also use a light blue tinted chrome for an extra oceanic touch.
Are mermaid ocean nails suitable for a wedding?
Yes, mermaid ocean nails are a popular choice for beach and destination weddings. A softer palette with pearl accents and subtle shimmer tends to look the most elegant for bridal looks.
How much do mermaid ocean nails cost at a salon?
Pricing varies by location and salon, but mermaid ocean nails typically cost more than a basic manicure due to the extra time needed for blending and adding shimmer or charms. Prices can range widely depending on how detailed the design is.