
There is something about rainbow ombre nails that stops people mid sentence. You are talking about your weekend plans and suddenly your friend grabs your hand and says wait what is happening on your nails. That reaction is exactly why rainbow ombre nails have become one of the most requested nail looks in salons across the world right now.
I work with clients every week who bring in a screenshot of rainbow ombre nails and ask if it is even possible to get that at home. The honest answer is yes, with the right approach, patience and a few tricks that most tutorials online completely skip. This guide is going to walk you through everything, from the basic idea of what rainbow ombre nails actually are, all the way to advanced tips that will make your blends look like they came straight out of a high end salon.
What Are Rainbow Ombre Nails
Rainbow ombre nails are a nail art style where multiple colors of the rainbow blend smoothly into each other across the nail, creating a soft gradient effect instead of sharp lines between colors. Unlike a regular ombre which usually uses two shades of the same color family, rainbow ombre nails use several bright, distinct colors that melt into one another.
Think of a sunset, or the inside of a soap bubble, or the way light bends through a prism. That soft, glowing transition is the whole point of rainbow ombre nails. When done correctly, you should not be able to point to an exact line where one color ends and the next begins.
The beauty of rainbow ombre nails is that they work on almost any nail length, shape or skin tone. You can go bold and saturated, or soft and pastel, and the technique stays basically the same. That flexibility is a big reason why this style has stuck around season after season instead of fading out like a lot of nail trends do.
Also Read: Rainbow Nail Ideas That Will Turn Your Manicure Into a Work of Art
Why Rainbow Ombre Nails Are Taking Over Instagram And TikTok
If you scroll through nail hashtags for even a minute you will see rainbow ombre nails everywhere. There is a real reason behind this beyond just the fact that they look pretty in photos.
First, rainbow ombre nails photograph incredibly well. The gradient catches light in a way that single color manicures simply cannot compete with. Every angle shows a slightly different shade, which makes for endless content if you are someone who likes posting nail pictures.
Second, rainbow ombre nails feel personal. You can pick your own color order, your own starting shade, your own intensity. Two people can both ask for rainbow ombre nails and walk out with completely different looks depending on their color choices and nail shape.
Third, there is a nostalgic, joyful energy to rainbow colors. After a few years of everyone leaning toward neutral, minimalist nail looks, rainbow ombre nails feel like a breath of fresh air. Clients tell me it makes them happy just to look down at their hands during the day, and honestly I feel the same way when I finish a set.
Tools And Supplies You Need Before Starting Rainbow Ombre Nails
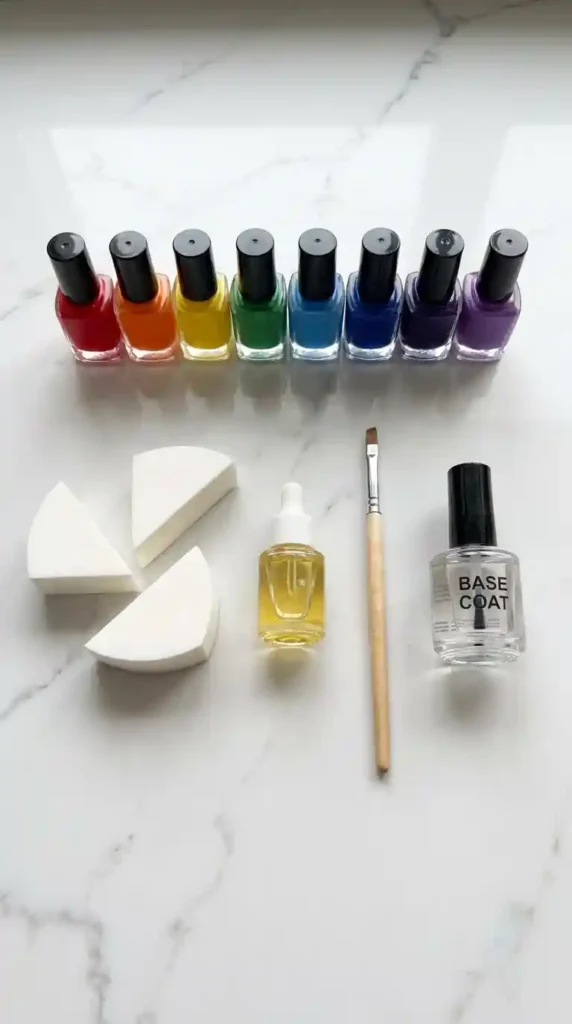
Before you even think about opening a polish bottle, gather your supplies. Rushing this step is the number one reason home attempts at rainbow ombre nails end up messy.
Here is what you actually need on your table:
A base coat suited to your nail type, whether that is a ridge filling base or a simple clear protective base.
Four to six polish colors in the rainbow order you want, or gel polish if you prefer that route.
A makeup sponge cut into small triangular pieces, or a specific nail ombre sponge sold at beauty supply stores.
A shallow palette or a piece of foil to blend colors on before applying to the nail.
Cuticle oil, because your skin around the nail will need some love after all the dabbing.
Tape or liquid latex to protect your skin from stray polish.
A good top coat, glossy or matte depending on your preference.
Small angled brush or clean up brush dipped in acetone for fixing edges.
I know it feels like a lot for what seems like a simple manicure, but rainbow ombre nails are genuinely a multi step process. Skipping supplies almost always shows up in the final result.
Choosing The Right Color Palette For Rainbow Ombre Nails
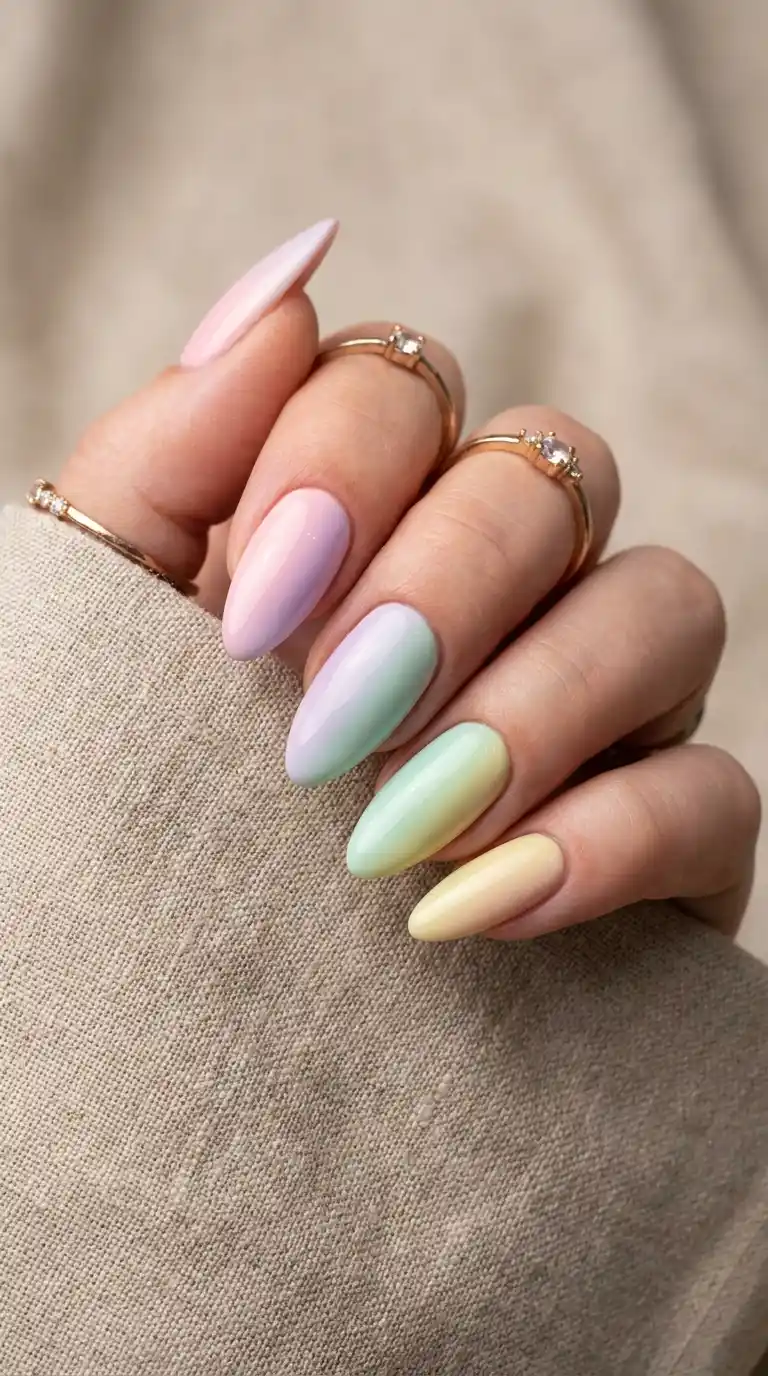
This is honestly my favorite part of the whole process and also the part where most people go wrong. Picking random rainbow shades and expecting them to blend nicely does not always work. Color theory matters here even if you never studied it formally.
The trick with rainbow ombre nails is choosing colors that sit next to each other on the color wheel, or that share a similar undertone, so the transitions feel smooth rather than jarring.
Warm Tone Rainbow Ombre Nails
A warm palette for rainbow ombre nails usually moves through red, orange, yellow, and sometimes a warm pink or coral thrown in. This combination feels energetic and summery. I love this palette for clients who want something bold that still reads as cohesive rather than chaotic.
Cool Tone Rainbow Ombre Nails
Cool rainbow ombre nails lean into blue, purple, teal and sometimes a cool toned green. This version tends to look more elegant and less playful, which makes it great for clients who want the rainbow effect without it feeling too loud for work or formal settings.
Pastel Rainbow Ombre Nails
Pastel rainbow ombre nails soften every shade with white mixed in. Baby pink, lilac, mint, butter yellow and sky blue blended together give a dreamy, cotton candy feel. This is the version I recommend most for beginners because pastel shades forgive small blending mistakes far more easily than saturated colors do.
Step By Step Tutorial: How To Create Rainbow Ombre Nails At Home
Let us get into the actual technique now. I have taught this method to clients who had never done nail art before in their life, and with a bit of practice they got results they were genuinely proud of.
Prepping Your Natural Nails
Every good manicure starts before any color touches the nail. Push back your cuticles gently, shape your nails to your preferred length, and lightly buff the surface so the polish has something to grip onto. Wipe the nail down with a bit of acetone on a lint free pad to remove any oils.
Apply your base coat and let it dry completely. This step protects your natural nail from staining, which matters a lot when you are working with several bold colors for rainbow ombre nails.
Also Read: Purple Summer Nails: 25 Gorgeous Ideas Every Nail Lover Needs To Try This Season
The Sponge Technique For Rainbow Ombre Nails
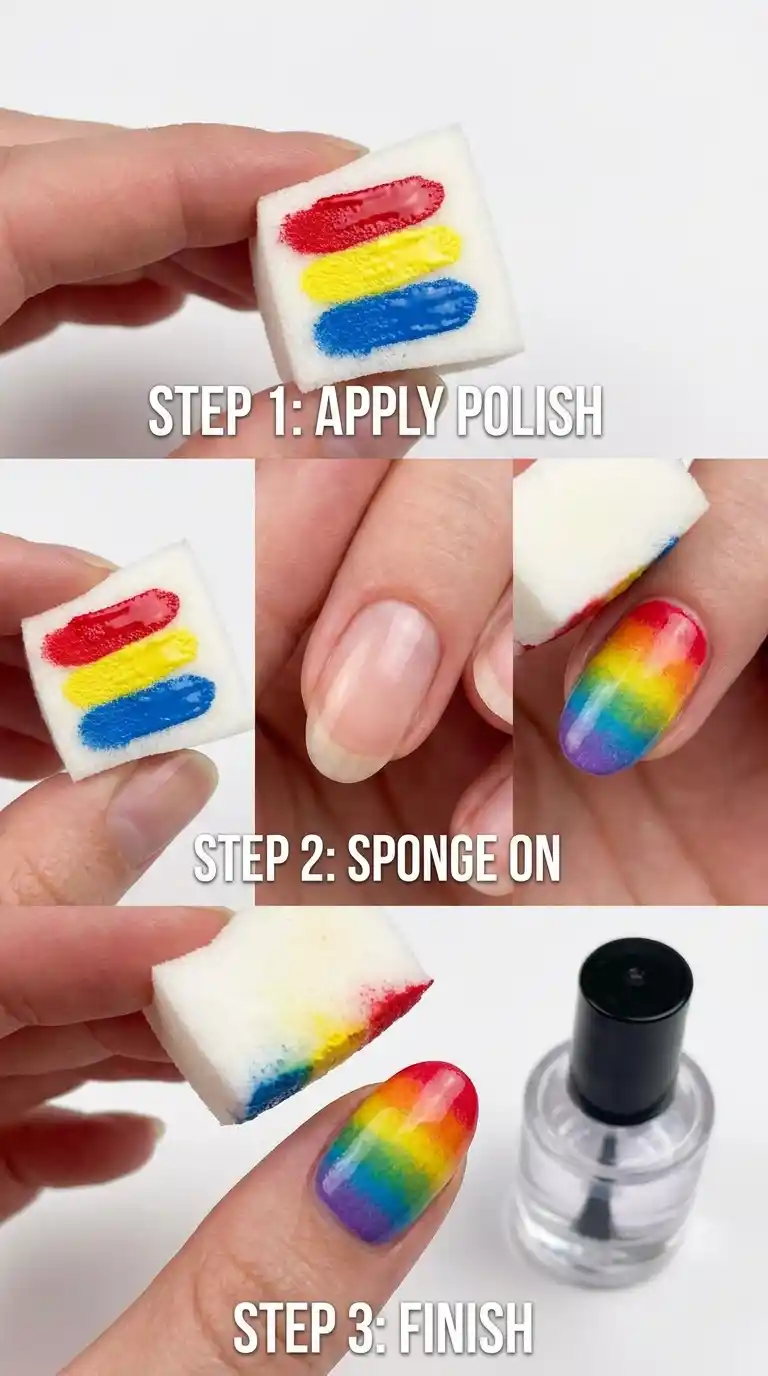
This is the classic method and still my go to for most rainbow ombre nails.
Paint your chosen colors in stripes directly onto your makeup sponge, slightly overlapping where each color meets the next. The overlapping is what creates that blended zone once you dab it onto the nail.
Press the sponge onto your nail firmly, then dab up and down a few times in the same spot without sliding it sideways. Sliding causes streaks, while dabbing creates that soft, airy gradient look that rainbow ombre nails are known for.
Repeat this two or three times, reapplying color to the sponge each time, until the coverage looks even and opaque.
Blending Without Harsh Lines
If you notice a hard line between two colors on your rainbow ombre nails, do not panic. Take a clean corner of the sponge, dip it lightly into whichever color sits closer to that line, and dab gently right over the seam. This softens the transition without ruining the color underneath.
Another trick I use often is going back over the entire nail with a very thin layer using the sponge one more time, moving it slightly diagonally. This evens out any patchiness and makes the whole gradient feel more unified.
Sealing And Finishing
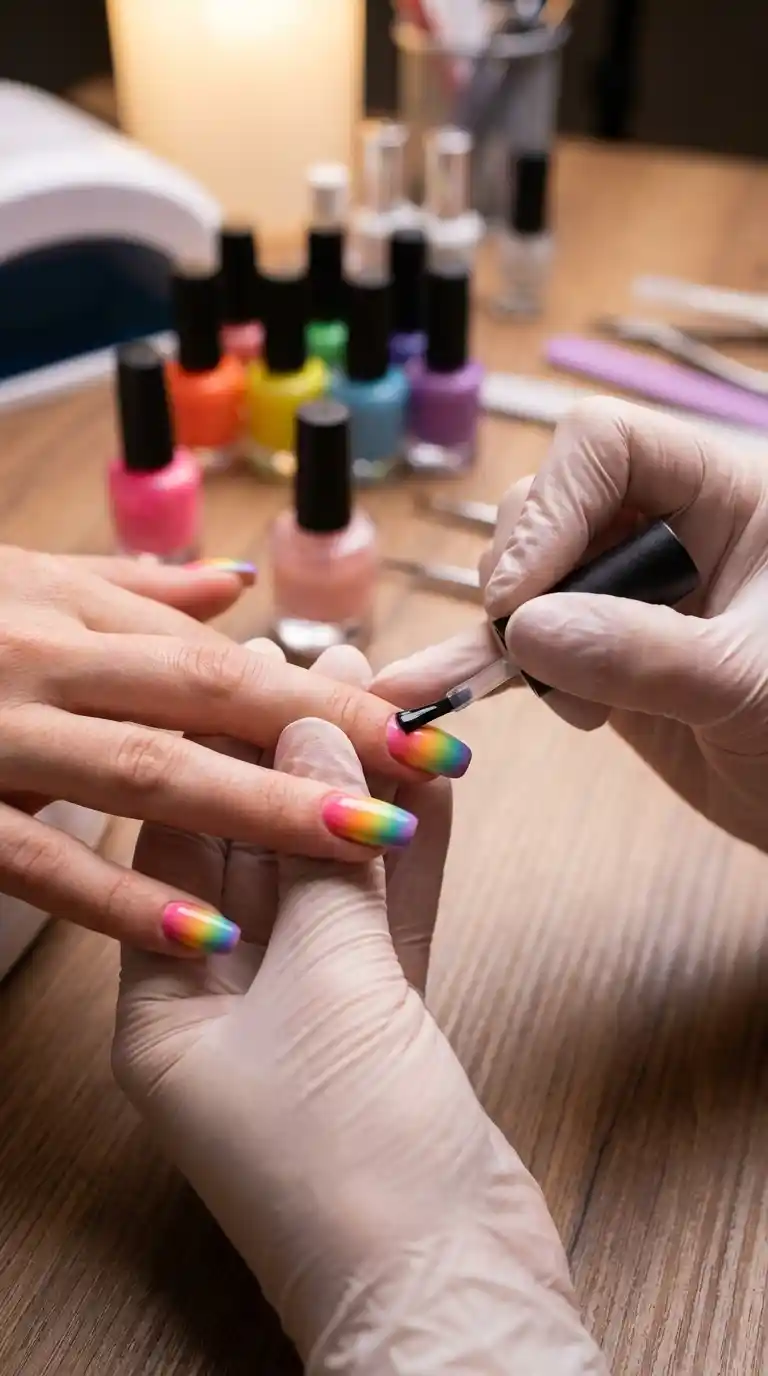
Once you are happy with the blend, clean up the skin around your nails using a small brush dipped in acetone. This step makes a bigger difference than people expect, since clean edges are what separate an amateur looking manicure from a professional one.
Apply a glossy top coat to seal everything in and add shine. Rainbow ombre nails genuinely glow under a good top coat, so do not skip this step even if you are tired by this point in the process.
Rainbow Ombre Nails On Different Nail Shapes

I get asked constantly whether rainbow ombre nails look better on certain nail shapes. The truth is they work on all of them, but the visual effect changes depending on the shape you choose.
Almond Shape
Almond nails elongate the gradient beautifully. Because the nail tapers toward the tip, rainbow ombre nails on almond shapes feel like the colors are flowing to a point, which looks especially elegant with a vertical color transition from base to tip.
Square Shape
Square nails give rainbow ombre nails a bold, graphic look. The flat tip means the final color at the top of the gradient really stands out, almost like a punctuation mark at the end of the blend.
Coffin Shape
Coffin, sometimes called ballerina shape, gives the most surface area to work with. This is honestly the shape I recommend if you want to really show off a detailed rainbow ombre nails design with multiple colors, since there is more room for a smooth, multi stage gradient.
Must Read : 87 Gorgeous Orange Nail Ideas That Will Make Your Hands Impossible To Ignore
Rainbow Ombre Nails With Gel Polish Versus Regular Polish
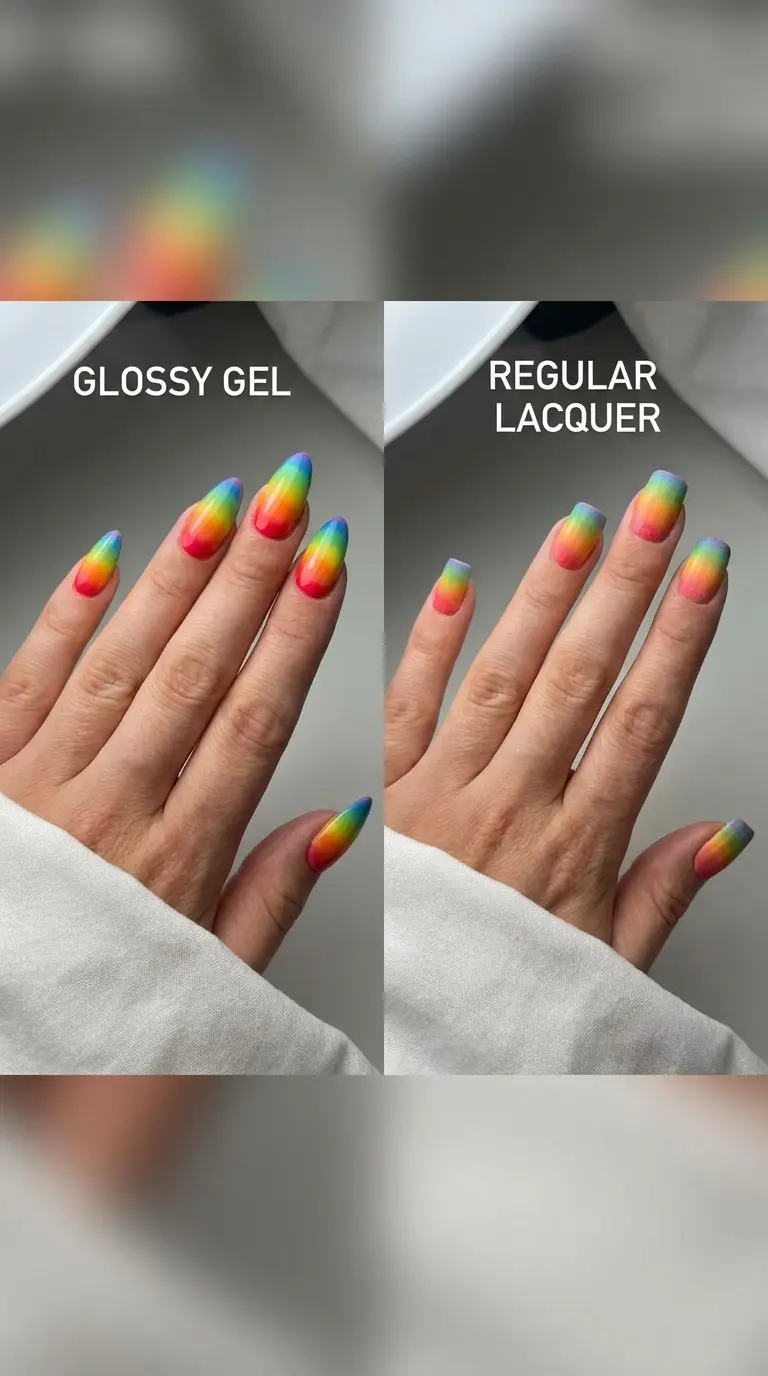
Clients often ask me which formula gives better rainbow ombre nails, gel or regular lacquer. Both have their place, and I use each depending on what the client needs.
Regular polish rainbow ombre nails dry faster between layers in some ways since you are not curing under a lamp, but the color can move around more if you are not careful, which sometimes muddies the blend.
Gel polish rainbow ombre nails require curing each layer or color under a UV or LED lamp, which slows the process down. However, gel gives you more control since the polish stays exactly where you place it until you cure it, and the final finish tends to be glossier and longer lasting.
If you are new to rainbow ombre nails, I actually recommend starting with regular polish since mistakes are easier to wipe away and redo without wasting gel product. Once you feel confident with the blending motion, move on to gel for a more durable result.
Rainbow Ombre Nails For Different Seasons
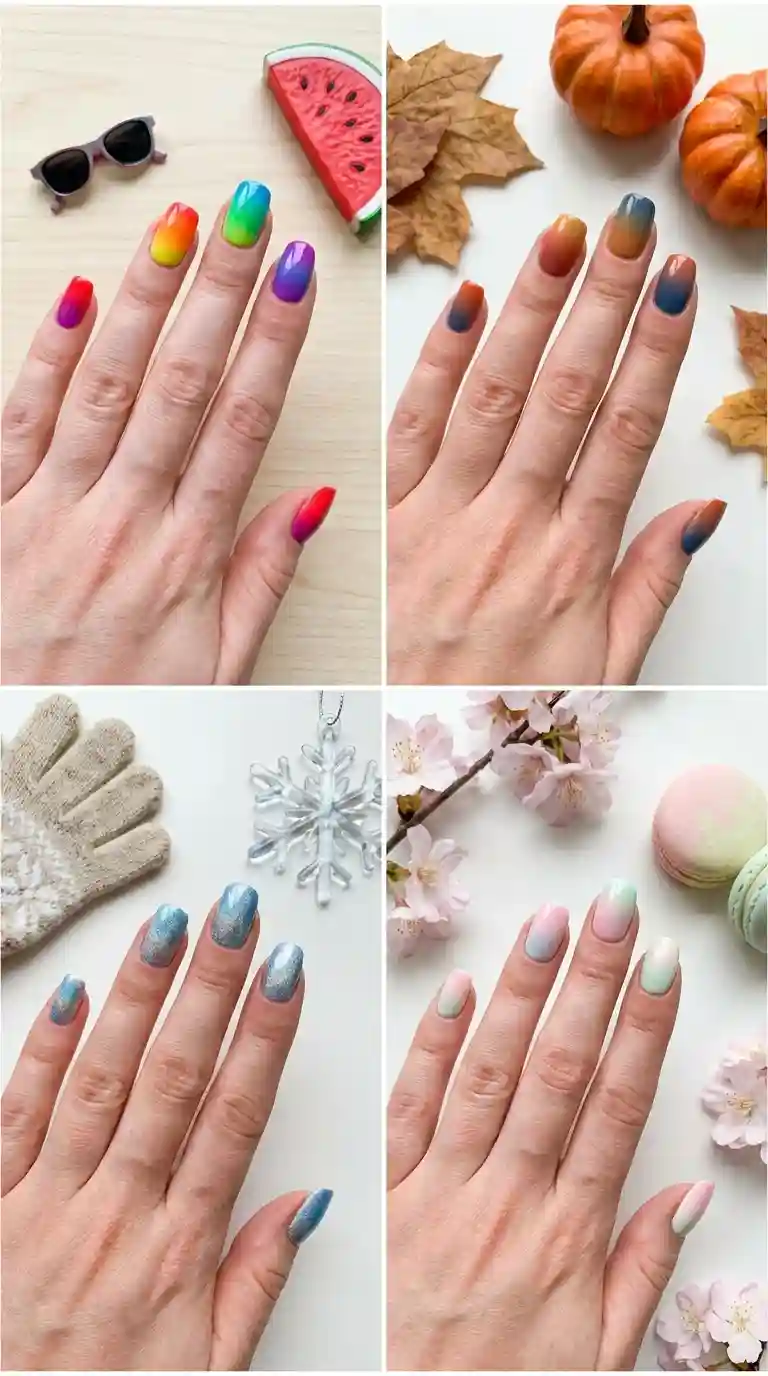
Something I love recommending to clients is adjusting their rainbow ombre nails palette based on the time of year. It keeps the style feeling fresh even if you get this manicure repeatedly.
Summer
Bright, saturated rainbow ombre nails fit summer perfectly. Think beach days, festivals, bright sunshine. Bold reds moving into oranges and yellows capture that energy well.
Fall
For autumn, I like shifting rainbow ombre nails toward deeper, muted tones. Burnt orange, mustard yellow, deep burgundy and forest green create a rainbow feel that still fits the cozy fall mood.
Winter
Winter rainbow ombre nails can lean icy and cool, using blues, silvers, purples and even a touch of white to mimic frost. Adding a bit of shimmer here makes the gradient feel festive without needing full glitter nails.
Spring
Spring is the season pastel rainbow ombre nails were made for. Soft pinks, lilacs, mints and light yellows echo blooming flowers and fresh starts, and honestly this is the season I get the most requests for this style.
Common Mistakes To Avoid With Rainbow Ombre Nails
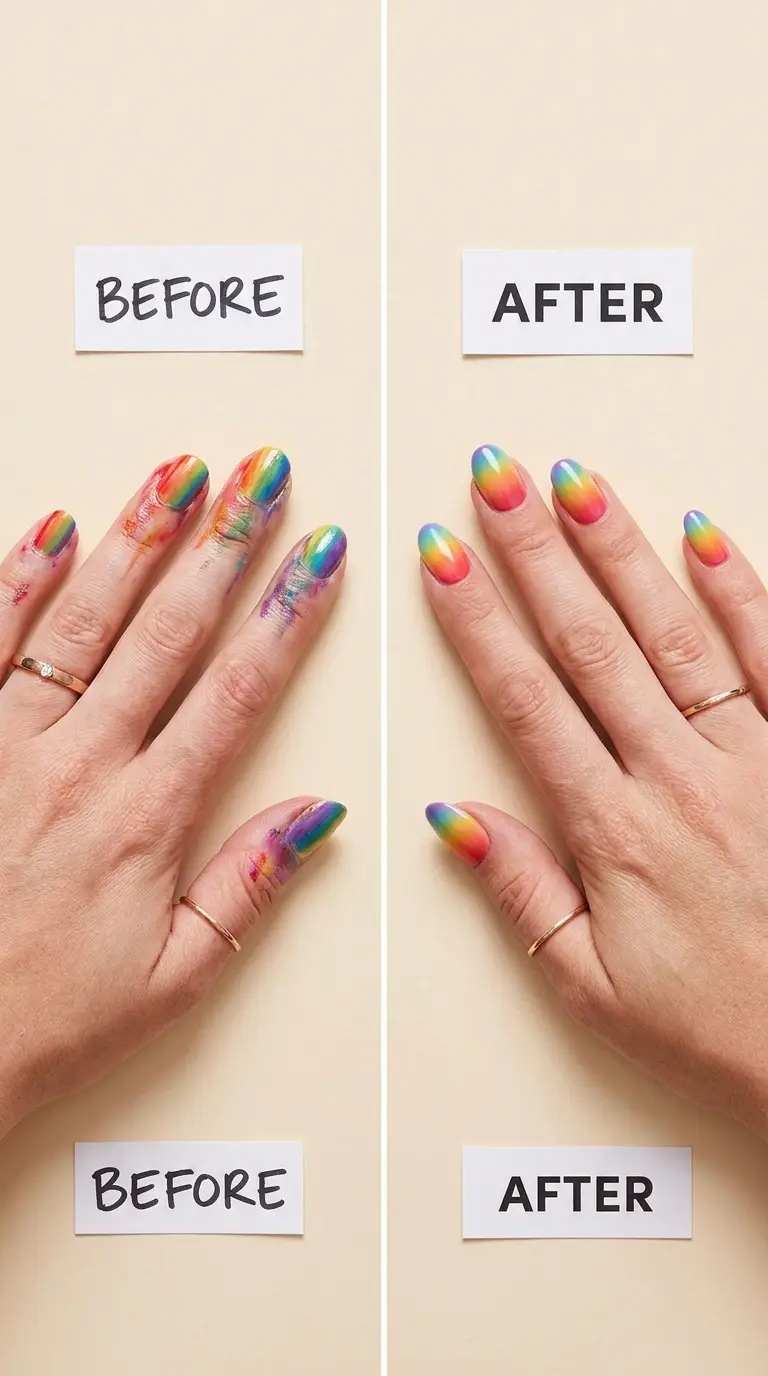
I have fixed a lot of botched rainbow ombre nails over the years, usually attempted at home the night before an event. Here are the mistakes I see over and over.
Using too many colors at once. More than five or six shades on one small nail tends to look muddy rather than gradient like. Stick to a tighter palette and let the blending do the visual work.
Not letting layers dry between dabs. Wet polish mixing together on the sponge or nail creates a grayish, dull result instead of a clean gradient.
Sliding the sponge instead of dabbing. This single habit is responsible for most streaky rainbow ombre nails attempts I have seen.
Skipping the skin cleanup. Even a perfect gradient looks sloppy if there is stray polish smeared around the cuticle and skin.
Choosing colors with clashing undertones. Mixing a very warm orange directly next to a very cool blue without a transition color between them can create a murky brown zone where they meet.
Also Read : Hot Pink Nail Designs: 47 Bold, Beautiful Ideas Every Nail Lover Needs To Try
How To Make Rainbow Ombre Nails Last Longer
Rainbow ombre nails involve multiple thin layers of polish, which can sometimes mean they are more prone to chipping if not sealed properly. A few habits genuinely extend the life of this manicure.
Always finish with a high quality top coat and reapply it every two to three days if you are using regular polish, since this adds a fresh protective layer and keeps the shine looking new.
Wear gloves while doing dishes or cleaning with harsh chemicals. Water and cleaning products are two of the biggest enemies of any manicure, rainbow ombre nails included.
Moisturize your cuticles daily. Dry, cracking skin around the nail can lift polish at the edges faster than you would expect.
Avoid using your nails as tools to open cans, peel stickers or scratch things. I know this sounds obvious but it is genuinely the top reason clients come back with chipped tips within a week.
Rainbow Ombre Nails For Short Nails
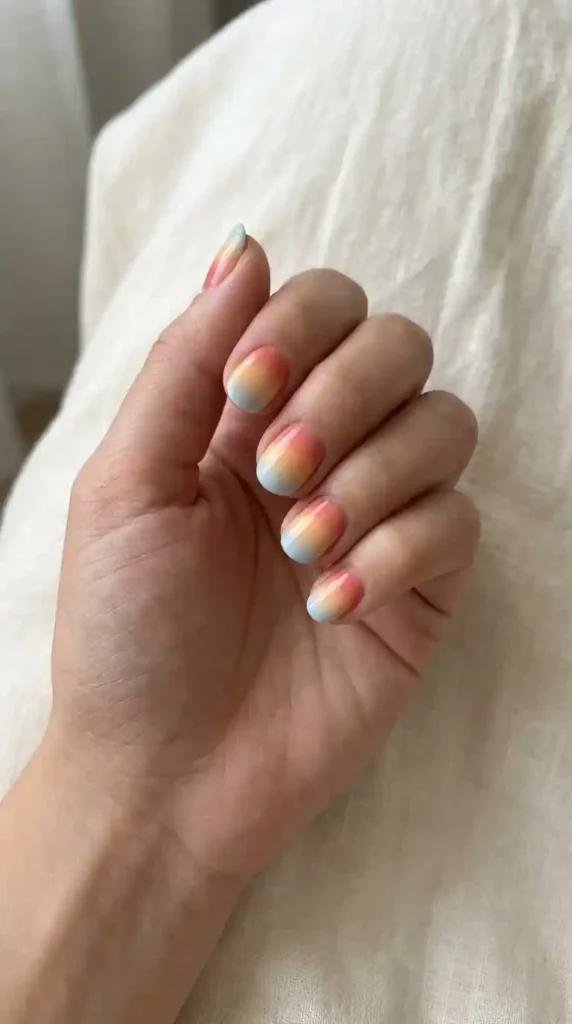
You do not need long nails to enjoy this style. Rainbow ombre nails on short, natural length nails actually look incredibly chic and are having a moment right now among people who want the color payoff without the length maintenance.
The key with short nails is using fewer color transitions, maybe three shades instead of five, since there simply is not as much surface area to work with. Keeping the gradient tight and close together prevents the design from looking cramped or rushed.
I personally think rainbow ombre nails on short square or short round nails look incredibly fresh and modern, almost like a grown up, sophisticated take on the trend.
Rainbow Ombre Nails Nail Art Add Ons
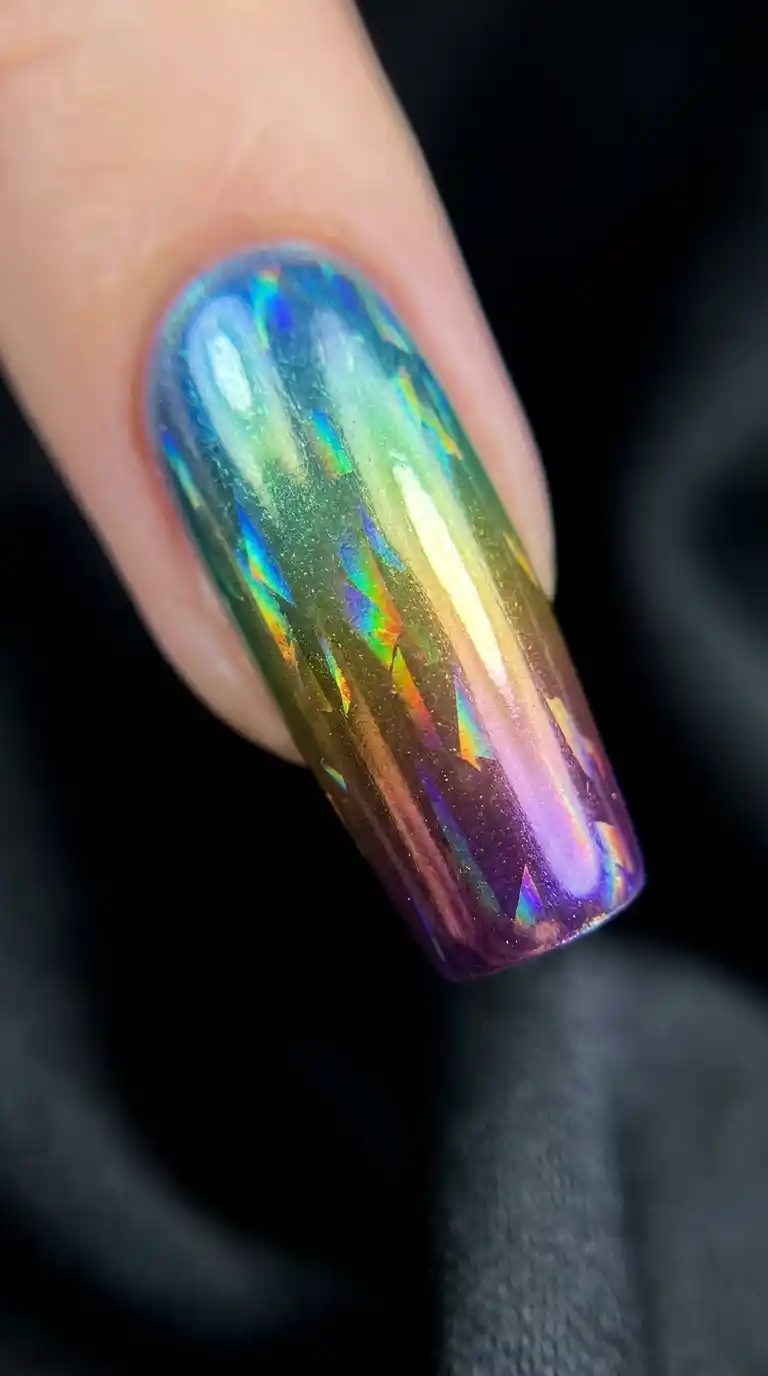
Once you have mastered the base gradient, there are plenty of ways to elevate rainbow ombre nails even further.
Glitter Accents
A light dusting of fine glitter over the tips or along one edge adds sparkle without overpowering the color blend. I usually apply this only on the ring finger or as an accent nail rather than across the whole set.
Chrome Finish
A chrome powder applied over the gradient gives rainbow ombre nails an almost holographic, metallic sheen. This version photographs beautifully and has become a favorite request among younger clients.
Matte Top Coat
Swapping the usual glossy top coat for a matte one completely changes the mood of rainbow ombre nails. The colors read as softer and more muted, which some clients prefer for everyday wear.
[IMAGE PROMPT 10: Artistic close up photograph of a single fingernail showing rainbow ombre nails with a chrome metallic finish, catching light in rainbow reflections, dark background for contrast, high end nail art macro photography style]
Rainbow Ombre Nails For Special Occasions
I have done rainbow ombre nails for birthdays, pride celebrations, festivals, and even a few weddings where the bride wanted something joyful and unexpected instead of the usual neutral bridal manicure.
For pride events specifically, rainbow ombre nails carry an extra layer of meaning beyond just being a pretty design, which is something I always love being part of when clients request it.
For weddings, I tend to soften the palette into pastels so it still feels celebratory but does not clash with a white dress or traditional photos.
Also Read : Green and Pink Nails: The Ultimate Guide to the Prettiest Color Clash You Will Ever Wear
How Much Do Rainbow Ombre Nails Cost At A Salon
Pricing for rainbow ombre nails varies quite a bit depending on your location, the salon’s reputation, and whether you choose gel or regular polish. In most areas within the United States, expect to pay somewhere between forty five and ninety dollars for a full set, with gel versions and add ons like chrome or glitter pushing the price higher.
Salons in bigger cities or those known for detailed nail art tend to charge more, sometimes upward of one hundred dollars for an elaborate, multi color rainbow ombre nails design with extra detailing.
It is worth asking your nail tech for a consultation photo review before booking, since not every salon specializes in ombre techniques even if it is listed on their menu.
DIY Versus Salon Rainbow Ombre Nails
I say this as someone who does nails professionally, there is real value in both routes depending on your goals.
DIY rainbow ombre nails are great for practicing a new skill, saving money, and having full creative control over your color choices. The trade off is that your first few attempts will likely have some imperfections, and that is completely normal.
Salon rainbow ombre nails give you a polished, precise result faster, especially if you are preparing for a specific event and cannot afford trial and error. A trained nail tech also has access to a wider color range and professional grade products that tend to last longer.
My honest advice, if you have an event this weekend, book a salon appointment. If you have a free afternoon and want to learn something new, grab a sponge and practice at home.
Maintaining Your Rainbow Ombre Nails Between Appointments
Whether you did your rainbow ombre nails yourself or had them done professionally, a little maintenance goes a long way.
Apply cuticle oil every single day, even when your nails feel fine. This keeps the surrounding skin healthy and prevents polish from lifting at the edges.
If you notice a small chip, resist the urge to peel it off. Peeling can take layers of your natural nail with it. Instead, gently file the chipped area smooth or dab a tiny bit of matching color over it as a quick fix.
Schedule a fill or touch up appointment around the two to three week mark if you got gel rainbow ombre nails, since regrowth becomes visible around this time and can throw off the gradient’s starting point.
Also Read : Red and Gold Nail Design: The Ultimate Guide to Bold, Glamorous Nails That Turn Heads
My Honest Experience Doing Rainbow Ombre Nails On Clients
Over the years I have painted more rainbow ombre nails sets than I can accurately count, and each one still feels a little different depending on the client’s skin tone, nail shape and color preferences. What I have learned is that patience matters more than talent here. The clients who trust the process, who let the sponge do its job instead of rushing to fix every tiny imperfection with a brush, always end up with the smoothest blends.
I have also learned that rainbow ombre nails are forgiving in a way people do not expect. Even if your first attempt looks a bit uneven, a coat of top coat and a bit of confidence usually pulls the whole look together far better than you think it will while you are in the middle of the process, frustrated and covered in stray polish.
If there is one thing I tell every client considering rainbow ombre nails for the first time, it is this. Pick colors that make you happy to look at, not just colors that are trending. You are going to be staring at your hands for the next two to three weeks, so choose a palette that genuinely brings you joy.
Frequently Asked Questions
How do you do rainbow ombre nails at home?
You do rainbow ombre nails at home using a makeup sponge, several polish colors applied in stripes, and a dabbing motion to blend the shades together on the nail before sealing with a top coat.
What colors work best for rainbow ombre nails?
Colors that sit close together on the color wheel work best for rainbow ombre nails, such as red moving into orange and yellow, or blue moving into purple and pink, since neighboring shades blend more smoothly than opposites.
How long do rainbow ombre nails last?
Rainbow ombre nails typically last one to two weeks with regular polish and up to three weeks with gel polish, depending on how well the nails are maintained and protected from daily wear.
Can you do rainbow ombre nails on short nails?
Yes, rainbow ombre nails work well on short nails, though it is best to limit the design to three or four colors since there is less surface area for a longer gradient.
What sponge is best for rainbow ombre nails?
A makeup sponge cut into small triangular pieces or a dedicated nail art ombre sponge both work well for rainbow ombre nails, as their texture creates a soft, airy gradient effect.
Is rainbow ombre nails hard to do?
Rainbow ombre nails require practice but are not overly difficult once you understand the dabbing technique and choose colors that blend well together, making them achievable for most beginners with patience.
How many colors should I use for rainbow ombre nails?
Most rainbow ombre nails designs look best with four to six colors, since too many shades on one nail can create a muddy appearance instead of a clean gradient.
Do rainbow ombre nails work with gel polish?
Yes, rainbow ombre nails can absolutely be done with gel polish, and many nail techs prefer gel since it holds its position better during blending and offers a longer lasting, glossier finish.
How much does it cost to get rainbow ombre nails done professionally?
Professional rainbow ombre nails typically cost between forty five and ninety dollars depending on your location, salon experience level, and whether you choose gel polish or additional nail art add ons.
Can rainbow ombre nails be done on acrylics?
Yes, rainbow ombre nails can be applied over acrylic extensions, and many clients choose this combination for extra length and a smooth surface that makes blending easier
Final Thoughts On Rainbow Ombre Nails
Rainbow ombre nails are one of those manicure styles that manage to feel both nostalgic and completely fresh at the same time. Whether you attempt this look at home with a cut up makeup sponge or book a session with your favorite nail tech, the process rewards patience and a willingness to experiment with color.
Every set of rainbow ombre nails I create ends up looking a little different, and honestly that is the part I love most about this style. There is no single correct way to do it, only your own version of the rainbow, blended onto ten small canvases at the tips of your fingers.
If you try this look, take your time with the blending, choose colors that genuinely excite you, and do not stress over small imperfections. A confident top coat and a bit of practice will carry your rainbow ombre nails a long way