
Some nail trends whisper and some nail trends absolutely shout, and peacock nail designs fall firmly into that second group. There is nothing subtle about a manicure inspired by one of the most visually striking birds in the world, and that is exactly why clients keep asking for it season after season.
I still remember the first time a client brought in a photo of a peacock feather and asked if I could turn that into a manicure. At the time I underestimated how much detail and patience it would take, but the finished result was so stunning that I ended up photographing it for my own portfolio. Since then, peacock nail designs have become one of my most requested statement looks, especially for weddings, formal events and anyone who simply wants their hands to do a little bit of showing off.
In this guide I want to share everything I have learned about peacock nail designs over the years, from color theory and technique to shape recommendations and aftercare. This is not a generic overview pulled from surface level research. This is what actually happens in my chair, based on real client requests and real hands on experience.
Also Read : Leo Nails: The Bold Zodiac Manicure Trend Every Fire Sign Needs To Try
Why Peacock Nail Designs Continue To Captivate People
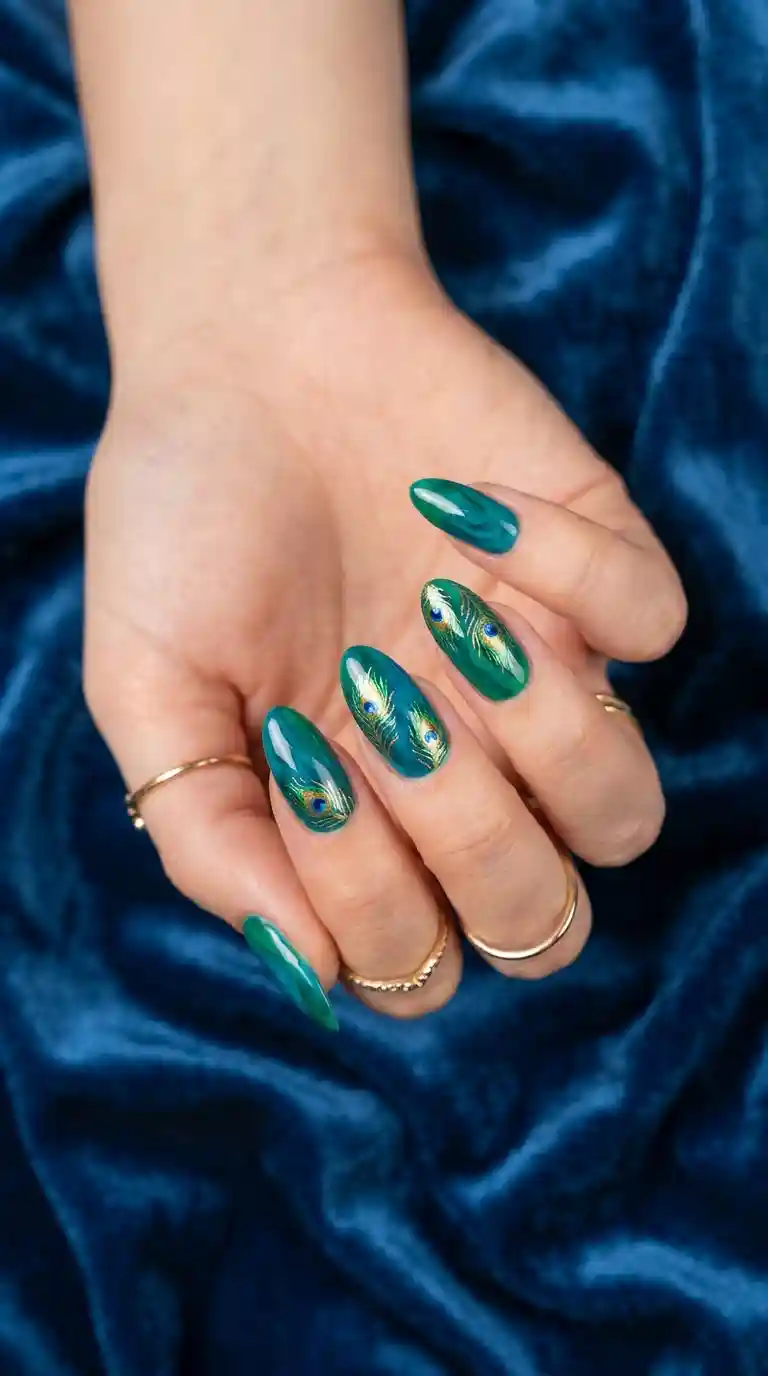
There is a reason peacock nail designs never seem to fully go out of style, even as other nail trends come and go with the seasons. The color combination alone, deep teals, rich blues, emerald greens and touches of gold, is simply stunning on its own, and that is before any detailed feather artwork even gets added.
Peacock nail designs also carry a certain symbolic weight that people connect with. Peacocks have long represented beauty, confidence and a bit of glamorous flair, and choosing this design often feels like a small personal statement rather than just a color choice. Clients tell me they feel bold and elegant wearing this design, which is not something every nail trend manages to achieve.
From a purely visual standpoint, the natural iridescence of peacock feathers translates beautifully into nail art, especially with the chrome powders and color shifting polishes available today. This has made peacock nail designs even more achievable and popular over recent years, since the technology to recreate that shimmering effect has genuinely caught up with the vision.
My Experience Creating Peacock Nail Designs In The Salon
Working behind the chair for years, I have noticed that clients who request peacock nail designs tend to be looking for something memorable. This is rarely someone’s first manicure or a casual weekday request. It usually comes attached to an event, a milestone or simply a desire to try something bold and different for once.
What continues to surprise me is how differently each client interprets this theme. Some want a literal, detailed feather painted across a single accent nail, while others prefer an abstract approach using color blocking and shimmer to hint at the peacock palette without any literal imagery at all. Both interpretations fall comfortably under the umbrella of peacock nail designs, and honestly, both look incredible in their own way.
Over time, peacock nail designs have become one of my favorite categories to work within because they allow for so much creative freedom. Unlike some trends with a fairly rigid formula, this one leaves room for genuine artistic interpretation, which keeps the work exciting for me even after painting dozens of variations.
Must Read : Exotic Nail Ideas That Turn Every Manicure Into A Statement Worth Chasing
Choosing The Right Color Palette For Peacock Nail Designs
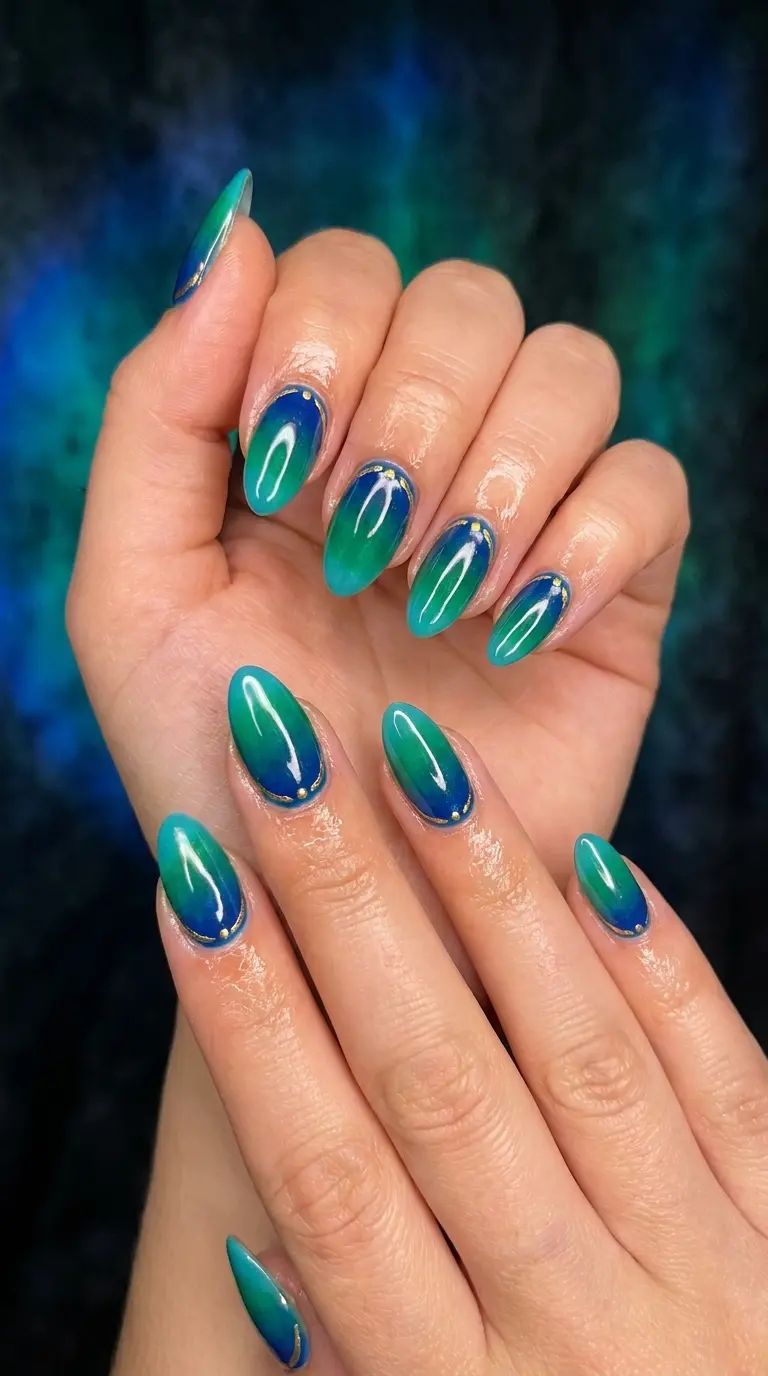
Getting the color palette right is honestly the foundation of any successful peacock nail design. The classic combination includes a deep sapphire blue, a rich emerald or forest green, a touch of teal to bridge the two, and gold or bronze for detailing and outlines.
I usually start by deciding on a dominant color rather than trying to fit every shade onto a single nail. Sometimes I lean the whole set toward blue with green as an accent, and other times I flip that balance depending on what looks best against the client’s skin tone. From there, gold detailing ties everything together and gives the design that unmistakable peacock feel.
Jewel Toned Peacock Nail Designs For Maximum Impact
For clients who want the boldest possible version of this trend, I recommend leaning into fully saturated jewel tones rather than softer, muted shades. Deep sapphire, rich emerald and a touch of amethyst purple create an incredibly rich, luxurious base that mimics the natural intensity of real peacock feathers.
This jewel toned approach to peacock nail designs tends to photograph beautifully under both natural and artificial lighting, which is part of why it remains such a popular choice for weddings, formal events and photoshoots.
Peacock Nail Designs With Hand Painted Feather Details
The feather itself is the true centerpiece of most peacock nail designs, and learning to paint one well genuinely takes practice. I usually begin with a base shape resembling a long teardrop, then build outward with layered strokes of blue, green and a touch of purple to mimic the natural gradient found in real feathers.
The signature eye shaped detail near the top of each feather is what really sells the design. I paint this using a small circular shape in a deep blue or black, surrounded by a ring of bronze or gold, then finish with fine, delicate brush strokes radiating outward to represent the individual feather barbs.
This level of detail usually works best as a single accent nail within a broader set, since replicating a fully painted feather across all ten nails can start to feel overwhelming rather than elegant. One striking accent nail alongside complementary solid colors is my go to approach for peacock nail designs that need to feel polished rather than busy.
Chrome And Iridescent Peacock Nail Designs
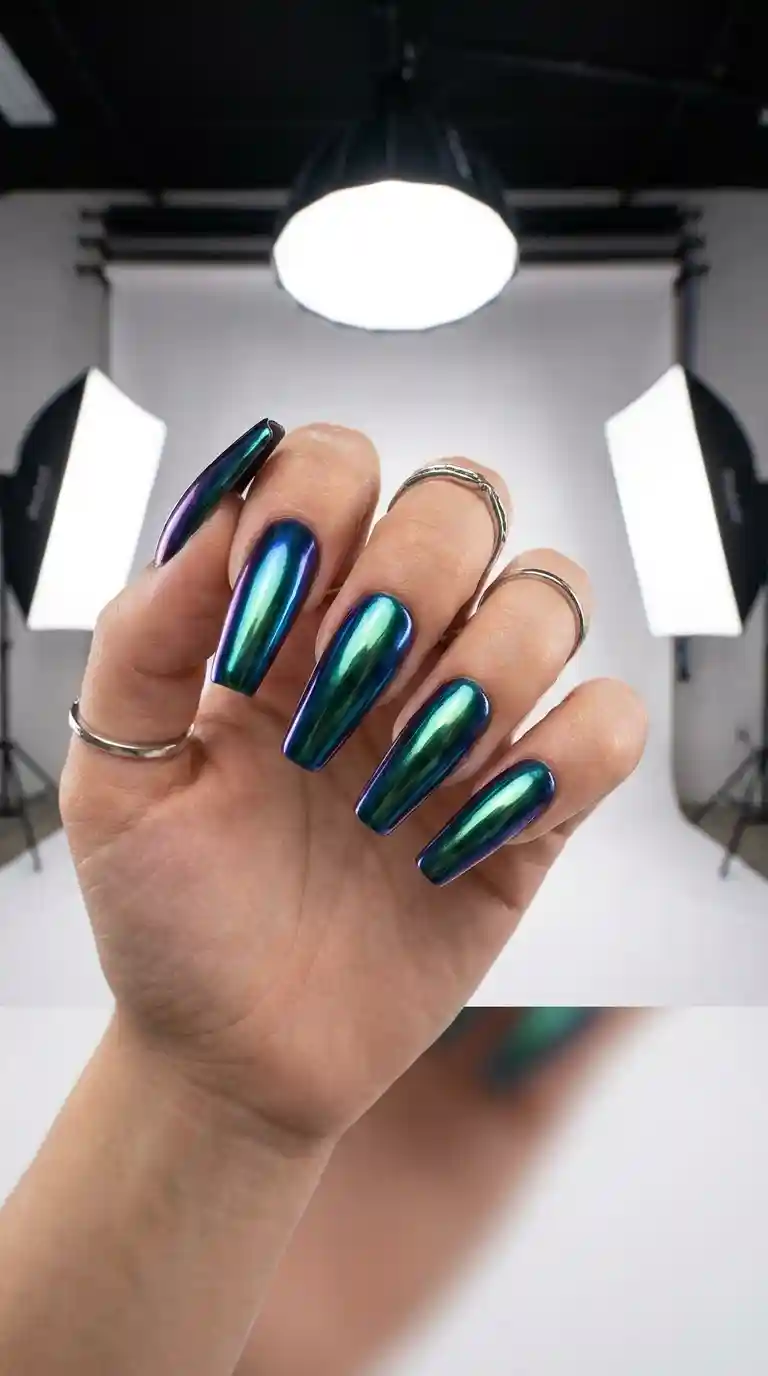
One of the most exciting developments in nail art over recent years has been the availability of chrome powders and color shifting polishes, and these products have completely transformed what is possible with peacock nail designs. The natural iridescence of a real peacock feather is notoriously difficult to replicate with flat polish alone, but chrome finishes get remarkably close.
I usually apply a dark base color first, then buff on a blue to green shifting chrome powder that changes appearance depending on the angle of light. This technique alone, without any additional painted detail, already reads clearly as inspired by peacock feathers, which makes it a fantastic option for clients who want the effect without the time commitment of detailed hand painting.
Combining chrome powder with just a few fine gold lines or a single painted feather eye on one accent nail creates a beautifully balanced result that captures both the shimmer and the detail associated with peacock nail designs.
Peacock Nail Designs With Gold Foil Accents
Gold plays an enormous role in making peacock nail designs feel complete, since it mimics the warm, metallic sheen found at the base of real peacock feathers. I love using gold foil specifically because it catches light in a way that flat gold polish simply cannot replicate.
For this technique, I usually apply a foil adhesive over specific areas of the nail, most often along the edges of a painted feather or as thin decorative lines near the cuticle, then press the gold foil sheet directly onto the tacky adhesive before peeling it away. The result is a crinkled, textured metallic finish that adds genuine dimension to the overall design.
Clients consistently tell me that the gold foil detailing is what makes their peacock nail designs feel truly luxurious, almost like a small piece of wearable art rather than a typical manicure.
Minimalist Peacock Nail Designs For Everyday Elegance
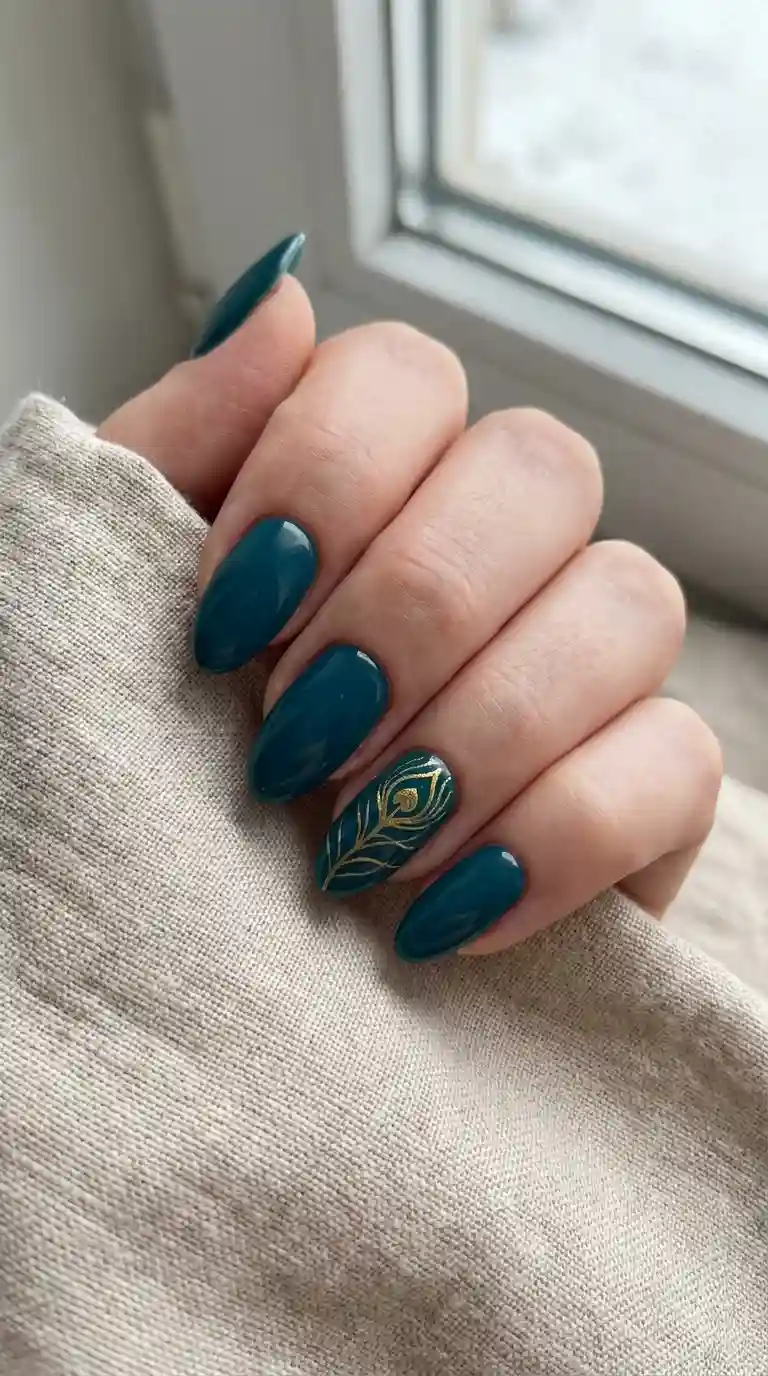
Not every client wants a fully illustrated feather across their nails, and that is completely understandable given how much detail the full version requires. Some of my favorite peacock nail designs are actually the simplest ones, relying on color and a few small suggestive details rather than a literal illustration.
A solid deep teal or emerald manicure with a single thin gold line near the cuticle already reads as peacock inspired without needing any painted imagery at all. This minimalist approach works beautifully for clients who love the color palette but want something they can comfortably wear to work or through their everyday routine.
Another simple option involves painting four nails in a rich jewel tone and just one nail with a small, abstract eye shape in gold, creating a subtle nod to the classic feather pattern without the time commitment of a fully detailed illustration.
Also Read : Plant Nails: The Ultimate Guide To Growing The Prettiest Botanical Nail Art At Home
Peacock Nail Designs For Short Nails
A question I hear constantly is whether short nails can handle a design this detailed, and the answer is absolutely yes, though the approach does need to shift slightly. Peacock nail designs work beautifully on shorter nail beds when the details are scaled down and concentrated rather than spread across a large surface.
For shorter nails, I usually skip the full feather illustration in favor of a small abstract eye shape near the cuticle, paired with a rich jewel toned base color. Fine gold lines also work wonderfully on shorter nails, since they add detail without requiring the extra surface area that a full feather design typically needs.
I have found that chrome and shimmer finishes look especially striking on shorter nails, since the shine draws attention on its own without needing extensive painted detail to feel complete.
Peacock Nail Designs For Long And Almond Shaped Nails
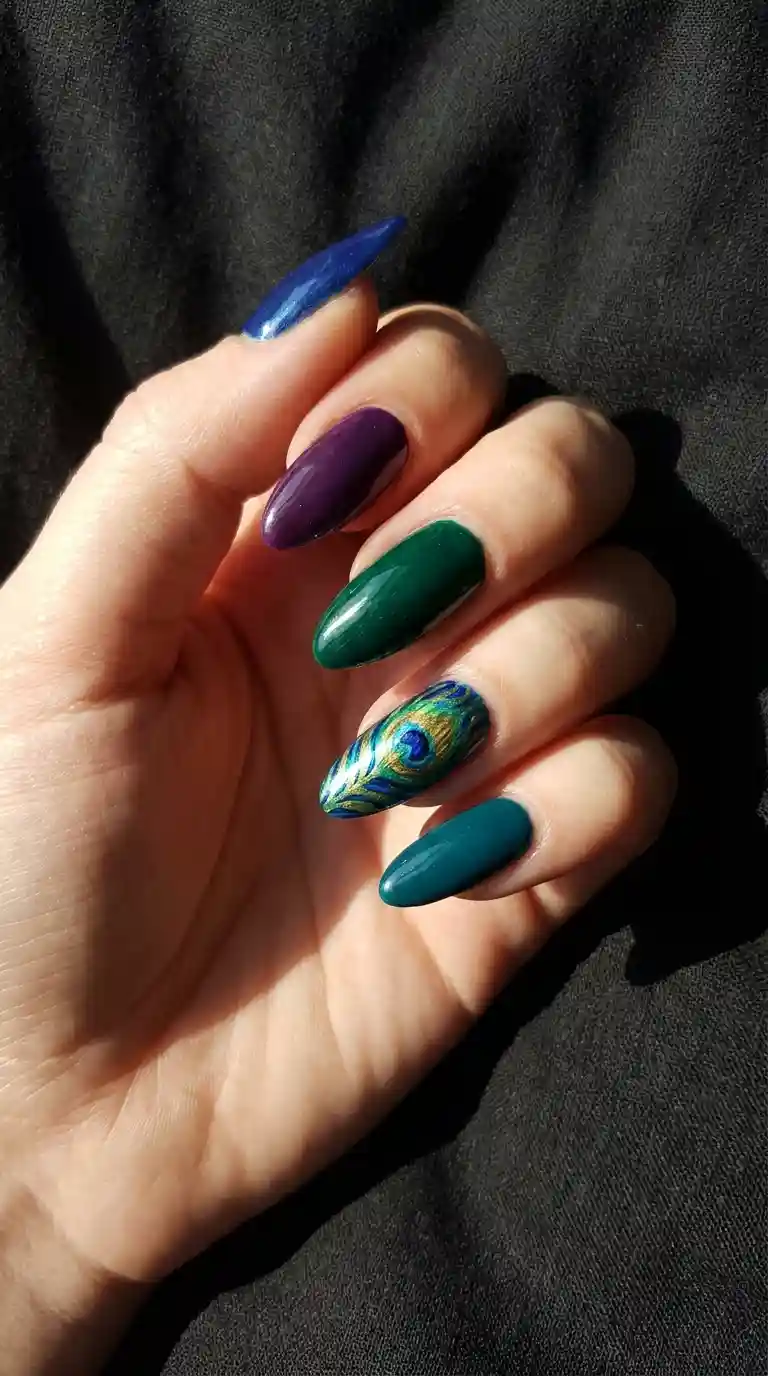
On longer nails, there is significantly more room to work with when creating peacock nail designs. I love using the extra surface area for a full feather illustration, layered gradients or even a small scene involving multiple feathers cascading across a single accent nail.
Almond and coffin shaped nails in particular provide a lovely elongated canvas that mimics the natural shape of an actual feather, which makes the finished design feel even more intentional and realistic. With longer nails, I also enjoy incorporating negative space into peacock nail designs, leaving small unpainted sections that create visual breathing room within an otherwise detailed illustration.
French tips get a beautiful makeover within this trend as well. Instead of the traditional white tip, painting the tip in deep teal or emerald against a nude or cream base gives an elegant, modern interpretation of peacock nail designs that still feels wearable for daily life.
Peacock Nail Designs With A French Tip Twist
The classic french manicure takes on a whole new personality when reimagined through this jewel toned lens. Rather than a plain white tip, I outline the very edge of each nail in a rich teal or emerald, sometimes adding a thin gold line right where the tip meets the natural base color.
I usually create this look using a thin striping brush to keep the tip line crisp and even. Adding a tiny gold dot or a small painted feather detail on just the accent nail elevates the design further while keeping the rest of the set clean and elegant.
This particular take on peacock nail designs tends to be popular among clients who want something eye catching enough for a formal event but still subtle enough to wear comfortably afterward.
Peacock Nail Designs With Rhinestones And Sparkle
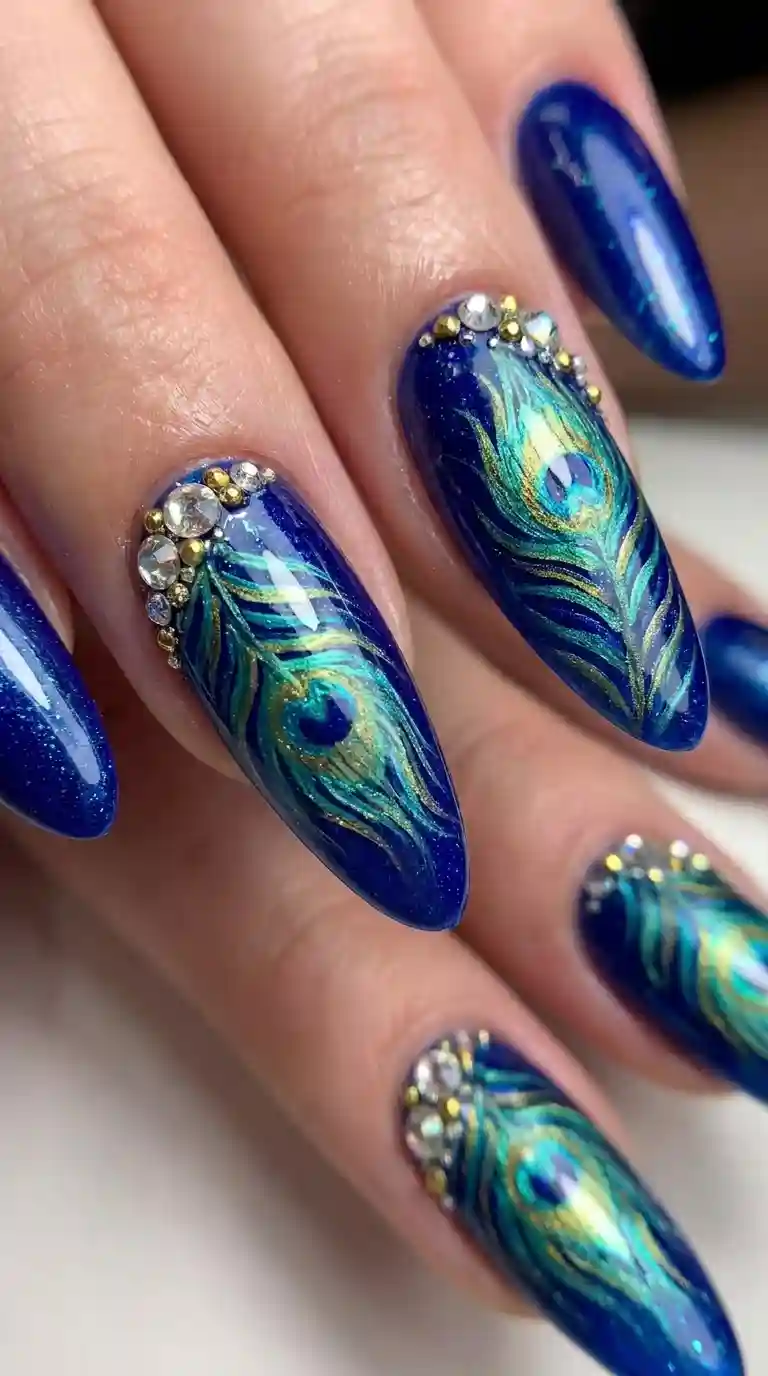
For clients attending weddings, galas or any formal event, adding a bit of sparkle to peacock nail designs takes the whole look to another level. Rhinestones placed strategically near the cuticle or scattered along a painted feather add genuine glamour without overwhelming the artwork underneath.
I usually reserve heavier rhinestone placement for one or two accent nails rather than the entire set, since too much sparkle across all ten nails can start to compete with the detailed featherwork rather than complementing it. A few carefully placed stones near the base of a painted feather, almost like dew drops, tend to look far more elegant than a fully encrusted nail.
Clear and gold rhinestones work particularly well within peacock nail designs, since they catch the light without introducing an entirely new color that might clash with the existing jewel tone palette.
Matte Finish Peacock Nail Designs For A Modern Twist
Matte finishes have grown incredibly popular across nearly every nail trend, and peacock nail designs translate surprisingly well into this softer, more velvety texture. A matte emerald or sapphire base gives the whole design a moodier, more sophisticated appearance that pairs beautifully with a single glossy accent featuring a painted feather.
I often recommend this combination to clients who want the drama of the color palette without the high shine typically associated with peacock nail designs. Pairing a matte base with just one glossy, detailed accent nail creates a lovely contrast in texture that still reads clearly as inspired by this theme.
Matte topcoats sometimes wear differently than glossy ones, so I always recommend sealing matte peacock nail designs with a matte specific topcoat to help the finish last as long as possible.
Must Read : Hibiscus Nail Art: The Ultimate Guide to Gorgeous Tropical Nails That Steal the Spotlight
Peacock Nail Designs For Acrylic And Gel Extensions
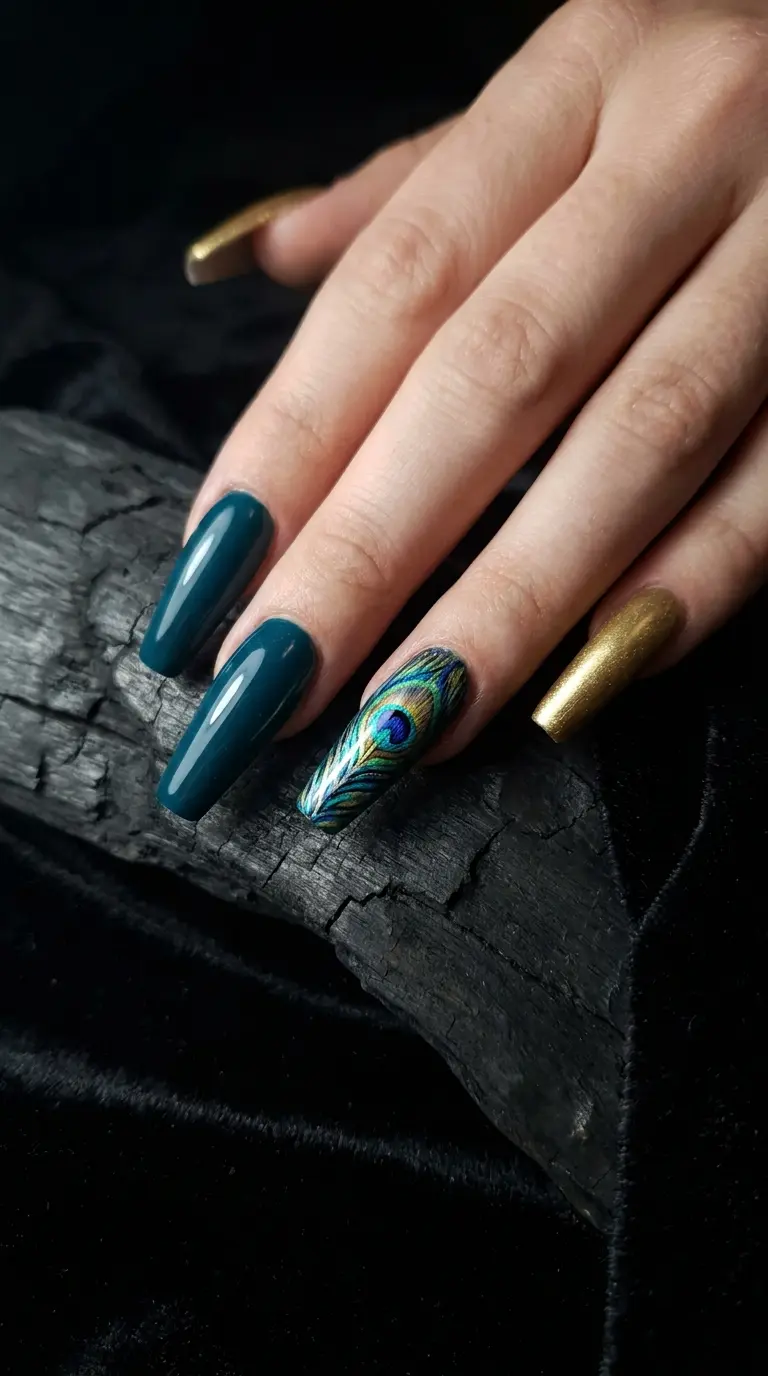
Clients frequently ask whether peacock nail designs work well on extensions, and the answer is absolutely yes. In fact, acrylic and gel extensions often provide even more surface area, which is particularly helpful for anyone wanting a fully detailed feather illustration rather than a smaller, simplified version.
For acrylic sets, I typically recommend an almond or coffin shape, since the elongated canvas closely mirrors the natural shape of a real feather, making the finished illustration feel more proportionate and realistic. Gel extensions offer a slightly more flexible, natural feeling alternative while still providing enough length for detailed artwork.
Regardless of which extension method you choose, the process for creating peacock nail designs stays fairly consistent. A smooth, evenly applied base color makes a significant difference in how crisp and clean the finished detail work ultimately looks.
How To Recreate Peacock Nail Designs At Home
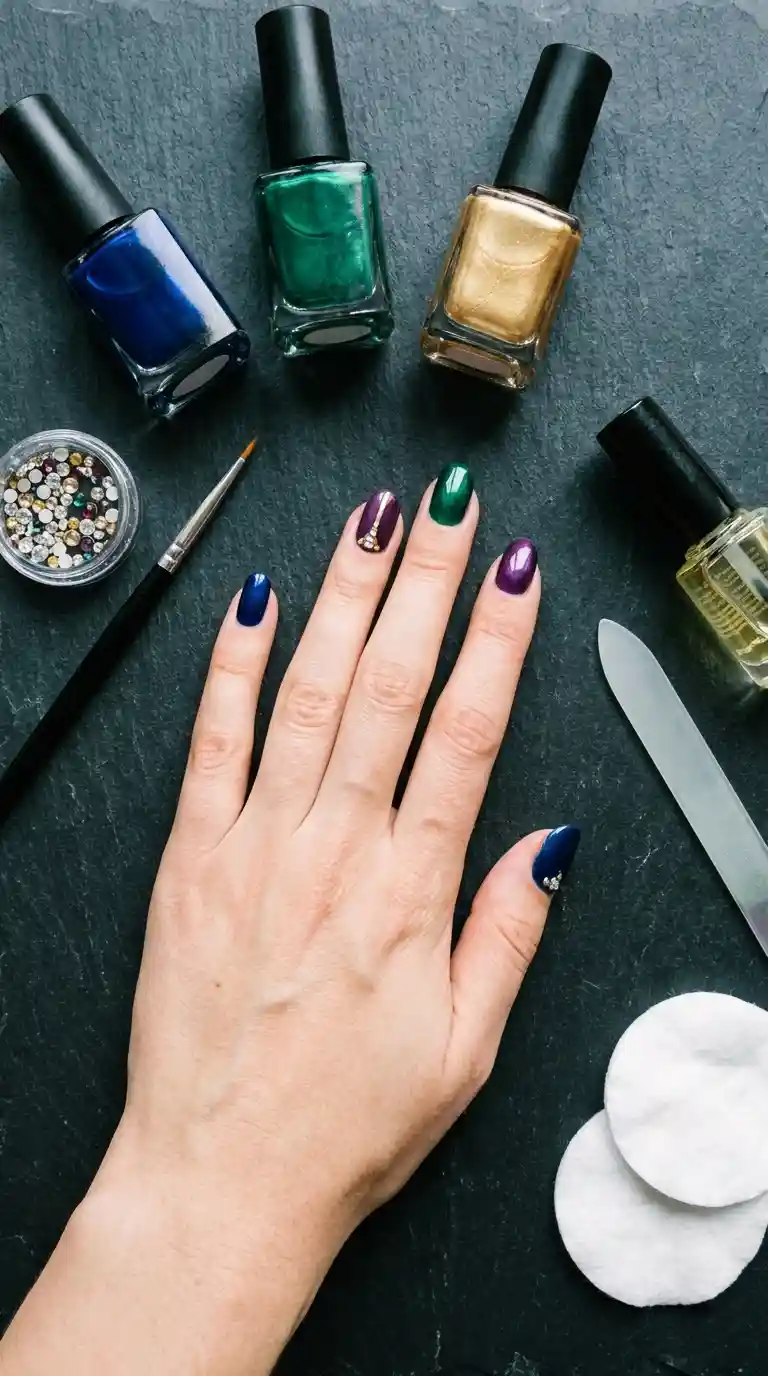
You do not need professional training to attempt peacock nail designs at home, though a good amount of patience genuinely helps, especially when tackling the detailed feather illustration. Over the years I have picked up a few techniques that make this process much more manageable for anyone trying it themselves.
Start with clean, properly prepped nails. Push back your cuticles gently, lightly buff the surface and wipe away any oils with rubbing alcohol before applying polish. This step matters more than people expect, since jewel toned colors tend to show unevenness on the nail bed more clearly than lighter shades.
Apply a good quality base coat, followed by two thin coats of your chosen dominant color, allowing each layer to dry fully before moving forward. Once your base is completely set, that is when the detailed part begins, whether that means painting a full feather, adding chrome shimmer or applying small gold accents.
Step By Step Guide For Peacock Nail Designs
- Start with clean, dry nails and gently push back the cuticles.
- Apply a thin base coat and let it dry completely.
- Paint two thin coats of your chosen jewel toned base color, allowing each coat to dry.
- Add your feather detail using a fine brush, starting with the teardrop shape and building outward.
- Finish the feather with a small eye shape and delicate gold outlining.
- Seal everything with a glossy or matte topcoat depending on your preferred finish.
Following these steps in order genuinely makes a difference in how polished your finished peacock nail designs end up looking, even for a first attempt.
Tools And Products For Creating Peacock Nail Designs
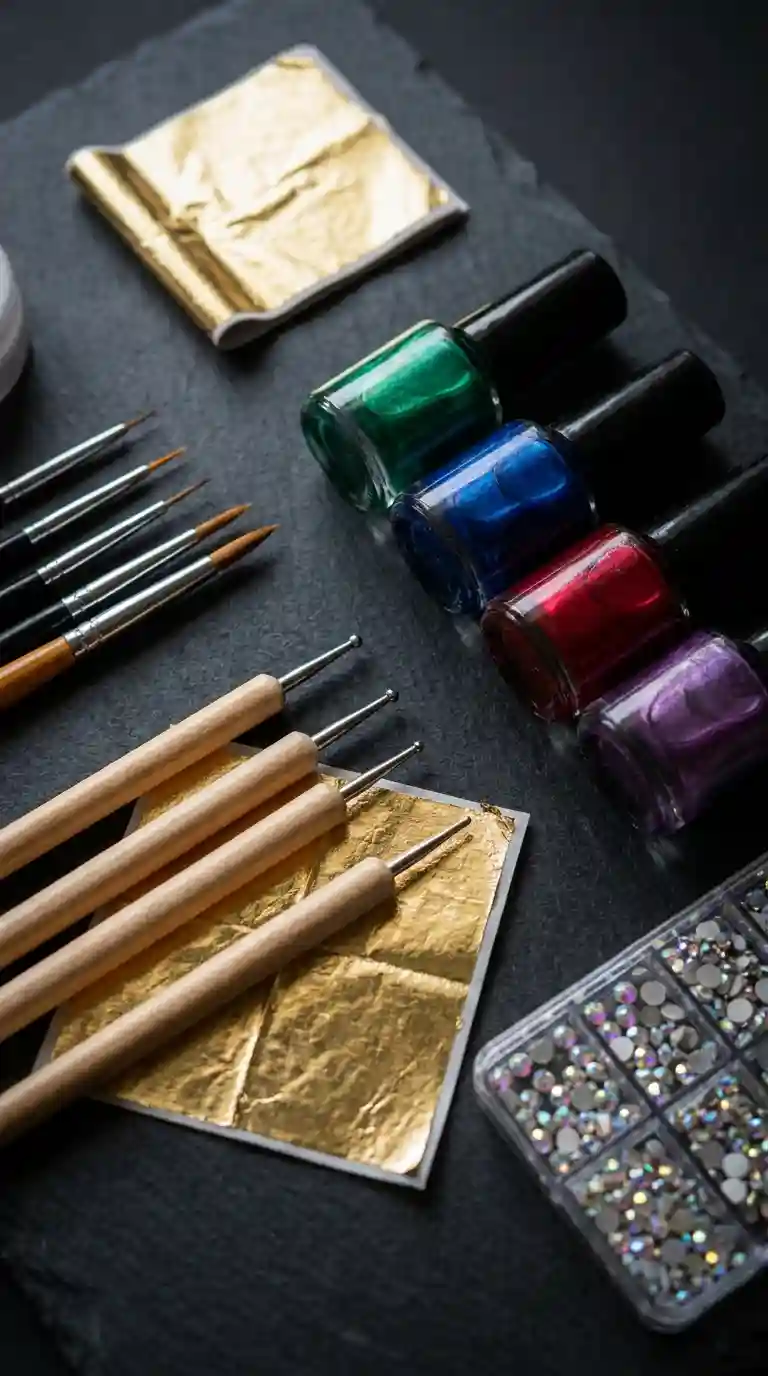
Over the years I have built a small collection of tools that make creating peacock nail designs significantly easier, both for detailed studio work and simpler versions at home. A fine detail brush is absolutely essential for painting the feather shape and the delicate radiating lines that give the design its realistic texture.
A dotting tool is incredibly useful for the eye shaped detail found at the top of each feather, helping create a clean, rounded shape before adding the surrounding ring of gold or bronze. I also always keep a selection of jewel toned polishes on hand, including several shades of blue and green, since having the right undertones available makes a noticeable difference in how rich and realistic the finished feather ends up looking.
For clients who want an extra touch of glamour, gold foil sheets and a small selection of rhinestones can instantly elevate a simple version of peacock nail designs into something that feels genuinely special for a formal occasion.
How To Make Peacock Nail Designs Last Longer
Detailed nail art deserves to last as long as possible, and there are a few habits I always recommend to help peacock nail designs hold up well over time. Wearing gloves while washing dishes or cleaning helps protect the polish and any painted detail from hot water and harsh soap, both of which weaken adhesion over time.
Applying cuticle oil daily keeps the surrounding skin healthy and helps prevent the polish from lifting at the edges, which is especially important for designs with fine detail work near the cuticle line. Using a gel based topcoat rather than a standard one also significantly improves wear time, particularly for designs involving delicate painted lines that need extra protection.
Avoiding the habit of using your nails as tools, whether that means opening packages or scratching labels, also helps preserve the crisp detail found in most peacock nail designs for as long as possible.
Read Also : Bad Bunny Nails: The Ultimate Bold Nail Trend Guide Every Nail Lover Needs to Try
Peacock Nail Designs For Different Skin Tones
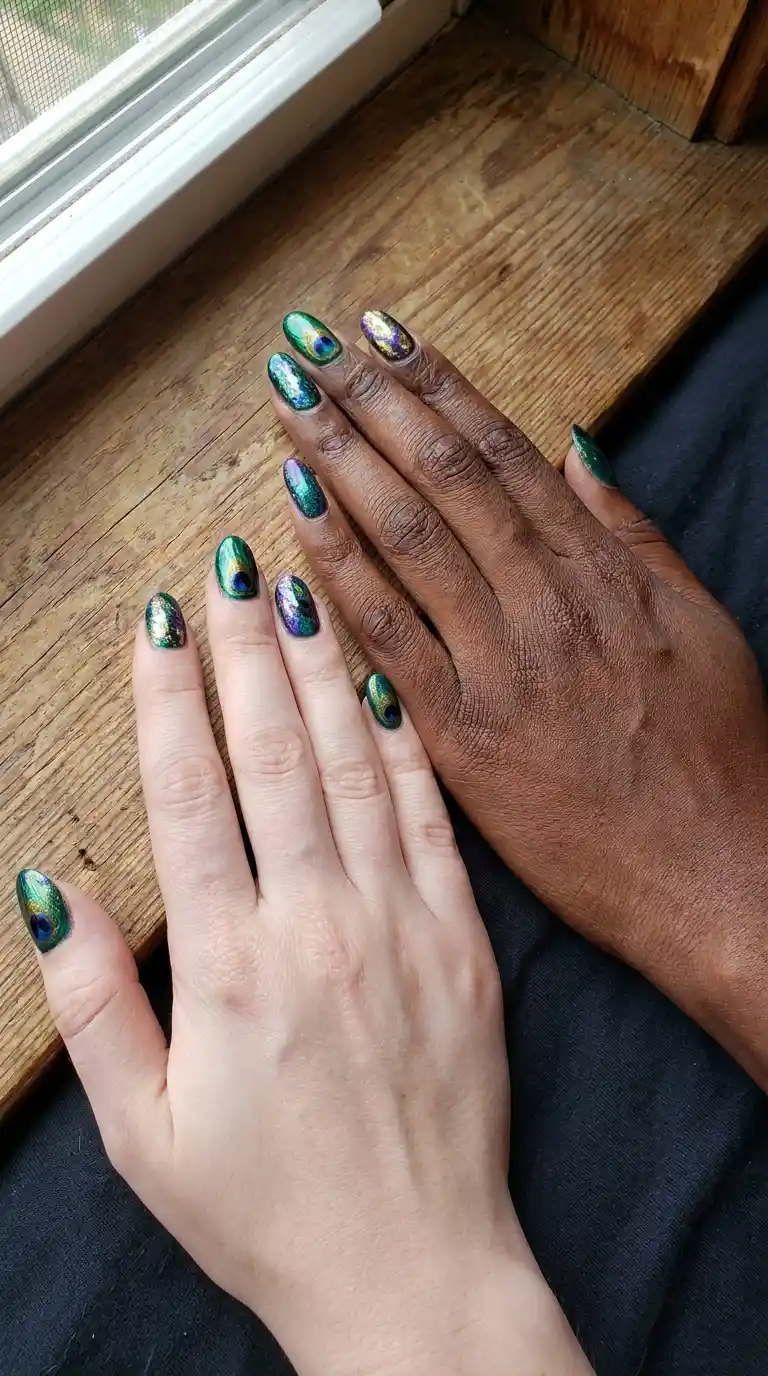
One of the wonderful things about peacock nail designs is how universally flattering the jewel toned color palette tends to be. Deep blues and greens generally complement a wide range of skin tones, though certain adjustments can help the design feel even more tailored.
For fair skin tones, I often recommend leaning slightly cooler with more blue dominant designs, which creates a striking, high contrast look. For deeper skin tones, richer emerald greens and warm gold detailing tend to look absolutely stunning, almost glowing against the skin.
Regardless of skin tone, peacock nail designs tend to look polished, rich and elegant, which is part of why this trend continues to attract such a wide range of clients in my chair.
Mistakes To Avoid When Trying Peacock Nail Designs
After creating peacock nail designs for so many clients over the years, I have noticed a handful of mistakes that come up repeatedly, especially among those attempting the more detailed feather illustration for the first time. One common issue is rushing the feather shape without first sketching a light guideline, which often results in an uneven or lopsided final shape.
Another mistake involves using too many colors without any clear structure. While peacock nail designs do involve multiple jewel tones, it helps to blend them gradually rather than placing hard, separated blocks of color that can look choppy rather than seamless.
Skipping a proper base coat is another issue I see often, particularly with darker jewel tones that can stain the natural nail if applied directly without protection. Rushing between layers, especially when combining chrome powder with hand painted detail, also tends to result in smudging that undermines otherwise careful work.
Peacock Nail Designs For Nail Art Beginners
If you are new to nail art, peacock nail designs can feel intimidating given the level of detail often associated with the full feather illustration, but there are plenty of simpler starting points. Beginning with a solid jewel toned base and a single small gold line near the cuticle already captures the spirit of the trend without requiring advanced painting skills.
Once you feel more confident, you can slowly build toward a simplified feather shape, focusing on just the basic teardrop outline and a small circular eye detail rather than the full layered gradient effect. Practicing on a paper nail wheel before committing to your actual nails is always a smart way to build muscle memory with a brush before attempting the real thing.
Pairing Peacock Nail Designs With Your Outfit
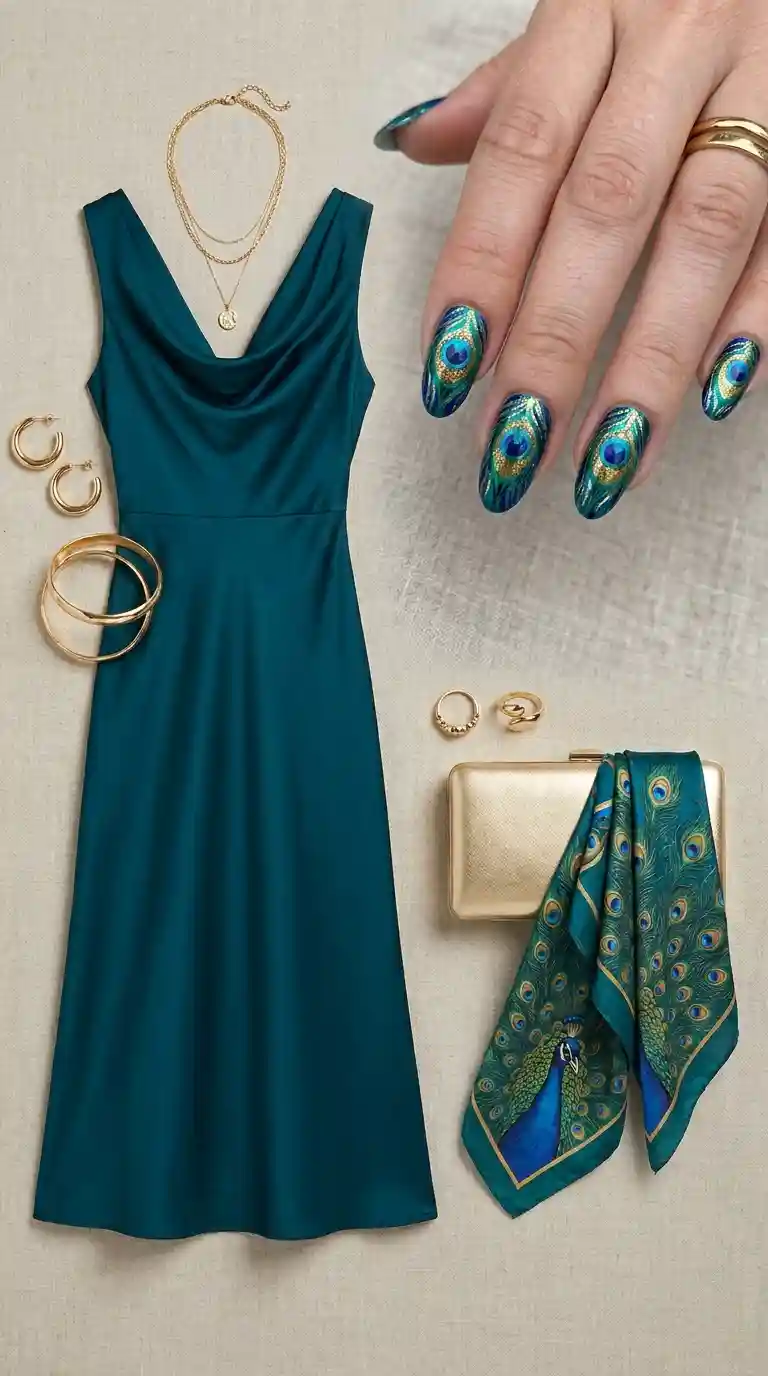
I love encouraging clients to think about their peacock nail designs as part of a broader styling choice rather than something separate from the rest of their outfit. The rich jewel tone palette pairs beautifully with formal wear, particularly deep colored gowns, gold jewelry and evening makeup looks.
For a more casual outfit, a simplified or minimalist version of peacock nail designs works surprisingly well against neutral tones like beige, cream or denim, adding a pop of color without overwhelming the overall look. For formal events like weddings or galas, the fully detailed feather illustration tends to feel especially fitting, particularly when paired with an outfit that includes complementary jewel tones or gold accents.
Peacock Nail Designs For Weddings And Formal Events
Weddings are probably the single most common occasion I create peacock nail designs for, whether it is the bride herself wanting something unique and personal, or a guest looking for a striking alternative to the traditional soft, neutral bridal manicure.
For bridal clients specifically, I often incorporate the peacock theme in a slightly more refined way, using softer teal tones combined with pearl or crystal accents rather than the boldest possible jewel colors. Guests, on the other hand, often prefer the fuller, more dramatic version, since they have more freedom to experiment with bold color outside of traditional bridal expectations.
Regardless of the specific role within the wedding, peacock nail designs consistently photograph beautifully, which matters a great deal given how much documentation happens throughout a typical wedding day.
Also Read : Heart Nails: The Ultimate Guide to Falling in Love With Your Manicure
Caring For Your Nails Underneath Peacock Nail Designs
A beautiful manicure always starts with healthy nails underneath, regardless of how detailed the design on top happens to be. I always recommend applying cuticle oil nightly, since this simple habit keeps the nail bed properly hydrated and helps prevent premature lifting, especially around detailed painted areas.
Taking short breaks between manicures, particularly if you regularly wear gel or acrylic extensions, gives your natural nails time to recover and stay strong. Healthy nails underneath not only help peacock nail designs look their best, they also help the artwork last significantly longer before requiring a touch up or full redo.
Final Thoughts On Peacock Nail Designs
After years of creating peacock nail designs for clients across countless occasions, I can honestly say this trend has earned its lasting popularity through genuine visual impact and versatility. There is something about the rich jewel tones, the shimmer of chrome finishes and the delicate detail of a hand painted feather that feels truly special, almost like wearing a tiny piece of art on each hand.
Whether you prefer a simple jewel toned manicure with a single gold line, or a fully illustrated feather across your accent nail, there is a version of peacock nail designs that fits your personal style and comfort level. My biggest piece of advice, both as someone who paints this design regularly and someone who genuinely admires the natural beauty it draws inspiration from, is to take your time with it. The detail is what makes this trend so special, and rushing through it rarely does the design justice.
Frequently Asked Questions
What colors are used for peacock nail designs?
The classic palette includes deep sapphire blue, rich emerald green, touches of teal and gold accents for outlining and detail work.
Are peacock nail designs good for weddings?
Yes, this design is a popular choice for both brides and wedding guests, especially when softened with pearl accents or kept in more refined jewel tones.
How do I make peacock nail designs last longer?
Using a gel topcoat, applying cuticle oil daily and wearing gloves while cleaning are the best ways to extend the wear time of this detailed design.
Can peacock nail designs work for short nails?
Yes, short nails handle this design well when the details are scaled down, such as a small abstract eye shape or a few fine gold lines instead of a full feather.
What is the best base color for peacock nail designs?
A rich sapphire blue or emerald green gel polish tends to give the most vibrant, opaque base for this design, though a chrome finish also works beautifully.
Do peacock nail designs suit every skin tone?
Yes, the jewel toned color palette is generally flattering across a wide range of skin tones, and adjusting the balance of blue versus green can help complement different undertones.
How many coats of polish do I need for the base?
Most jewel toned polishes require two to three thin coats for full, even opacity, especially darker shades like sapphire blue or emerald green.
Can I do peacock nail designs on acrylic extensions?
Definitely. Acrylic extensions provide extra surface area, making them a great canvas for a fully detailed feather illustration.
What nail shape works best for peacock nail designs?
Almond and coffin shapes showcase the elongated feather shape beautifully, though the design translates well onto virtually any nail shape.
How do I paint a peacock feather on my nails?
Start with a teardrop shaped outline, build layered strokes of blue and green outward, then finish with a small circular eye detail surrounded by gold.
Pingback: Blue Jean Nail Designs: Trendy Denim-Inspired Nail Ideas
Pingback: Stunning Gemini Birthday Nails Ideas for Your Special Day