
There is a certain kind of magic that happens the moment a drop of blooming gel touches a wet base and starts spreading into soft, feathery petals right in front of your eyes. If you have never tried it before, the first time can feel like watching a tiny flower bloom in slow motion on your own fingertip. That is exactly why blooming gel nail ideas have become one of the most requested designs in salons and one of the most searched techniques among nail lovers who want something that looks expensive without needing a hand painted mural.
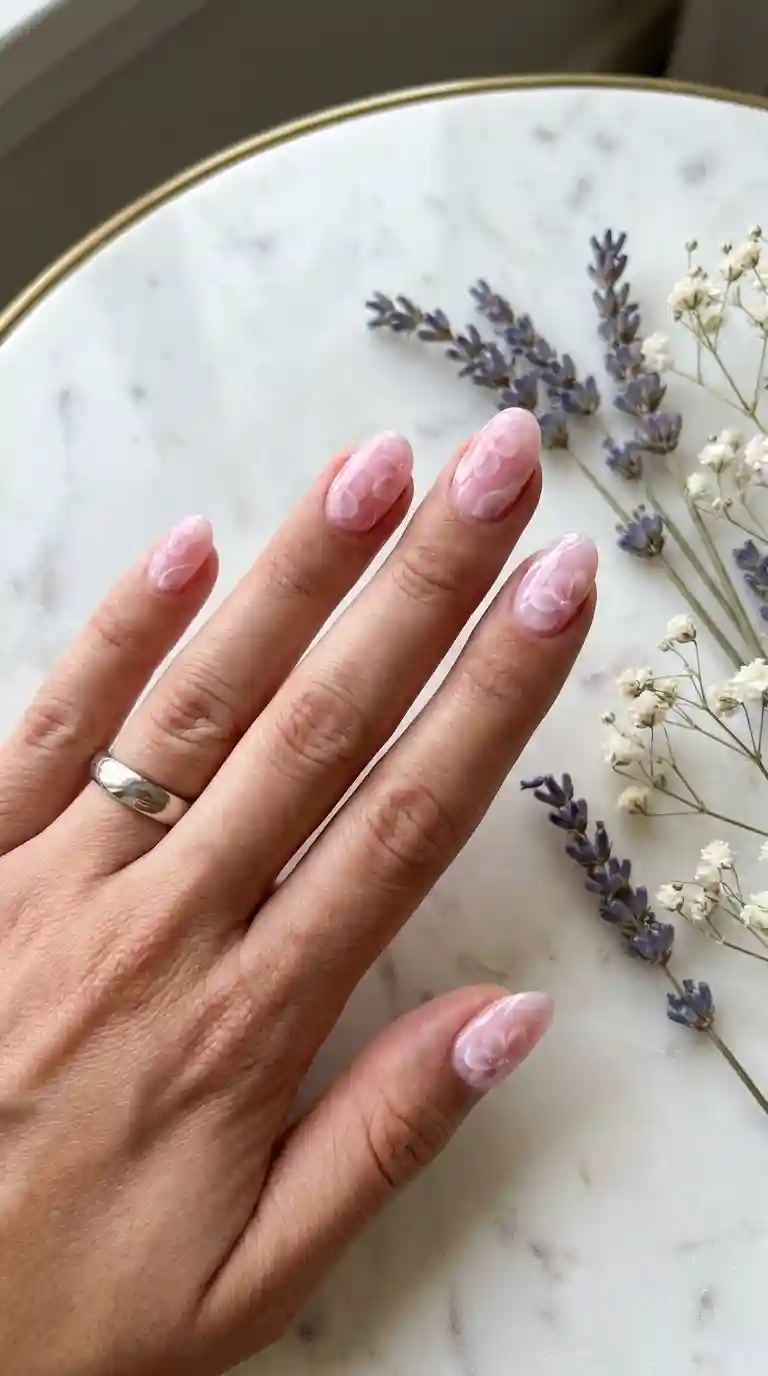
I work with clients almost every single week who bring in a screenshot of a blooming gel design and ask if it is really possible to get that look at home or in a regular salon visit. The answer is yes, and honestly it is one of the more forgiving techniques once you understand how the gel behaves. In this article I am going to walk you through everything I know about blooming gel nail ideas, from the very basics all the way to advanced combinations, so that whether you are a client trying to explain what you want to your nail tech or a nail artist trying to expand your service menu, you will walk away with a full picture.
Also Read: Boho Nail Ideas: The Ultimate Guide To Effortless, Free Spirited Manicures That Actually Turn Heads
What Is Blooming Gel and Why It Changed the Way I Design Nails
Blooming gel is a special type of gel polish that is thinner and more fluid than regular gel polish. It is designed to be applied on top of a wet, uncured layer of another gel color, and instead of sitting flat, it spreads and blooms into organic shapes that look like petals, marble veins, or watercolor splashes. The reaction happens because the blooming gel has a lower viscosity, so when it meets the wet base coat underneath, it pushes and diffuses through the liquid in unpredictable, beautiful patterns.
When I first started experimenting with blooming gel nail ideas years ago, I remember being nervous because nail art that relies on a chemical reaction feels less controllable than hand painting. But over time I realized that the lack of total control is actually the charm of it. Every single blooming gel nail looks slightly different, even when you use the exact same colors and the exact same dotting tool. That uniqueness is something clients genuinely love because it means their manicure is one of a kind, not a copy of a picture from Pinterest.
The reason blooming gel nail ideas have exploded in popularity is simple. They give you a high end, artistic result in a fraction of the time that hand painted florals or intricate marble designs would normally take. A skilled nail tech can create a stunning blooming gel design in under ten minutes per nail, while a similar hand painted floral design could take thirty minutes or more per hand.
How Blooming Gel Nail Ideas Actually Work Behind the Scenes
Understanding the mechanics behind blooming gel nail ideas will help you get better results whether you are doing this on yourself or on a client. The process starts with a base color that is applied as a normal gel polish but is left uncured, meaning it stays wet and tacky rather than being cured under a lamp right away.
Once that wet base layer is ready, small drops of blooming gel in one or more colors are placed on top using a fine brush or a dotting tool. Because the base layer is still liquid, the blooming gel begins to spread outward from the point of contact. You can encourage this spreading using a thin brush, an orange stick, or even a clean dotting tool by gently dragging or swirling the color.
The final step is curing everything under a UV or LED lamp once you are happy with the pattern. As soon as it goes under the lamp, the movement stops completely and the design is locked in place. This is one of the reasons blooming gel nail ideas feel so satisfying to create because you have a small window of time to play, and then the light freezes your art exactly as it is.
Why Timing Matters So Much in Blooming Gel Nail Ideas
Timing is honestly the single biggest factor that separates a gorgeous blooming gel manicure from a muddy, overworked one. If you wait too long before applying the blooming gel drops, the base coat may start to thicken slightly, and the bloom will not spread as freely. If you work too fast and add too many colors at once, everything can blend into a brownish or grayish mess instead of clean, distinct petals.
From my own experience, the sweet spot is usually within the first thirty to sixty seconds after applying your wet base color. I always tell newer nail techs to practice on a nail wheel or a few practice tips before trying blooming gel nail ideas directly on a paying client, simply because timing is something you feel with repetition rather than something you can memorize from a chart.
Tools and Supplies You Need Before Trying Blooming Gel Nail Ideas
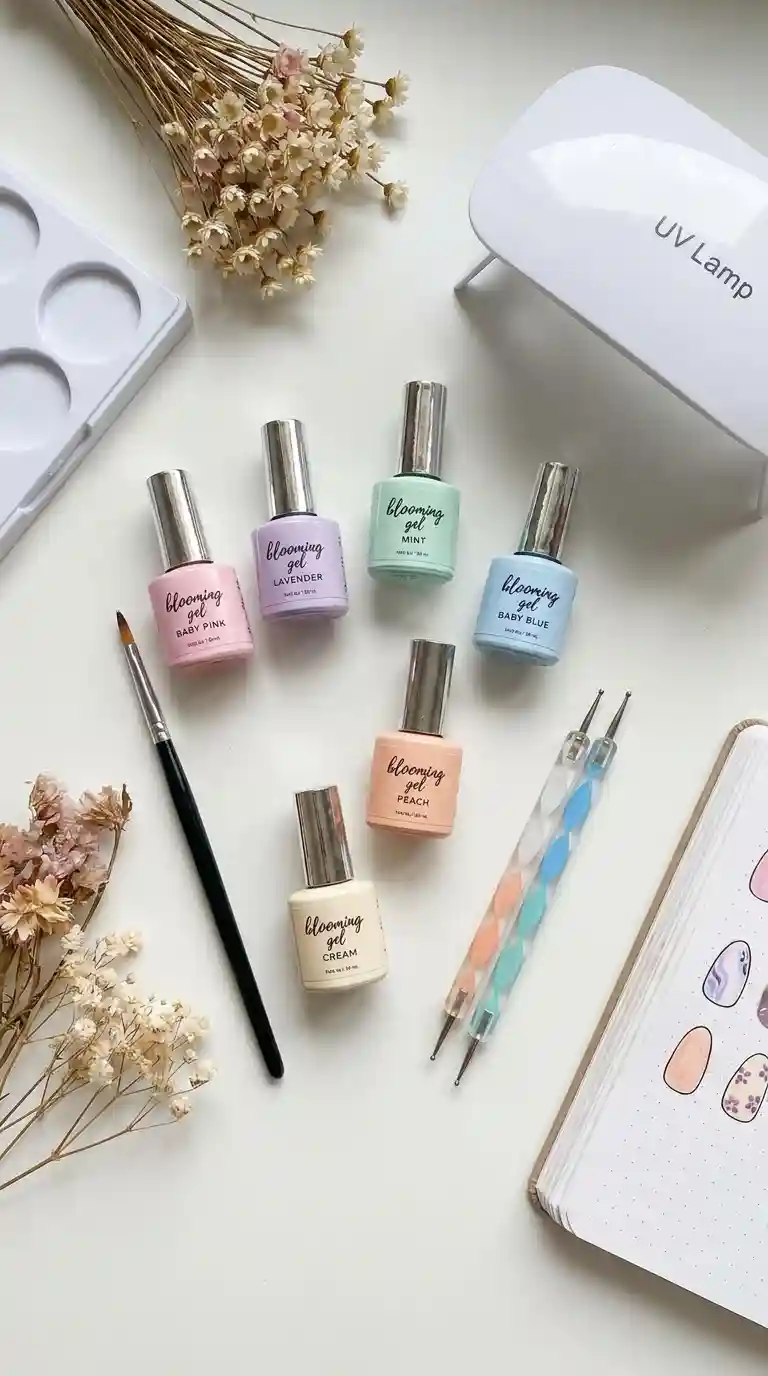
Before jumping into specific blooming gel nail ideas, let me talk about what you actually need on your desk. You do not need a huge kit to get started, which is part of why this technique is so accessible.
You will need a wet look gel base coat in your chosen color, a bottle or two of dedicated blooming gel in contrasting or complementary shades, a thin detail brush, a dotting tool with a small round tip, a UV or LED lamp for curing, and a top coat to seal everything once you are finished. Some nail artists also like to keep a bit of pure acetone and a lint free wipe nearby for quick cleanup if the design spreads further than intended.
I personally keep at least five different blooming gel colors on my desk at all times because clients often want custom combinations that are not part of a preset collection. White, soft pink, burgundy, sage green, and a deep navy cover almost every request I get for blooming gel nail ideas throughout the year.
Also Read : 100+ Dazzling Dipped Nail Ideas That Will Transform Your Manicure Game Forever
Best Blooming Gel Nail Ideas for Beginners
If you are new to this technique, starting simple will save you a lot of frustration. Here are the blooming gel nail ideas I recommend most often to beginners because they are forgiving, quick, and still look stunning.
Single Flower Accent Nail
One of the easiest blooming gel nail ideas to start with is a single flower on just the ring finger while the rest of the nails stay a plain matching color. You place one drop of white or soft pink blooming gel in the center of a wet nude base, then use a thin brush to pull five or six petal shapes outward from the center dot. It looks incredibly elegant and only requires you to master one flower rather than a full hand of intricate patterns.
Two Tone Marble Bloom
Another beginner friendly option among blooming gel nail ideas is a two tone marble effect. Instead of trying to create defined petals, you simply drop two contrasting blooming gel colors onto a wet white or clear base and let them swirl together with light strokes of a dotting tool. This gives you a marble like finish that looks intentional even if your lines are not perfectly symmetrical.
Ombre Bloom Tips
For clients who want something soft and wearable for everyday life, ombre bloom tips are a fantastic entry point into blooming gel nail ideas. You apply your base color, then add a lighter blooming gel shade near the tip of the nail and gently drag it downward so it fades into the base. This creates a soft gradient with a slightly textured, organic edge instead of a harsh straight line.
Romantic and Floral Blooming Gel Nail Ideas
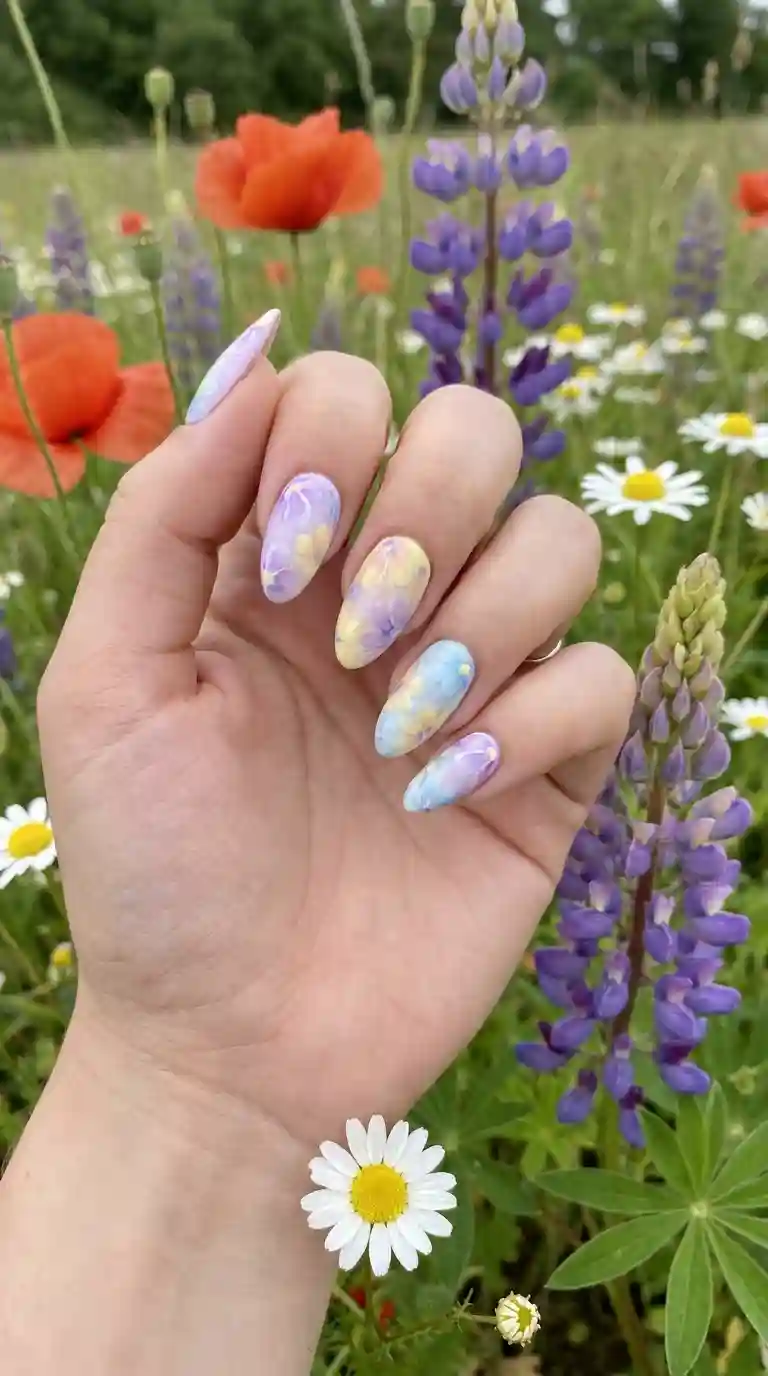
Floral patterns are by far the most requested category when clients ask for blooming gel nail ideas, and I understand why. There is something inherently feminine and romantic about watching a flower bloom on your own nail bed rather than having it painted on top.
Classic Rose Bloom
The classic rose is one of my personal favorite blooming gel nail ideas because it photographs beautifully and works for almost any skin tone. You start with a soft pink or dusty rose base, then place a slightly darker rose or burgundy blooming gel drop in the center. Using your dotting tool, you gently swirl the color in a circular motion, working from the center outward, which naturally creates the layered petal look of a rose in bloom.
Cherry Blossom Scatter
Cherry blossom inspired blooming gel nail ideas work wonderfully across a full set rather than as a single accent nail. Small clusters of pale pink blossoms are scattered across two or three nails on each hand, often paired with thin gold branch lines painted separately once the blooming gel has cured. The contrast between the delicate bloom texture and the crisp gold lines gives the whole set a very polished, professional finish.
Wildflower Meadow Set
For clients who want something a bit more playful, I love creating a wildflower meadow using multiple blooming gel colors on a single hand. Soft yellows, lavenders, and pale blues are scattered in small clusters across different nails, mimicking the randomness of an actual meadow. This is one of those blooming gel nail ideas that genuinely looks different every single time because the whole point is embracing the unpredictability of the bloom.
Blooming Gel Nail Ideas for Wedding Season
Bridal season keeps me busier than almost any other time of year, and blooming gel nail ideas have become one of my go to recommendations for brides who want something delicate but not boring.
Ivory and Champagne Bloom
For a bridal look, an ivory or champagne base with softly blooming white and pale gold petals feels timeless. This design pairs beautifully with a simple veil and traditional gown because it echoes the romance of the day without competing with the dress or jewelry.
Blush Bloom With Chrome Accent
Many brides ask me for blush toned blooming gel nail ideas finished with a single chrome accent nail. The combination of the soft organic bloom texture against one high shine metallic nail creates a beautiful contrast that still photographs well under both natural light and flash photography during the reception.
Bridesmaid Coordinated Blooms
When I do nails for an entire bridal party, I often give each bridesmaid a slightly different blooming gel color that still ties into the overall wedding palette. This way every set of hands in the wedding photos feels cohesive without being identical, and it gives each bridesmaid a small sense of individuality within the group look.
Must Read : Daisy Nail Design: 27 Stunning Ideas That Will Make Your Manicure Bloom All Year Long
Dark and Moody Blooming Gel Nail Ideas
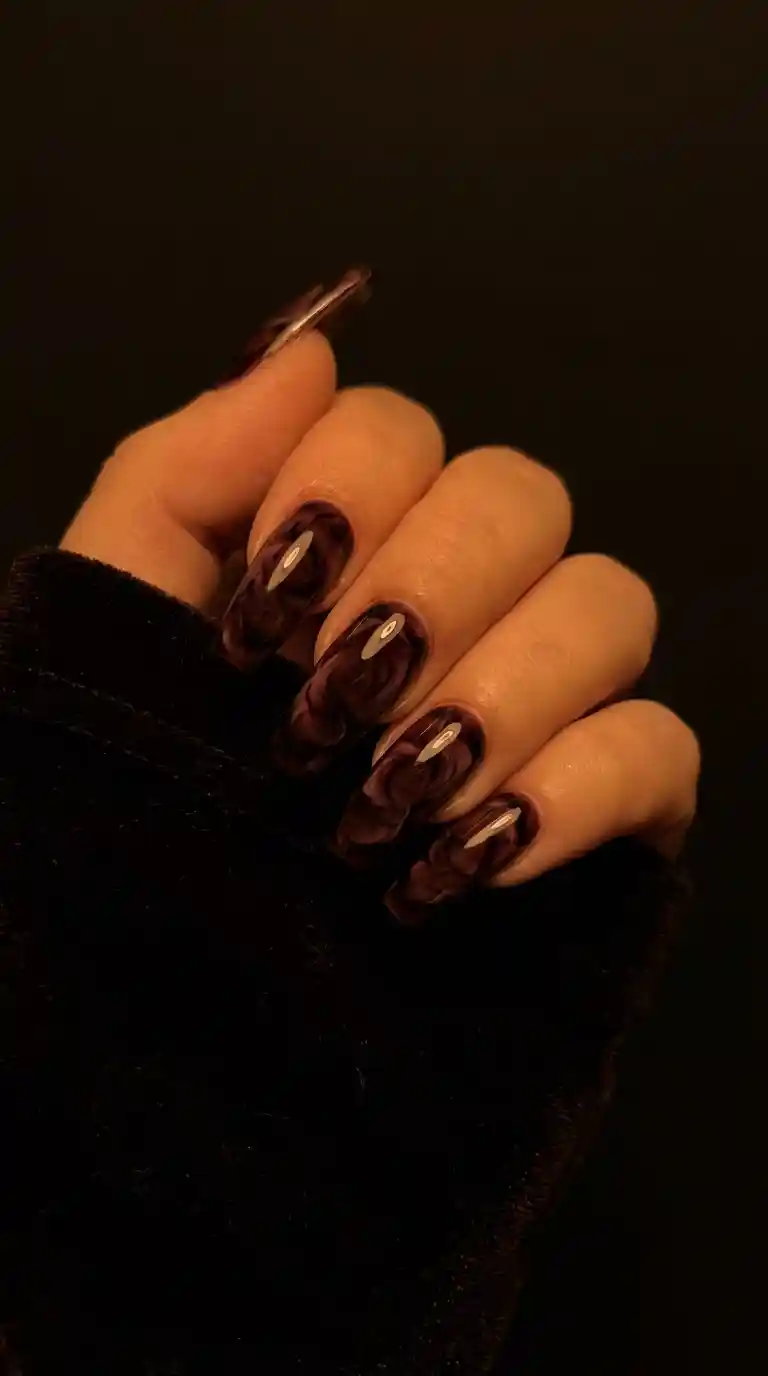
Not every client wants something soft and pastel. Some of my favorite blooming gel nail ideas actually come from clients who want a darker, more dramatic aesthetic, especially heading into autumn and winter.
Deep Burgundy Bloom
A deep burgundy base with black blooming gel creates a rich, almost gothic floral effect that looks incredible under warm indoor lighting. This is one of those blooming gel nail ideas that feels luxurious without needing any additional embellishment like rhinestones or foil.
Emerald and Gold Bloom
For clients heading into holiday parties, I love pairing a deep emerald base with gold blooming gel. The gold spreads through the green in a way that mimics the look of marbled stone, giving the nails a jewel toned, opulent finish that still fits within the blooming gel category.
Midnight Navy Floral
Navy blue paired with silver or white blooming gel creates a night sky effect that many of my clients request specifically for winter weddings or New Year celebrations. The contrast between the deep base and the lighter bloom mimics stars or snow depending on how you shape the petals.
Pastel and Spring Blooming Gel Nail Ideas
Spring is when I see the highest number of bookings specifically requesting blooming gel nail ideas, and it makes complete sense given how naturally the technique lends itself to floral, fresh looks.
Baby Blue and Lilac Bloom
This soft pairing is one of the most requested blooming gel nail ideas every March and April in my chair. The pale blue base combined with lilac blooming gel gives a gentle, watercolor like effect that feels perfectly suited to the season without being overly sweet.
Peach and Coral Bloom
Peach and coral tones create a warm, sun kissed version of blooming gel nail ideas that clients love pairing with gold jewelry during spring and early summer. This combination tends to photograph particularly well in natural daylight.
Mint and White Bloom
Mint green paired with white blooming gel gives a crisp, clean, almost minty fresh appearance that many clients choose for Easter or garden party events. It is one of the lighter, airier blooming gel nail ideas in my regular rotation.
Blooming Gel Nail Ideas With Chrome and Metallic Accents
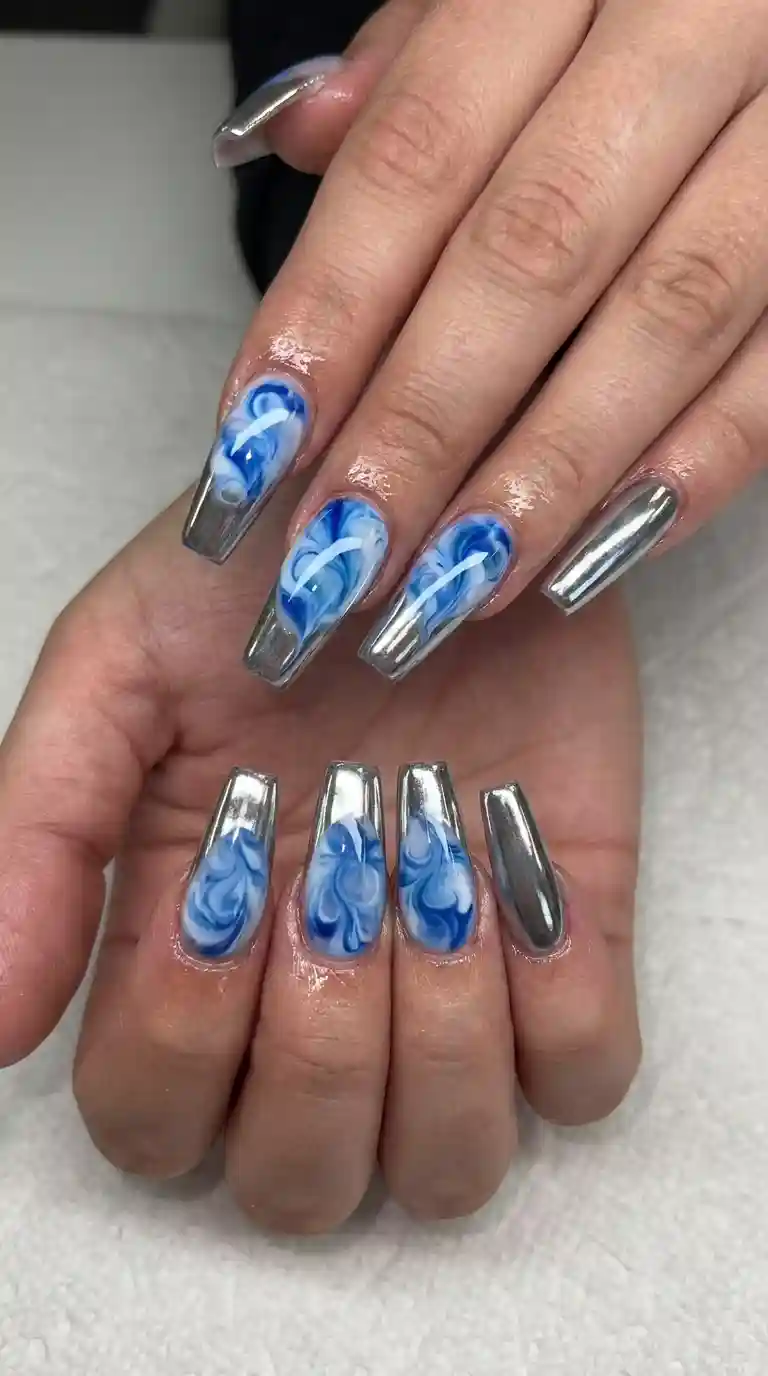
Combining blooming gel with chrome powder or metallic accents has become one of the biggest trends I have seen over the past two years. It takes the softness of the bloom and adds an unexpected shine that makes the whole set feel more modern.
Also Read : 65 Leopard Print Nail Ideas That Will Make Your Manicure Absolutely Unforgettable
Chrome Tip With Bloom Base
One popular approach among blooming gel nail ideas is keeping most of the nail as a soft bloom design while the very tip is finished in a mirror chrome powder. This creates a striking contrast between the organic texture of the bloom and the flawless, reflective shine of the chrome.
Gold Foil Accented Bloom
Adding small pieces of gold foil directly on top of a cured blooming gel design gives extra dimension and sparkle. I usually apply this on just one or two accent nails so the foil does not overpower the softness of the bloom itself.
Silver Chrome Marble Bloom
For clients who want something that leans more edgy than romantic, a silver chrome powder blended into a marble style blooming gel design creates an almost liquid metal appearance. This is one of the more advanced blooming gel nail ideas because balancing the chrome application with the still curing gel takes practice.
Blooming Gel Nail Ideas for Short Nails
A common misconception I hear constantly is that blooming gel nail ideas only work well on long nails. This is simply not true, and I actually think some of the prettiest blooming designs I have ever done were on very short, natural length nails.
Single Petal Accent
On short nails, scaling down the design is key. Rather than a full bloom, I recommend a single small petal shape near the cuticle area, leaving the rest of the nail a clean solid color. This keeps the proportions balanced on a smaller nail bed.
French Tip With Tiny Bloom
Combining a classic French manicure with a tiny bloom accent near the smile line is one of my favorite blooming gel nail ideas for clients who want something professional enough for an office job but still a bit special. The bloom stays small and delicate so it does not overwhelm the short nail shape.
All Over Mini Bloom Texture
Instead of a large focal flower, scattering several tiny bloom dots across the entire nail creates a subtle textured pattern that reads as elegant rather than busy, even on short nails. This works especially well in neutral tones like beige, taupe, and soft white.
Blooming Gel Nail Ideas for Almond and Coffin Shapes
The shape of the nail changes how a bloom design reads visually, and understanding this has made a huge difference in how I plan out blooming gel nail ideas for different clients.
Almond Shape Vertical Bloom
Because almond shaped nails are narrower and more tapered, I usually orient the bloom vertically, starting near the cuticle and letting the petals stretch toward the tip. This elongates the nail even further and works beautifully with romantic, soft color palettes.
Coffin Shape Statement Bloom
Coffin nails have more flat surface area, which makes them perfect for larger, more detailed blooming gel nail ideas. I often do a full statement flower centered on the nail with additional smaller accent blooms scattered around it since there is simply more canvas to work with.
Square Shape Corner Bloom
On square nails, placing the bloom in one corner rather than dead center tends to look more intentional and modern, especially when paired with a negative space design where part of the natural nail is left bare.
Step by Step Tutorial: My Go To Blooming Gel Technique
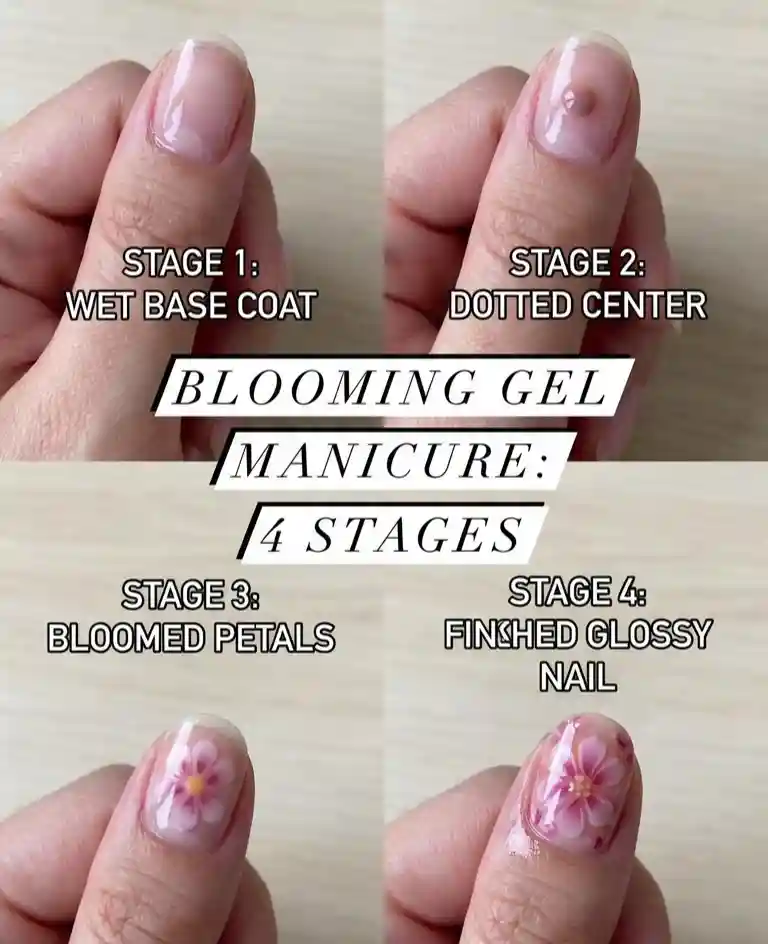
I get asked so often to break down exactly how I personally approach blooming gel nail ideas that I want to walk through my full process here in detail.
Also Read : Classy Short Nail Designs That Never Go Out Of Style: A Nail Artist’s Honest Guide
Step One: Prep the Natural Nail
Just like any gel manicure, everything starts with proper prep. I push back the cuticles, lightly buff the nail surface to remove shine, and apply a dehydrator followed by a bonder to ensure the gel adheres properly and lasts as long as possible.
Step Two: Apply the Base Color
I apply one thin, even coat of my chosen base gel color. This layer needs to remain uncured, so I skip the lamp at this stage and move directly into the next step while the polish is still wet and glossy.
Step Three: Add the Blooming Gel Drops
Using a thin brush, I place small drops of blooming gel wherever I want the center of each flower or pattern to begin. I try to work quickly but calmly, since rushing tends to create messy, undefined shapes rather than clean petals.
Step Four: Shape the Bloom
With a clean dotting tool or the tip of my brush, I gently pull the color outward from each drop in short, controlled strokes to create petal shapes. I usually work in odd numbers, five or seven petals per flower, because it tends to look more natural than an even, overly symmetrical count.
Step Five: Cure and Seal
Once I am happy with how the pattern looks, I cure the nail under my LED lamp to lock everything in place. After curing, I apply a glossy or matte top coat depending on the client’s preference, and cure once more to finish the set.
Common Mistakes With Blooming Gel Nail Ideas and How I Fixed Them
Over the years I have made almost every mistake possible with this technique, and I think sharing them honestly is more helpful than pretending it was perfect from day one.
Working Too Slowly
Early on, I would take too long deciding where to place my blooming gel drops, and by the time I started, the base coat had already begun to thicken slightly. The fix was simple once I realized it: plan your color placement mentally before you even open the base coat bottle, so you can move confidently once the wet layer is down.
Using Too Much Product
Another mistake I made constantly when I first tried blooming gel nail ideas was using too much blooming gel per drop. A little genuinely goes a long way, and overloading the brush causes the colors to spread too far and blend into mud rather than staying as distinct petals.
Overworking the Design
There is a temptation to keep touching and adjusting the bloom because it looks so satisfying while it moves. But every extra stroke you add increases the risk of muddying the colors together. I now force myself to stop as soon as the basic shape looks good, even if it feels incomplete, because curing often reveals a cleaner finish than expected.
Skipping the Practice Nail
I used to jump straight into client work with new blooming gel colors without testing them first. Different brands and even different color pigments within the same brand can behave slightly differently in terms of spread speed and thickness. Now I always test a new bottle on a practice tip before using it in a paid service.
Must Read : 90 Western Nail Ideas That Will Turn Your Manicure Into a Full Blown Cowgirl Statement
Blooming Gel Nail Ideas Versus Other Nail Art Techniques
Clients often ask me how blooming gel compares to other popular nail art styles, so I want to break this down clearly.
Blooming Gel Versus Hand Painted Florals
Hand painted florals give you complete control over every petal and leaf, which allows for extremely detailed, realistic looking flowers. However, this level of control takes significantly more time and a steadier hand. Blooming gel nail ideas trade some of that precision for speed and a softer, more painterly texture that many clients actually prefer because it looks less rigid.
Blooming Gel Versus Water Marble
Water marbling involves dropping polish onto the surface of water and then transferring the pattern onto the nail. It creates beautiful, unpredictable swirls but is messy and time consuming, often requiring cleanup around the entire finger. Blooming gel nail ideas achieve a similarly organic, marbled effect directly on the nail without any water involved, making it far cleaner and faster for salon use.
Blooming Gel Versus Encapsulated Dried Flowers
Encapsulated designs use real dried flowers sealed under layers of clear gel, giving a beautifully realistic three dimensional look. This technique is stunning but fragile and can be more prone to lifting if not sealed correctly. Blooming gel nail ideas offer a similar floral feeling with far less risk of damage since there is no physical flower embedded in the layers.
How to Make Blooming Gel Designs Last Longer
A gorgeous set of blooming gel nail ideas is only as good as how long it lasts, so I always walk clients through aftercare before they leave my chair.
Seal Every Layer Properly
Making sure both the base color and the blooming gel pattern are fully cured before applying top coat is essential. Any uncured product trapped underneath the top coat can lead to premature peeling or a tacky texture over time.
Apply Cuticle Oil Daily
I recommend cuticle oil every single day, not just for nail health but because well hydrated nails and skin around them reduce the chances of gel lifting at the edges, which is often where damage to a blooming gel design starts first.
Avoid Excessive Soaking
Long soaks in hot water, like extended baths or hot tubs, can weaken the bond between gel layers over time. I suggest wearing gloves during dishwashing and being mindful of prolonged water exposure to help blooming gel nail ideas last through the full appointment cycle.
Choose a Durable Top Coat
Not all top coats are created equal. I personally use a high shine, flexible top coat that resists chipping and yellowing, which helps preserve the vibrancy of the blooming gel colors underneath for weeks rather than days.
Seasonal Blooming Gel Nail Ideas Throughout the Year
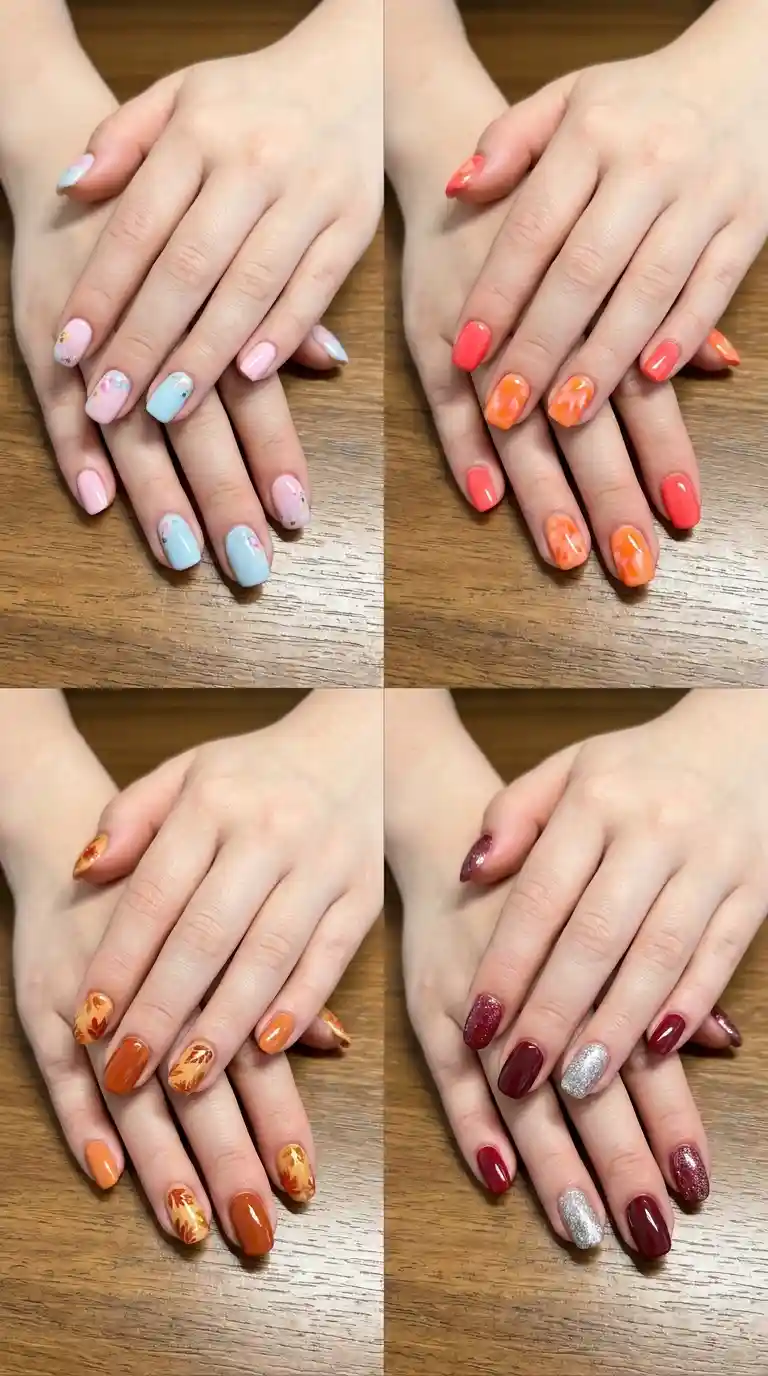
One of the things I love most about this technique is how easily it adapts to every season, which keeps blooming gel nail ideas feeling fresh no matter when a client books an appointment.
Spring Blooming Gel Nail Ideas
Soft pastels, cherry blossoms, and watercolor florals dominate my spring bookings. Clients tend to lean toward lighter, airier color palettes that reflect the season of renewal.
Summer Blooming Gel Nail Ideas
During summer, brighter colors like coral, turquoise, and sunny yellow become the most requested blooming gel nail ideas. Many clients also ask for beachy interpretations, using blue and white blooming gel to mimic ocean waves.
Autumn Blooming Gel Nail Ideas
As the weather cools, burnt orange, deep mustard, and warm brown tones take over. Autumn blooming gel nail ideas often mimic falling leaves or harvest inspired color combinations.
Winter Blooming Gel Nail Ideas
Winter brings out the richest, most dramatic blooming gel nail ideas in my chair, with deep reds, forest greens, and icy silvers being the most requested combinations, especially around the holiday season.
Blooming Gel Nail Ideas for Different Skin Tones
Choosing the right color palette makes a real difference in how a blooming gel design looks on the hand, and I always take skin tone into consideration when suggesting blooming gel nail ideas to clients.
Fair Skin Tones
Soft pastels like baby pink, lilac, and pale blue tend to look especially delicate against fair skin. I also love a burgundy and black bloom for fair skin clients who want more contrast and drama.
Medium Skin Tones
Warm tones like coral, terracotta, and gold blend beautifully with medium skin tones. Emerald green blooming gel also tends to pop wonderfully against this undertone.
Deep Skin Tones
Bright jewel tones such as sapphire blue, deep purple, and vibrant fuchsia create striking contrast against deep skin tones. I also find that metallic gold blooming gel accents look particularly luxurious in this combination.
Also Read : 50 Gorgeous Summer Flower Nail Designs That Will Make Your Manicure Bloom This Season
Tips From My Salon Chair: Client Favorite Blooming Gel Designs
After years of doing this professionally, certain blooming gel nail ideas keep coming back as consistent client favorites, and I want to highlight a few of them here.
The Everyday Elegant Bloom
A nude or soft beige base with a single small white bloom on the ring finger remains one of the most requested designs because it works for literally any occasion, from the office to a wedding.
The Statement Bridal Bloom
Full hand blush and ivory bloom sets continue to be a top request during engagement season, often paired with a small crystal placed in the center of the flower.
The Bold Date Night Bloom
Deep red bases with black blooming gel accents are frequently requested for date nights and special evenings out, giving a sultry, dramatic finish that photographs beautifully in low lighting.
Where to Buy Quality Blooming Gel Products
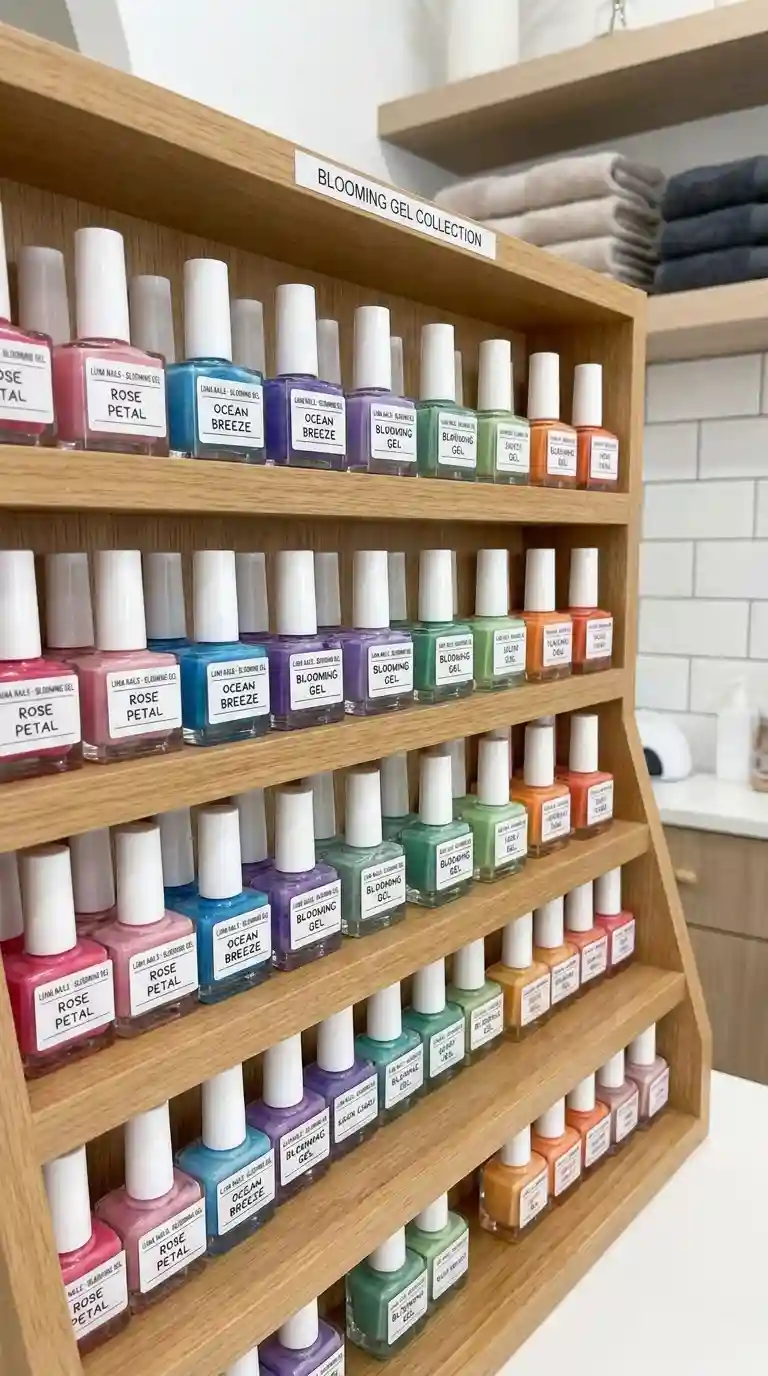
If you are planning to try blooming gel nail ideas at home or want to add this service to your salon menu, product quality matters significantly. Cheaper, poorly formulated blooming gels can be too thick, spreading unevenly or clumping instead of flowing smoothly.
I recommend researching reputable nail supply brands that specifically market their product as blooming gel rather than assuming any thin gel polish will work the same way. Reading reviews from other nail artists and watching application demonstrations before purchasing can save you a lot of frustration and wasted product.
Final Thoughts on Blooming Gel Nail Ideas
After everything I have shared here, I hope it is clear why blooming gel nail ideas have earned such a devoted following among both nail artists and clients. The technique manages to strike a rare balance between being achievable for beginners and offering enough depth that even experienced professionals continue discovering new combinations and effects.
Every set I create using blooming gel feels a little different from the last, and that unpredictability is exactly what keeps this style exciting rather than repetitive. Whether you are drawn to soft romantic florals, bold dark blooms, or shimmering chrome accents, there is a version of blooming gel nail ideas suited to your personal style and the season you find yourself in.
Frequently Asked Questions
What is blooming gel used for in nail art?
Blooming gel is used to create organic, spreading patterns like flowers, marble effects, and watercolor designs directly on the nail. It works by spreading through a wet, uncured base color to form soft, natural looking shapes.
Can I use regular gel polish instead of blooming gel?
Regular gel polish is generally too thick to spread properly and will not create the same flowing, petal like effect. Blooming gel is specifically formulated with a thinner consistency to achieve that reaction, so it is best to use an actual blooming gel product for reliable results.
How long does a blooming gel manicure last?
With proper application and aftercare, a blooming gel manicure typically lasts just as long as a standard gel manicure, usually around two to three weeks, depending on nail growth and daily activities.
Is blooming gel nail art hard to do at home?
It is beginner friendly with practice, though the timing takes a little getting used to. Starting with simple designs like a single accent flower before attempting a full hand pattern is the best way to build confidence.
What colors work best for blooming gel flowers?
Soft pastels like pink, lilac, and white are popular for romantic florals, while deeper tones like burgundy, navy, and emerald work well for more dramatic designs. The best colors ultimately depend on the mood and season you are going for.
Do I need a UV lamp for blooming gel nail ideas?
Yes, blooming gel needs to be cured under a UV or LED lamp just like regular gel polish once your design is complete. The lamp is what locks the pattern in place and stops the spreading process.
Why is my blooming gel not spreading properly?
This usually happens if the base coat has started to cure or thicken before you apply the blooming gel drops, or if the blooming gel itself is too thick due to age or poor formulation. Working quickly on a fresh wet base typically solves this issue.
Can blooming gel be used on short nails?
Absolutely. Scaled down designs like a single small petal or subtle textured dots actually look beautiful on short nails and are one of the easiest ways to try blooming gel nail ideas without needing extra length.
What is the difference between blooming gel and gel polish?
Gel polish is formulated to sit flat and hold its shape once applied, while blooming gel is specifically designed to be thinner so it spreads and diffuses through a wet layer, creating the signature bloom effect.
How many colors can I use in one blooming gel design?
You can use as many as you like, though I usually recommend starting with two or three colors when you are still learning, since too many colors at once can blend together and lose definition.
Pingback: 77 Stunning Cowgirl Nails Ideas for a Western Look
Pingback: 50+ Stunning Plum Ombre Nails You’ll Love