
There is something about a bow nail design that instantly makes a manicure feel special. Maybe it is the playful shape, maybe it is the way it catches attention without trying too hard, or maybe it is simply that bows remind us of gifts, celebrations and little moments of joy. Whatever the reason, bow nail design has become one of the most requested looks at nail salons and one of the most searched nail trends online.
I work as a nail artist and I get asked about bow nail design almost every single week. Clients come in with screenshots from Pinterest and Instagram, pointing at tiny painted bows sitting on top of glossy nails, asking if it is possible to recreate that look on their own hands. The answer is always yes, and in this article I am going to walk you through everything you need to know about bow nail design, from what it actually is, to how you can create it yourself, to the mistakes people make and how to avoid them.
This guide is long because bow nail design deserves a proper explanation. It is not just a passing trend. It has staying power because it works on almost every nail shape, length and skin tone. So grab a cup of tea, get comfortable, and let us go through everything together.
Also Read : Mermaid Ocean Nails: The Ultimate Guide To Dreamy, Show Stopping Ocean Inspired Nail Art
What Is Bow Nail Design?
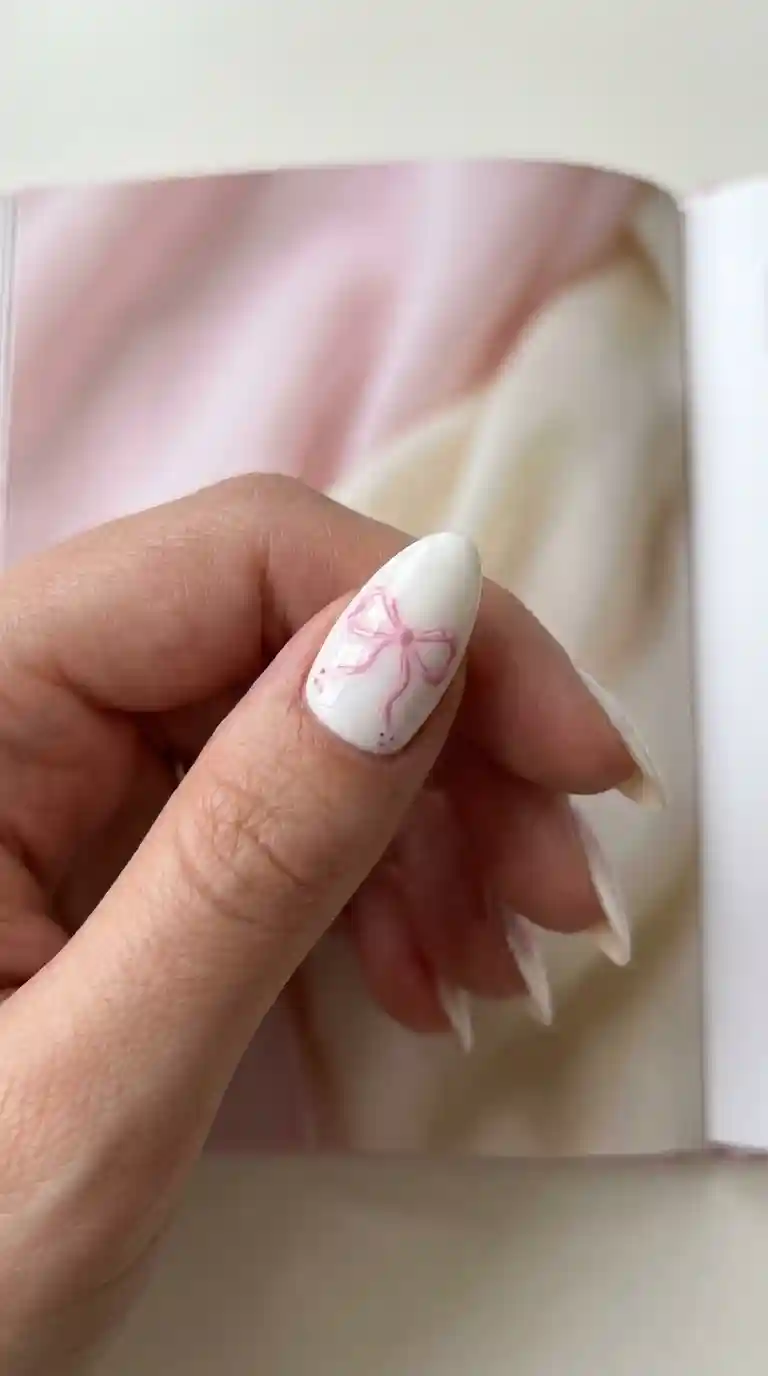
Bow nail design is exactly what it sounds like. It is a nail art style where a small bow, either painted, molded or applied as a charm, is placed on one or more nails as the main decorative element. The bow can be tiny and delicate, sitting quietly in the corner of a nail, or it can be bold and oversized, taking up most of the nail bed as a statement piece.
The beauty of bow nail design is in its flexibility. You can pair it with a plain nude base for something soft and romantic, or you can pair it with bright colors and glitter for something loud and fun. Bow nail design works for teenagers going to their first school dance and it works for brides walking down the aisle. That range is rare in nail art and it is part of why this trend has stuck around for so long.
When clients ask me what makes bow nail design different from other trends, I always say it comes down to shape. A bow has a very recognizable silhouette. Two loops, a small knot in the middle, sometimes with little tails hanging down. That silhouette is easy to spot from across the room, which is exactly why bow nail design photographs so well and why it does so well on social media.
Why Bow Nail Design Is Trending Right Now
Trends in the beauty world come and go quickly, but bow nail design has managed to hold its place for several seasons in a row, and there are real reasons behind that.
First, there is a broader shift happening in fashion and beauty toward softer, more feminine aesthetics. Think of the coquette style, the return of ribbons in hair accessories, and the rise of pastel color palettes in clothing. Bow nail design fits perfectly into this movement because it borrows the same visual language.
Second, social media has played a huge role. Short video platforms have made it easy for nail artists to show step by step tutorials of bow nail design, and because the process is satisfying to watch, these videos get shared often. When something is fun to watch being made, people want it done on their own nails too.
Third, bow nail design is genuinely versatile. It is not locked into one season or one age group. I have done bow nail design for a six year old going to a birthday party and I have done it for a sixty year old grandmother who wanted something fun for her granddaughter’s wedding. That kind of universal appeal keeps a trend alive far longer than something niche.
Read Also : Cherry Blossom Nail Design: The Dreamy Spring Manicure Every Nail Lover Needs To Try
Different Types Of Bow Nail Design
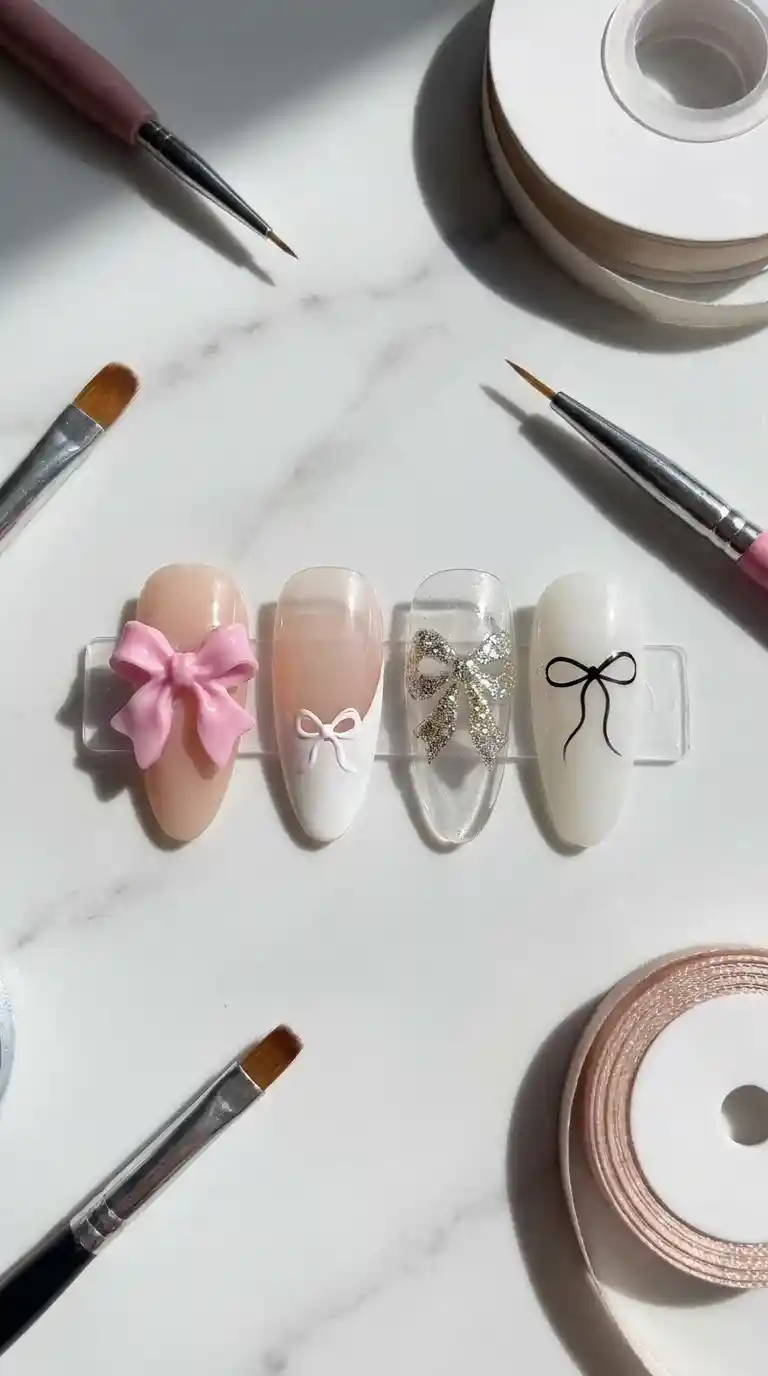
Not all bow nail design looks are created the same way. Over the years I have tried nearly every method out there, and each one gives a slightly different final result. Let me break down the main types so you can decide which one suits your style.
3D Bow Nail Design
This is probably the most eye catching version of bow nail design. Instead of painting a flat bow on the nail surface, the nail artist sculpts an actual three dimensional bow using acrylic powder or hard gel, then attaches it to the nail once it has cured.
3D bow nail design gives a very luxurious, almost jewelry like effect. It stands slightly off the nail surface and catches light beautifully. The downside is that it requires more skill and it is a bit more fragile than flat designs, so it works best for special occasions rather than everyday wear.
French Tip Bow Nail Design
This style combines the classic French manicure with a small painted bow near the base of the nail or right where the French tip line starts. It is elegant, timeless and works incredibly well for weddings, job interviews and any setting where you want something polished but still fun.
I personally love recommending French tip bow nail design to clients who are nervous about trying nail art for the first time. It feels familiar because of the French tip base, but the bow adds just enough personality to make it memorable.
Glitter Bow Nail Design
Glitter bow nail design takes the classic bow shape and fills it in with fine glitter instead of solid color, or surrounds the bow with a glitter gradient. This version is popular around the holiday season and for New Year celebrations because it adds sparkle without being overwhelming.
Minimalist Bow Nail Design
For clients who want something subtle, minimalist bow nail design is the answer. This usually means a tiny outline of a bow drawn in a single color, often placed near the cuticle, with the rest of the nail left bare or with a simple nude polish. It is quiet, chic and works in professional settings.
Chrome Bow Nail Design
Chrome bow nail design uses a metallic chrome powder either on the bow itself or on the surrounding nail, creating a mirror like shine. This is a newer variation that has become popular because it photographs beautifully under different lighting conditions.
How To Create A Bow Nail Design At Home
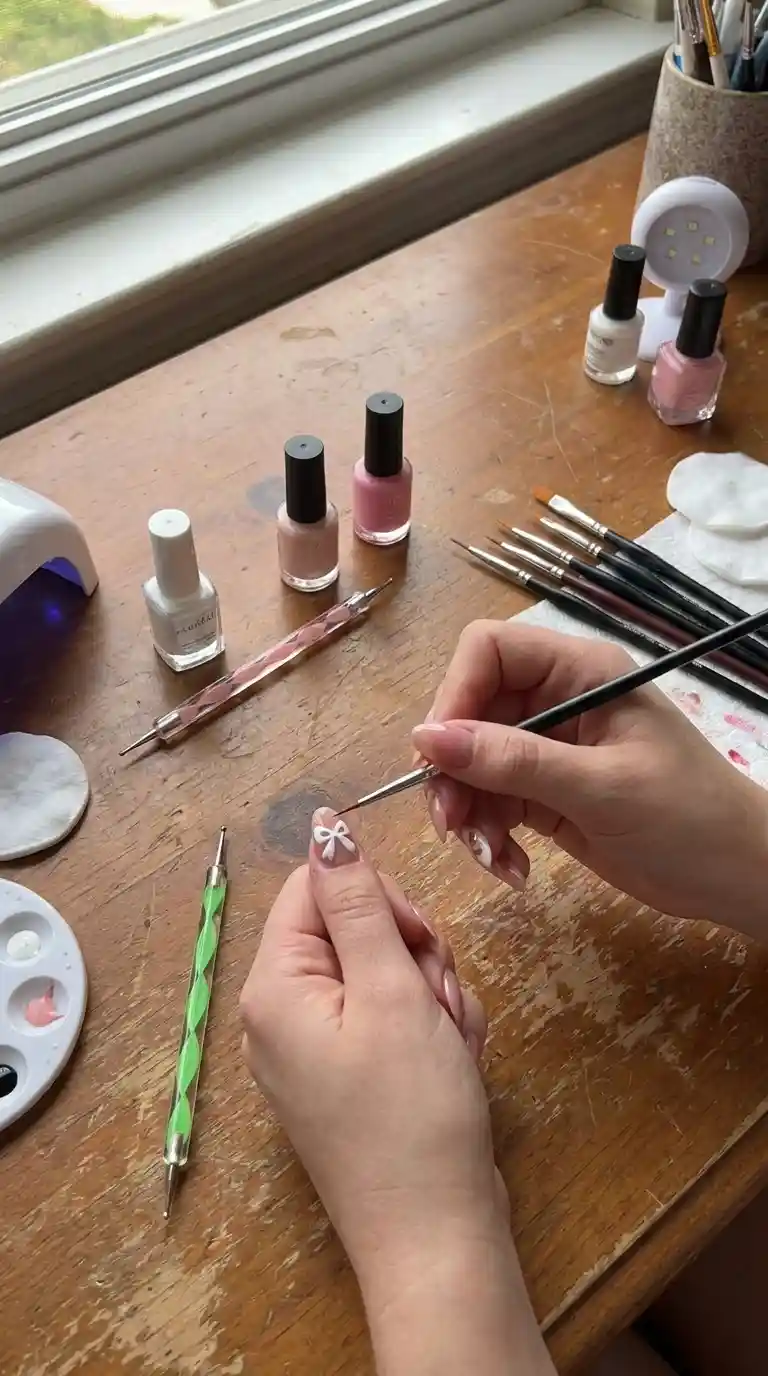
You do not need to be a professional to try bow nail design at home. I have taught plenty of friends and family members how to do a simple version, and with a bit of patience, most people can get a decent result on their first try.
Here is the process I usually walk beginners through when they ask about doing bow nail design themselves.
Also Read : Rose Nail Design Magic: 50+ Gorgeous Ideas Every Nail Lover Needs To Try
Step one, prepare your nails. Push back your cuticles, shape your nails and apply a thin base coat. This step matters more than people think because a smooth base makes the bow design sit much better on top.
Step two, apply your base color. Whether you choose nude, white, pink or any other shade, let it dry completely before moving on. Rushing this step is the most common reason bow nail design ends up smudged.
Step three, sketch the bow lightly. Using a very thin nail art brush or even a toothpick dipped in polish, sketch two small triangle like loops facing each other. Do not worry about perfection at this stage, this is just a guide.
Step four, fill in the loops. Go back over your sketch with a slightly thicker layer of polish to fill in the two loops of the bow. Keep your hand steady and work in small strokes rather than one long stroke.
Step five, add the center knot. Paint a small rectangle or oval shape in the middle where the two loops meet. This is what ties the whole bow nail design together visually.
Step six, add details. This is where you can get creative. Add a tiny highlight with white polish for dimension, or outline the bow with a fine black or gold liner for definition.
Step seven, seal it in. Apply a good quality top coat to protect your bow nail design and give it that glossy salon finish.
The first few times you try this, it might not look perfect, and that is completely normal. I always tell beginners that bow nail design is one of those skills where your fifth attempt will look noticeably better than your first, so do not give up after one try.
Tools And Products You Need For Bow Nail Design
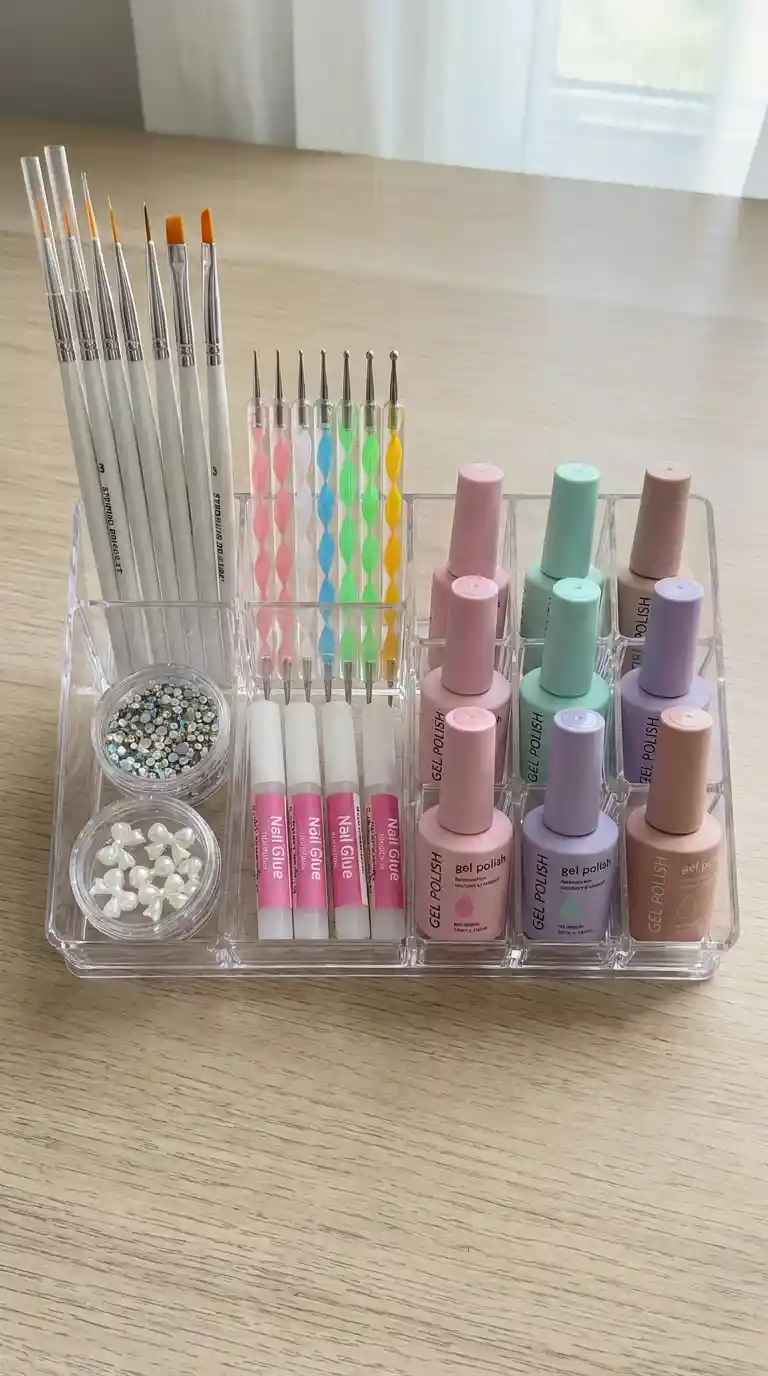
Having the right tools makes a massive difference when attempting bow nail design, whether you are a professional or doing it at home for fun.
Here are the essentials I keep in my kit specifically for bow nail design work.
A fine detail brush is non negotiable. Look for a brush with a very thin tip, often labeled as a size 000 or 00, since this gives you the control needed to draw clean bow loops.
Gel polish tends to hold its shape better than regular polish when painting small details like bows, so I often recommend it for anyone serious about getting into nail art.
A dotting tool helps with the small knot in the center of the bow and can also be used to add tiny accent dots around your bow nail design for extra flair.
Nail art charms shaped like bows are a great shortcut if hand painting feels intimidating. These pre made bow charms can simply be glued onto the nail with nail glue or embedded into gel for a secure hold.
A good top coat, preferably one designed for nail art since these tend to be thicker and protect fine details without smudging them.
Rhinestones or small pearls are optional but they pair beautifully with bow nail design, especially when placed at the center knot of the bow to make it look like a tiny bow accessory rather than just a painted shape.
Bow Nail Design For Different Occasions
One of the reasons I recommend bow nail design so often to my clients is because it adapts so well to different events and settings.
Wedding Bow Nail Design
Brides love bow nail design because it strikes the right balance between elegant and sentimental. A common request I get is a soft white or ivory base with tiny pearl white bows on the ring finger only, leaving the rest of the nails plain for a clean, timeless look. Some brides go bolder and want bows on every nail paired with subtle shimmer for extra shine in wedding photos.
Prom And Party Bow Nail Design
For prom season, bow nail design gets a lot more colorful. Bright pinks, purples, and even color changing polish paired with glittery bows are extremely popular among teens. This is the time of year I see the most requests for oversized, statement bow nail design on the ring finger.
Everyday Bow Nail Design
Not every bow nail design has to be for a big event. Plenty of my regular clients ask for a subtle version they can wear to work or school. In these cases I usually suggest a small, single colored bow on just one or two nails, keeping the rest of the manicure simple so it does not look out of place in a professional setting.
Bow Nail Design Color Combinations
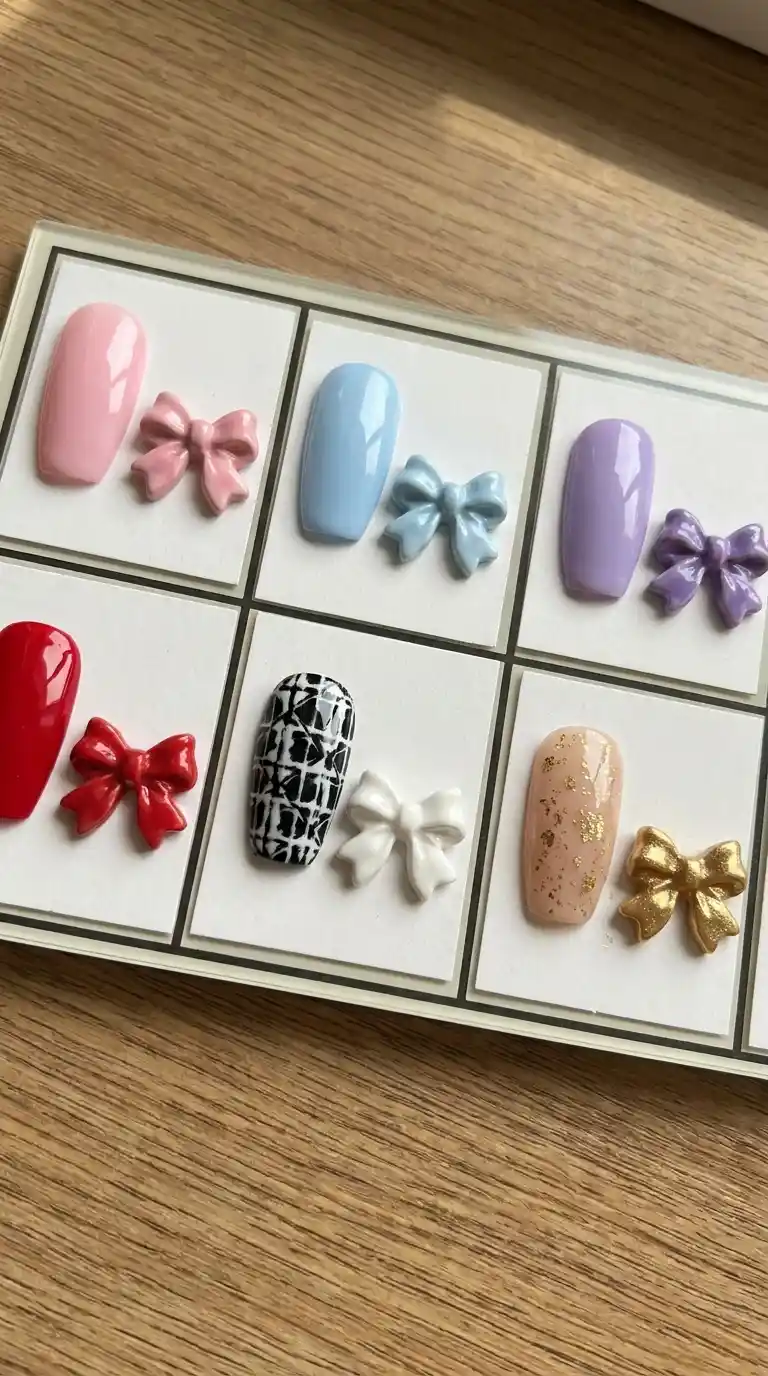
Choosing the right color combination can make or break a bow nail design. Over the years I have found certain pairings work better than others.
Pink and white is the most requested combination and it never seems to go out of style. It gives a soft, romantic feel that suits almost any occasion.
Red and white creates a bold, classic look that many clients request during the winter holidays because it has a festive, almost candy cane inspired feel without being too literal.
Black and gold gives bow nail design a more mature, sophisticated edge. This combination is popular among clients who want something elegant for evening events.
Lavender and silver is a newer trend I have noticed picking up, especially among younger clients who want something that feels fresh and slightly whimsical.
Nude with a single accent color, usually gold or a soft brown, works wonderfully for anyone who wants bow nail design but needs to keep things office appropriate.
Also Read : Rainbow Ombre Nails: The Ultimate Guide To Stunning Salon Quality Color Blends At Home
Bow Nail Design For Short Nails Versus Long Nails
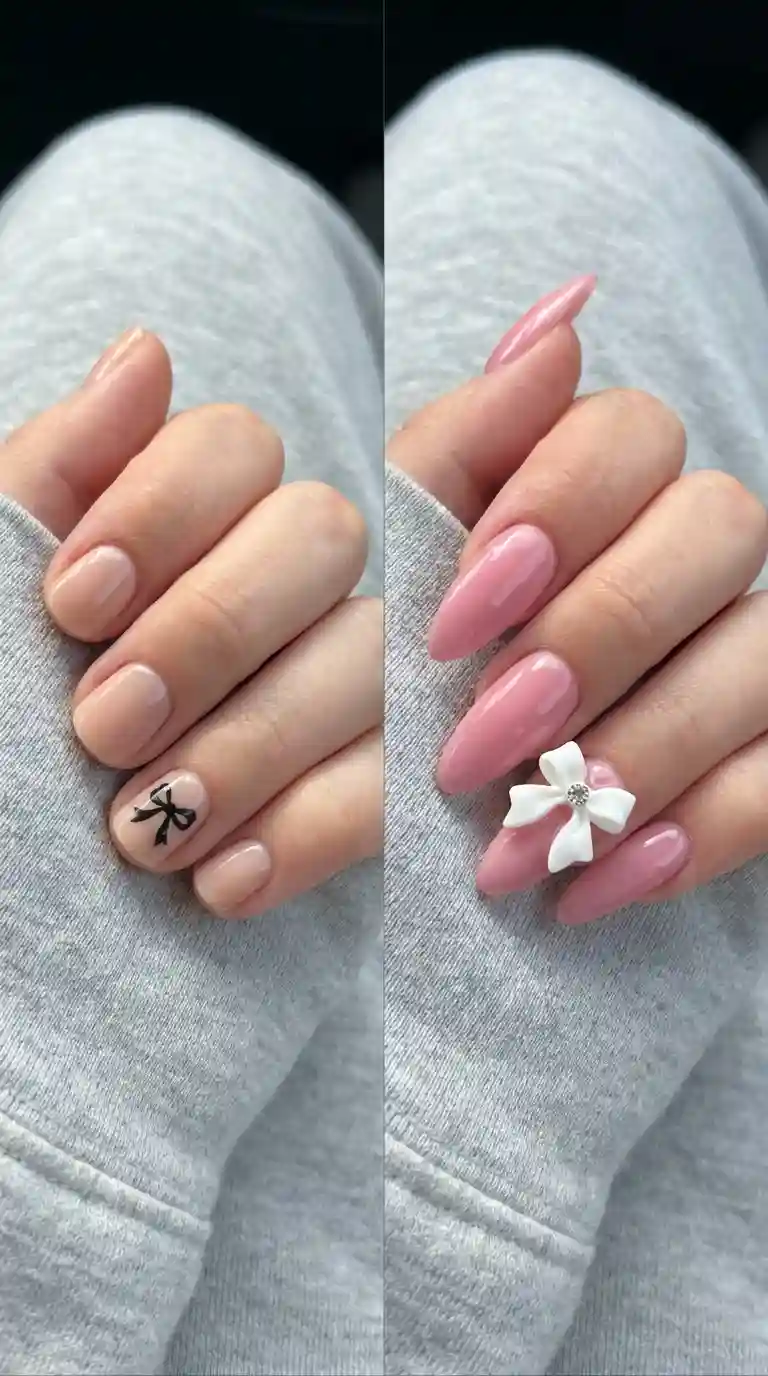
A question I hear constantly is whether bow nail design works on short nails or if you need length for it to look good. The honest answer is that it works on both, but the approach changes slightly.
For short nails, I always recommend scaling the bow down significantly. A tiny bow placed near the cuticle looks proportionate and elegant on a short nail bed, while a large bow can end up looking cramped and messy. Sticking to a single color bow rather than multiple colors also helps keep short nail bow designs looking clean rather than busy.
For long nails, you have much more room to play with. This is where 3D bow nail design really shines because there is enough surface area to properly showcase the sculpted bow without it overwhelming the nail. Longer nails also allow for more intricate detailing, like adding tiny rhinestones along the edges of the bow or combining it with a French tip.
Common Mistakes To Avoid In Bow Nail Design
I have seen a lot of bow nail design attempts go wrong over the years, both from clients trying it at home and occasionally from newer nail technicians still building their skills. Here are the mistakes that come up most often.
Using too much polish on the brush is probably the number one issue. When your brush is overloaded, the bow shape spreads out and loses its crisp edges. Always wipe excess polish off your brush before starting a stroke.
Skipping the base coat is another common error. Without it, your bow nail design might not last as long and the color underneath can look uneven.
Rushing between layers causes smudging. Bow nail design involves several small steps, and each one needs a moment to dry before you move to the next, otherwise the lines blur together.
Making the bow too large for the nail is something I see often with beginners. A bow that takes up the entire nail surface can look cartoonish rather than elegant unless that is specifically the style you are going for.
Not sealing with a top coat leads to the design chipping away much faster than it should. This is especially true for 3D bow nail design, where the sculpted element needs proper sealing to stay attached.
How Long Does Bow Nail Design Last
This depends heavily on which type of bow nail design you choose and how it was applied. Hand painted bow nail design using regular polish typically lasts about a week before chipping becomes noticeable, similar to a standard manicure.
Gel based bow nail design tends to last two to three weeks with proper care, since gel polish is more resistant to daily wear and tear.
3D bow nail design, when done with acrylic or hard gel and properly sealed, can last just as long as a full set of acrylics, often three to four weeks, though the sculpted bow itself may need occasional reinforcement if it takes a hard knock.
Charm based bow nail design, where a pre made bow is glued on, tends to be the least durable of the options since the glue bond can weaken over time, especially with frequent hand washing or exposure to lotions and oils.
Bow Nail Design Trends By Season
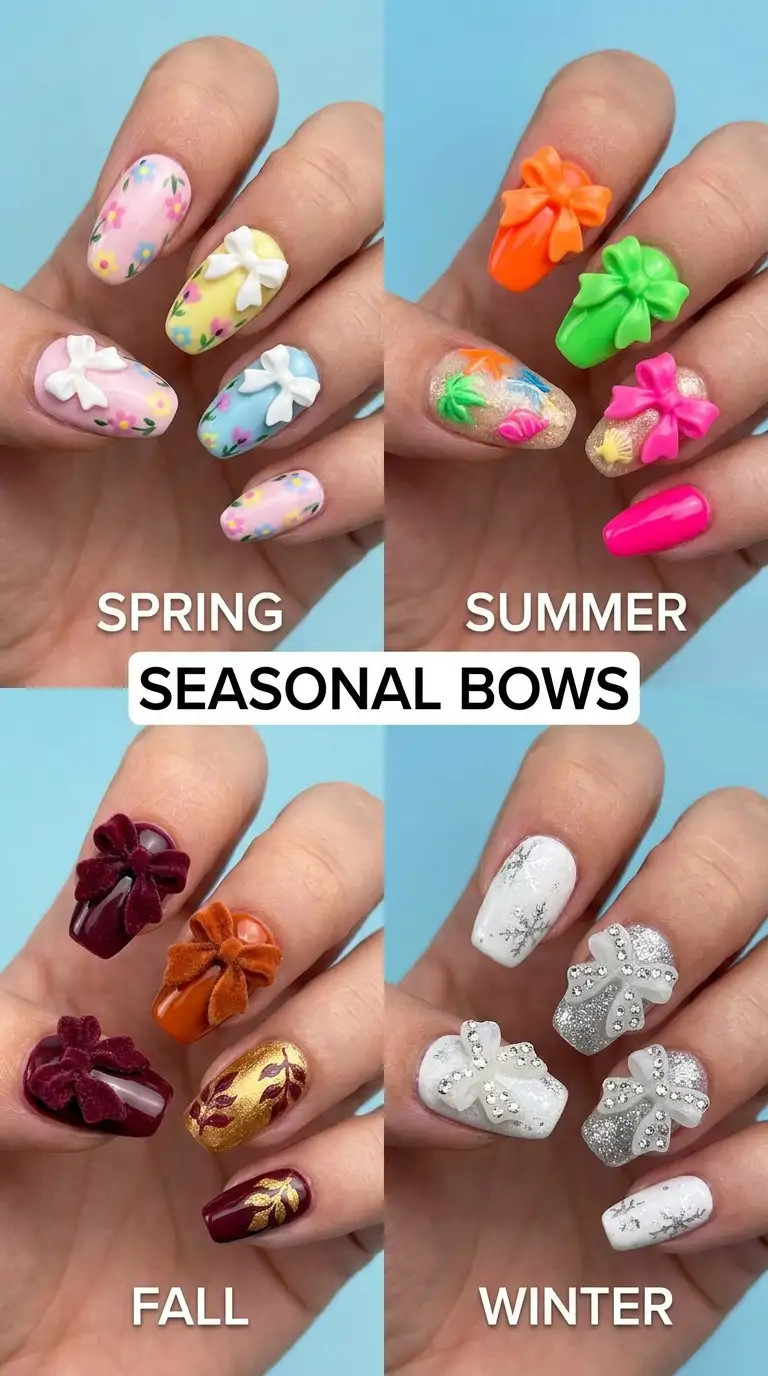
Bow nail design shifts in style depending on the time of year, and I always adjust what I recommend to clients based on the season.
Spring Bow Nail Design
Spring is all about soft pastels. Think baby pink, mint green, lilac and pale yellow, often paired with tiny painted bows and sometimes a small flower accent nearby. This is my favorite season for bow nail design because the color options feel fresh and light.
Summer Bow Nail Design
Summer tends to bring out bolder, brighter choices. Neon pinks, oranges and vibrant blues paired with white bows are extremely popular, especially for vacations and beach trips where clients want their nails to stand out in photos.
Fall Bow Nail Design
Once autumn arrives, the palette shifts toward deeper, warmer tones. Burgundy, burnt orange, deep browns and mustard yellow all pair beautifully with bow nail design, often finished with a matte top coat for a cozy, seasonal feel.
Winter Bow Nail Design
Winter is when I see the most requests for glittery and metallic bow nail design. White, silver, deep red and emerald green are common base colors, often combined with sparkling bows to match the holiday season.
Tips From My Personal Experience As A Nail Artist
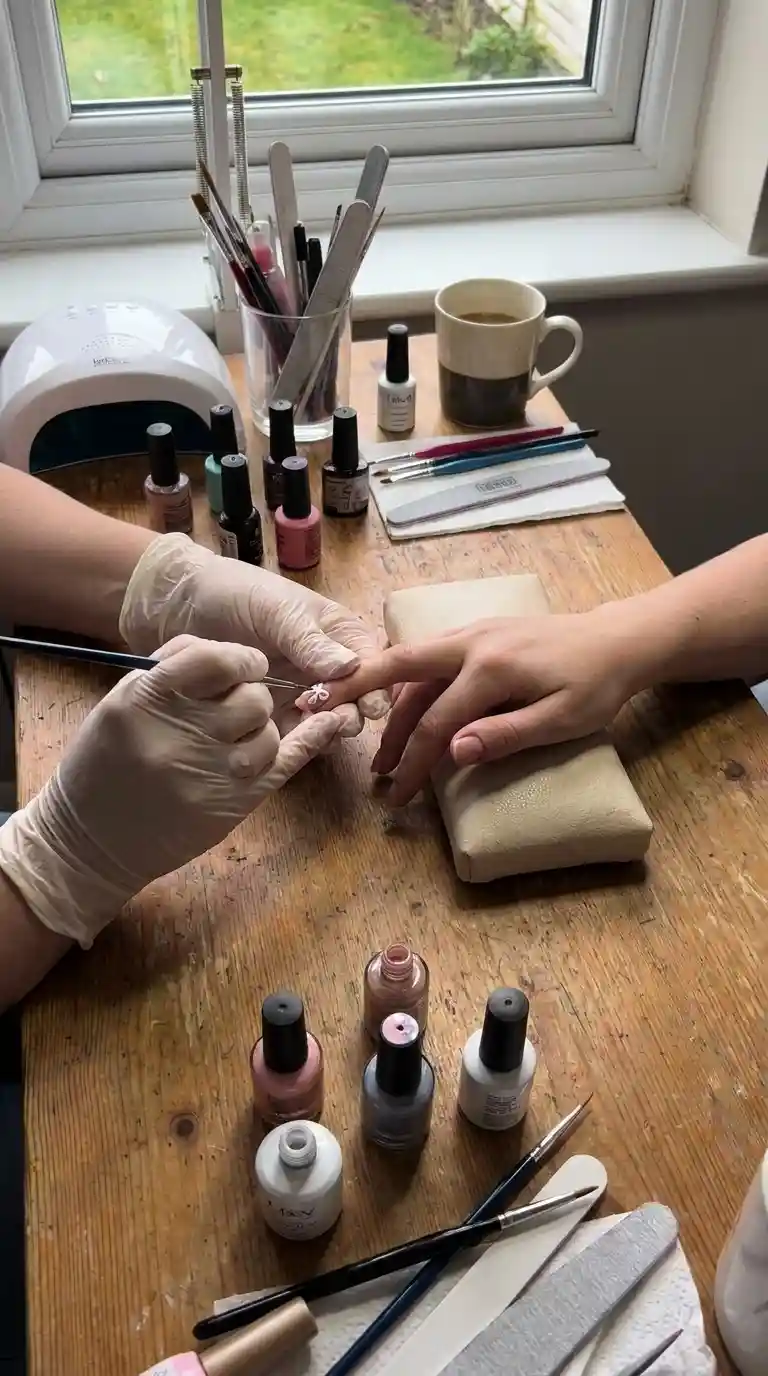
Over the years working with countless clients on bow nail design, I have picked up a few tricks that are not always mentioned in tutorials but make a real difference.
Must Read : Lime Green Nail Designs: 27 Bold Ideas That Will Make Your Manicure Impossible to Ignore
Practice on a nail wheel before attempting bow nail design directly on your own nails or a client’s nails. This lets you get comfortable with the brush strokes without the pressure of ruining an actual manicure.
Thin your polish slightly if it feels too thick to control. A drop or two of polish thinner can make a huge difference in how smoothly your brush glides when creating the delicate lines needed for bow nail design.
Keep a cotton swab dipped in acetone nearby while working. Mistakes happen, and being able to quickly clean up a smudged line without starting the entire nail over saves a lot of time and frustration.
Do not be afraid to make the two loops of the bow slightly uneven or asymmetrical. In my experience, a tiny bit of imperfection actually makes bow nail design look more hand crafted and charming rather than stiff and robotic.
Take your time with the center knot. This small detail is what makes a bow nail design read as a bow rather than just two random blobs of color, so give it a bit of extra attention even if you rush through other parts of the design.
Bow Nail Design Aftercare
Once you have your bow nail design done, whether at home or at a salon, taking care of it properly will help it last longer and look fresher for the entire wear period.
Apply cuticle oil daily, focusing around the base of the nail. This keeps the skin hydrated and prevents lifting, which can be especially important around any raised elements like a 3D bow.
Wear gloves when doing household chores involving water or chemicals. Prolonged exposure to dish soap or cleaning products can weaken both the base color and any glued on elements of your bow nail design.
Avoid using your nails as tools. Opening cans, scratching off labels or picking at packaging puts unnecessary stress on nail art, and a raised bow element is particularly vulnerable to snagging.
Reapply top coat every few days if you notice the shine starting to fade. A quick refresh coat can extend the life of your bow nail design without needing a full redo.
Cost Of Getting Bow Nail Design Done Professionally
Pricing for bow nail design varies quite a bit depending on where you live, the salon you visit, and which style you choose.
A simple hand painted bow on one or two nails, added to a regular manicure, usually costs a small additional fee on top of the base service, often somewhere in the range of a few extra dollars per nail.
Full set bow nail design, where every nail features some version of the bow motif, costs more since it takes significantly longer to complete. This can range widely depending on complexity.
3D bow nail design tends to be the most expensive option because it requires additional product and more time for sculpting and curing. Clients should expect to pay a premium for this style compared to simple flat painted designs.
I always tell clients to communicate clearly with their nail artist about budget before the appointment starts, since bow nail design can be scaled up or down in complexity to fit different price points without sacrificing the overall look.
Also Read : Nude Nail Designs: The Ultimate Guide to Effortless, Elegant Nails for Every Occasion
Bow Nail Design Inspiration For 2026
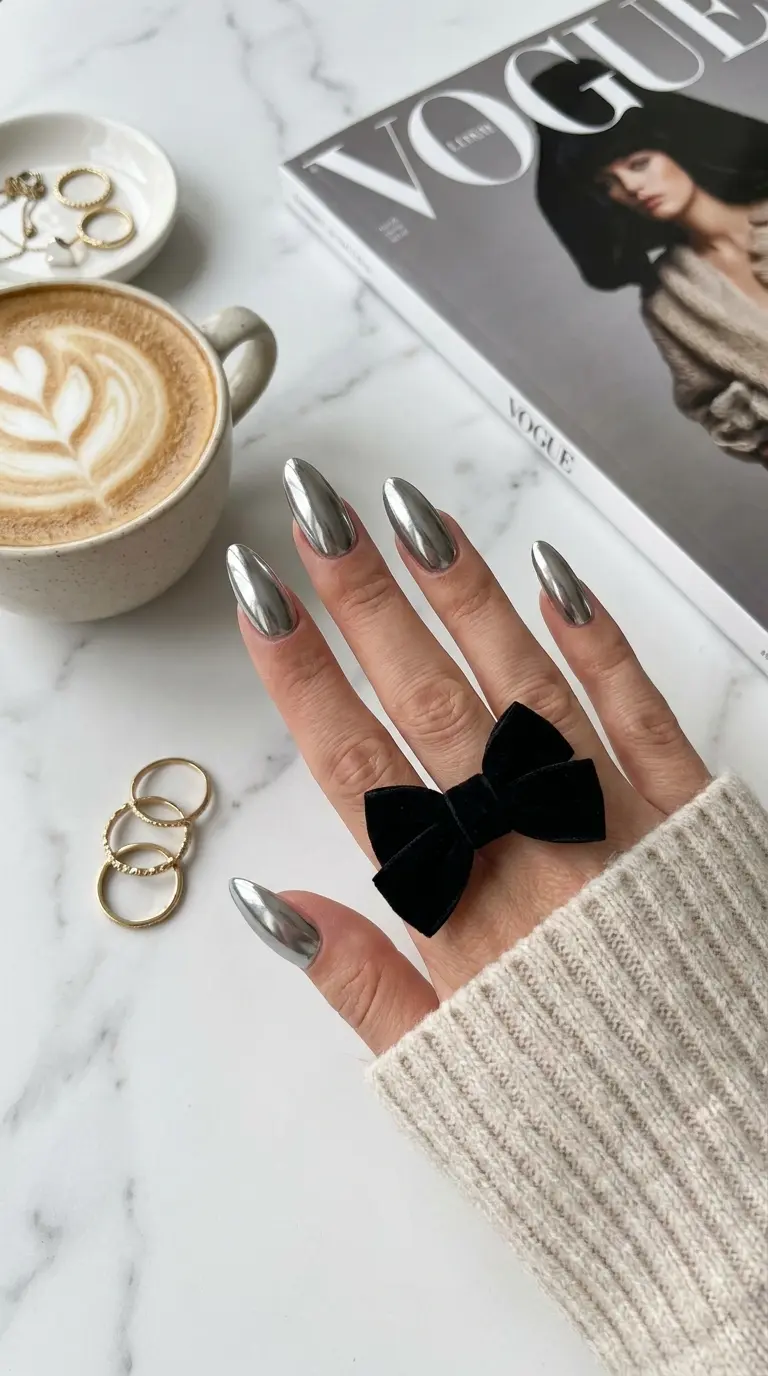
Nail trends evolve every year, and bow nail design continues to evolve alongside broader fashion movements. Heading into 2026, I am seeing a few new directions emerging among clients and on social media.
Oversized statement bows on a single accent nail, rather than smaller bows across every nail, are becoming increasingly popular. This creates a focal point without overwhelming the entire hand.
Two toned bows, where each loop of the bow is a different color, are showing up more often as clients look for ways to make their bow nail design feel more unique and personalized.
Textured bows, using a matte finish for the bow itself against a glossy nail base, or vice versa, add dimension without needing full 3D sculpting.
Mixed media bow nail design, combining a painted bow with a small rhinestone or pearl at the center knot, continues to grow in popularity as a way to elevate a simple design into something that feels more special occasion worthy.
Final Thoughts On Bow Nail Design
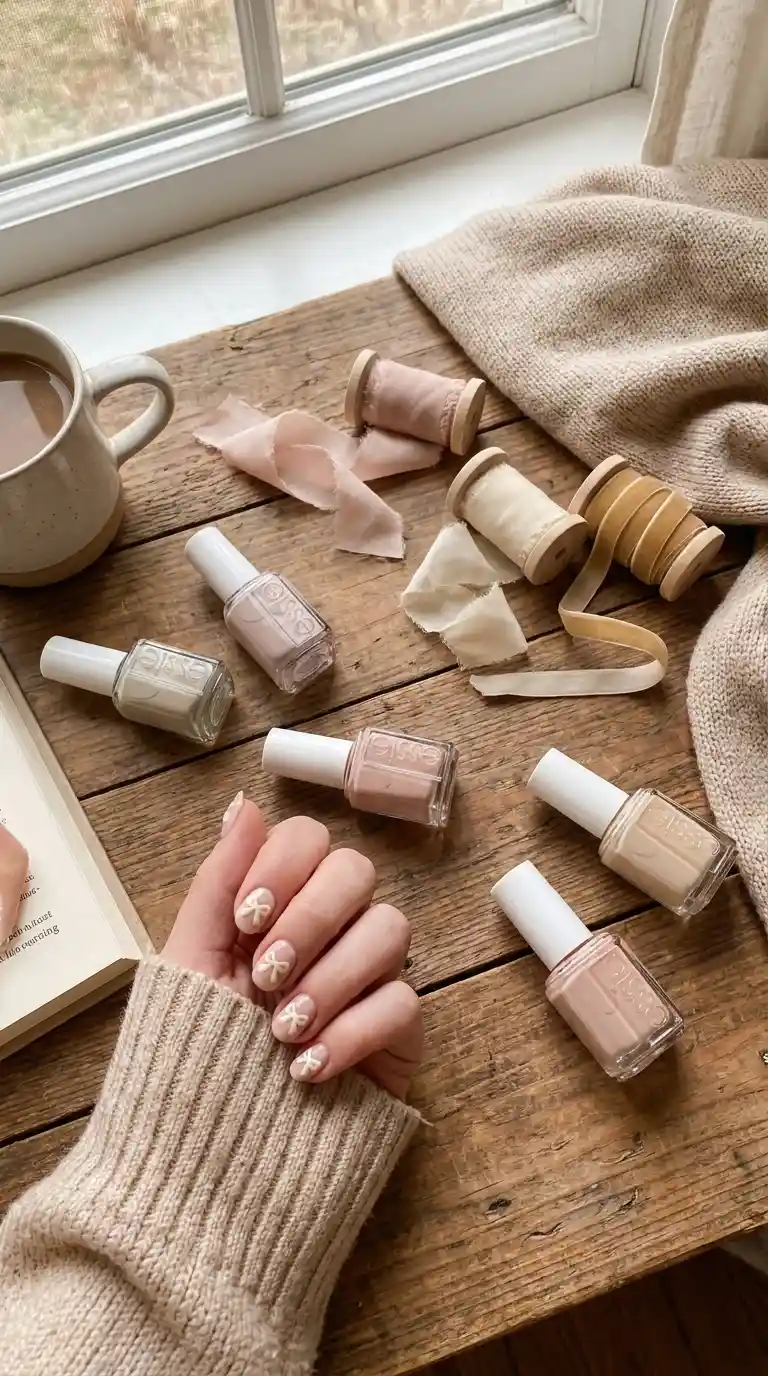
Bow nail design has earned its place as a lasting favorite rather than a fleeting trend because it offers something for everyone. Whether you want something delicate and barely there or bold and impossible to miss, there is a version of bow nail design that fits your style, your nail length, and your lifestyle.
If you are thinking about trying bow nail design for the first time, my advice is simple. Start small, practice patience, and remember that even professional nail artists had a first attempt that did not turn out perfectly. Bow nail design rewards practice, and once you get the hang of the basic technique, you will find endless ways to customize it for every season, occasion and mood.
Frequently Asked Questions
What is bow nail design?
Bow nail design is a style of nail art where a bow shape, either hand painted, sculpted in three dimensions, or applied as a small charm, is used as the main decorative feature on one or more nails.
Is bow nail design hard to do at home?
It can be challenging at first, especially getting the two loops symmetrical, but with practice on a nail wheel and patience, most beginners can achieve a decent bow nail design within a few attempts.
What colors work best for bow nail design?
Pink and white is the most classic and requested combination, though black and gold, red and white, and nude with gold accents are also extremely popular depending on the occasion.
How long does bow nail design last?
Hand painted bow nail design using regular polish typically lasts about a week, gel based versions last two to three weeks, and properly sealed 3D bow nail design can last three to four weeks.
Can bow nail design be done on short nails?
Yes, bow nail design works well on short nails as long as the bow is scaled down appropriately, usually placed near the cuticle in a smaller size to keep proportions balanced.
What tools do I need for bow nail design?
A fine detail brush, a dotting tool, quality polish or gel, a good top coat, and optionally rhinestones or bow shaped charms are the main tools needed to create bow nail design.
Is bow nail design suitable for a wedding?
Absolutely, bow nail design is one of the most requested bridal nail styles, often done in soft white or ivory shades with small pearl accents for an elegant, romantic finish.
How much does professional bow nail design cost?
Pricing varies by salon and complexity, but a simple accent bow usually costs a small additional fee on top of a regular manicure, while full set or 3D bow nail design costs more due to the extra time and skill involved.
What is 3D bow nail design?
3D bow nail design involves sculpting an actual raised bow shape using acrylic powder or hard gel, then attaching it to the nail, giving a more dimensional and luxurious appearance compared to a flat painted bow.
Can I use nail stickers instead of hand painting a bow nail design?
Yes, pre made bow stickers or charms are a great alternative for anyone who finds hand painting difficult, and they can look just as polished when applied and sealed properly.
Pingback: 65 Leopard Print Nail Ideas That Are Wildly Chic