
There is something about the first week of spring that makes every client walk into my salon chair and say the same thing. They want flowers on their nails. Not just any flowers though. They want cherry blossoms.
I still remember the very first time a bride asked me for a cherry blossom nail design for her wedding. She showed me a photo on her phone of a sakura tree in full bloom and said she wanted her hands to look like that tree during her vows. That request changed the way I look at floral nail art forever, and cherry blossom nail design has been one of my most requested services ever since.
If you have ever scrolled through Pinterest or Instagram during March or April, you already know what I am talking about. Soft pink petals scattered across a milky white or nude base, tiny gold branches curving across the nail bed, and that delicate, almost watercolor feel that makes a manicure look like a piece of art rather than just polish. That is cherry blossom nail design, and in this article I am going to walk you through everything I have learned about it over the years, from the tools you need to the mistakes almost every beginner makes.
This is not a rushed guide. I want to give you the full picture, from history to technique to aftercare, so that by the end of this article you will understand cherry blossom nail design well enough to either try it at home or ask for it confidently at your next salon visit.
Also Read : Rose Nail Design Magic: 50+ Gorgeous Ideas Every Nail Lover Needs To Try
What Is Cherry Blossom Nail Design
Cherry blossom nail design is a style of nail art inspired by sakura flowers, the delicate five petal blossoms that bloom on cherry trees during springtime in places like Japan, Korea, and parts of the United States such as Washington D.C. The design usually features soft pink or white petals painted on a light colored base, often paired with thin brown or gold branch lines that mimic the natural growth of a cherry blossom tree.
What makes cherry blossom nail design different from other floral nail art is its simplicity. Unlike roses or hibiscus flowers, which need heavy shading and multiple layers to look realistic, cherry blossom petals are made of just a few soft strokes. Each petal has a small notch at the tip, giving it that heart shaped, almost whimsical look. This simplicity is exactly why so many nail artists, including myself, fell in love with this style early in our careers.
In my experience, cherry blossom nail design works on almost every nail shape and length. I have done it on short square nails for busy moms who just wanted a hint of spring, and I have done full length coffin nails for clients who wanted a dramatic statement look for a spring wedding. The design is flexible enough to be minimal or bold depending on how many flowers you add and how much of the nail you cover.
The Cultural Meaning Behind Cherry Blossom Nail Design
Before I explain the techniques, I think it is worth mentioning why this design carries so much emotional weight for people. In Japanese culture, cherry blossoms represent the fleeting nature of life. The flowers bloom beautifully for only a short time before falling, which is why they are often connected to themes of renewal, beauty, and impermanence.
When clients ask me for cherry blossom nail design, they are often not just asking for a pretty pattern. Many of them tell me it reminds them of a trip they took to Japan, a memory of a cherry blossom festival, or simply the feeling of spring arriving after a long winter. I think that emotional connection is part of why this nail art trend has stayed popular for so many years instead of fading out like other seasonal trends.
Why Cherry Blossom Nail Design Is Trending This Year
Every spring I see a spike in requests for cherry blossom nail design, but this year feels different. Social media has completely changed how fast a nail trend can spread, and cherry blossom designs are practically made for video content. The petals catching light, the gradient backgrounds, the tiny gold branch details, all of it looks incredible on camera.
There is also a bigger shift happening in the nail industry toward what I like to call quiet elegance. For a while, clients wanted loud, maximalist nails with rhinestones and chrome finishes on every single nail. Now I am seeing more requests for soft, romantic, almost painterly designs, and cherry blossom nail design fits perfectly into that shift.
Another reason this trend keeps growing is that it works for almost any occasion. I have done cherry blossom nail design for graduations, baby showers, birthdays, first dates, and even funerals where the family wanted something soft and meaningful rather than dark colors. Very few nail art styles are that versatile.
Cherry Blossom Nail Design And The Rise Of Minimalist Florals
Something I have noticed in the last two years is a strong pull toward minimalist floral nail art. Clients are asking for one or two accent nails instead of covering every nail with flowers. This actually plays to the strengths of cherry blossom nail design because a single branch with a few scattered petals can look just as striking as a fully covered set, sometimes even more striking because of the negative space.
I often tell my clients that cherry blossom nail design does not need to be complicated to look expensive. A clean base, one accent nail with a hand painted branch, and a couple of tiny petals on the surrounding nails can look just as polished as a full floral set, and it takes half the time in the chair.
Read Also: Rainbow Ombre Nails: The Ultimate Guide To Stunning Salon Quality Color Blends At Home
Tools And Supplies Needed For Cherry Blossom Nail Design
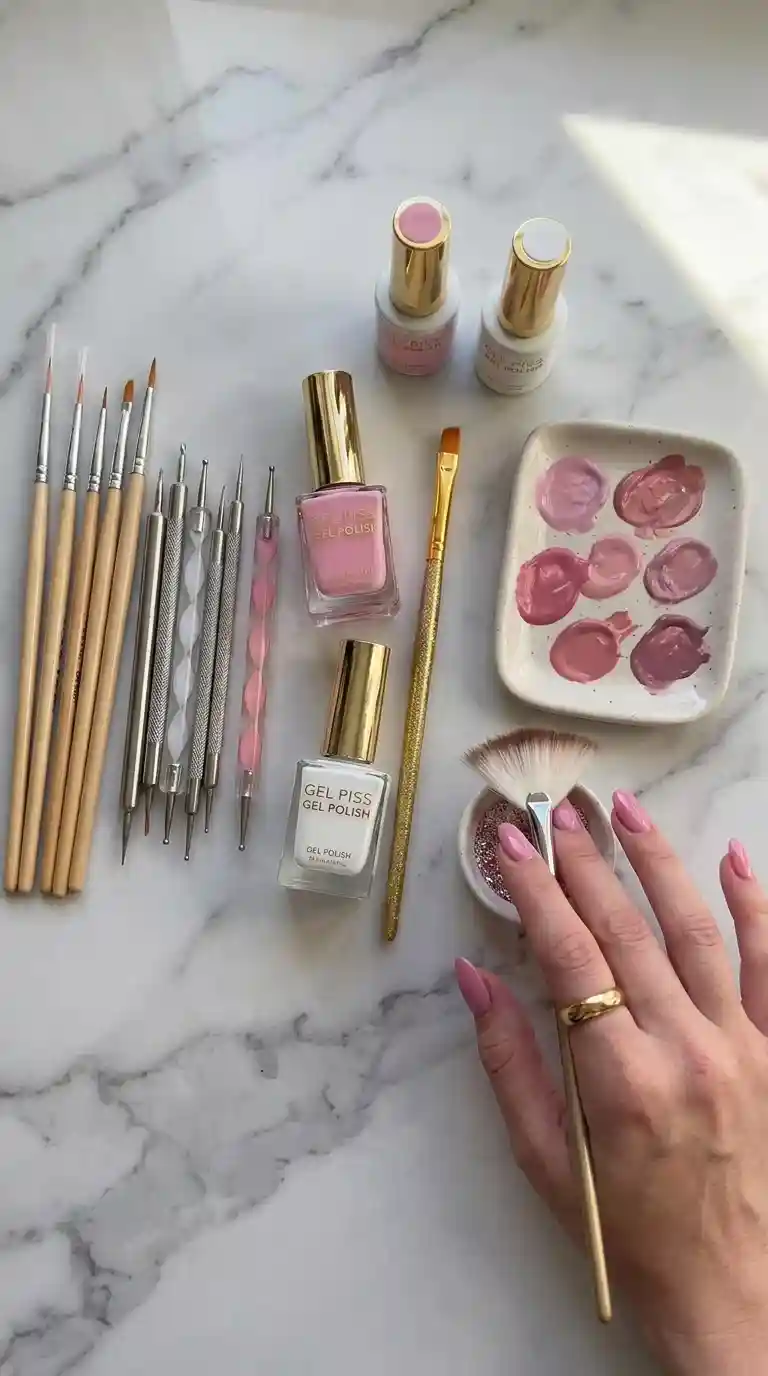
Before you attempt cherry blossom nail design, either on yourself or a client, you need the right tools. I have tried cutting corners on supplies early in my career and I can tell you it never ends well. Cheap brushes fray, thin polish drags, and dotting tools that are too thick ruin the delicate look that cherry blossom nail design depends on.
Here is what I personally keep in my kit whenever I know I have a cherry blossom nail design appointment coming up.
Brushes You Actually Need
The most important tool for cherry blossom nail design is a good detail brush. I use a size 000 or 00 liner brush for the branches and a small flat or angled brush for the petals. Some artists prefer a one stroke technique using a flat brush loaded with two colors at once, which creates a natural gradient on each petal without extra blending steps.
A fan brush is optional but I like to keep one nearby for softening edges or creating a light dusting effect around the flowers, almost like falling petals in the wind.
Polish And Gel Colors For Cherry Blossom Nail Design
You do not need dozens of colors to create a beautiful cherry blossom nail design. In fact, I usually work with a very small palette:
A soft baby pink for the main petals A deeper rose or mauve pink for shading and depth Pure white for highlights and lighter petals A warm brown or dark taupe for the branches A touch of gold or champagne shimmer for accents A base color, usually milky white, nude, or a very pale pink
That is really all you need. I know it is tempting to buy every shade of pink in the store, but a limited palette actually makes the design look more cohesive.
Dotting Tools And Other Extras
A small dotting tool is useful for creating the little dots you sometimes see at the center of each blossom or scattered around the design like falling petals caught in the air. I also keep a small piece of makeup sponge on hand for ombre backgrounds, which pair beautifully with cherry blossom nail design because they mimic the soft blush of a spring sky.
Choosing The Right Base Color For Cherry Blossom Nail Design
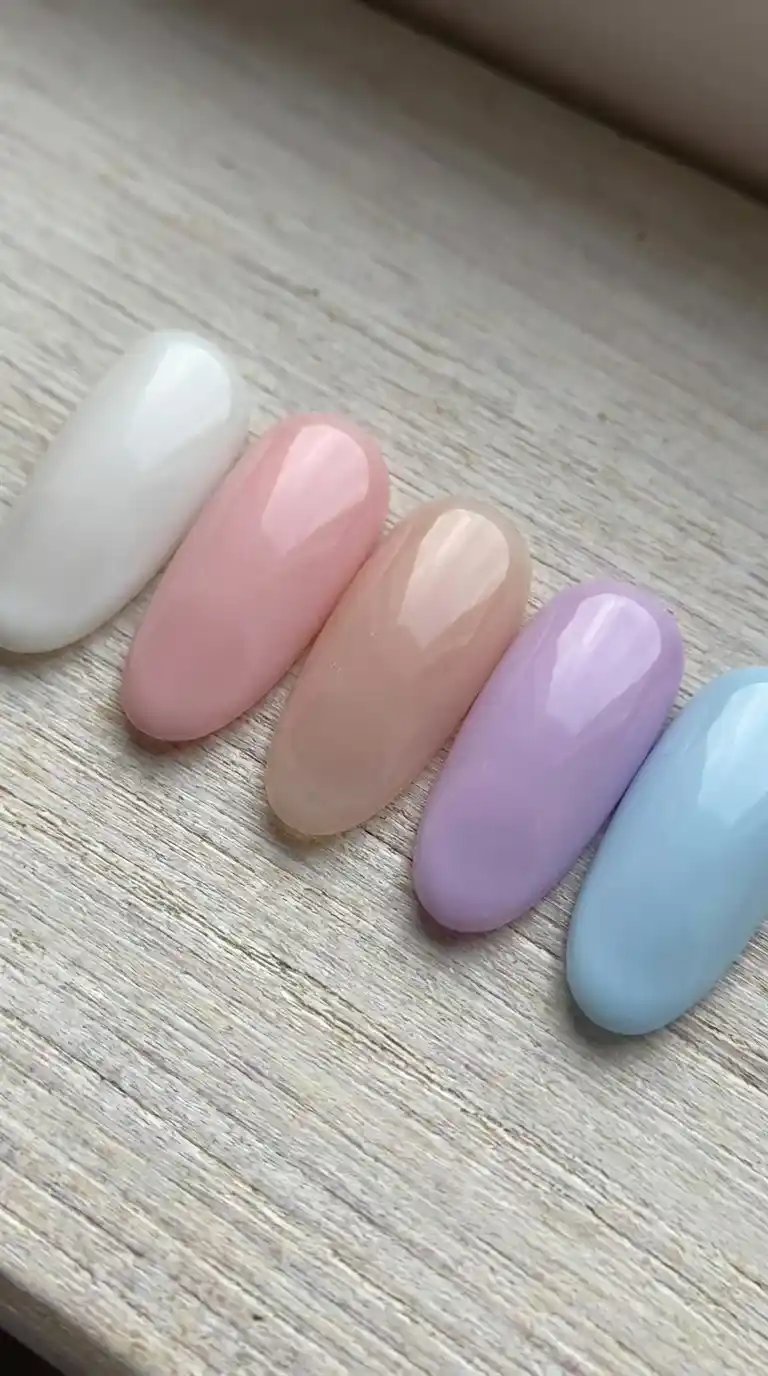
The base color you choose can completely change the mood of your cherry blossom nail design. I always ask my clients a few questions before picking a base, like what they are wearing, what the occasion is, and how bold they want their nails to feel.
Also Read : Red and Gold Nail Design: The Ultimate Guide to Bold, Glamorous Nails That Turn Heads
Milky White Base
This is my personal favorite base for cherry blossom nail design. It has a soft, almost porcelain look that makes the pink petals pop without being harsh. It also photographs beautifully, which matters a lot to clients who want their nails on social media.
Nude Or Sheer Pink Base
A nude base gives cherry blossom nail design a more natural, everyday feel. This is what I recommend most often for clients who want something they can wear to work or to a casual event without looking too dressed up.
Pale Lavender Or Sky Blue Base
I know these might sound unusual for cherry blossom nail design, but trust me, they work beautifully. A soft lavender base gives the design a dreamy, almost twilight feeling, while a pale sky blue base makes the pink petals look like they are floating against a spring sky. I have done both for clients heading to spring festivals and the compliments never stop.
Deep Colors For Contrast
For clients who want something bolder, I sometimes suggest a deep burgundy or even a matte black base with cherry blossom nail design painted in white and soft pink. The contrast is striking and it tends to suit clients with a more edgy personal style who still want a touch of softness.
Step By Step Cherry Blossom Nail Design Tutorial
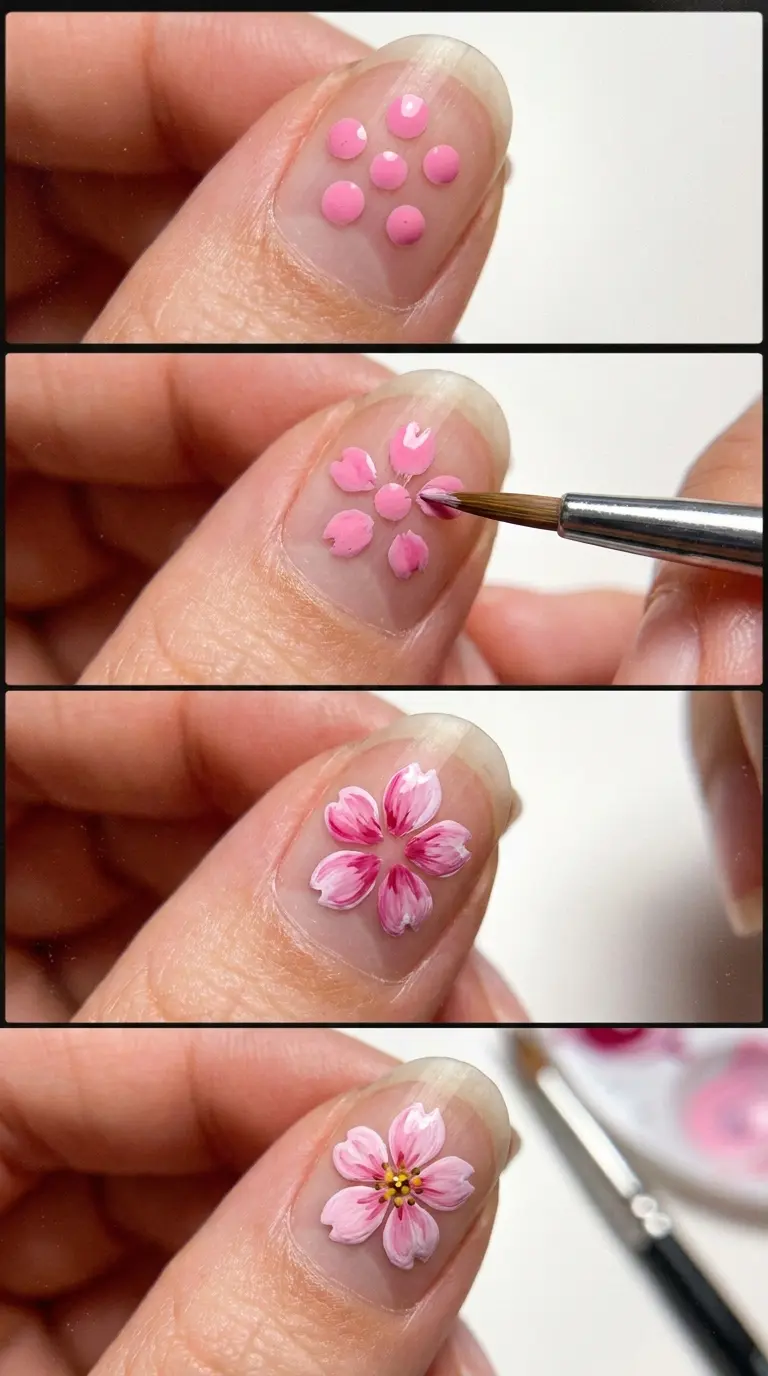
This is the section I get asked about the most, so I am going to break it down exactly the way I teach it to my apprentices. Cherry blossom nail design might look complicated from a distance, but once you understand the basic petal shape, it becomes almost repetitive, in a relaxing way.
Step One: Prep The Nail
Like any good manicure, cherry blossom nail design starts with proper prep. Push back the cuticles, shape the nail, and buff the surface lightly so your base color goes on smoothly. Skipping this step is one of the biggest reasons a design ends up looking messy, because any texture on the nail bed will show through the thin layers of polish used in floral art.
Step Two: Apply The Base Color
Apply two thin coats of your chosen base color and let it cure fully if you are using gel, or dry completely if you are using regular polish. I always tell clients that patience here saves time later. If the base is even slightly tacky, your detail work will drag and smear.
Step Three: Paint The Branch
Using your thin liner brush and brown or dark taupe polish, paint a soft curved line from one corner of the nail toward the center or across the tip. Do not worry about making it perfectly straight. Real cherry blossom branches are never perfectly straight, and a slightly wobbly line actually looks more natural. Add one or two smaller branch lines coming off the main branch for a more realistic look.
Step Four: Create The Petal Base Dots
For each blossom, use your dotting tool or the tip of your brush to place five small dots in a rough circle, close together but not touching. This will act as the foundation for your petals.
Step Five: Shape Each Petal
Using your detail brush, gently drag each dot outward and pinch the tip slightly inward to create that classic heart shaped notch at the end of each petal. This is the step that takes the most practice, and honestly, even after years of doing cherry blossom nail design, I still slow down here because it is the detail that makes or breaks the whole look.
Step Six: Add Shading
Once your five petals are dry, take your deeper rose pink and add a tiny bit of shading near the base of each petal where it meets the center. This tiny step adds so much dimension. Without it, the flowers look flat, but with it, they suddenly look like they have depth and light hitting them naturally.
Step Seven: Add The Center Dots
Using a dotting tool with a very fine tip, add a small yellow or gold dot in the center of each blossom. Some artists add three or four tiny lines radiating out from the center to mimic stamens, which gives an even more realistic finish for close up photos.
Step Eight: Scatter Loose Petals
To finish the cherry blossom nail design, I like to scatter a few loose petals or small dots around the nail, almost like they have fallen from the branch. This detail ties the whole hand together when you look at all ten nails at once.
Step Nine: Seal With Top Coat
Finish with a high shine or matte top coat depending on your client’s preference. I personally love a glossy top coat for cherry blossom nail design because it gives the petals a wet, almost dewy look that feels very true to a real flower.
Cherry Blossom Nail Design Ideas For Different Occasions
Cherry blossom nail design is not a one size fits all style. Over the years I have adapted it for dozens of different occasions, and I want to share some of my favorite variations with you.
Also Read : Swirl Nail Designs: The Complete Guide To Painting Gorgeous, Head Turning Swirls On Every Nail Shape
Cherry Blossom Nail Design For Weddings
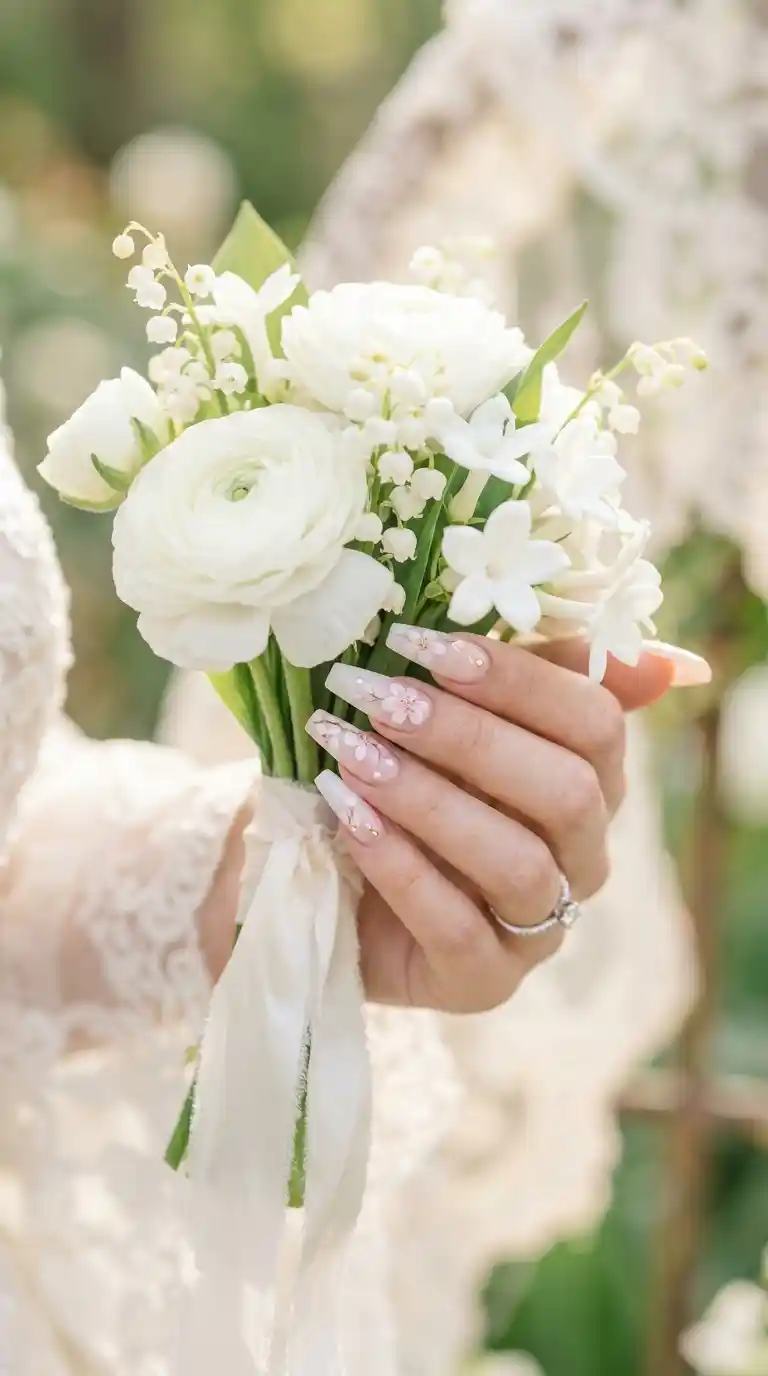
Wedding nails need to photograph well from every angle for hours on end, which means the design has to be durable and elegant at the same time. For brides, I usually recommend a soft white or ivory base with delicate blush pink cherry blossom nail design on the ring finger and pinky as accent nails, keeping the rest of the nails simple with a hint of shimmer.
I always ask brides about their dress and flowers before finalizing the design. If the bouquet has cherry blossoms or peonies, matching the nail color to the bouquet creates such a beautiful cohesive look in photographs.
Cherry Blossom Nail Design For Spring Festivals
For clients heading to outdoor spring events, I love going a bit more playful. Bright coral accents mixed into the traditional pink petals, or a pale yellow base instead of white, gives the design a fresh, festival ready feeling. This is also where I bring in more scattered petals and a slightly more colorful branch, sometimes even a soft green undertone to represent new leaves.
Minimalist Cherry Blossom Nail Design
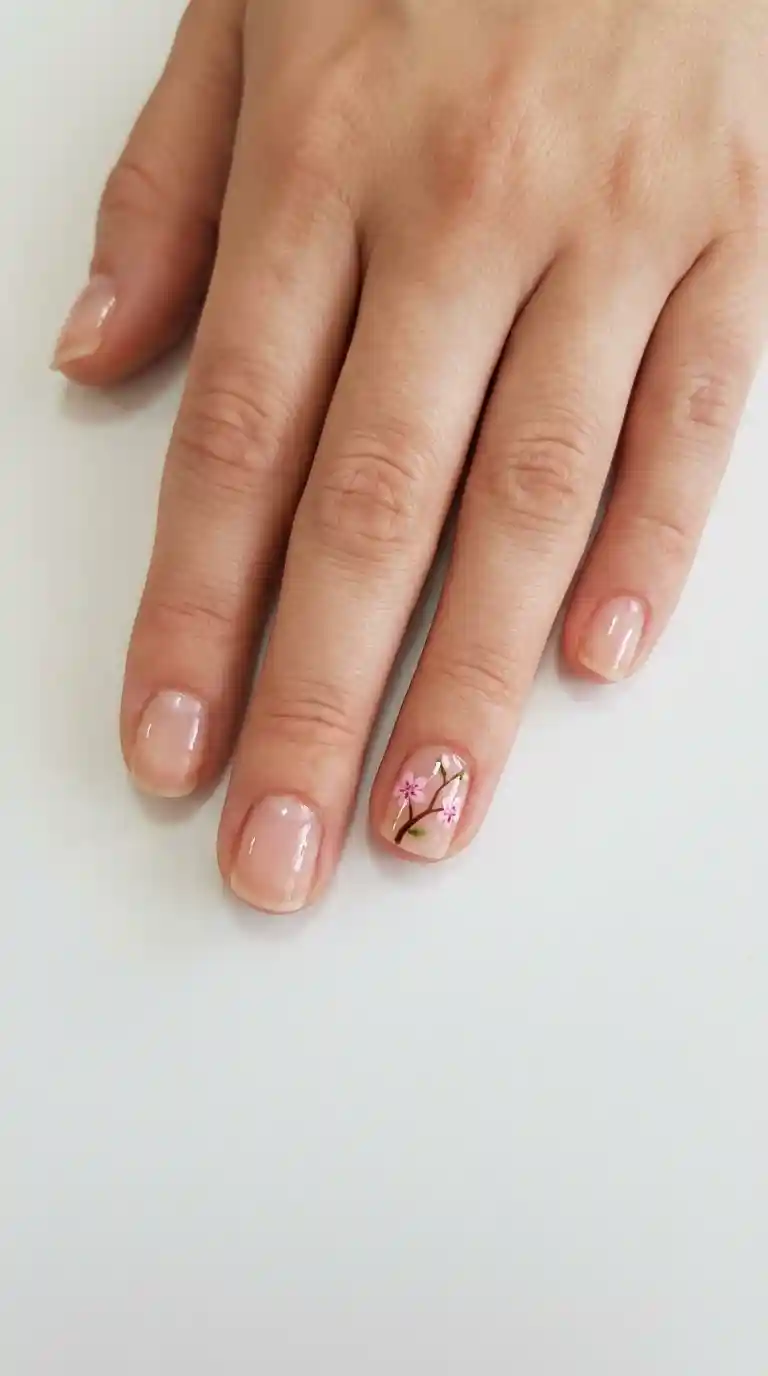
Not everyone wants a full floral set, and honestly, some of my favorite work has come from minimalist requests. A single accent nail with one small branch and two or three blossoms, while the rest of the nails stay a simple nude or clear coat, can look incredibly sophisticated. This version of cherry blossom nail design is perfect for workplaces with more conservative dress codes or for clients who are new to nail art and want to ease into it.
Must Read : Cherry Nail Design: 50 Sweet, Stunning and Show Stopping Ideas Every Nail Lover Needs To Try
French Tip Cherry Blossom Nail Design
Combining the classic French manicure with cherry blossom nail design has become one of my most requested combinations this year. Instead of the standard white tip, I paint a soft pink or nude tip, and then add tiny cherry blossom branches curving from the tip line downward onto the nail bed. It gives a modern twist to a timeless style.
Ombre Cherry Blossom Nail Design
For clients who love a gradient look, I blend two shades of pink from the cuticle to the tip, going from a very pale blush at the base to a slightly deeper rose at the tip, then add cherry blossom branches over the gradient. The soft color transition mimics the way real blossoms look against a sunset sky, and it is genuinely one of the most photographed designs I have ever done.
Cherry Blossom Nail Design For Short Nails Versus Long Nails
I get this question constantly, so let me address it directly. Cherry blossom nail design absolutely works on short nails. In fact, I sometimes think it looks even more elegant on a shorter, neatly shaped nail because the design does not overwhelm the hand.
Short Nail Considerations
On short nails, I scale everything down. Smaller petals, thinner branch lines, and usually just one or two blossoms per nail instead of a full cluster. Trying to cram a large, detailed cherry blossom nail design onto a tiny nail bed tends to look cluttered rather than delicate, so less really is more here.
Long Nail Considerations
Longer nails, especially coffin or almond shapes, give you more canvas to work with. This is where I love creating a full branch that travels across two or three nails when the hand is placed flat, almost like a continuous scene rather than isolated flowers on each nail. It takes more planning and a steady hand, but the final result for cherry blossom nail design on long nails is absolutely stunning.
Color Combinations For Cherry Blossom Nail Design
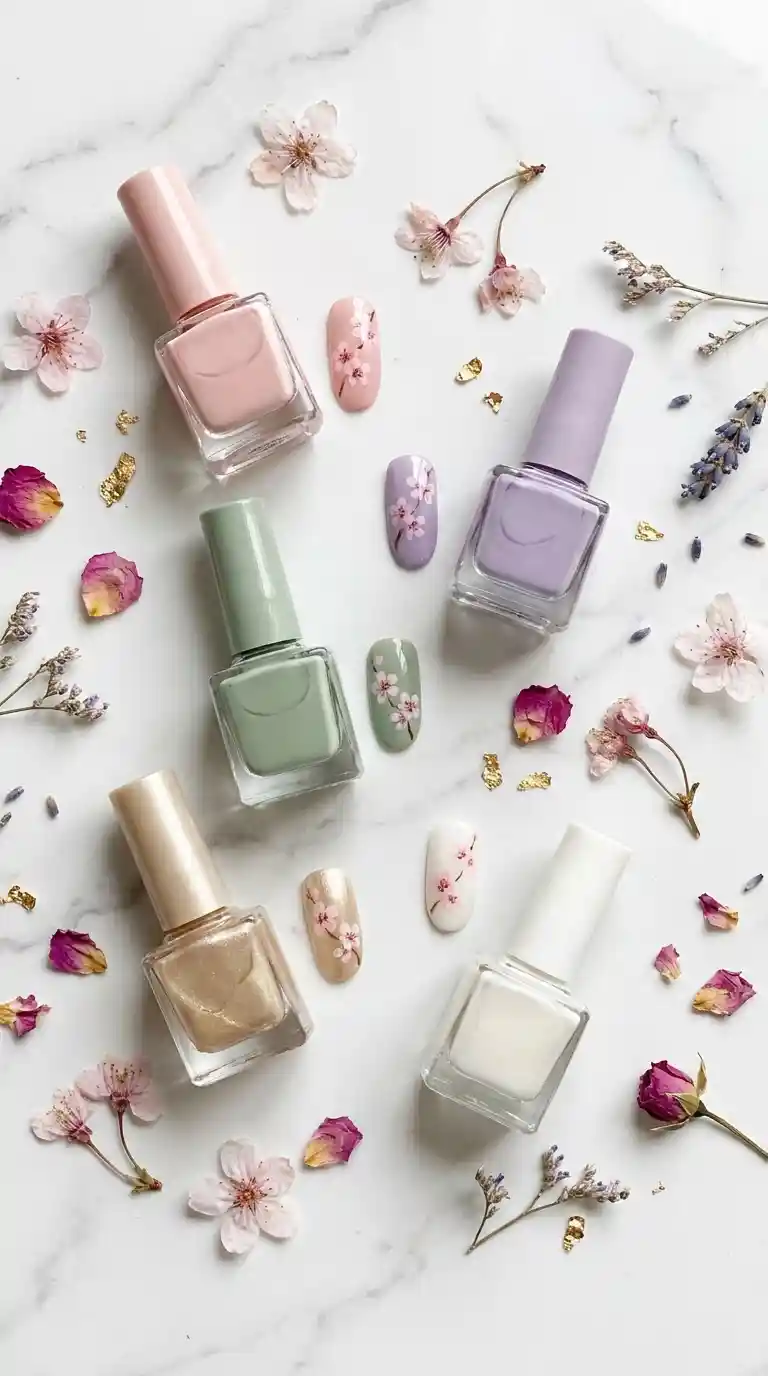
While pink and white will always be the classic combination for cherry blossom nail design, I love experimenting with unexpected color pairings, and my clients often end up loving the results even more than the traditional palette.
Soft Pink And Gold
Adding a touch of gold leaf or gold striping to your cherry blossom nail design instantly elevates it. I use gold for the branch lines instead of brown when a client wants something a bit more luxurious. It works beautifully for wedding or engagement nails.
Lavender And Blush
This combination gives cherry blossom nail design a dreamy, almost fairy tale quality. I pair a soft lavender base with blush pink petals and it always reminds me of blossoms at dusk.
Sage Green And Pink
For clients who want a more earthy, botanical feel, I use a sage green base instead of white or nude. The pink petals against the green background create a beautiful contrast that feels fresh and modern rather than overly sweet.
Black And White Cherry Blossom Nail Design
For a more dramatic, editorial look, I have done cherry blossom nail design in pure white petals against a matte black base. It photographs incredibly well and tends to suit clients with bolder personal style who still want a floral element in their nails.
Common Mistakes To Avoid In Cherry Blossom Nail Design
I have made every single one of these mistakes myself when I was learning, and I still see them constantly when new nail artists attempt cherry blossom nail design for the first time.
Overcrowding The Nail
The biggest mistake I see is trying to fit too many flowers onto one nail. Cherry blossom nail design relies heavily on negative space to feel elegant. When every inch of the nail is covered in petals, it starts to look busy instead of delicate.
Using Polish That Is Too Thick
Thick polish drags when you try to create fine petal shapes, which ruins the crisp, clean look that cherry blossom nail design needs. If your polish feels gloopy, thin it slightly with a proper polish thinner rather than nail polish remover, which can break down the formula.
Skipping The Shading Step
I mentioned this earlier but it deserves repeating. Flat, single toned petals with no shading look amateur no matter how good your petal shape is. The shading is what separates a beginner cherry blossom nail design from a professional one.
Rushing The Drying Time Between Layers
Painting petals on top of a base that has not fully dried causes smearing and dragging. I know it is tempting to move quickly, especially when you have a full day of appointments, but rushing this step almost always leads to redoing the entire nail.
Ignoring Nail Shape When Planning The Design
Every nail shape holds a design differently. A branch line that looks beautiful on an almond shaped nail might look awkward on a square nail if you do not adjust the curve. I always take a moment to look at the nail shape before deciding exactly where the branch and blossoms will sit.
Cherry Blossom Nail Design Aftercare Tips
Once your cherry blossom nail design is complete, taking care of it properly will make it last significantly longer, especially if you went with hand painted gel art rather than stickers or decals.
Moisturize Daily
I tell every client to apply cuticle oil daily, not just for the health of their nails but because well moisturized cuticles actually make hand painted designs like cherry blossom nail design look neater for longer, since dry skin can cause the polish to lift at the edges.
Avoid Harsh Chemicals
Cleaning products, especially those with bleach or strong solvents, can dull the top coat and cause your cherry blossom nail design to lose its shine much faster. I always recommend wearing gloves for household chores when you have fresh nail art.
Get Regular Fill Ins
If you went with gel extensions or a gel overlay for your cherry blossom nail design, book a fill in appointment every two to three weeks. Waiting too long allows the natural nail to grow out unevenly, which can distort the design and cause lifting near the cuticle.
Handle With Care During The First Few Hours
This applies to any polish, but especially detailed art. Cherry blossom nail design involves several thin layers, and even with a top coat, the design needs a few hours to fully harden if regular polish was used. Avoid tight gloves or activities that put pressure on the nail tips right after your appointment.
Also Read : Best Summer Pastel Nails: The Dreamy Manicure Trend Taking Over This Season
Seasonal Cherry Blossom Nail Design Trends
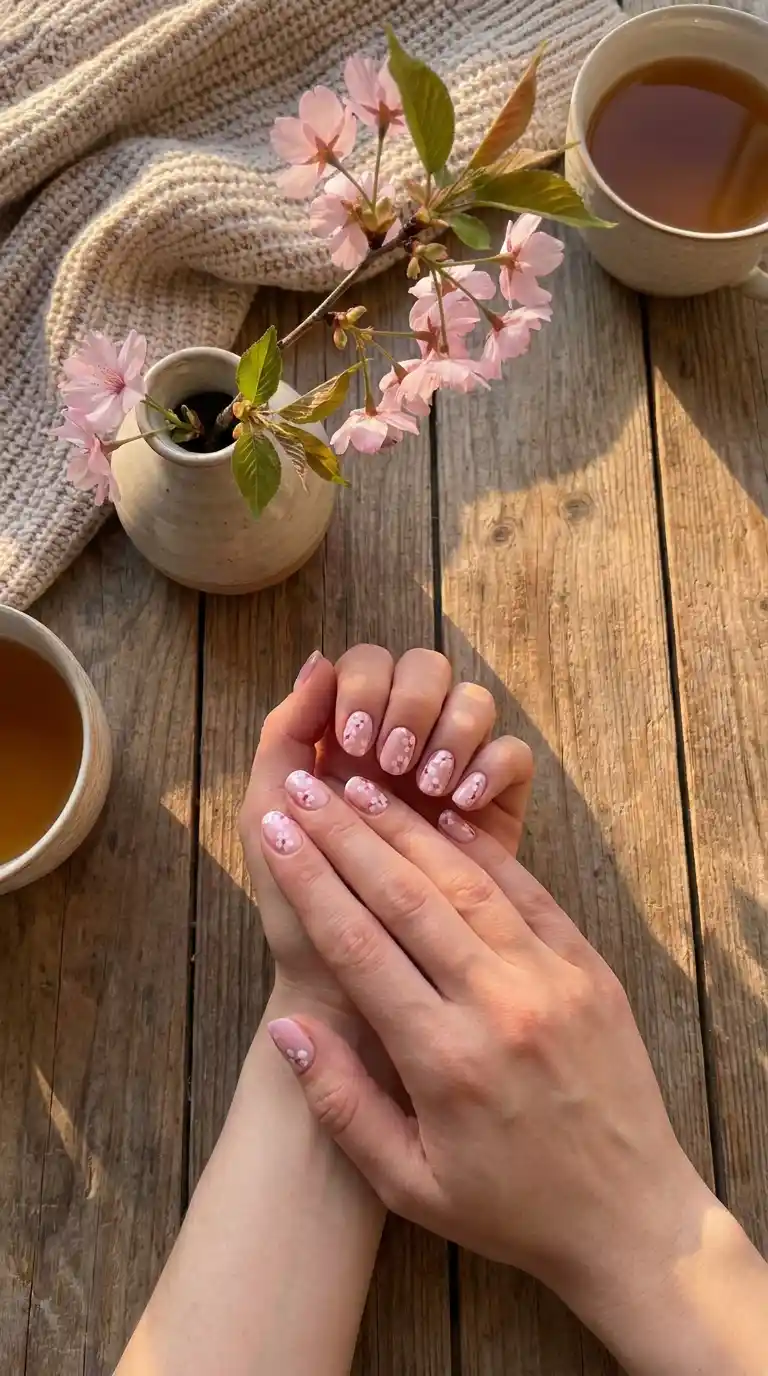
While spring is obviously the peak season for cherry blossom nail design, I have found ways to adapt it for other times of the year, and clients love having a version they can wear beyond the traditional bloom season.
Spring Cherry Blossom Nail Design
This is the classic version most people think of, soft pinks, whites, and gold accents that mirror the actual blooming season outside. I do the most bookings for this style between late February and early May.
Summer Cherry Blossom Nail Design
In summer, I tend to brighten the palette. Coral pinks, a hint of turquoise in the base, and sometimes a small crystal or two placed at the center of each blossom for a bit of sparkle that catches the sunlight.
Autumn Cherry Blossom Nail Design
Believe it or not, cherry blossom nail design translates beautifully into fall palettes too. I switch the petals to a warmer terracotta or dusty rose and use the branch as the main focus, sometimes adding a few tiny painted leaves in deep orange or burgundy alongside the blossoms.
Winter Cherry Blossom Nail Design
For winter, I love pairing white cherry blossom nail design against a deep navy or forest green base, almost like blossoms against a night sky. Adding a subtle shimmer or snowflake accent nail alongside the florals makes this version feel appropriate for the colder months without losing the essence of the design.
Cherry Blossom Nail Design For Gel Versus Acrylic
Clients often ask me whether cherry blossom nail design looks better on gel or acrylic, and honestly, the answer depends on what they want out of the manicure.
Gel Cherry Blossom Nail Design
Gel tends to give a slightly more natural, glossy finish and it cures quickly under a lamp, which means less waiting time between layers when creating detailed petals. I personally prefer gel for cherry blossom nail design because the polish stays workable a bit longer before curing, giving me more control over blending and shading.
Acrylic Cherry Blossom Nail Design
Acrylic is a great option for clients who want length and extra durability, especially for events like weddings where the nails need to survive hours of activity. The hard surface of acrylic can actually hold fine detail work beautifully once it is properly buffed and prepped, and I often use acrylic extensions as the base before painting a full cherry blossom nail design on top.
Which One Lasts Longer
In my experience, both gel and acrylic can hold cherry blossom nail design for two to three weeks with proper care, though acrylic tends to have a slight edge in durability for very active hands, while gel wins in terms of a lighter, more natural feel on the nail.
DIY Versus Salon Cherry Blossom Nail Design
I always tell people that cherry blossom nail design is absolutely something you can attempt at home, but I want to be honest about the learning curve involved.
What DIY Cherry Blossom Nail Design Requires
If you want to try this at home, patience is honestly more important than skill in the beginning. I recommend practicing the petal shape on paper or on a practice nail tip before attempting it on your actual nails. Start with just one flower on one nail before committing to a full set. Nail art decals and cherry blossom stickers are also a wonderful shortcut for beginners who want the look without the freehand painting.
When To Visit A Salon
For special occasions like weddings, graduations, or professional photos, I always recommend visiting a trained nail artist for your cherry blossom nail design. A professional will have the steady hand, proper tools, and years of muscle memory needed to create clean, symmetrical petals across all ten nails, something that is genuinely difficult to achieve on your own dominant hand.
Read Also : 50 Stunning Red Nail Designs That Will Instantly Upgrade Your Manicure Game
My Personal Experience With Cherry Blossom Nail Design Clients
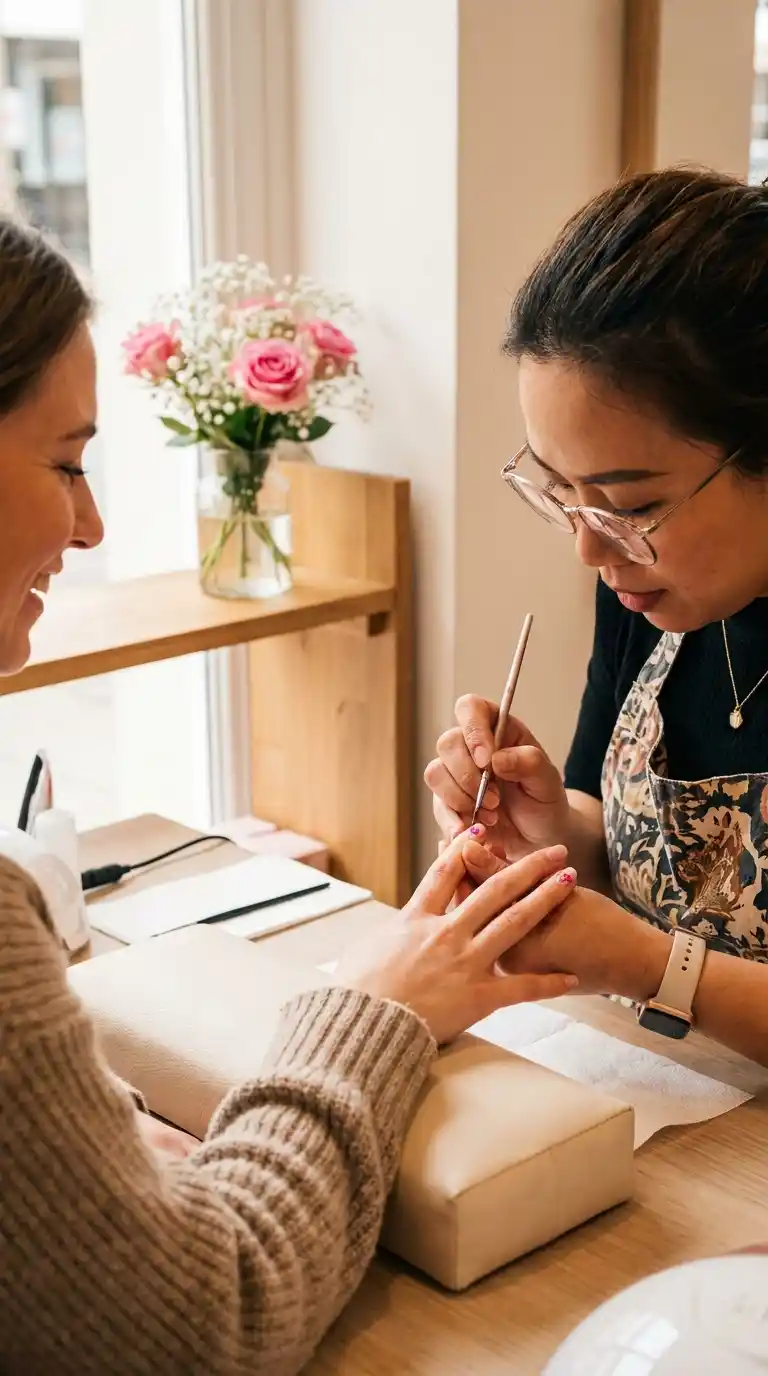
Over the years, cherry blossom nail design has become one of the styles I associate most with meaningful client conversations. I mentioned the bride earlier, but there have been so many others. A client once asked for cherry blossom nail design to celebrate finishing chemotherapy, telling me she wanted her hands to look like something new was growing again. Another client wanted it for her daughter’s first birthday party because cherry blossoms were the theme of the nursery.
These moments are why I never treat cherry blossom nail design as just another service on my price list. Each set tells a small story, and the fact that this particular design keeps carrying that kind of emotional weight for people is part of why I have kept perfecting my technique year after year.
I have also learned so much through trial and error, especially in my early years when I would rush the shading step or overcrowd the nail with too many petals because I thought more meant better. Slowing down, using fewer flowers, and trusting negative space completely changed the quality of my work, and it is advice I now pass on to every apprentice who wants to learn cherry blossom nail design.
How Long Does Cherry Blossom Nail Design Take To Create
On average, a full set of cherry blossom nail design takes me between forty five minutes and one and a half hours, depending on how detailed the client wants the florals and whether we are doing a full floral set or just accent nails. Minimalist designs with one or two accent nails can be done in as little as twenty minutes once the base color has cured, while a full hand painted floral set with shading, gold accents, and scattered petals can take closer to two hours for a truly detailed result.
How Much Does Cherry Blossom Nail Design Cost
Pricing varies a lot depending on your location and the salon, but in my own experience, cherry blossom nail design typically costs anywhere from fifteen to sixty dollars on top of a regular manicure price, depending on how many nails are being decorated and how intricate the florals are. Full hand painted sets with gold leaf or crystal accents will naturally sit at the higher end of that range, while a simple accent nail design is much more affordable.
Final Thoughts On Cherry Blossom Nail Design
After everything I have shared in this article, I hope it is clear why cherry blossom nail design has remained one of my favorite styles to create year after year. It is delicate without being fragile, simple without being boring, and meaningful in a way that very few nail art trends manage to achieve. Whether you choose a full floral set for a wedding, a single accent nail for everyday wear, or a bold black and white version for something more editorial, cherry blossom nail design has a version that will suit you.
If you are attempting this at home, be patient with yourself. Every nail artist you admire, including myself, started with wobbly petals and uneven branches. If you are booking this with a professional, do not be afraid to bring reference photos and describe the mood you are going for, whether that is romantic, minimalist, or bold. Cherry blossom nail design is flexible enough to become whatever you need it to be, and that flexibility is exactly why I do not see this trend disappearing anytime soon.
Frequently Asked Questions
What is cherry blossom nail design?
Cherry blossom nail design is a style of nail art that features hand painted or decal based sakura flowers, usually in soft pink and white shades, often paired with thin brown or gold branch lines across the nail bed.
How do you paint cherry blossom flowers on nails?
You start by placing five small dots in a loose circle using a detail brush or dotting tool, then drag each dot outward while pinching the tip to create a heart shaped notch, followed by shading near the center and a small dot in the middle to finish the flower.
Does cherry blossom nail design work on short nails?
Yes, cherry blossom nail design works beautifully on short nails as long as the petals and branches are scaled down and the design is kept minimal rather than overcrowded.
How long does cherry blossom nail design last?
With proper care and either gel or acrylic application, cherry blossom nail design typically lasts two to three weeks before a fill in or touch up is needed.
Can I do cherry blossom nail design at home?
Absolutely, though it requires practice. Beginners should try practicing the petal shape on paper first and consider using cherry blossom nail decals or stickers as a simpler alternative to freehand painting.
What tools do I need for cherry blossom nail design?
You will need a thin detail brush, a small dotting tool, pink and white polish or gel, brown or gold polish for branches, and a good top coat to seal the design.
Is cherry blossom nail design good for weddings?
Yes, cherry blossom nail design is extremely popular for weddings because it is elegant, photographs beautifully, and can be customized to match a bride’s bouquet or dress details.
What nail shape looks best with cherry blossom nail design?
Almond and coffin shapes give more surface area for detailed branch work, but cherry blossom nail design also looks lovely on round and square nails, especially in a minimalist version.
How much does cherry blossom nail design cost at a salon?
Prices generally range from fifteen to sixty dollars on top of a standard manicure, depending on the intricacy of the design and whether extra details like gold leaf or crystals are added.
What is the difference between cherry blossom and regular floral nail design?
Cherry blossom nail design specifically uses five petal blossoms with a small notch at each petal tip, paired with branch line details, while general floral nail art can include a wider variety of flower shapes such as roses, hibiscus, or daisies.