
There is a certain kind of client who walks into my studio during the middle of July and asks for something dark, moody and a little bit unexpected. At first I thought this was a strange request for the sunniest season of the year, but the more I worked on spooky summer nails, the more I understood the appeal. There is something exciting about wearing dark, eerie nail art while everyone else is doing bright florals and pastel colors.
Spooky summer nails have quietly become one of my favorite categories to work on, mostly because they break every rule people assume about seasonal nail art. Who says summer has to mean neon colors and beachy themes? Some of my most creative work has come from clients who wanted something a little darker, a little more unusual, even while the sun was blazing outside.
In this article I want to share everything I have learned about spooky summer nails, from color theory and design inspiration to application tips and long term care. This comes from real time spent behind the chair, working with real clients who wanted something different from the typical summer manicure.
Also Read : Black Halloween Nails That Turn Heads: Spooky, Stylish And Unforgettable Ideas For This Year
Why Spooky Summer Nails Are Becoming A Major Trend
Spooky summer nails have grown in popularity for a few very specific reasons, and once you understand them, the trend starts to make a lot of sense. Part of it comes down to a broader shift in beauty culture, where people are moving away from strict seasonal color rules and choosing designs based on personal mood rather than the calendar.
There is also a strong visual contrast element at play. A dark, moody manicure against sun kissed summer skin creates a really striking look that photographs beautifully, especially against bright backgrounds like beach sand, green foliage or a clear blue sky. That contrast is part of what makes spooky summer nails so eye catching on social media.
From my experience, clients who request this style tend to be drawn to alternative fashion, gothic inspired aesthetics or simply a love of anything a little unconventional. Spooky summer nails give them a way to express that personality even during a season typically associated with brightness and cheerfulness.
My Personal Experience Creating Spooky Summer Nails
Every time a client requests spooky summer nails, I get genuinely excited, mostly because it gives me a chance to work outside the usual seasonal box. Instead of coral, turquoise and bright yellow, I get to pull out deep purples, blacks, dark greens and moody metallics, which honestly feels refreshing after weeks of painting the same bright summer palette.
What I have noticed over time is that spooky summer nails attract a really diverse group of clients. Some want something subtle, like a single dark accent nail paired with sheer summer shades. Others want a full transformation, with detailed skulls, bats or dark florals covering every nail. Both approaches work beautifully, and both fall firmly under this same creative umbrella.
I always tell clients that spooky summer nails do not have to feel out of place during the warmer months. With the right balance of color and detail, dark nail art can feel just as fitting for a summer evening as any bright, beachy design.
Choosing The Right Color Palette For Spooky Summer Nails
Building the right color palette is one of the most important steps when designing spooky summer nails. Unlike traditional Halloween nail art, which leans heavily into black and orange, this trend allows for a much wider range of colors that still feel connected to the season.
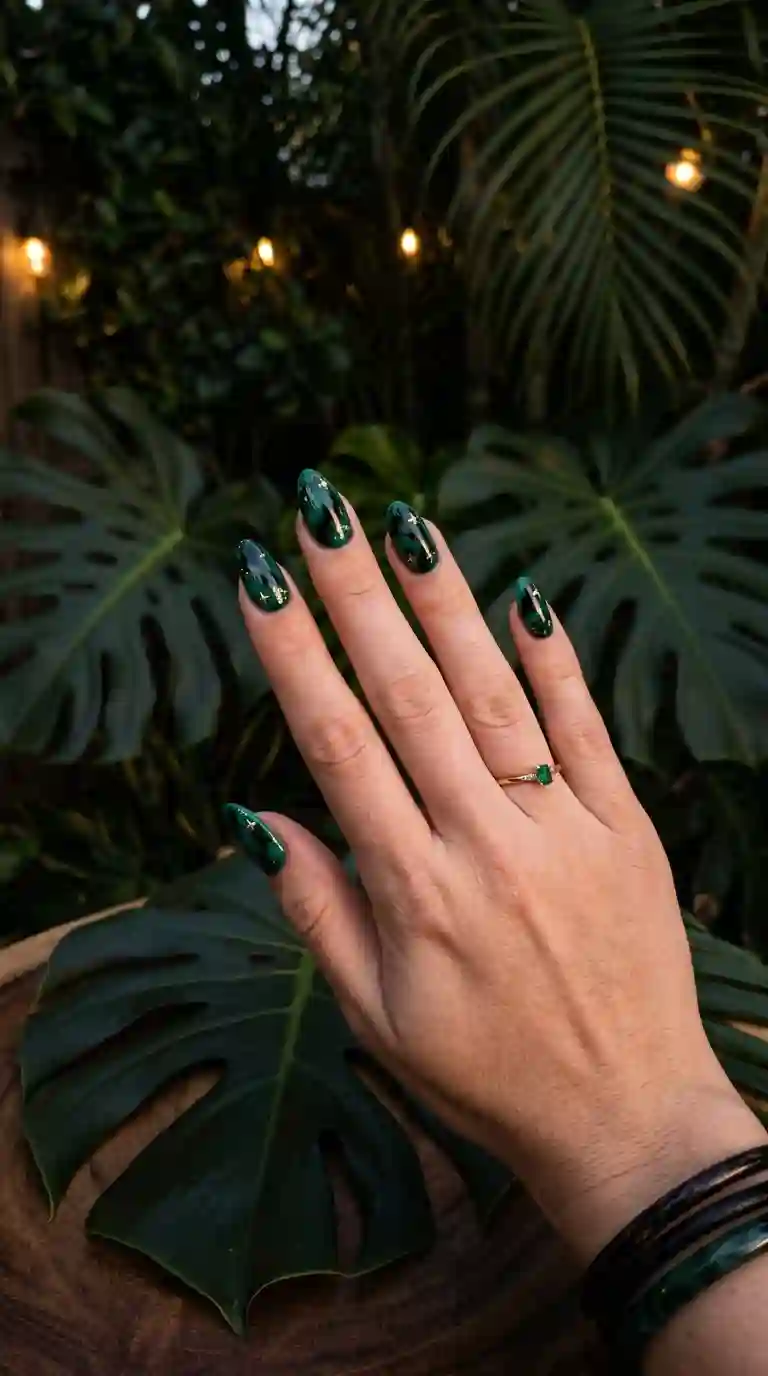
I usually start with a base of deep jewel tones, like emerald green, midnight blue or deep burgundy, since these colors still feel warm and vibrant enough for summer while carrying that moody, eerie undertone. Black remains a core color as well, but I like pairing it with metallics like gold or silver to keep the overall look feeling intentional rather than heavy.
Related Post: Cute Pumpkin Nail Designs: The Ultimate Fall Manicure Guide That Will Steal the Season
Dark Jewel Tones For Spooky Summer Nails
Jewel tones are probably my favorite category to work with when creating spooky summer nails. A deep emerald or sapphire blue instantly reads as rich and dramatic, yet still feels appropriate for warmer weather compared to a flat, matte black.
I often pair these jewel tones with subtle shimmer or a glossy topcoat, which helps the color catch the light beautifully outdoors. This small addition keeps spooky summer nails from feeling too heavy or wintery, even though the color palette itself leans dark.
Spooky Summer Nails With Spiderweb Details
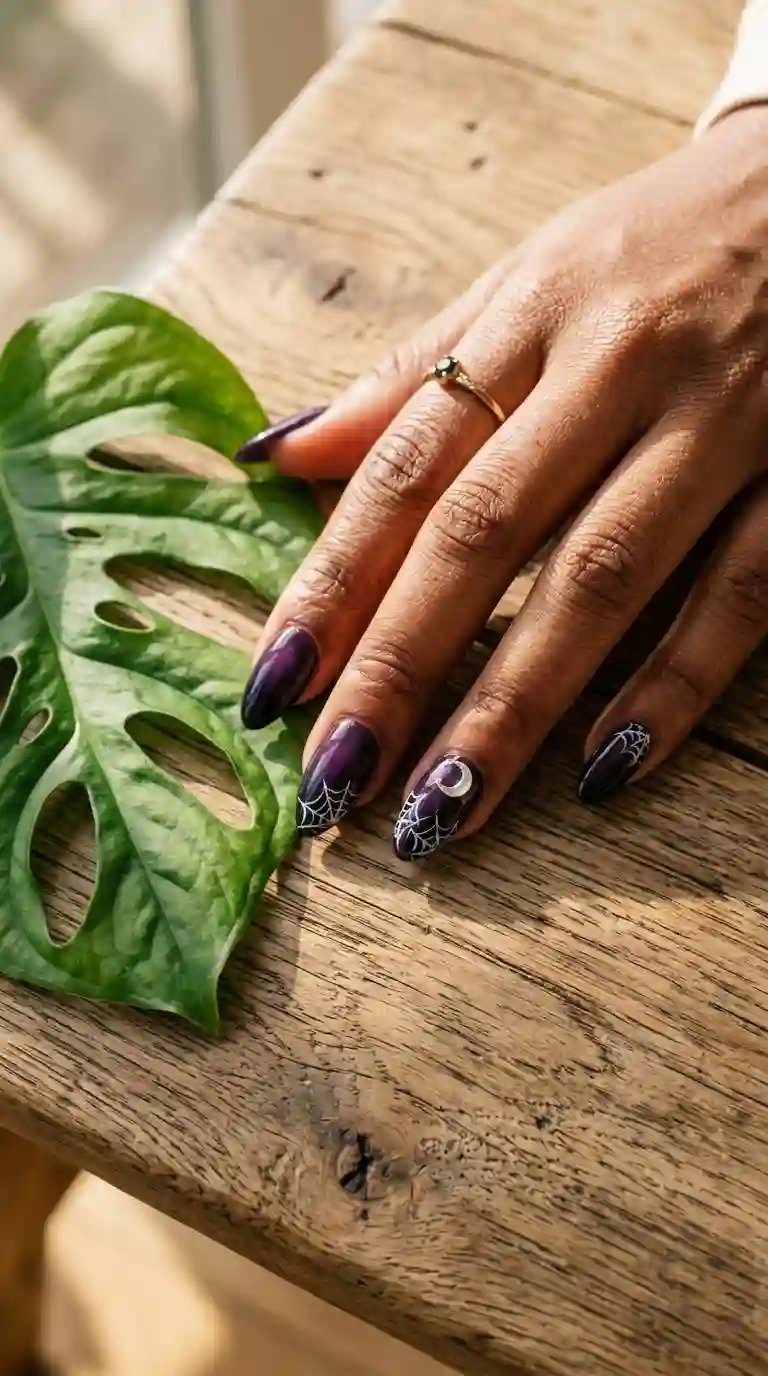
Spiderwebs are one of the most requested details I paint when clients ask for spooky summer nails, and honestly, they translate beautifully onto almost any base color. The delicate, intricate lines add a lot of visual interest without requiring the entire nail to be covered in dark polish.
I usually paint spiderwebs using a thin detail brush and either black or white polish, depending on the base color underneath. Starting from a single point near the cuticle and drawing outward in slightly curved lines, then connecting them with smaller crossing threads, creates a realistic web effect that looks intentional and clean.
This detail works wonderfully as an accent on just one or two nails within a full set of spooky summer nails, especially when paired with a lighter summer shade on the remaining fingers for balance.
Spooky Summer Nails Featuring Bats And Moths
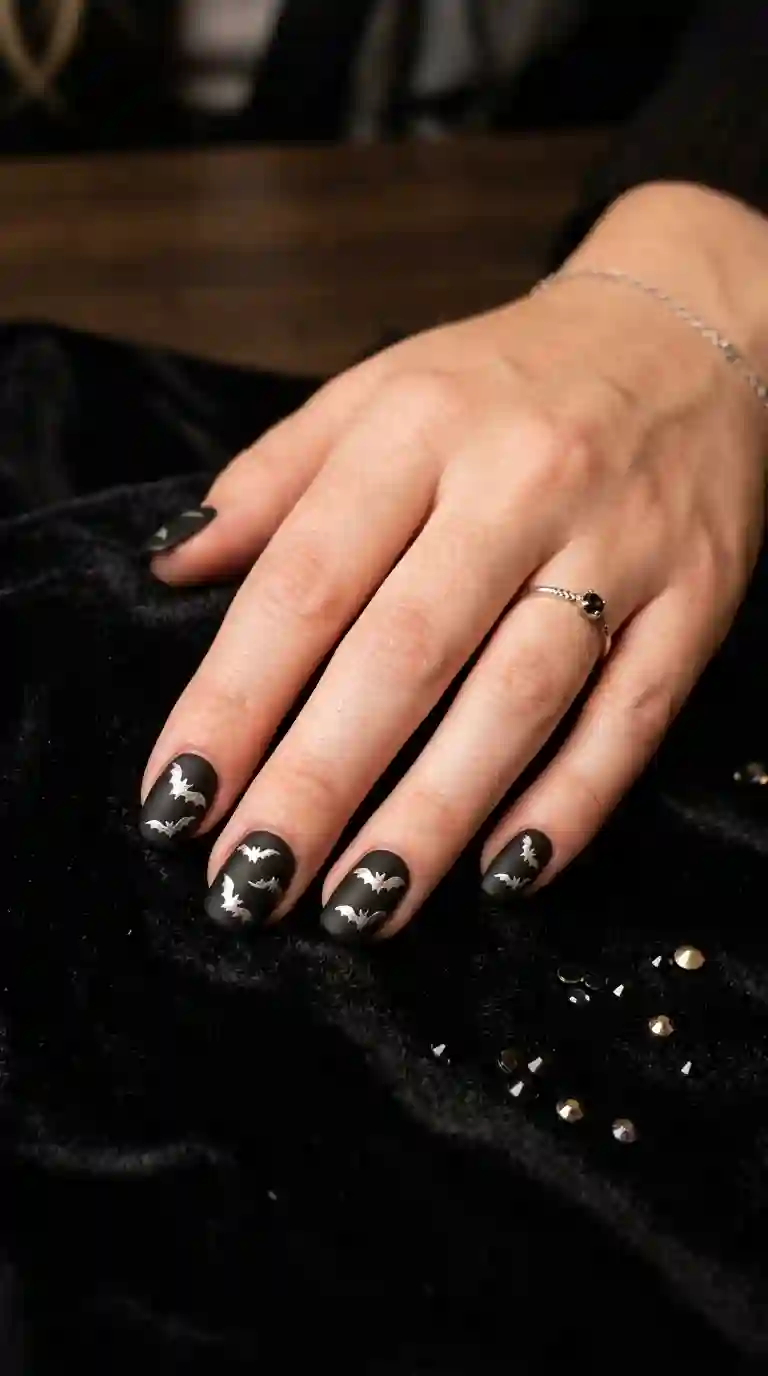
Bats and moths show up constantly in spooky summer nails, and they bring a wonderfully eerie, whimsical quality to any design. I love painting small silhouettes of bats mid flight, often using a deep black or dark purple against a lighter background for contrast.
For moths, I tend to focus on the wing detail, adding small dotted patterns or thin lines to mimic the natural texture found on real moth wings. This detail works especially well on a matte black base, since the texture almost disappears into the polish until light catches it just right.
Both of these details add a subtle, gothic charm to spooky summer nails without feeling overly dark or heavy, which makes them a great choice for clients who want something eerie but still wearable during the daytime.
Spooky Summer Nails With Dark Floral Designs
One of my favorite twists on this trend involves combining dark, moody colors with traditional summer floral designs. Instead of the usual bright pink or yellow flowers, spooky summer nails often feature deep burgundy roses, black orchids or dark purple hibiscus flowers painted directly onto the nail.
I usually start with a nude or soft cream base, then layer the dark florals on top using a detail brush, adding subtle shading to give each petal some depth and dimension. This combination gives the manicure a slightly romantic, gothic feel while still nodding to the classic floral themes typically associated with summer nail art.
Clients who love florals but want something a little different from the usual pastel version often gravitate toward this style of spooky summer nails, since it still feels feminine and elegant despite the darker color choices.
Spooky Summer Nails With Skull Accents
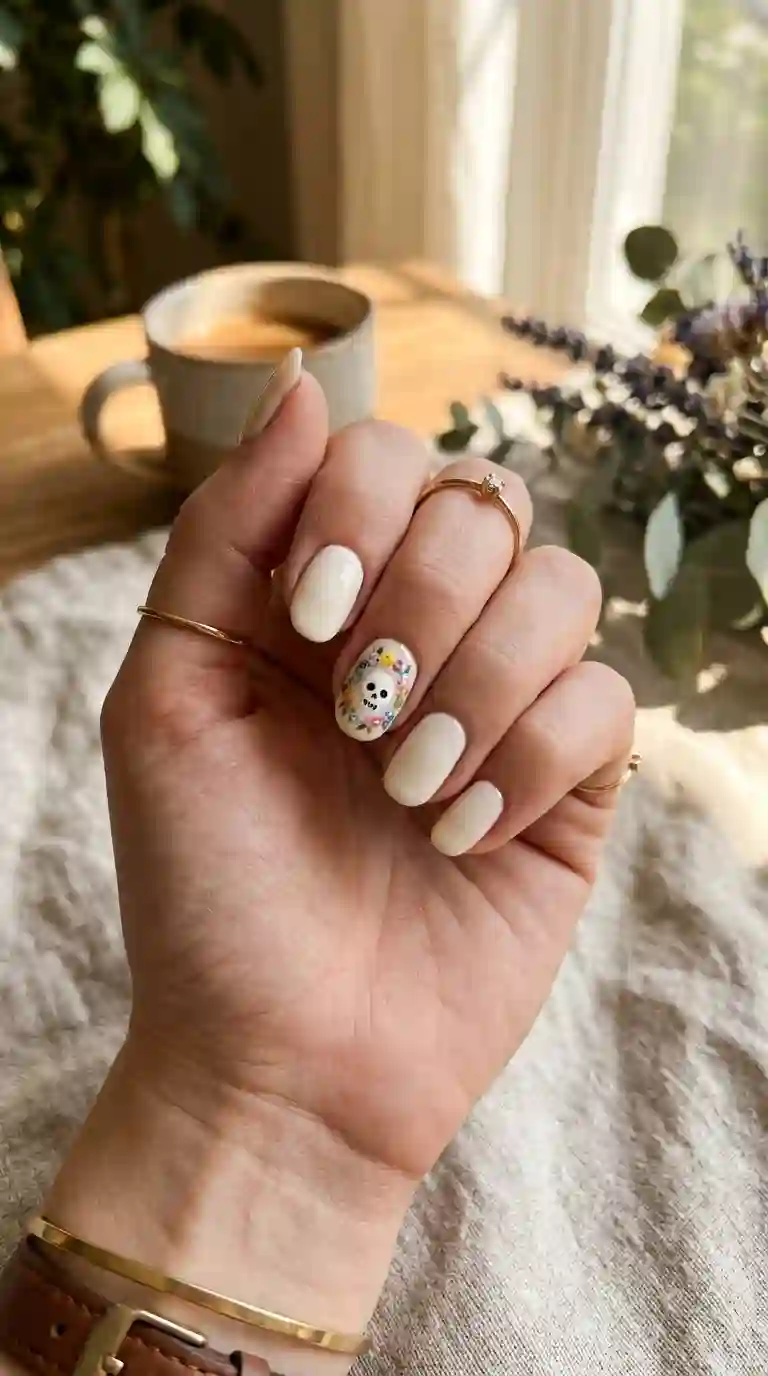
Skulls are a classic gothic motif, and they show up surprisingly often in spooky summer nails, especially as a single accent detail rather than covering an entire set. I usually reserve this design for one nail, often the ring finger, while keeping the rest of the set in a softer, more neutral summer tone.
Painting a small skull requires a steady hand, starting with a rounded white or cream shape, then adding shading around the eye sockets and cheekbones to create dimension. Surrounding the skull with tiny painted flowers, a technique borrowed from traditional sugar skull artwork, softens the overall look and keeps it feeling more whimsical than frightening.
This combination of skull and floral imagery has become one of my most requested versions of spooky summer nails, especially among clients who love a bit of edge mixed with something delicate and pretty.
Related Post : Cute Purple Halloween Nails: 30 Bewitching Ideas Every Nail Lover Needs To Try This Spooky Season
Spooky Summer Nails For Short Nails
A lot of clients assume detailed dark nail art only works on longer nails, but that is simply not true. Spooky summer nails translate beautifully onto shorter nail beds, you just need to scale the details down and keep the design a little more simplified.
For shorter nails, I usually recommend focusing on color blocking or small, concentrated details near the cuticle, like a tiny spiderweb, a single small star or a thin metallic line. This keeps the design from feeling cramped while still delivering that eerie, moody summer feeling.
Matte black or deep jewel tones tend to look especially striking on shorter nails, since the color itself carries a lot of visual weight without needing extra detail work to make an impact.
Spooky Summer Nails For Long And Almond Shaped Nails
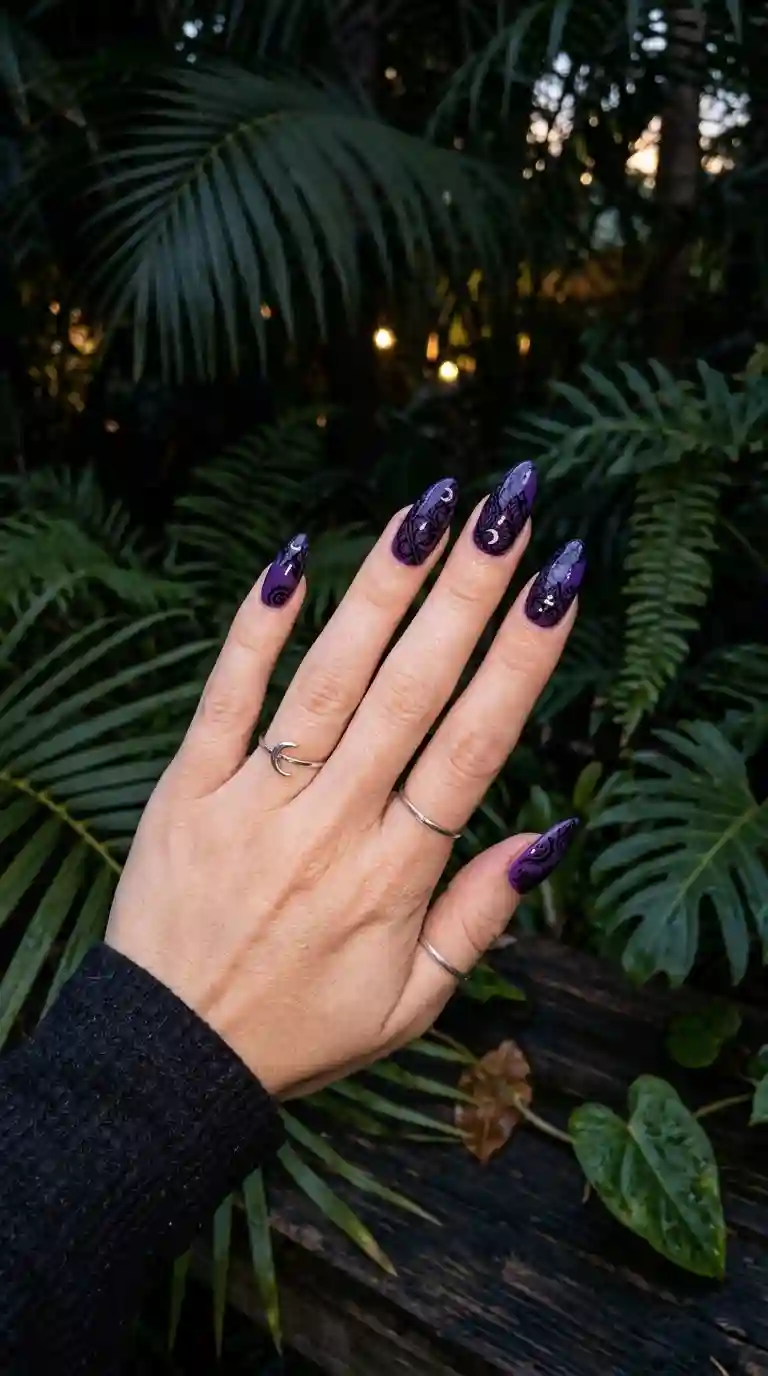
Longer, almond shaped nails give so much more room to explore detailed spooky summer nails. I love using the extra surface area for bigger illustrations, layered lace patterns or even small painted scenes that combine multiple eerie elements like bats, moons and spiderwebs across a single accent nail.
Negative space also works beautifully on longer nails within this trend. Leaving a small unpainted section shaped like a crescent moon or a star against a dark, glossy background creates a striking visual effect while keeping the overall design from feeling too heavy or overwhelming.
French tips get a dramatic makeover here as well. Swapping the classic white tip for a deep black or midnight purple tip against a soft nude base gives spooky summer nails an elegant, modern edge that works beautifully for both daytime and evening wear.
Spooky Summer Nails With A Gothic French Tip
The reimagined french manicure has become one of my favorite techniques for creating a more subtle version of spooky summer nails. Instead of the classic white tip, I use a deep black, burgundy or midnight blue shade to outline just the tip of each nail.
I usually create clean lines using a thin striping brush or a guide sticker, then fill in the tip carefully to maintain a crisp edge. Adding a tiny silver or gold accent right at the point where the tip meets the base gives the design a polished, finished look that feels intentional rather than random.
This particular take on spooky summer nails tends to appeal to clients who love the eerie aesthetic but need something professional enough to wear at work or during more formal summer occasions.
Spooky Summer Nails With Glitter And Metallic Accents
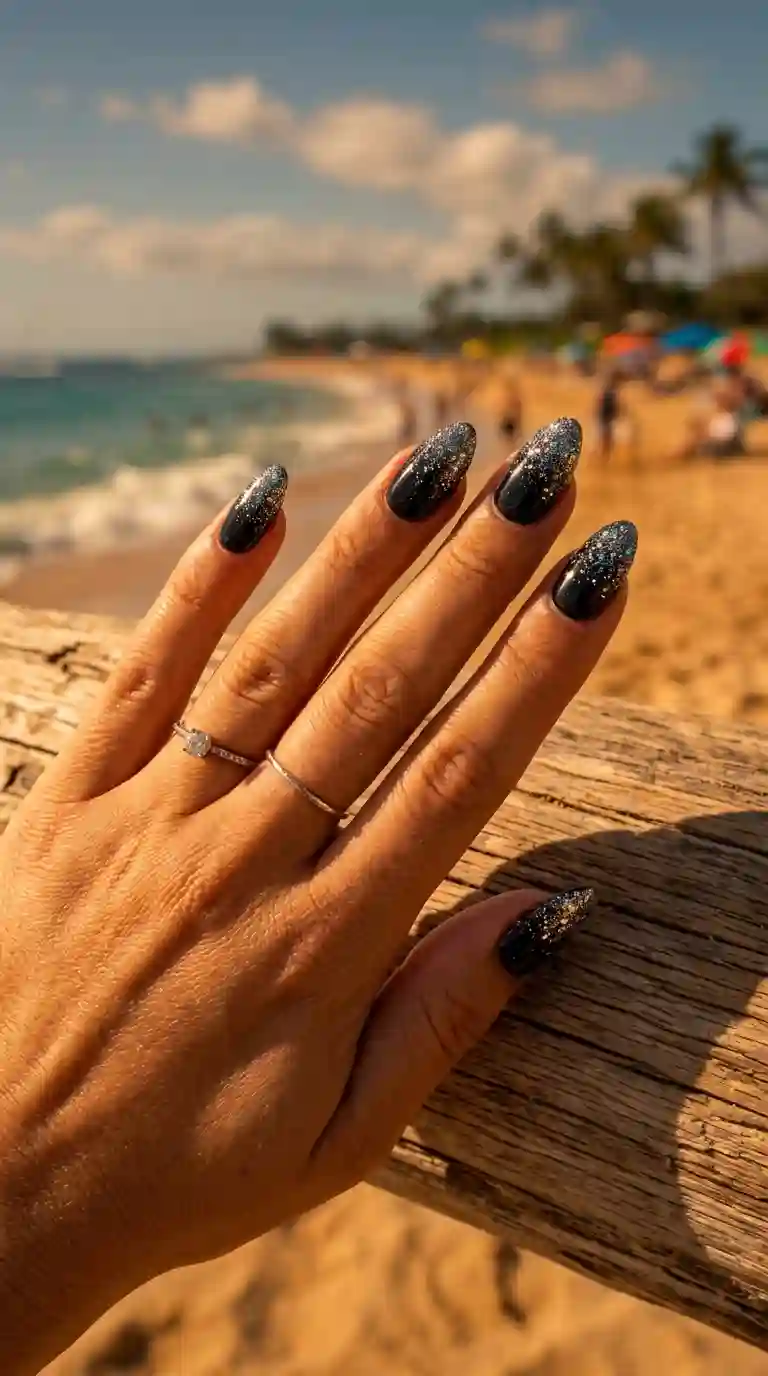
Glitter might seem like an unusual addition to spooky summer nails, but a touch of shimmer actually helps balance out the darker color palette beautifully. Silver, gunmetal and even iridescent glitters work especially well, adding a starry, almost celestial quality to the overall design.
I often apply glitter as a gradient near the tips, fading from a solid black or dark purple base at the cuticle into sparkling silver toward the tip. This creates a striking effect that catches sunlight beautifully outdoors, which helps the design feel less wintery and more suited to the warmer months.
For clients who want extra sparkle, adding a scattering of small rhinestones near the cuticle of one or two accent nails elevates spooky summer nails into something that feels a bit more special for evening events or parties.
Must Read : Pink October Nails: Beautiful Meaningful Manicure Ideas To Celebrate Awareness This Fall
Matte Finish Spooky Summer Nails For A Moodier Look
Matte finishes have become incredibly popular across so many nail trends, and spooky summer nails are no exception. A fully matte black or deep purple base gives the manicure a velvety, almost shadowy appearance that instantly amplifies the eerie, gothic feel of the design.
I usually recommend matte to clients who want their nails to feel a bit edgier or more dramatic. Pairing a matte base with one glossy accent nail featuring a small detail, like a painted spiderweb or a tiny moon, creates a beautiful contrast in texture that still keeps the overall look cohesive.
Matte topcoats can be slightly more delicate than glossy ones, so I always recommend sealing spooky summer nails with a matte specific topcoat to help the design hold up better throughout a busy, active summer season.
Spooky Summer Nails For Acrylic And Gel Extensions
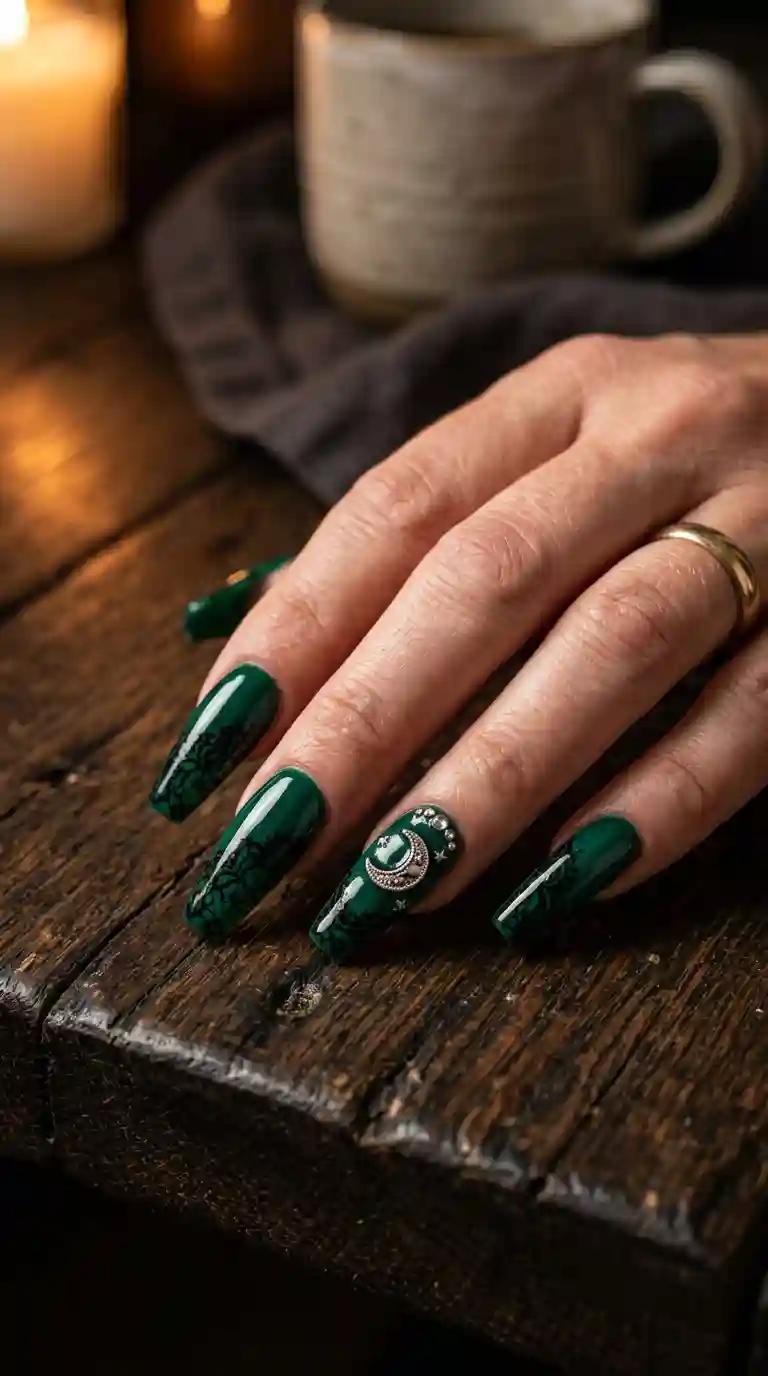
Clients frequently ask whether spooky summer nails work well on extensions, and the answer is definitely yes. Acrylic and gel extensions actually provide even more surface area, which is especially helpful for detailed illustrations like lace patterns, spiderwebs or layered floral designs.
For acrylic sets, I typically recommend an almond or coffin shape, since the elongated nail bed really allows dark, detailed artwork to stand out beautifully. Gel extensions provide a slightly more flexible, natural feeling while still offering plenty of length for intricate nail art.
Regardless of which extension type you choose, the application process for spooky summer nails stays fairly consistent. A smooth, fully opaque base coat makes a significant difference in how sharp and clean the finished details end up looking against the dark polish.
How To Recreate Spooky Summer Nails At Home
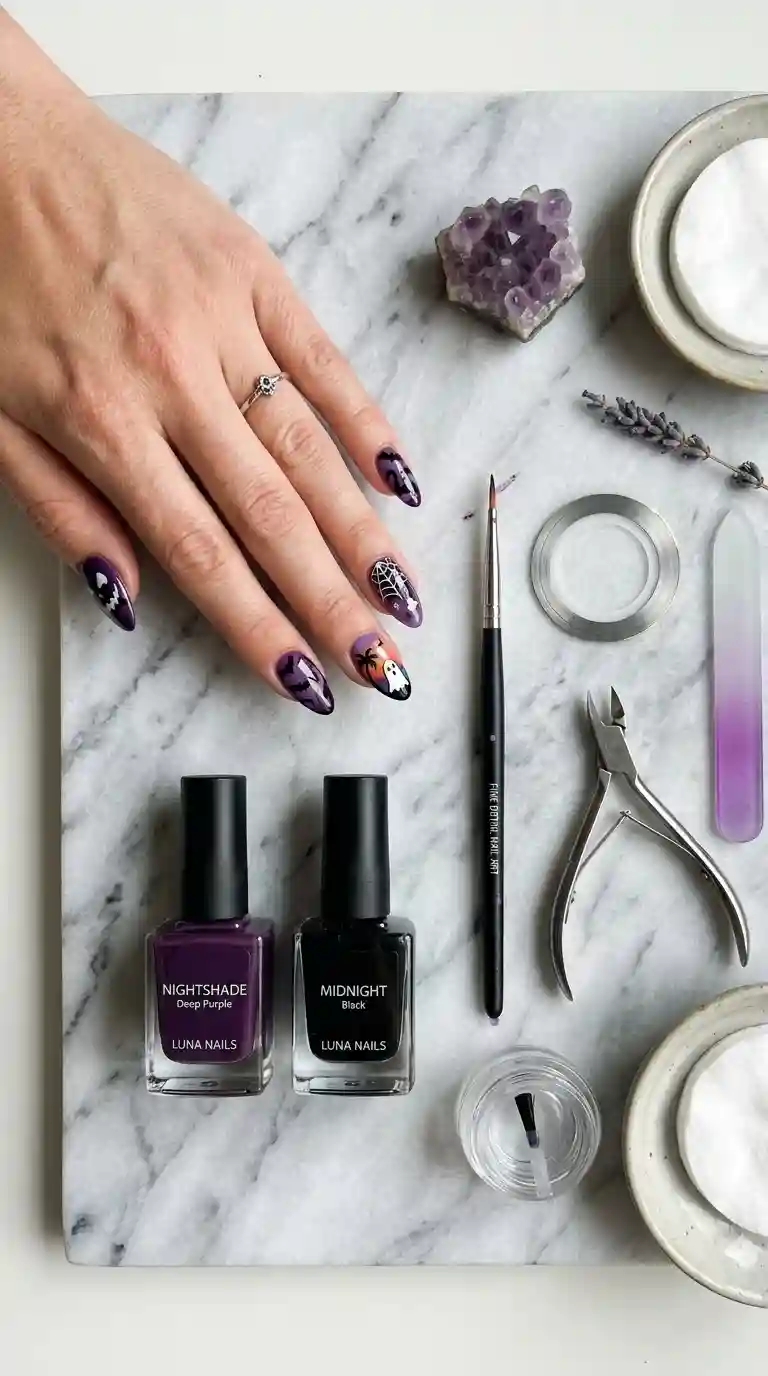
You do not need professional training to try spooky summer nails at home, though a bit of patience definitely helps for the more detailed designs. Over the years I have picked up several tricks that make this process much easier for clients recreating the look themselves.
Start with properly prepped nails. Push back your cuticles gently, lightly buff the surface and wipe away any oils using rubbing alcohol before applying polish. This step matters significantly more than people realize, since dark polish tends to highlight any unevenness or ridges on the natural nail underneath.
Apply a quality base coat first, followed by two thin coats of your chosen dark polish, allowing each layer to dry fully before adding the next. Once your base color is completely set, that is when you can begin layering on your chosen details, whether that is a spiderweb, a tiny skull or a metallic accent line.
Step By Step Guide For Spooky Summer Nails
- Start with clean, dry nails and gently push back the cuticles.
- Apply a thin base coat and let it dry completely.
- Paint two thin coats of your chosen dark polish, allowing each coat to dry before adding the next.
- Add your chosen detail, whether that is a spiderweb, a skull, a moon or a glitter accent.
- Seal everything with a glossy or matte topcoat depending on your preferred finish.
- Clean up any excess polish around the cuticles using a small brush dipped in acetone.
Following these steps in order really does make a difference in how polished your finished spooky summer nails end up looking, even for a first attempt at this style.
Also Read: Firework Nail Design Ideas That Will Make Your Manicure Explode With Style
Tools And Products I Use For Spooky Summer Nails
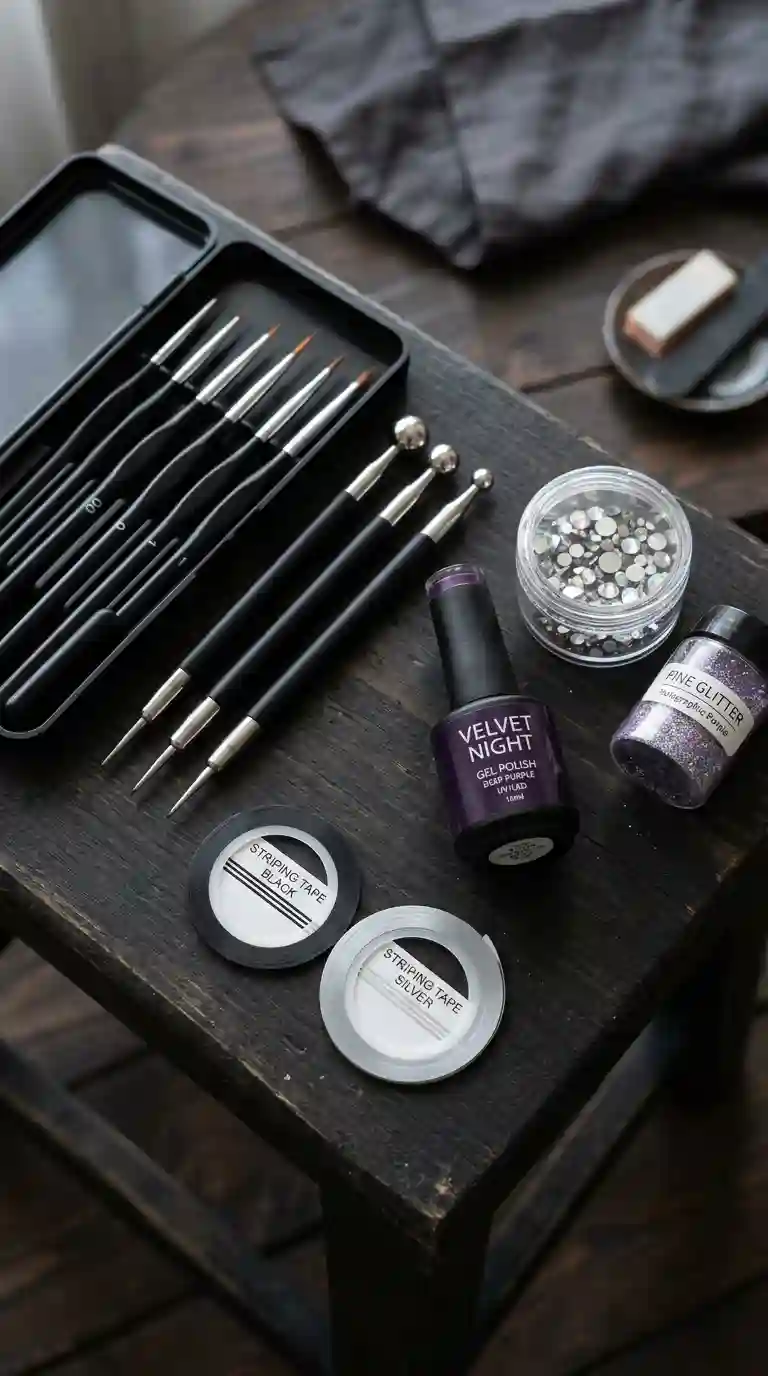
Over the years I have built a collection of tools that make creating spooky summer nails much easier, both in the studio and for clients recreating designs at home. A fine detail brush is essential for almost every element of this trend, since it allows for clean lines when painting spiderwebs, bats or small skull details.
Striping tape has become one of my favorite shortcuts for achieving crisp, straight metallic lines on spooky summer nails without needing perfectly steady hands. Simply place the tape along the desired line, paint over it, then peel it away before the polish fully dries for a sharp, clean result.
A good dotting tool makes adding small details, like the eyes of a skull or scattered star accents across a dark background, incredibly easy. I also always keep a small collection of dark polishes on hand, including several shades of black, deep purple and emerald green, since having the right base tones available makes designing spooky summer nails so much smoother.
How To Make Spooky Summer Nails Last Longer
Summer weather can be tough on any manicure, between sunscreen, swimming and general outdoor activity, so keeping spooky summer nails looking fresh takes a bit of extra care. Applying a strong, gel based topcoat helps protect detailed designs from chipping, especially around the edges of each nail.
Wearing gloves during activities like gardening or cleaning also helps protect the polish, and applying cuticle oil daily keeps the surrounding skin hydrated, which in turn helps prevent premature lifting. Chlorine from pools and salt water from the ocean can also be harsh on polish, so rinsing your hands thoroughly and reapplying a bit of oil after swimming helps extend the life of spooky summer nails throughout the season.
Avoiding direct, prolonged sun exposure without protection can also help prevent certain polishes from fading or discoloring slightly over time, particularly darker shades that sometimes develop a subtle color shift after extended sun exposure.
Spooky Summer Nails For Different Skin Tones
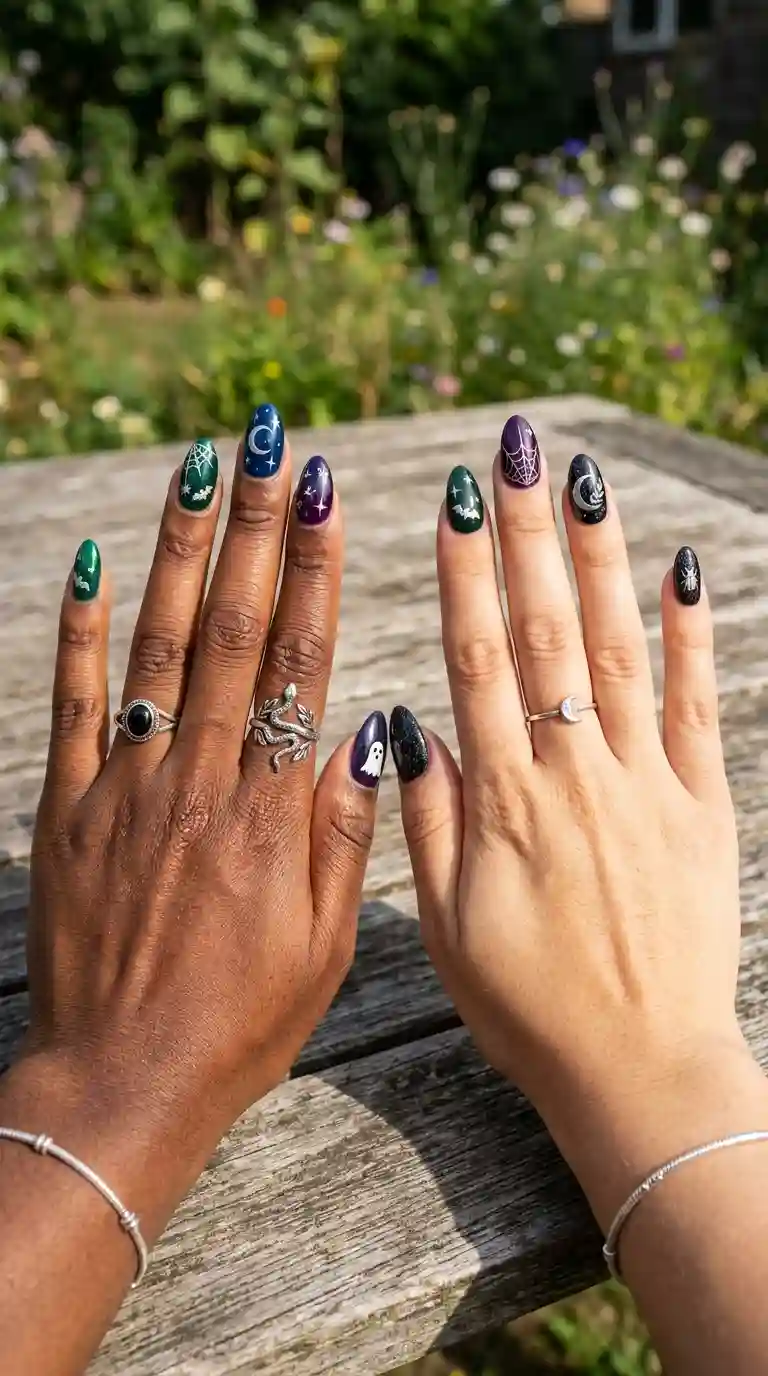
One of the best aspects of spooky summer nails is how flattering dark, rich colors tend to look across a wide range of skin tones. Deep jewel tones like emerald, sapphire and burgundy generally complement most undertones beautifully, creating a striking contrast against summer tanned skin.
For lighter skin tones, I often suggest leaning into cooler dark shades like black or deep purple, which create a dramatic, high contrast look. For deeper skin tones, rich jewel tones and warm metallic accents like gold or bronze tend to look absolutely stunning, almost glowing against the base color.
Regardless of skin tone, spooky summer nails tend to look polished and intentional, which is part of why this trend has resonated with such a diverse range of clients throughout the warmer months.
Mistakes To Avoid When Trying Spooky Summer Nails
After creating spooky summer nails for so many clients, I have picked up on a few common mistakes, some of which I made myself in the early days of experimenting with this style. The most frequent issue is applying dark polish too thick in an attempt to achieve full opacity in a single coat, which almost always leads to streaking, bubbling and much longer drying times.
Skipping the base coat entirely is another common mistake, especially with darker polishes that can sometimes stain the natural nail if applied directly. This staining becomes especially noticeable once the polish is removed, leaving behind an unwanted tint.
Rushing the drying process between layers is another issue I see often. Since spooky summer nails frequently involve multiple steps, like a base color, detail work and glitter accents, each layer needs proper time to dry before moving forward, or the entire design risks smudging.
Also Read : 60+ Fall Dip Nail Ideas That Will Make Your Manicure the Star of the Season
Spooky Summer Nails For Nail Art Beginners
If you are new to nail art, spooky summer nails might feel a little intimidating at first, especially with all the detailed imagery associated with the trend, but there are plenty of accessible entry points. Starting with a solid dark base and a single small metallic accent, like a thin gold line or a few scattered dots, is a simple, forgiving way to try this style for the first time.
Once you feel comfortable, you can slowly build toward more detailed elements like a small spiderweb or a simple crescent moon design. Practicing on a paper nail wheel before committing to your actual nails is always a smart way to build confidence with a detail brush and get comfortable with proportions before attempting the real design.
Pairing Spooky Summer Nails With Your Summer Wardrobe
I love encouraging clients to think of spooky summer nails as part of their overall summer look rather than something separate from their outfit choices. Dark, moody nail colors actually pair beautifully with lighter summer clothing, creating a striking contrast that feels intentional and stylish.
For a flowy white summer dress, spooky summer nails in deep black or emerald green add an unexpected, edgy contrast that photographs beautifully. For a more casual outfit, like denim shorts and a simple tank top, a single dark accent nail paired with softer summer shades on the remaining nails adds just enough personality without feeling like an overwhelming statement.
Even for beach days, a matte black or deep purple manicure can look surprisingly fitting against a bright, sunny backdrop, proving that spooky summer nails really can work in almost any summer setting.
Spooky Summer Nails For Festivals And Night Events
Summer is full of festivals, concerts and late night gatherings, and spooky summer nails fit beautifully into that kind of atmosphere. The combination of dark colors, metallic accents and a bit of glitter tends to photograph incredibly well under stage lighting or string lights at an outdoor event.
For festival season specifically, I often recommend adding a bit more sparkle or a few extra rhinestones to elevate the design slightly, since these events tend to call for something a little more eye catching than a subtle daytime manicure. Spooky summer nails with heavy silver glitter or holographic accents tend to be especially popular requests during this time of year.
Caring For Your Nails Underneath Spooky Summer Nails
A beautiful manicure always starts with healthy nails underneath, regardless of how dark or detailed the design on top happens to be. I always recommend applying cuticle oil nightly throughout the summer season, since heat and sun exposure can be surprisingly drying for both skin and nails.
Taking short breaks between manicures, especially if you wear gel or acrylic extensions regularly, gives your natural nails time to recover and stay strong. Healthy nails underneath not only make spooky summer nails look better, they also help the design last noticeably longer before needing any touch ups.
Read Also : Best Summer Pastel Nails: The Dreamy Manicure Trend Taking Over This Season
Final Thoughts On Spooky Summer Nails
After spending so many summers creating spooky summer nails for clients who wanted something a little different, I can honestly say this trend has earned its place as a genuinely exciting alternative to traditional seasonal nail art. There is something freeing about breaking the usual color rules and choosing a design based purely on personal style rather than what the calendar suggests.
Whether you prefer something subtle, like a single dark accent nail paired with sheer summer polish, or something fully transformed with detailed skulls, bats and spiderwebs across every finger, there is a version of spooky summer nails that fits your personal taste and comfort level. My biggest advice, both as a nail artist and someone who genuinely loves working on this trend, is to embrace the contrast. Let your nails feel a little unexpected this summer, and enjoy every bit of the attention they bring.
Frequently Asked Questions About Spooky Summer Nails
What colors work best for spooky summer nails?
Deep jewel tones like emerald green, sapphire blue and burgundy work beautifully, along with classic black paired with metallic silver or gold accents.
Are spooky summer nails appropriate for warm weather?
Yes, dark nail art can absolutely work during summer, especially when paired with glossy finishes, metallic accents or lighter summer inspired details for balance.
How do I make dark nail polish last longer during summer?
Using a strong gel topcoat, applying cuticle oil daily and rinsing your hands after swimming are all effective ways to extend wear time throughout the season.
What is the best dark polish for summer nail art?
A high quality gel formula tends to give the most opaque, long lasting finish, though a good quality regular polish with a strong topcoat also performs well.
Do spooky summer nails suit every skin tone?
Yes, dark jewel tones and black generally complement a wide range of skin tones, and adjusting the metallic accent color can help enhance different undertones further.
How many coats of black polish do I need?
Most black or dark polishes require two thin coats for full, even opacity, since applying one thick coat often leads to streaking or an uneven finish
Can I do spooky summer nails on acrylic extensions?
Definitely. Acrylic extensions provide extra surface area, making them a wonderful canvas for detailed designs like spiderwebs, bats or dark floral illustrations.
What nail shape works best for this trend?
Almond and coffin shapes tend to showcase detailed dark nail art beautifully, though the trend translates well onto virtually any nail shape, including short and round.
How do I remove glitter polish from a dark manicure?
Soaking cotton pads in acetone, placing them over each nail and wrapping with foil for about ten minutes usually breaks down glitter polish effectively without excessive scrubbing.
Is matte or glossy better for spooky summer nails?
Both look beautiful, and the choice depends on personal preference. Matte offers a moodier, velvety texture, while glossy feels more classic and vibrant in sunlight.
Can I recreate spooky summer nails at home without professional tools?
Yes, a basic detail brush, some striping tape and a dotting tool are enough to recreate most simple versions of this trend at home with a bit of practice.