
Winter has a funny way of making everything feel a little more special, and if you ask me, nothing captures that feeling better than a snowflake nail design. I have been doing nails professionally for over eight years now, and every single winter without fail, clients walk into my salon asking for the same thing. They want snowflakes on their nails. Not just any snowflakes either. They want the kind that make people stop and ask where they got their nails done.
I still remember the first time I painted a snowflake nail design on a client back when I was still learning the craft. My hands were shaking a little because tiny detail work always makes me nervous, but the moment I finished and she looked down at her nails, her whole face lit up. That reaction is the reason I fell in love with doing snowflake nail design work in the first place.
In this article I want to share everything I have learned about snowflake nail design over the years. This is not going to be some generic list you find everywhere online. This is going to be a real conversation about what works, what does not work, and how you can get this look at home or ask for it confidently at your next salon appointment.
Also Read : Summer Mint Green Nails: The Fresh, Fabulous Trend Every Nail Lover Needs This Season
What Is Snowflake Nail Design and Why Everyone Is Obsessed This Winter
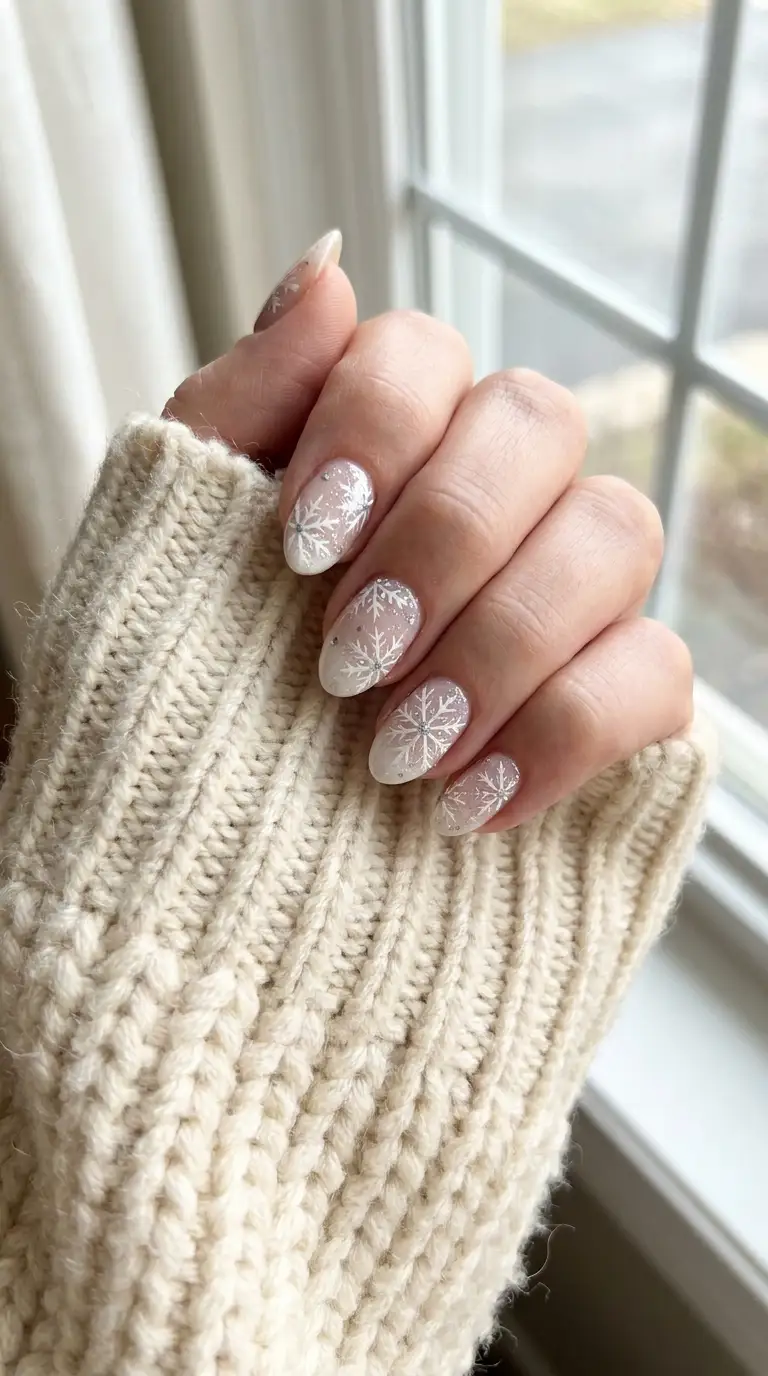
Snowflake nail design is exactly what it sounds like. It is nail art that features snowflake patterns painted, stamped, or applied onto the nails, usually paired with winter appropriate colors like white, silver, icy blue, or navy.
But it is so much more than just a pretty pattern. Snowflake nail design has become a symbol of the entire winter season on social media and in salons everywhere. It shows up in December but honestly, I have clients requesting snowflake nail design well into February because it just feels so fitting for the colder months.
What makes snowflake nail design so popular is how versatile it actually is. You can go with a full glam version covered in rhinestones and glitter, or you can keep it minimal with just one tiny snowflake on the ring finger. Both looks fall under the same umbrella, and both look stunning in their own way.
I think people are drawn to snowflake nail design because it feels nostalgic. It reminds us of childhood winters, hot chocolate, and watching snow fall outside the window. There is an emotional pull to this trend that other nail art styles simply do not have.
My Journey With Snowflake Nail Design as a Nail Artist
When I first started my career, winter nail art meant plain red or green polish with maybe a candy cane on one nail. Snowflake nail design was not really a mainstream request back then. It took a few years, and a lot of Pinterest boards, before clients started bringing in photos asking specifically for snowflakes.
I remember practicing snowflake nail design on plastic nail tips at my kitchen table for weeks before I felt confident enough to offer it to clients. The tricky part is that a snowflake looks simple, but getting those six symmetrical points to actually look even takes real practice.
Over time I developed my own little tricks for making snowflake nail design faster and cleaner, and I am going to share every single one of those tricks with you in this article. Nothing here is theory. Everything I am telling you has been tested on real hands, real nails, and real clients who wanted their snowflake nail design to look flawless for holiday parties.
Why Snowflake Nail Design Is Perfect for Every Winter Occasion
One thing I always tell my clients is that snowflake nail design is not just for Christmas. Yes, it works beautifully for the holidays, but it honestly suits the entire winter season from November through February.
Christmas Parties and Snowflake Nail Design
Christmas is obviously the peak season for snowflake nail design requests. Clients want something festive but not overly childish, and snowflakes hit that sweet spot perfectly. Pair them with a deep red or emerald green base and you have got a nail look that feels elegant enough for a fancy dinner but still screams holiday spirit.
New Year Celebrations
For New Year’s Eve, I usually push my clients toward a more glamorous take on snowflake nail design. Think black base coats with silver snowflakes and a touch of chrome powder. It photographs beautifully under party lighting, which matters a lot when everyone is taking pictures at midnight.
Everyday Winter Elegance
Not every snowflake nail design request is for a big event. A lot of my regular clients just want subtle snowflakes on a nude or soft pink base for their everyday look during the colder months. This version is my personal favorite honestly, because it proves that snowflake nail design does not need to be loud to be beautiful.
Read Also: 50 Gorgeous Summer Flower Nail Designs That Will Make Your Manicure Bloom This Season
Tools and Products You Need for Snowflake Nail Design
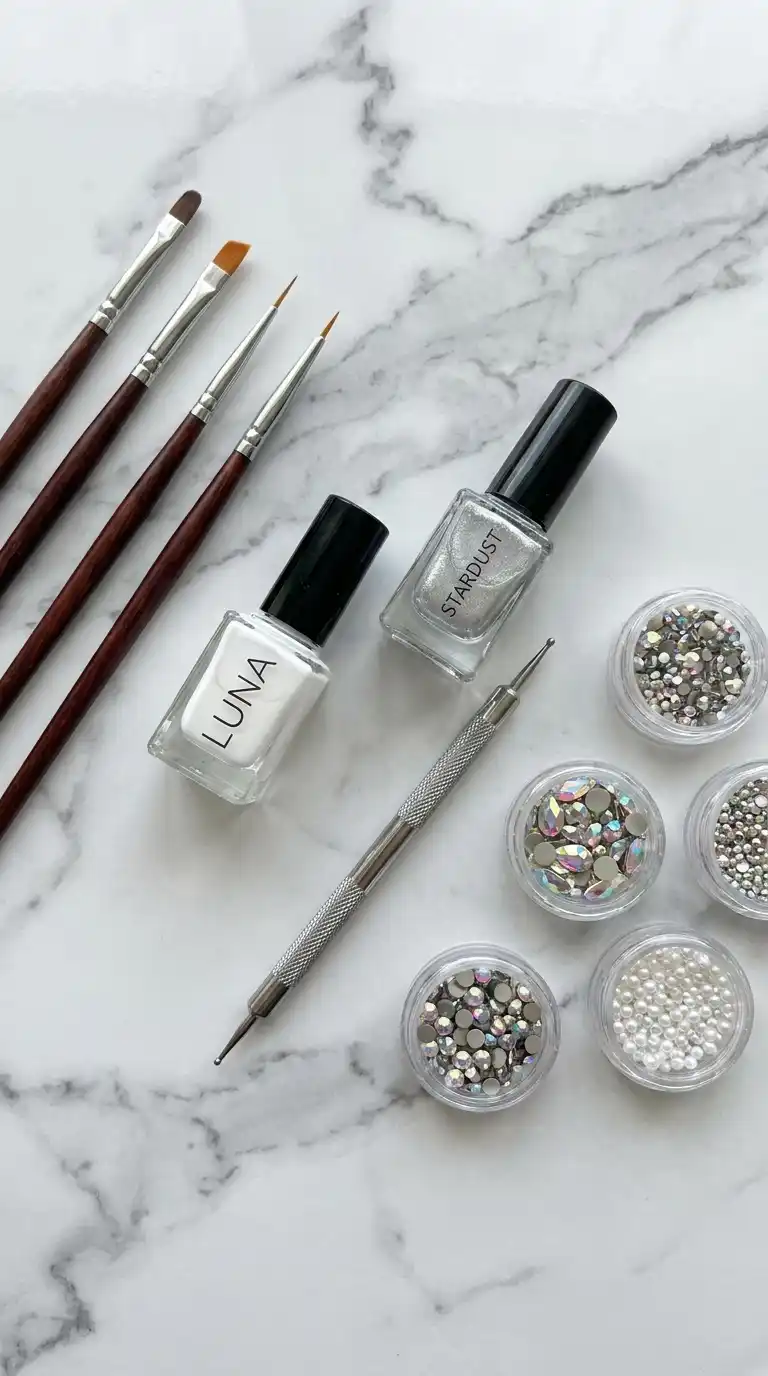
Before we get into the actual techniques, let me walk you through what you need to have on hand if you want to try snowflake nail design yourself at home.
First, you need a good detail brush. I am talking about a brush with a very fine point, something like a size 000 or 00 nail art brush. Without this, getting clean snowflake lines is nearly impossible.
Second, a dotting tool is your best friend for snowflake nail design. The little dots at the tips of each snowflake point really bring the whole design together, and a dotting tool gives you consistent, round dots every single time.
You will also want a base color of your choice, a white polish for the actual snowflake lines, and maybe a silver or holographic top coat if you want some sparkle. Rhinestones, silver chrome powder, and striping tape are optional but they add a really nice touch if you want your snowflake nail design to feel more elevated.
Finally, do not forget a good top coat. Snowflake nail design involves fine detail work, and without a solid top coat sealing everything in, those delicate lines can chip or smudge within days.
Best Nail Shapes for Snowflake Nail Design
I get asked this question constantly. Which nail shape looks best with snowflake nail design? Honestly, snowflake nail design works on almost every shape, but there are a few that I personally think show it off the best.
Almond and oval shaped nails give you a nice curved canvas that makes the snowflake pattern feel soft and elegant. Square and squoval shapes give you more flat space to work with, which is great if you want to fit a larger, more detailed snowflake on the nail.
Coffin shaped nails are probably my favorite for a bold snowflake nail design because the longer surface allows for layered patterns, like a big snowflake at the base with smaller ones scattered toward the tip.
Even short, natural nails can pull off a beautiful snowflake nail design. In fact, I often recommend a single small snowflake near the cuticle for clients with shorter nails since it keeps the look proportional and elegant rather than cluttered.
Read Also.: 60+ Fall Dip Nail Ideas That Will Make Your Manicure the Star of the Season
Best Color Combinations for Snowflake Nail Design
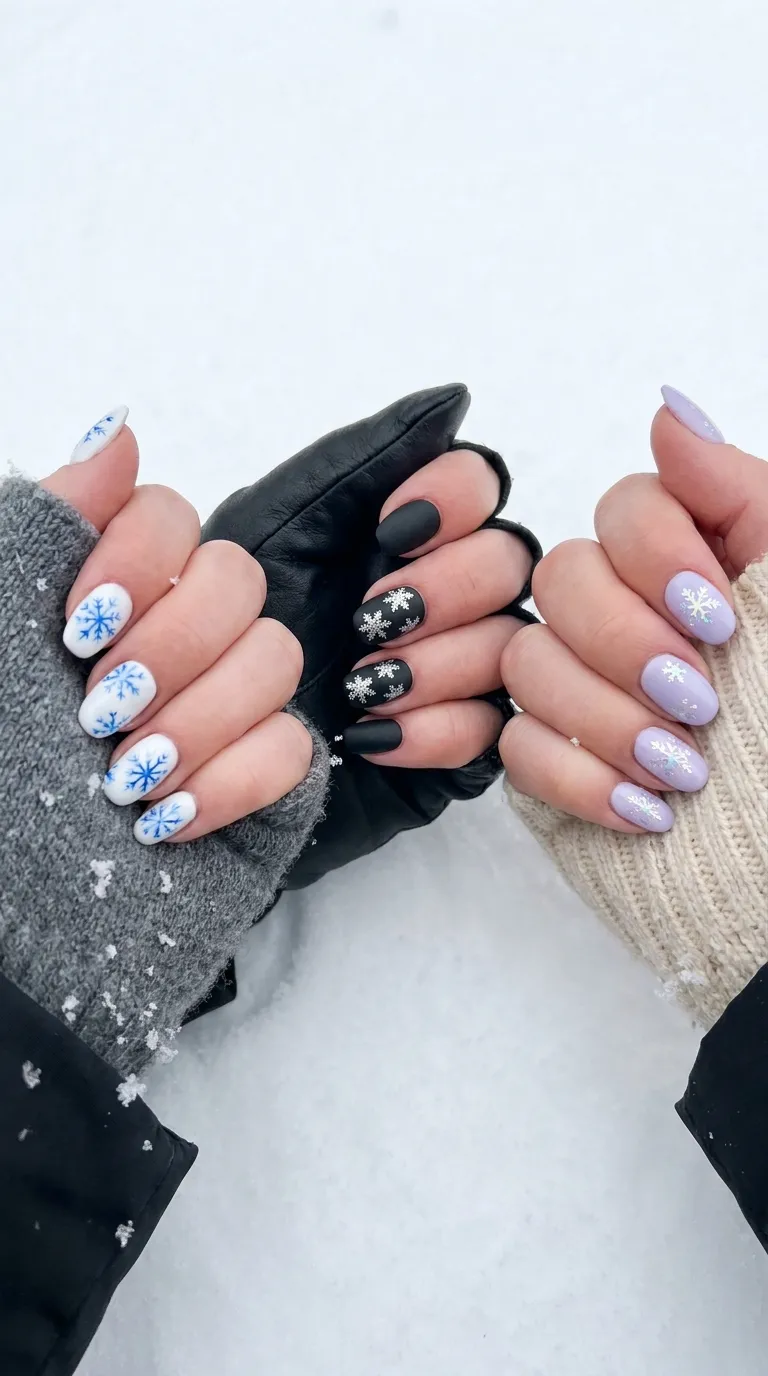
Color choice can honestly make or break a snowflake nail design. Over the years I have tested countless combinations, and here are the ones that consistently get the most compliments.
Classic White and Blue
This is the combination most people picture when they think of snowflake nail design. A soft icy blue base with white snowflake details feels straight out of a winter wonderland. It is timeless, it suits almost every skin tone, and it never goes out of style.
Black and Silver
For clients who want something a little more dramatic, black and silver snowflake nail design is the way to go. The contrast is striking, and it looks incredible under any kind of lighting, which is why it is so popular for New Year’s Eve looks.
Pastel Winter Shades
Lately I have been doing a lot of pastel based snowflake nail design, using colors like lilac, baby blue, or soft mint as the base with white snowflakes on top. It feels fresh and a little different from the traditional deep winter tones, and my younger clients especially love this softer approach.
Step by Step Freehand Snowflake Nail Design Tutorial
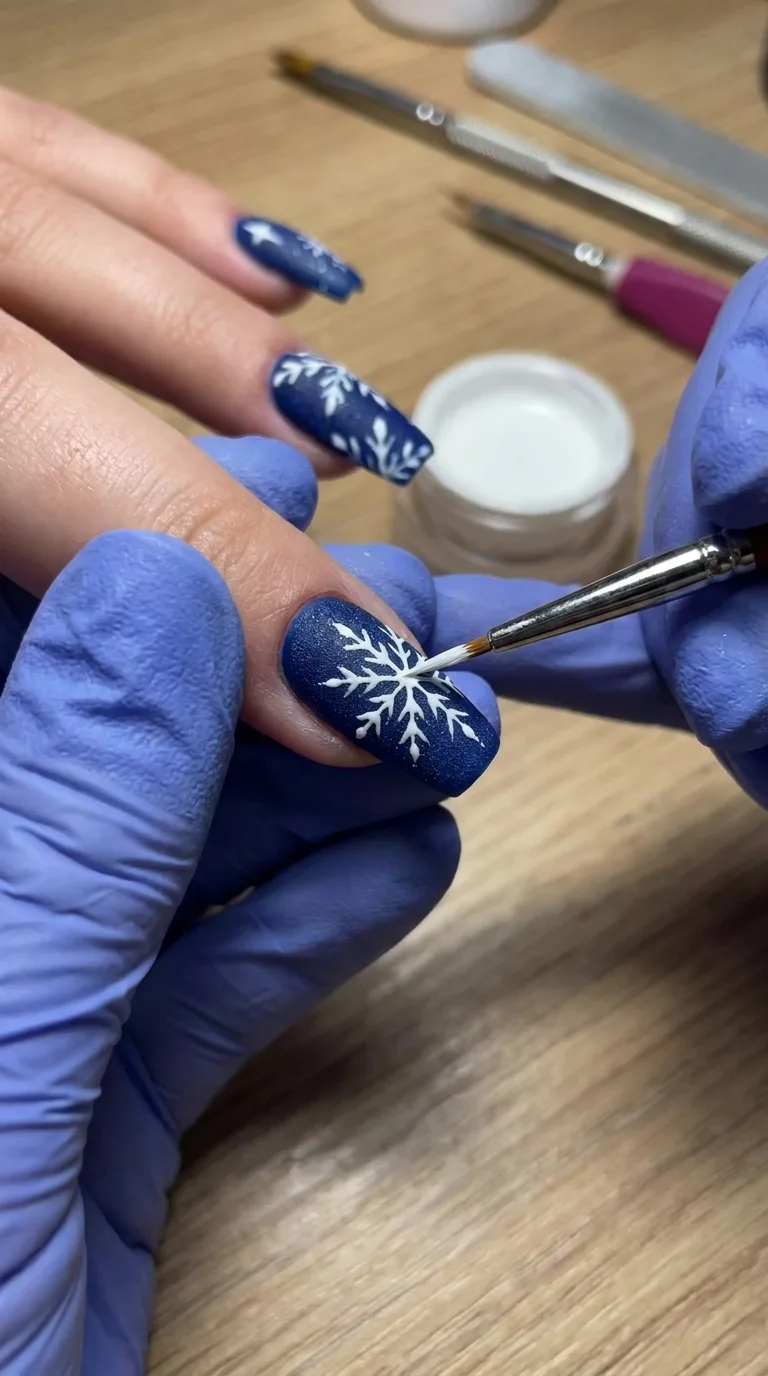
This is the technique I use most often in my salon, and I promise it is easier than it looks once you understand the structure of a snowflake.
Start by applying your base color and letting it fully dry. This step matters more than people realize. If your base is even slightly tacky, your detail work will smudge and ruin hours of effort.
Once dry, dip your detail brush into white polish and paint a small vertical line down the center of the nail. Then paint a horizontal line crossing it, followed by two diagonal lines, so you end up with a six pointed star shape. This is the skeleton of your snowflake nail design.
Next, add smaller branch lines coming off each of the six main points. Think of little V shapes or small diagonal lines branching outward. This is what gives a snowflake its signature look rather than just looking like a plain star.
Finally, use your dotting tool to add tiny white dots at the tip of each branch. This step takes the design from looking flat to looking like an actual snowflake with dimension and detail.
Let everything dry completely before applying your top coat. I cannot stress this enough because rushing this last step is the most common reason a beautiful snowflake nail design ends up smudged.
Read Also: September Nail Ideas That Will Make Your Manicure Impossible To Ignore This Fall
Snowflake Nail Design With Stamping Plates
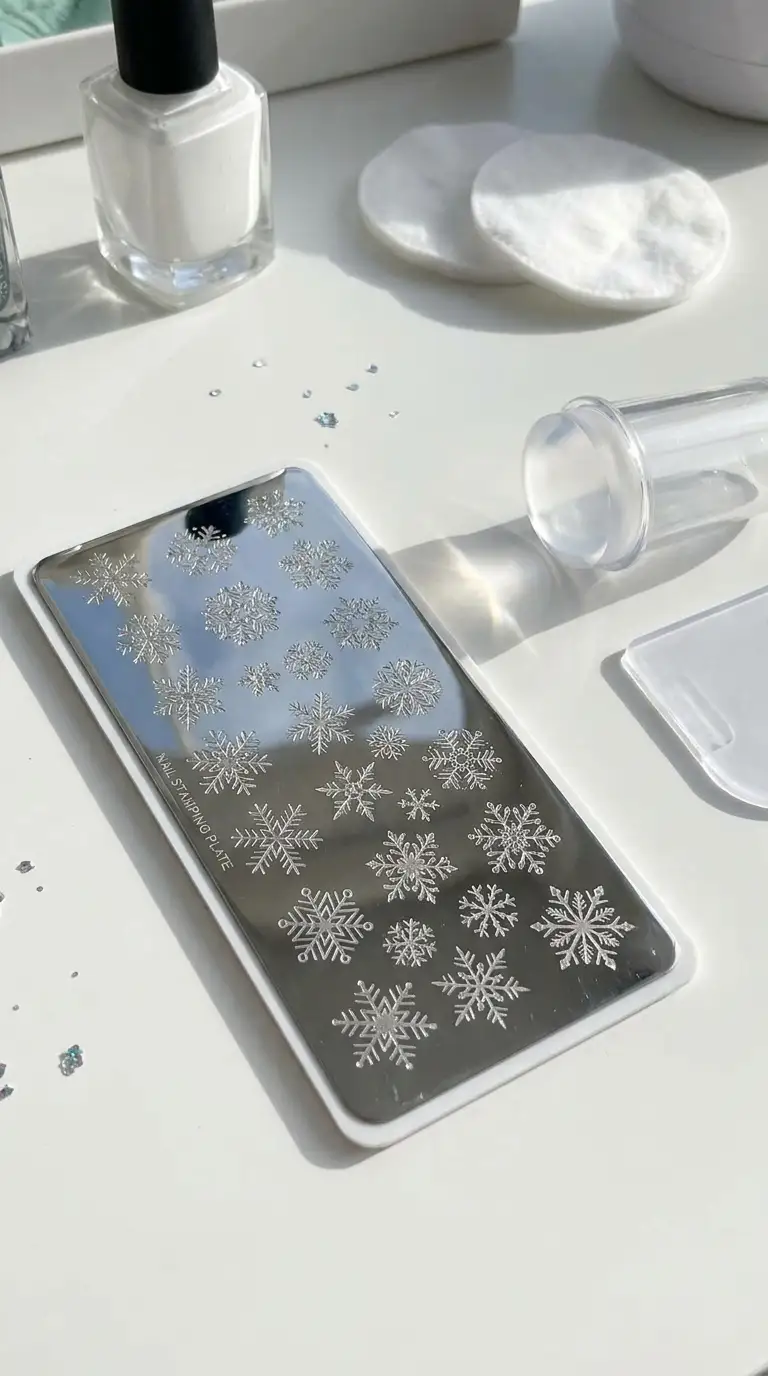
If freehand painting feels intimidating, stamping is honestly a fantastic shortcut for snowflake nail design, and I use it often for clients who want a quick but still detailed look.
You will need a stamping plate that has snowflake patterns engraved on it. There are tons available now specifically marketed for winter nail art, so finding one is not hard at all.
Apply a thin layer of stamping polish over the snowflake design on the plate, scrape off the excess with your scraper, then quickly press your stamper onto the design before it dries. Roll the stamper onto your nail firmly and evenly.
The result is a crisp, symmetrical snowflake nail design that would take much longer to achieve by hand. This method is also great for beginners who are still building confidence with detail brushes.
Snowflake Nail Design Using Nail Decals and Stickers
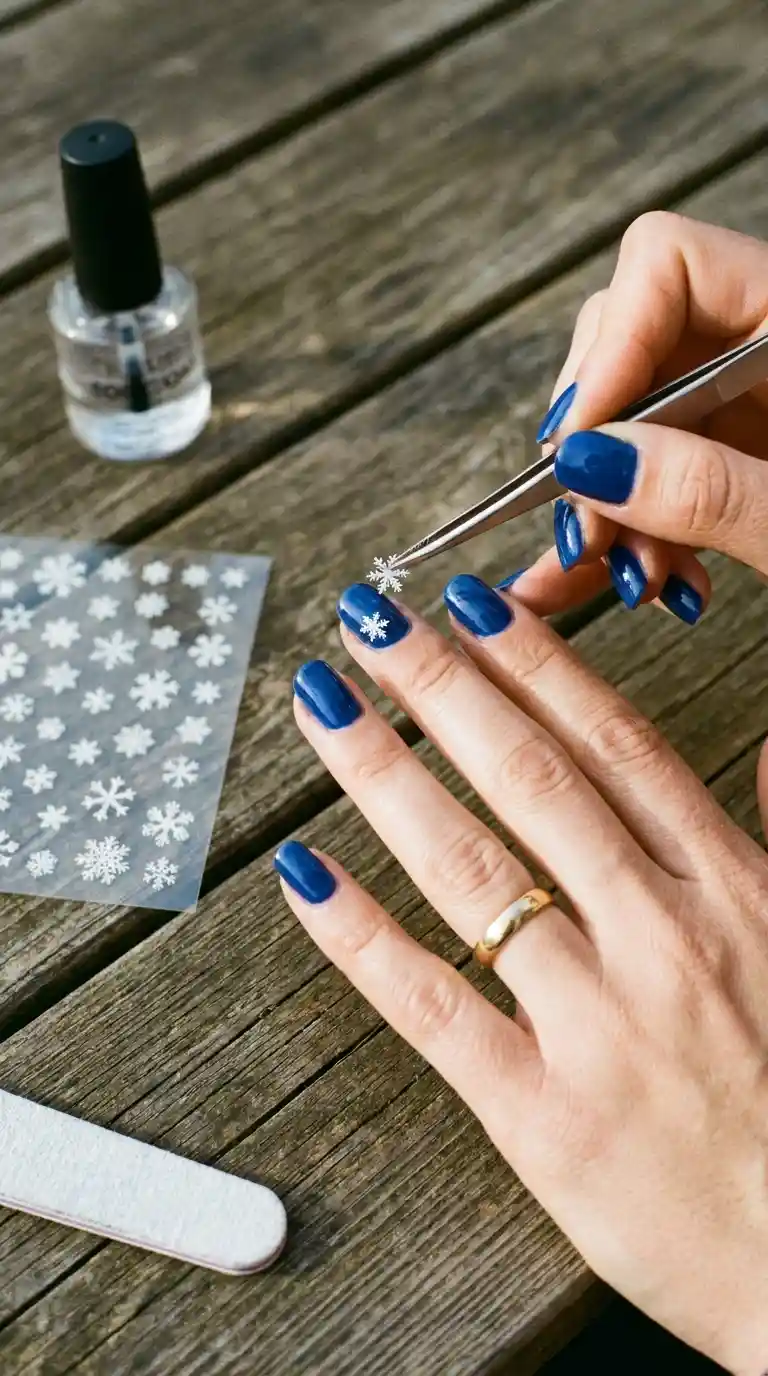
For an even faster route, nail decals and stickers have gotten remarkably realistic looking over the years. A lot of my clients who are short on time still want a snowflake nail design for a party that same evening, and decals are a lifesaver in those situations.
Simply paint your base color, let it dry, then use tweezers to place your snowflake decal exactly where you want it. Gently press out any air bubbles, and seal everything with a glossy top coat.
The nice thing about decals is the consistency. Every snowflake will look identical, which gives your snowflake nail design a very polished, professional finish without needing years of brush control practice.
Gel Snowflake Nail Design for Long Lasting Wear
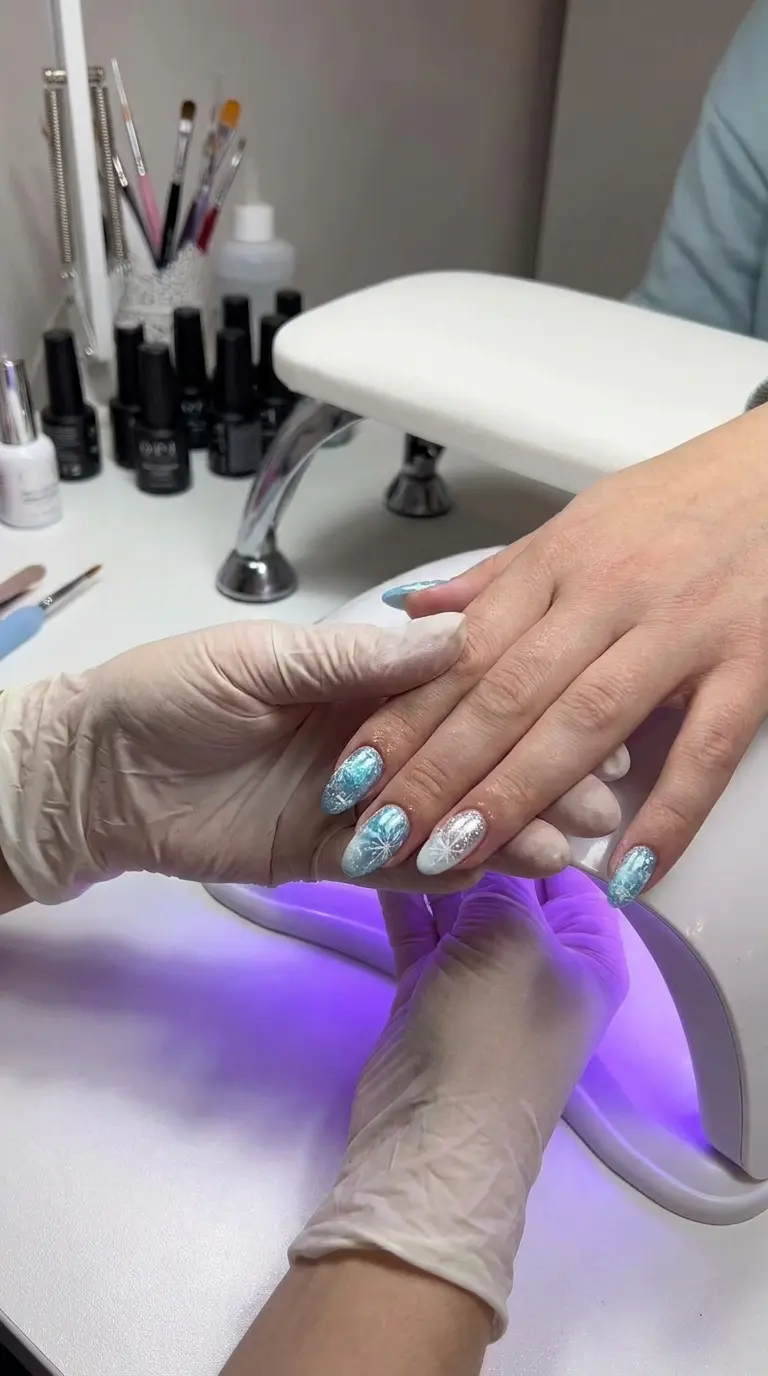
Gel polish has genuinely changed the game for snowflake nail design longevity. Regular polish can chip within a few days, but gel holds up for two to three weeks with proper care.
The process is basically the same as freehand or stamped snowflake nail design, except you are working with gel polish and curing each layer under a UV or LED lamp. This means your base coat, color, snowflake detailing, and top coat each need their own curing time.
The advantage here is that gel dries instantly under the lamp, so there is zero risk of smudging your delicate snowflake lines while you wait for them to air dry. For clients who want their snowflake nail design to survive an entire holiday season of parties and gift wrapping, gel is always my recommendation.
Read Also : Classy Short Nail Designs That Never Go Out Of Style: A Nail Artist’s Honest Guide
Acrylic Snowflake Nail Design for Extra Durability
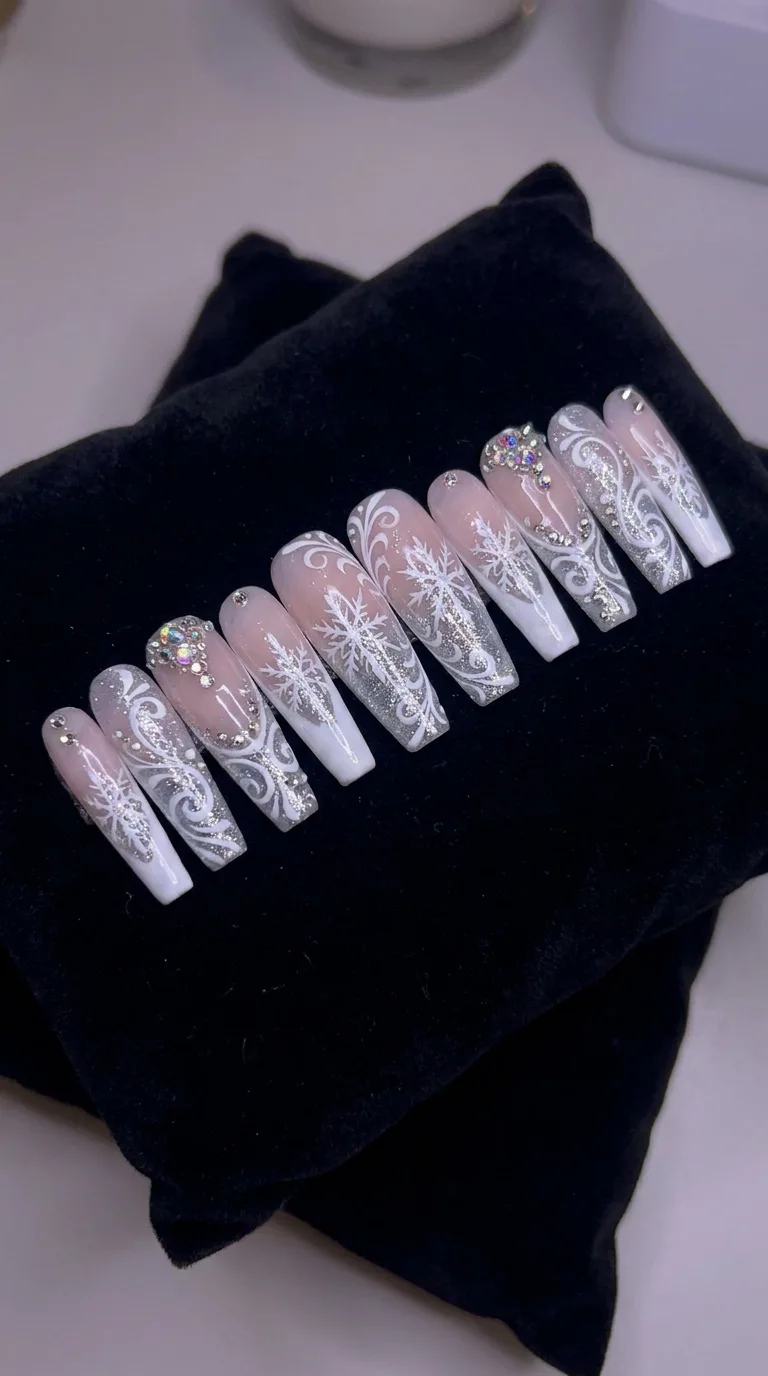
If someone wants length along with their snowflake nail design, acrylics are the way to go. I often build out a longer coffin or almond shape with acrylic first, then apply the snowflake design once the extensions are shaped and smoothed.
Acrylics give you more surface area to play with, which means you can go bigger and bolder with your snowflake nail design. I have done full hand snowflake nail design sets on acrylics where every single nail features a different sized snowflake, layered with rhinestones and a light dusting of silver chrome powder near the tips.
The durability of acrylic combined with a well sealed snowflake nail design means clients can go three to four weeks before needing a fill, which is perfect for anyone who wants their nails looking festive from the start of December straight through New Year.
Dip Powder Snowflake Nail Design
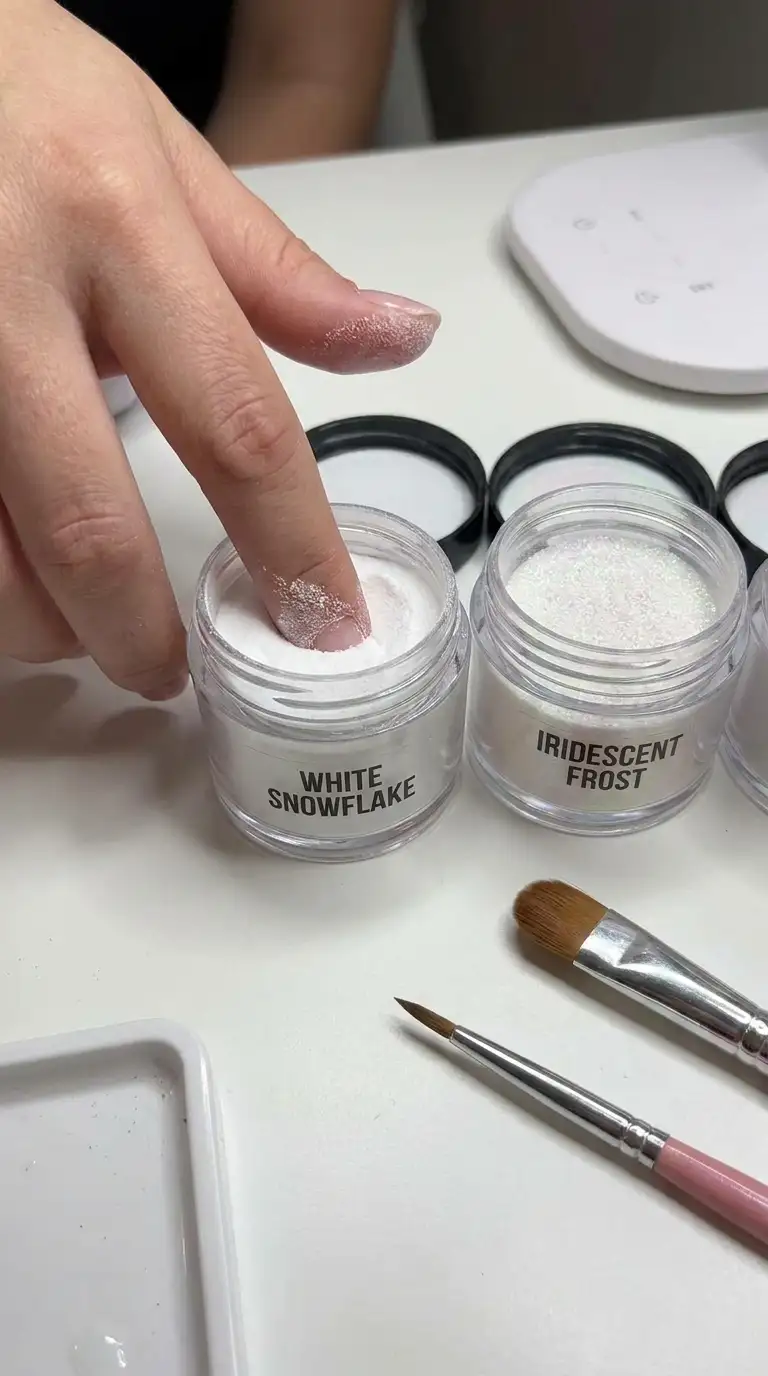
Dip powder has become really popular in the last few years, and it actually works wonderfully as a base for snowflake nail design. The powder gives a slightly textured, matte like finish before top coat, and I find it holds detail work exceptionally well.
To create a dip powder snowflake nail design, you first build your base color using the dipping method, seal it with activator, and buff it smooth. From there, the process is identical to a regular manicure. You paint your snowflake details on top with a detail brush, then apply your gel top coat to seal and add shine.
One thing I really appreciate about dip powder as a base is its strength. It genuinely protects natural nails from breaking, which makes it a wonderful option for clients who want a long lasting snowflake nail design without committing to acrylic extensions.
Glitter and Rhinestone Snowflake Nail Design
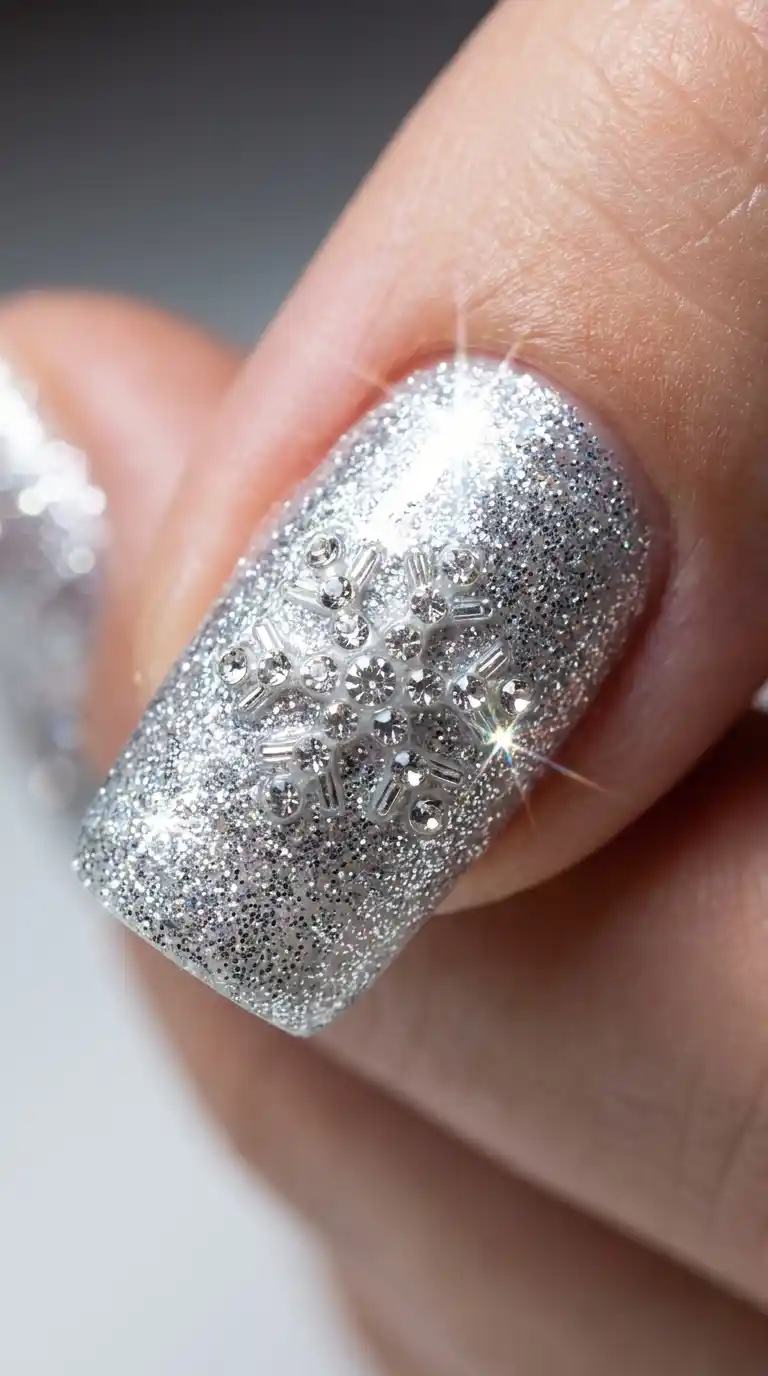
If subtlety is not your thing, this is the section for you. Glitter and rhinestones take snowflake nail design to an entirely different level of glam, and honestly, it is one of my favorite styles to create around the holidays.
Start with a glitter base, either a full glitter polish or a glitter gradient near the tips. Once that is sealed, paint your snowflake outline in white or silver on top. Then, using nail glue or gel, place small rhinestones at each point of the snowflake and one larger rhinestone in the very center.
This version of snowflake nail design catches light beautifully and photographs incredibly well, which is exactly why so many of my clients request it specifically for New Year’s Eve or Christmas Eve parties. It is loud, it is festive, and it never fails to get compliments.
Also Read : Short Duck Nails: The Bold, Playful Shape Every Nail Lover Needs To Try This Year
Minimalist Snowflake Nail Design for Simple Elegance
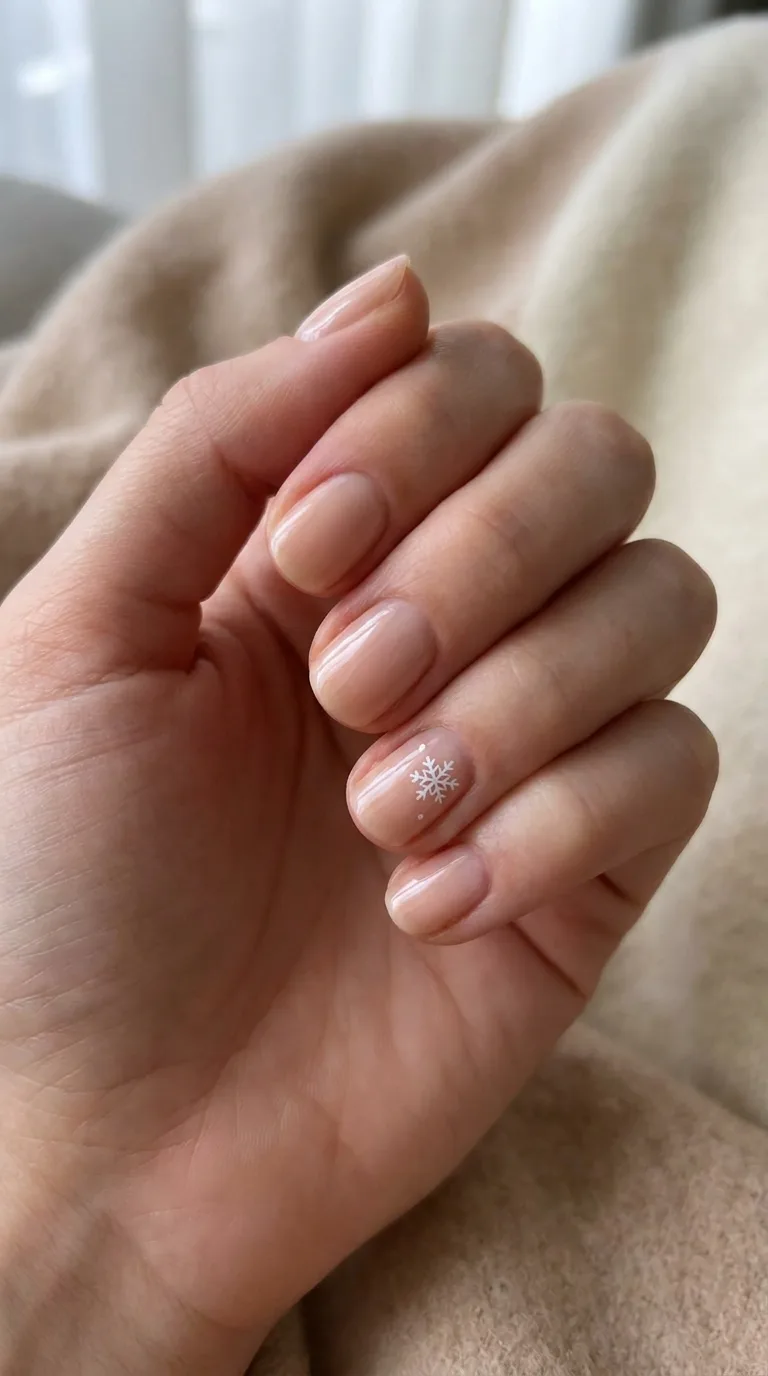
Not everyone wants a full glam look, and that is completely fine. Some of the most requested styles in my salon lately have actually been minimalist takes on snowflake nail design.
This usually means a soft neutral or nude base, with just one or two nails featuring a single small snowflake, often on the ring finger only, while the rest stay plain. It is understated, professional appropriate, and honestly still feels very festive without being over the top.
I have found that a lot of my clients who work in offices prefer this minimalist snowflake nail design specifically because it lets them enjoy the winter trend without feeling like their nails are too distracting for a work setting.
Common Mistakes to Avoid in Snowflake Nail Design
After years of doing this, I have seen every mistake possible, and honestly I have made a few of them myself when I was starting out. Let me save you some frustration.
The biggest mistake is rushing the drying time between layers. Snowflake nail design involves thin, delicate lines, and if your base coat is not fully dry, your white detailing will smear the moment your brush touches the nail.
Another common issue is overcrowding the nail. A lot of beginners try to fit too many snowflakes onto one nail, and it ends up looking messy rather than elegant. Less is often more with this particular style.
People also tend to use a brush that is too thick for detail work. If your lines are coming out chunky and uneven, it is very likely your brush, not your skill, that is the problem. Invest in a proper thin detail brush and the whole process becomes so much easier.
Lastly, skipping the top coat, or using a cheap one, is a mistake I see far too often. A snowflake nail design without a strong, glossy top coat will lose its shine within a day or two and the fine details can start to lift.
How to Make Your Snowflake Nail Design Last Longer
Longevity really comes down to a few simple habits. First, always apply cuticle oil daily. Keeping the skin around your nails moisturized prevents lifting at the edges, which is often where nail art starts to peel first.
Second, wear gloves when doing dishes or cleaning with harsh chemicals. I know it sounds like a small thing, but hot water and soap are two of the biggest enemies of any manicure, including a detailed snowflake nail design.
Third, avoid using your nails as tools. I cannot tell you how many times a client has come back with a chipped snowflake nail design because they used their nail to open a can or scrape something off a surface.
Finally, get in the habit of applying a fresh layer of top coat every four to five days. This simple step alone can extend the life of your snowflake nail design by an extra week or more.
Snowflake Nail Design Removal Tips
Eventually, every manicure needs to come off, and removing a snowflake nail design properly matters just as much as applying it did.
For regular polish, a standard acetone remover with a cotton pad works fine. Just be gentle since you do not want to damage the natural nail underneath, especially if you plan on doing another round of snowflake nail design afterward.
For gel or dip powder versions, soak cotton pads in acetone, place them directly on the nail, and wrap each finger in foil. Leave it on for about ten to fifteen minutes before gently pushing off the softened product with a cuticle stick. Never pick or peel gel off, since this can seriously damage the nail bed.
If you had acrylics with your snowflake nail design, I always recommend visiting a salon for removal rather than doing it yourself. Acrylic removal takes a bit more skill to avoid thinning out the natural nail underneath.
Snowflake Nail Design Ideas for Short Nails
A lot of people assume snowflake nail design only works on long nails, but that is honestly a myth. Some of my favorite snowflake nail design looks have actually been on short, natural nails.
For shorter nails, I recommend keeping the snowflake small and placing it near the base of the nail rather than in the center. A single snowflake per nail, rather than multiple, tends to look cleaner and more proportional on a smaller canvas.
Simple French tips with a tiny white snowflake accent nail also work beautifully for short nails. It is subtle, professional, and still very much on theme for the winter season.
Snowflake Nail Design Ideas for Long Nails
Long nails, on the other hand, give you a much bigger canvas to really go all out with snowflake nail design. This is where you can experiment with layered patterns, multiple snowflakes of varying sizes, and even ombre backgrounds that transition from deep navy to icy white.
I love doing a cascading effect on longer nails, where a large snowflake sits near the cuticle and progressively smaller ones trail down toward the tip. It creates a sense of movement and depth that you simply cannot achieve on shorter nails.
Adding chrome powder accents or a holographic top coat also tends to look more dramatic and eye catching on longer nails, since there is simply more surface area for the light to catch.
Salon vs DIY Snowflake Nail Design
I get this question a lot from clients who are debating whether to attempt snowflake nail design at home or book an appointment. Honestly, my answer depends on what look you are going for.
If you want a simple, minimalist snowflake nail design with just one or two accent nails, doing it at home is completely doable, especially with a bit of practice and the right brush. There are countless tutorials online, including detailed step by step guides like the one in this article.
However, if you are picturing something more elaborate, like a full set with rhinestones, chrome powder, and multiple layered snowflakes, I always recommend visiting a professional. Not because you cannot learn it, but because achieving that level of symmetry and cleanliness across ten nails takes real time and practice, and a rushed attempt often ends up looking uneven.
Either way, snowflake nail design is a beautiful trend that is accessible at almost every skill level, which is part of why it has stayed so popular year after year.
Final Thoughts on Snowflake Nail Design
After years of painting these delicate little patterns onto client after client, I can honestly say snowflake nail design never gets old for me. There is something so satisfying about turning a plain, bare nail into a tiny winter masterpiece.
Whether you go bold with glitter and rhinestones or keep it simple with one small accent nail, snowflake nail design is one of those trends that suits pretty much everyone. It is festive without being childish, elegant without being boring, and honestly just really fun to create.
If you are trying this at home for the first time, be patient with yourself. My first attempts at snowflake nail design were nowhere near perfect, and it took genuine practice before I felt confident enough to offer it professionally. Give yourself that same grace, and I promise the results will get better with every attempt.
Frequently Asked Questions
What colors go best with snowflake nail design?
White and icy blue are the most classic combination, but black and silver, deep red, emerald green, and soft pastels like lilac or mint also pair beautifully with snowflake nail design depending on the vibe you want.
How do you do a simple snowflake nail design at home?
Start with a dry base coat, use a thin detail brush to paint a six pointed star shape, add small branch lines off each point, then finish with tiny dots at the tips using a dotting tool.
Does snowflake nail design work on short nails?
Yes, absolutely. A single small snowflake near the base of a short nail actually looks very elegant and proportional, and it is one of the most requested styles I do for clients with shorter natural nails.
What tools do I need for snowflake nail design?
You will need a fine detail brush, a dotting tool, white polish, your chosen base color, and a good quality top coat. Rhinestones and chrome powder are optional extras.
How long does a gel snowflake nail design last?
With proper care, a gel based snowflake nail design typically lasts two to three weeks before needing a touch up or full removal.
Can I use nail stickers for snowflake nail design instead of painting?
Yes, nail decals and stickers work great for snowflake nail design, especially if you are short on time or still building confidence with a detail brush.
Is snowflake nail design only for Christmas?
Not at all. While it is very popular during the Christmas season, snowflake nail design suits the entire winter period, from late November through February.
What nail shape looks best with snowflake nail design?
Almond, oval, coffin, and square shapes all work beautifully, though coffin nails give you the most surface area for more elaborate snowflake nail design patterns.
How do you make snowflake nail design look symmetrical?
Start with a light pencil style guide using your brush, mapping out the six main points before adding detail. Practicing on paper first can also help train your hand for symmetry.
Can beginners do snowflake nail design?
Yes, especially using stamping plates or nail decals, which allow beginners to achieve a crisp, symmetrical snowflake nail design without needing advanced freehand brush skills.