
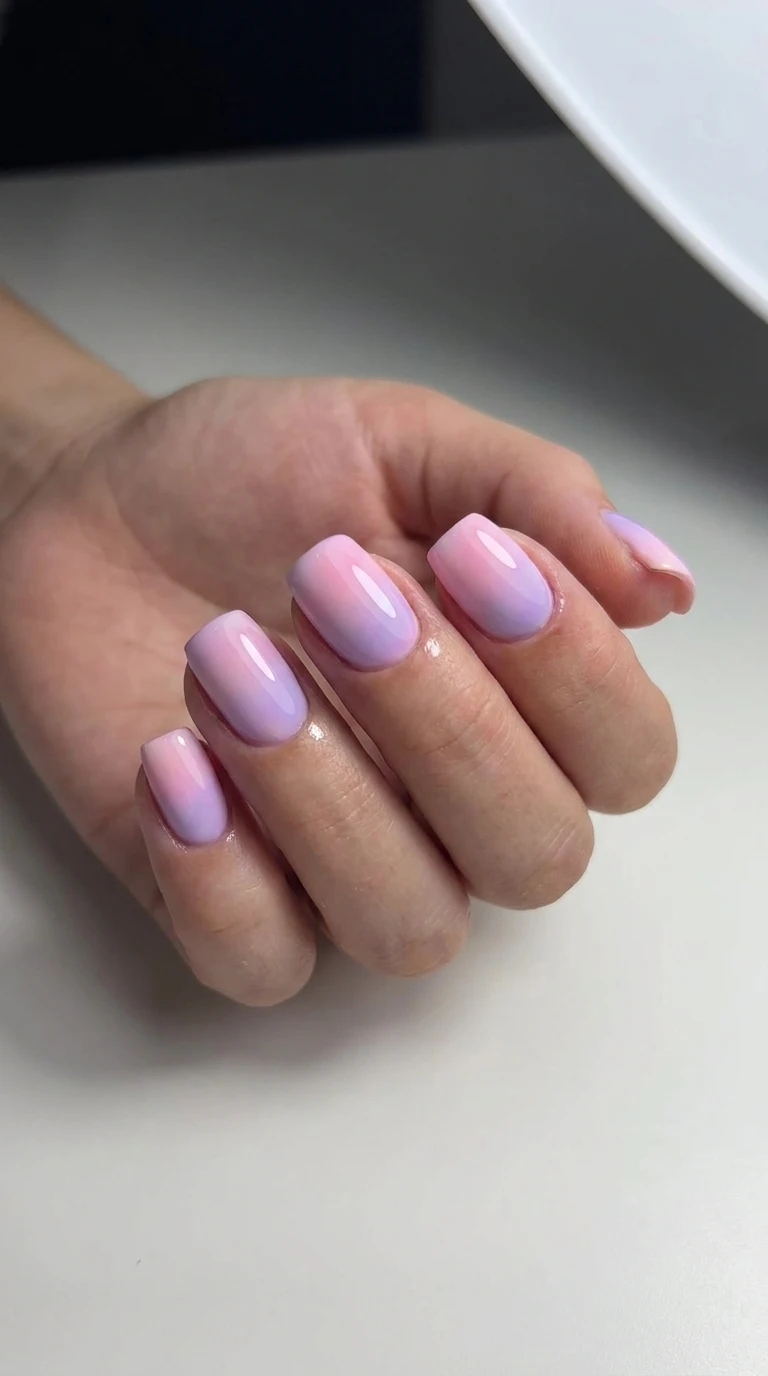
If you have ever scrolled through your phone at midnight, thumb tired, eyes glazed over, stopping only when a set of nails looked so soft and cloud like that you actually gasped out loud, chances are you were looking at airbrush nails. That soft gradient, that misty color blend that looks like it was painted by a tiny fairy with a spray can, that is the magic of airbrush nail ideas, and once you understand how the technique works, you will never look at a plain manicure the same way again.
I have spent a huge chunk of my career behind a nail desk, holding tiny compressors, mixing pigments, and watching clients light up when they see their nails for the first time. Airbrush nail art is one of those techniques that looks incredibly complicated from the outside but, once you break it down, becomes something anyone with patience and the right tools can learn. This article is going to walk you through everything, from the basic tools you need, to the exact techniques used for the most popular airbrush nail ideas, to troubleshooting tips that will save you hours of frustration.
Grab a cup of tea, get comfortable, and let us talk about airbrush nail ideas in a way that actually makes sense.
Also Read : Rainbow Nail Ideas That Will Turn Your Manicure Into a Work of Art
What Are Airbrush Nail Ideas And Why Everyone Is Obsessed With Them
Airbrush nail ideas are basically any nail design that uses a small airbrush gun or a fine mist nozzle to spray thin layers of color onto the nail instead of painting it on with a brush. The result is a smooth, seamless blend that looks nothing like traditional polish. When you paint with a brush, you get visible strokes, harder lines, and sometimes uneven coverage. When you use an airbrush, the pigment lands on the nail in a fine mist, which means the colors blend into each other like a sunset blending into the sky.
This is exactly why airbrush nail ideas have exploded across social media over the last couple of years. The aura nail trend, the cloud nail trend, the sunset ombre trend, almost all of these viral looks rely on airbrush work to get that soft, dreamy finish. You simply cannot get the same smoky blend with a regular brush no matter how skilled you are, because a brush leaves texture and an airbrush leaves a mist.
Clients ask for airbrush nail ideas because they want something that looks expensive, something that looks like it took real skill, and honestly, it does take skill, but it is a skill that can be learned step by step.
The Difference Between Airbrush Nails And Regular Nail Art
A lot of people confuse airbrush nails with regular hand painted nail art, so let me clear that up right away. Regular nail art uses brushes, dotting tools, and sometimes stamping plates to create designs directly on the nail. Airbrush nail art uses a small gun that atomizes paint or gel polish into a fine spray, which is then directed onto the nail through a stencil or freehand.
The biggest difference you will notice is the finish. Hand painted nails have visible edges, brush marks if the artist is not careful, and a flatter color application. Airbrush nails have this soft, almost airbrushed makeup like quality where the color fades gently instead of stopping abruptly.
Another difference is speed. Once you get comfortable with an airbrush machine, you can create a full set of gradient nails in a fraction of the time it takes to hand paint the same gradient with a brush and a sponge. This is one of the reasons professional nail techs love adding airbrush nail ideas to their service menu, because it lets them offer high end looking designs without spending an hour per hand.
Essential Tools You Need To Try Airbrush Nail Ideas At Home
Before you even think about spraying your first coat, you need the right setup. I remember when I first started experimenting with airbrush nail ideas, I bought a cheap machine online thinking it would work exactly like the professional ones I used at the salon. It did not. The compressor was weak, the nozzle clogged constantly, and I nearly gave up before I even finished my first practice set.
So let me save you that headache.
The Airbrush Machine And Compressor
The heart of every good airbrush nail idea is the machine itself. You need two parts, a compressor that pushes air, and a gun that mixes that air with paint to create the mist. For beginners, a dual action gun gives you more control because pressing the trigger controls the air, while pulling it back controls how much paint comes out.
Look for a compressor with adjustable pressure. Nails need a gentle, controlled spray, not the same pressure you would use for painting a car or a t shirt. Something in the range of fifteen to twenty five psi usually works well for most airbrush nail ideas, though you will adjust based on the design.
Must Read : Simple Toe Nail Designs That Look Expensive Without Trying Too Hard
Airbrush Paint Or Gel Polish
You cannot just grab any polish and pour it into an airbrush gun. Regular polish is too thick and will clog the nozzle almost instantly. You need paint specifically made for airbrushing, which is thinner and formulated to atomize properly. Many brands now make water based airbrush gel polish that cures under a lamp just like regular gel polish, which is fantastic for durability.
I always recommend beginners start with a basic set of five or six colors rather than buying every shade available. You can mix colors to create custom shades once you understand how they blend, and honestly, mixing your own colors is half the fun of airbrush nail ideas.
Stencils And Masking Tape
A huge part of achieving clean, sharp airbrush nail ideas comes down to masking. Stencils allow you to spray color only where you want it, keeping the rest of the nail clean. You can buy pre made vinyl stencils in shapes like flowers, hearts, stars, and swirls, or you can cut your own from stencil sheets using a craft blade.
Masking tape is also essential for creating clean lines, like a French tip edge or a straight color block design. Without proper masking, your airbrush nail ideas will end up looking blurry and messy instead of crisp and intentional.
Base Coat, Top Coat, And Nail Prep Supplies
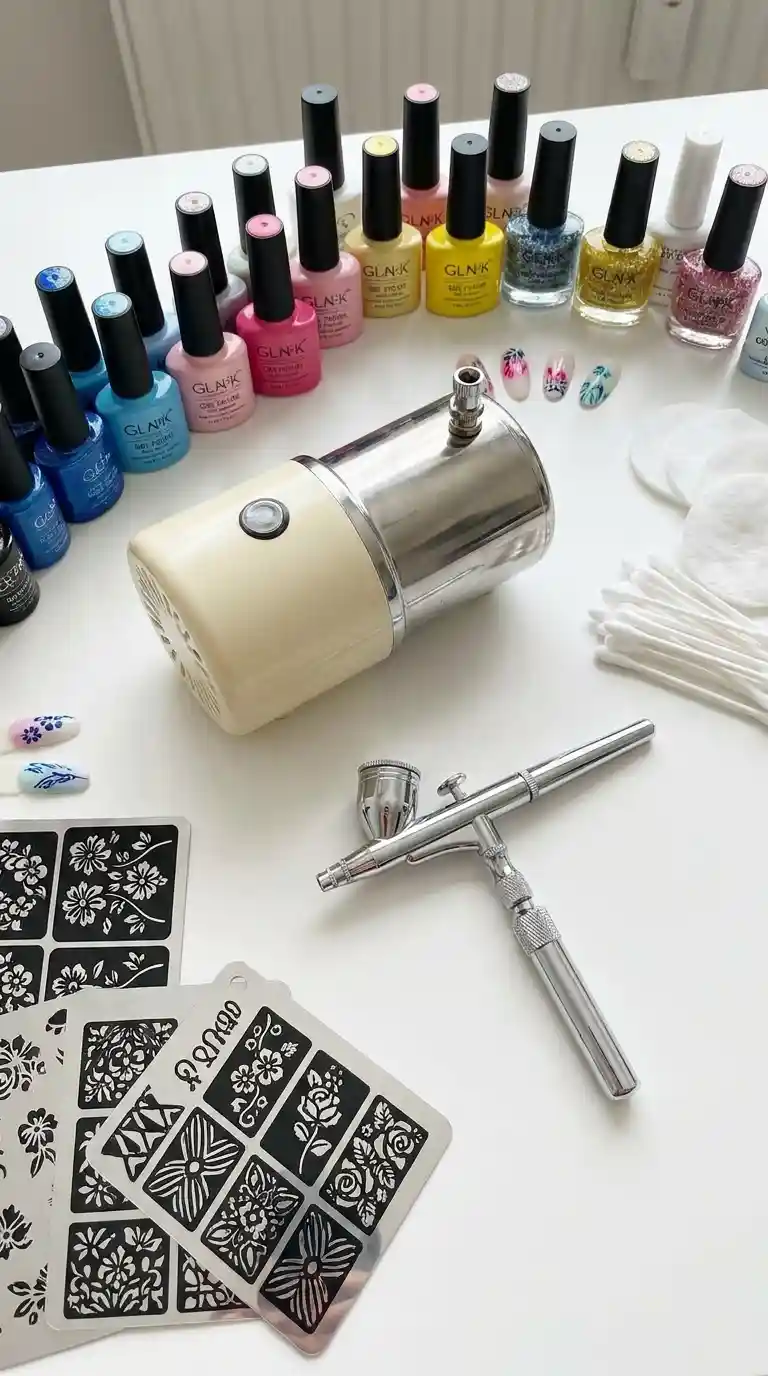
Just like any manicure, airbrush nail ideas start with proper nail prep. You need a good base coat to protect the natural nail and help the airbrush paint adhere properly. After your design is finished, a glossy or matte top coat seals everything in and gives that salon quality shine.
I always tell clients that skipping prep is the number one reason airbrush nail ideas do not last as long as they should. Oil, moisture, or leftover shine on the nail plate will cause peeling within days.
Top Airbrush Nail Ideas That Are Trending Right Now
Now for the fun part. Let me walk you through some of the most popular airbrush nail ideas that clients have been requesting nonstop, along with tips on how each one is achieved.
Aura Nails, The Soft Glowing Halo Look
If there is one design responsible for bringing airbrush nail ideas back into the spotlight, it is aura nails. This look features a soft colored cloud or halo shape sitting on a lighter base, almost like the color is glowing from within the nail. It is dreamy, it is calming, and it photographs beautifully.
To create aura nails, you start with a neutral or pastel base color, then use the airbrush to spray a slightly darker or contrasting shade in soft, circular motions toward the center of the nail. The key is control. You want the color to fade gently into the base rather than forming a hard edge. Many artists use a small round sponge or a gloved fingertip to soften the edges even further after spraying.
Aura nails work in almost any color combination, lavender on white, hot pink on nude, sage green on cream. This versatility is exactly why aura style airbrush nail ideas have stayed popular season after season.
Sunset Ombre Airbrush Nails
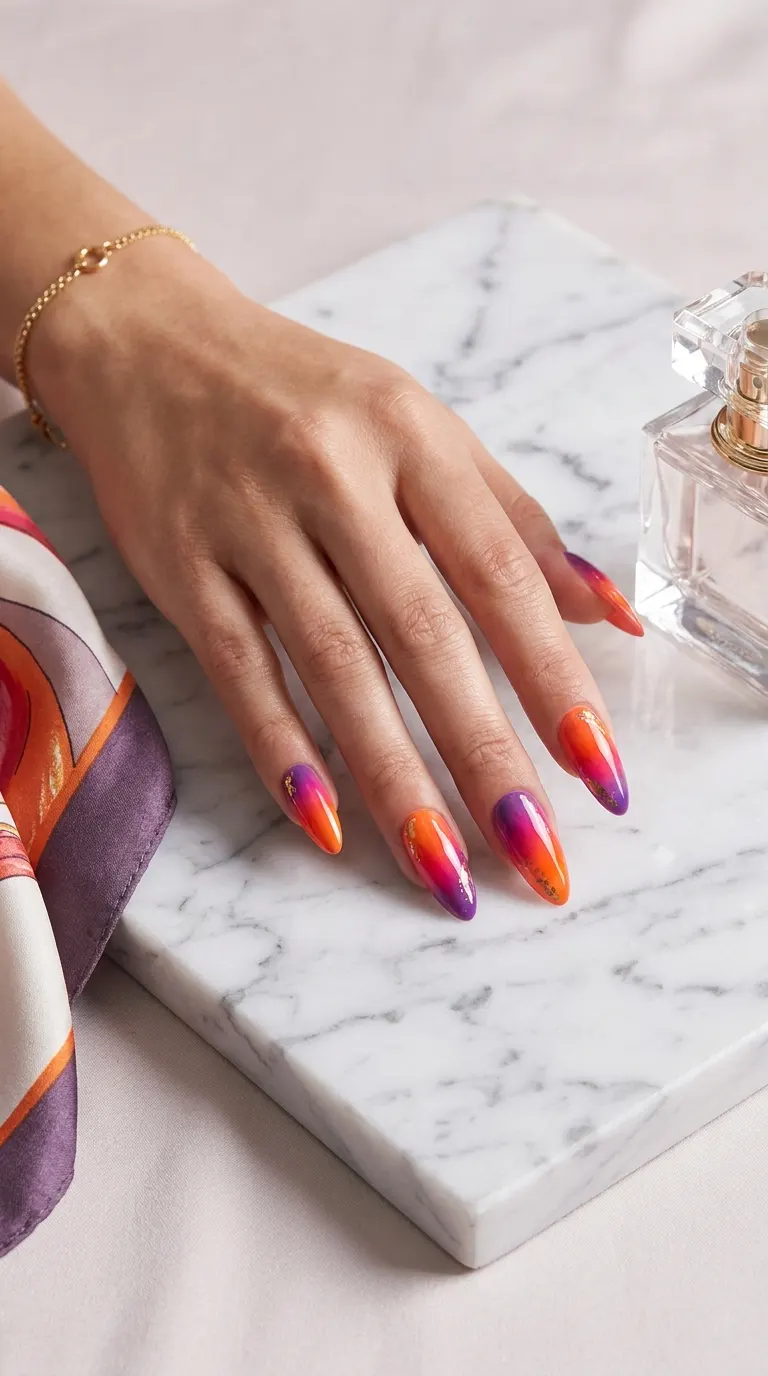
Sunset inspired airbrush nail ideas take the natural gradient of an evening sky and translate it onto the nail plate. Picture warm orange fading into pink, which fades into a deep purple near the cuticle. This look genuinely mimics how colors blend in the sky right before the sun disappears.
Achieving this requires layering multiple colors in thin passes, starting with the lightest shade near the tip of the nail and gradually building darker tones toward the base. Patience is everything here. Rushing the process and spraying too much paint at once will muddy the colors instead of creating that smooth transition.
Cloud And Sky Airbrush Nail Ideas
Cloud nails have a whimsical, storybook quality that clients absolutely adore. This design usually involves a blue or lavender sky background with soft white cloud shapes airbrushed on top, sometimes with tiny stars or a crescent moon added with a detail brush.
The airbrush is perfect for this look because clouds in real life do not have hard edges, they are soft and wispy. Using a small piece of stencil material or even a cotton ball as a shield while spraying white paint creates that fluffy, natural cloud texture that would be nearly impossible to replicate with a brush.
Read Also: Natural Nail Ideas Short: The Complete Guide To Effortless Beauty That Actually Lasts
French Tip With An Airbrush Twist
Classic French tips get a beautiful upgrade when airbrush technique is involved. Instead of a crisp white line painted with a brush, the tip is created using a stencil and a fine mist of color, giving it a soft, blurred edge that feels modern and effortless.
You can take this even further by using colored airbrush paint instead of plain white for the tip, creating what people often call a colored French airbrush design. Baby blue tips, soft coral tips, or even black smudged tips are all incredibly popular airbrush nail ideas right now.
Marble And Smoke Effect Nails
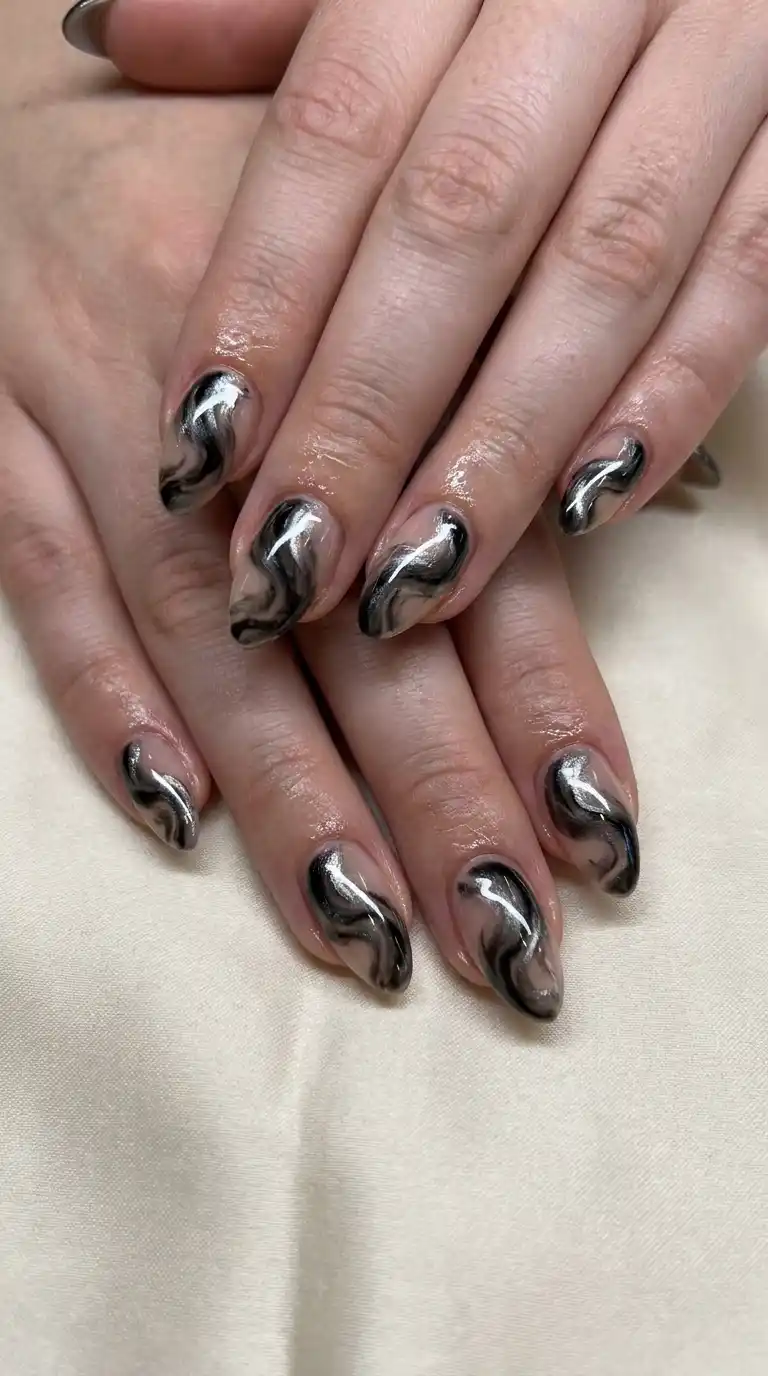
Marble effect airbrush nail ideas mimic the look of natural stone, with swirling veins of color running through a soft base. This is achieved by spraying two or three colors close together and using a fine detail brush dipped in thinner to drag delicate lines through the wet paint before it dries.
Smoke effect nails are similar but focus on soft, wispy trails of a single color, almost like watching smoke curl through the air. Both looks require a light hand and a lot of practice, but they are some of the most eye catching airbrush nail ideas you can offer.
Chrome And Metallic Airbrush Nails
Combining airbrush technique with chrome powder creates an incredibly futuristic looking manicure. The airbrush lays down a smooth, even base of color, and once cured, chrome powder is buffed on top to create that mirror like shine. Because the airbrush application is so smooth and free of brush strokes, the chrome reflects light more evenly compared to a hand painted base.
This combination has become one of the most requested airbrush nail ideas for special occasions like weddings and parties, since chrome nails photograph incredibly well under flash photography.
Floral Airbrush Nail Ideas
Flowers have always been popular in nail art, and airbrushing takes floral designs to a whole new level of softness. Using flower shaped stencils, artists can spray layered petals in gradient colors, creating blooms that look almost photographic rather than flat and cartoonish.
A common technique involves spraying a light pink or white base petal shape first, then adding a deeper pink or red toward the center of each petal to create dimension. Green airbrushed leaves and stems complete the look. These floral airbrush nail ideas are especially popular during spring and summer months.
Galaxy And Space Themed Nails
Galaxy nails were one of the earliest viral nail trends, and they remain a staple request among airbrush nail ideas because the technique is genuinely perfect for the look. Dark blues, purples, and blacks are layered and blended to create a deep space background, then white paint is flicked or lightly misted on top to create stars, sometimes finished with fine glitter for extra sparkle.
Watercolor Style Airbrush Nails
Watercolor nails borrow from painting techniques, creating soft washes of color that blend into each other exactly like watercolor paint on paper. The airbrush is the ideal tool for this because it naturally creates that soft, translucent blending effect. Pastel rainbows, soft floral washes, and abstract color blocks all fall under this category of airbrush nail ideas.
Also Read : 87 Gorgeous Orange Nail Ideas That Will Make Your Hands Impossible To Ignore
Step By Step Guide To Creating Your First Airbrush Nail Design
I know reading about all these gorgeous designs is exciting, but let us slow down and talk through the actual process so you can try this yourself with confidence.
Preparing The Natural Nail
Start by pushing back cuticles, shaping the nail, and lightly buffing the surface to remove shine. Wipe the nail with alcohol or a nail prep solution to remove any oils. This step matters more than people realize, because airbrush paint needs a clean surface to properly bond.
Applying The Base Coat
Apply a thin layer of base coat and cure it if you are using gel formulas. This protects the natural nail and gives the airbrush paint something smooth to adhere to. Skipping this step is one of the most common mistakes beginners make when experimenting with airbrush nail ideas at home.
Choosing Your Color Palette
Decide on your color scheme before you start spraying. I always suggest picking two or three main colors along with one accent color. Too many colors at once can turn your design muddy, especially when you are still learning how the airbrush blends shades together.
Practicing Your Spray Pattern On Paper First
This step gets skipped constantly and it should not be. Before you spray a single drop onto your nail, practice on a piece of paper or a nail tip. Get a feel for how far to hold the airbrush from the surface, generally somewhere between two and four inches works for most designs, and how much pressure creates a soft mist versus a heavier splatter.
Layering Color With Patience
Airbrush nail ideas rely on thin layers built up slowly rather than one heavy coat. Spray a light pass, let it dry for a few seconds, then spray again if you need more intensity. This layering technique is what creates that soft, professional gradient look instead of a blotchy, uneven mess.
Using Stencils For Precision
If your design includes shapes like clouds, flowers, or geometric lines, place your stencil firmly against the nail before spraying. Hold it flat to avoid paint seeping underneath the edges, which creates blurry lines instead of crisp ones.
Sealing With Top Coat
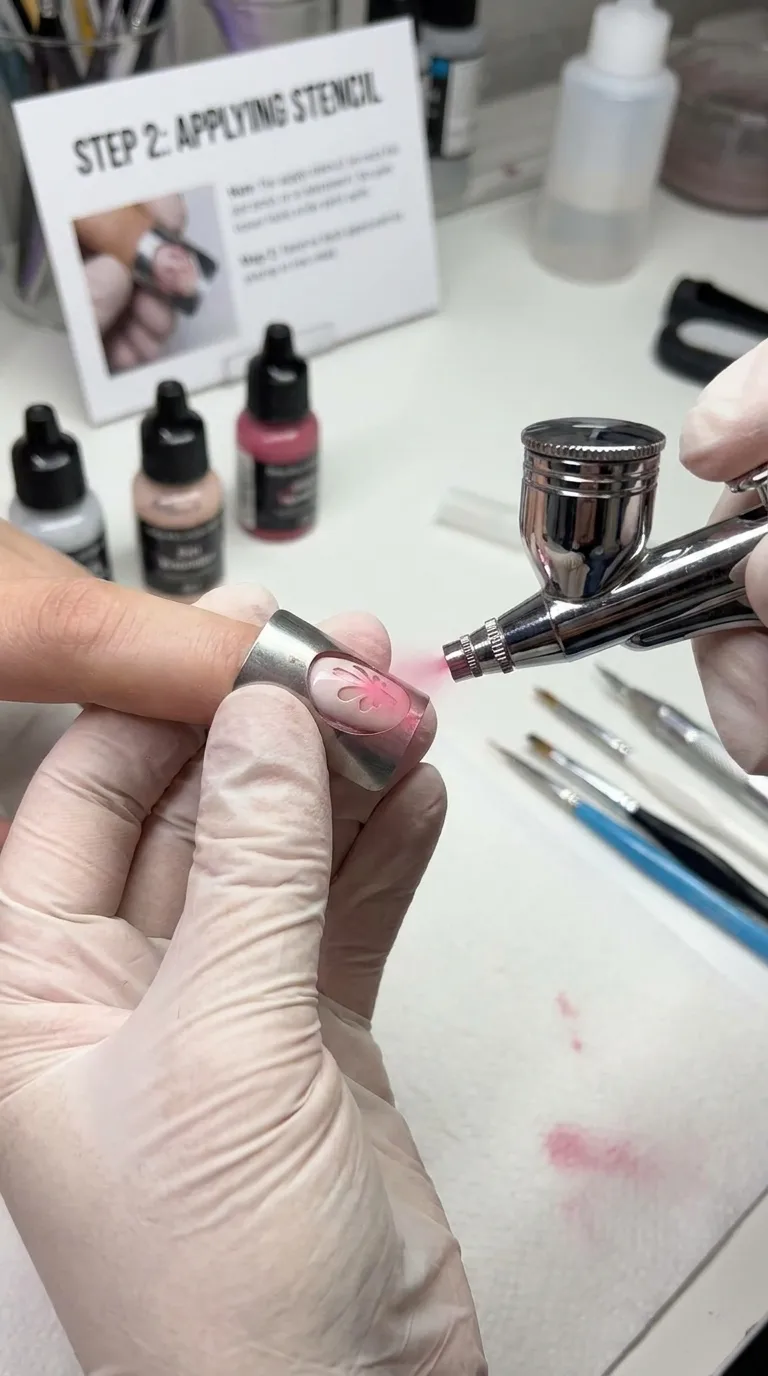
Once your design is complete and fully cured, apply a generous layer of top coat to seal everything in and add shine. This step also protects the delicate airbrush layers from chipping or fading over the following weeks.
Best Color Combinations For Airbrush Nail Ideas
Choosing colors that blend beautifully together can make or break your design. Here are some combinations that consistently look stunning when airbrushed.
Soft Pastel Combinations
Baby pink and lilac, mint green and baby blue, peach and cream, these gentle pastel pairings create the softest, most wearable airbrush nail ideas. They work for almost any occasion and tend to be the most requested by clients who want something elegant rather than bold.
Bold Sunset Tones
Orange, hot pink, and deep purple create that fiery sunset look I mentioned earlier. This combination works beautifully on both short and long nails and tends to photograph incredibly well in natural light.
Deep Jewel Tones
Emerald green, sapphire blue, and amethyst purple create rich, luxurious airbrush nail ideas that feel perfect for autumn and winter. These darker tones also pair beautifully with gold or silver chrome accents.
Monochrome Gradients
Sometimes the most sophisticated airbrush nail ideas use a single color family, like three shades of pink blending from light to dark, or various tones of gray fading into black. This approach feels minimal yet still shows off the technical skill involved in airbrushing.
Neon And Bright Combinations
For clients who want something loud and fun, neon yellow, hot pink, and electric blue create eye catching summer designs. Neon pigments can be trickier to blend since they are often more opaque, so extra thin layers are needed to keep the gradient soft.
Short Nails And Airbrush Nail Ideas
A common misconception is that airbrush nail ideas only look good on long, dramatic nail shapes. This is simply not true. Short and round nails can absolutely rock airbrush designs, and honestly, some of the softest, most elegant looks I have created have been on short natural nails.
For shorter lengths, simpler designs tend to work best since there is less surface area to work with. A soft aura design, a simple two tone gradient, or a delicate French tip with airbrushed edges all translate beautifully onto shorter nails without looking cramped or overworked.
If you have short nails and feel intimidated by all the elaborate airbrush nail ideas you see online, do not worry. Start simple, master the gradient blend first, and build up to more detailed designs as your confidence grows.
Must Read : Cat Eye Nail Designs: The Mesmerizing Manicure Trend That Will Make Your Nails Impossible To Ignore
Long Nails And Statement Airbrush Designs
On the flip side, longer nails, especially almond, coffin, or stiletto shapes, give you a much bigger canvas to work with. This is where the more elaborate airbrush nail ideas really get to shine, since there is enough room for detailed cloud formations, layered floral designs, or intricate marble swirls.
Longer nails also allow for multi zone designs, where different sections of the nail feature different elements, like a French tip near the edge blending into an aura design closer to the cuticle. These combination looks require more planning but result in truly show stopping manicures.
Seasonal Airbrush Nail Ideas Worth Trying
Spring Inspired Designs
Spring calls for soft floral airbrush nail ideas, pastel gradients, and light, airy color palettes. Think cherry blossom pink fading into white, or soft lavender with tiny airbrushed daisies scattered across an accent nail.
Summer Inspired Designs
Summer is the perfect time for bold sunset gradients, tropical color combinations, and beachy blue and white cloud designs. Bright neon airbrush nail ideas also tend to spike in popularity during the warmer months.
Autumn Inspired Designs
Come autumn, deep burgundy, burnt orange, and mustard yellow gradients dominate requests. Smoky brown and black marble effects also feel right at home during the cooler months.
Winter Inspired Designs
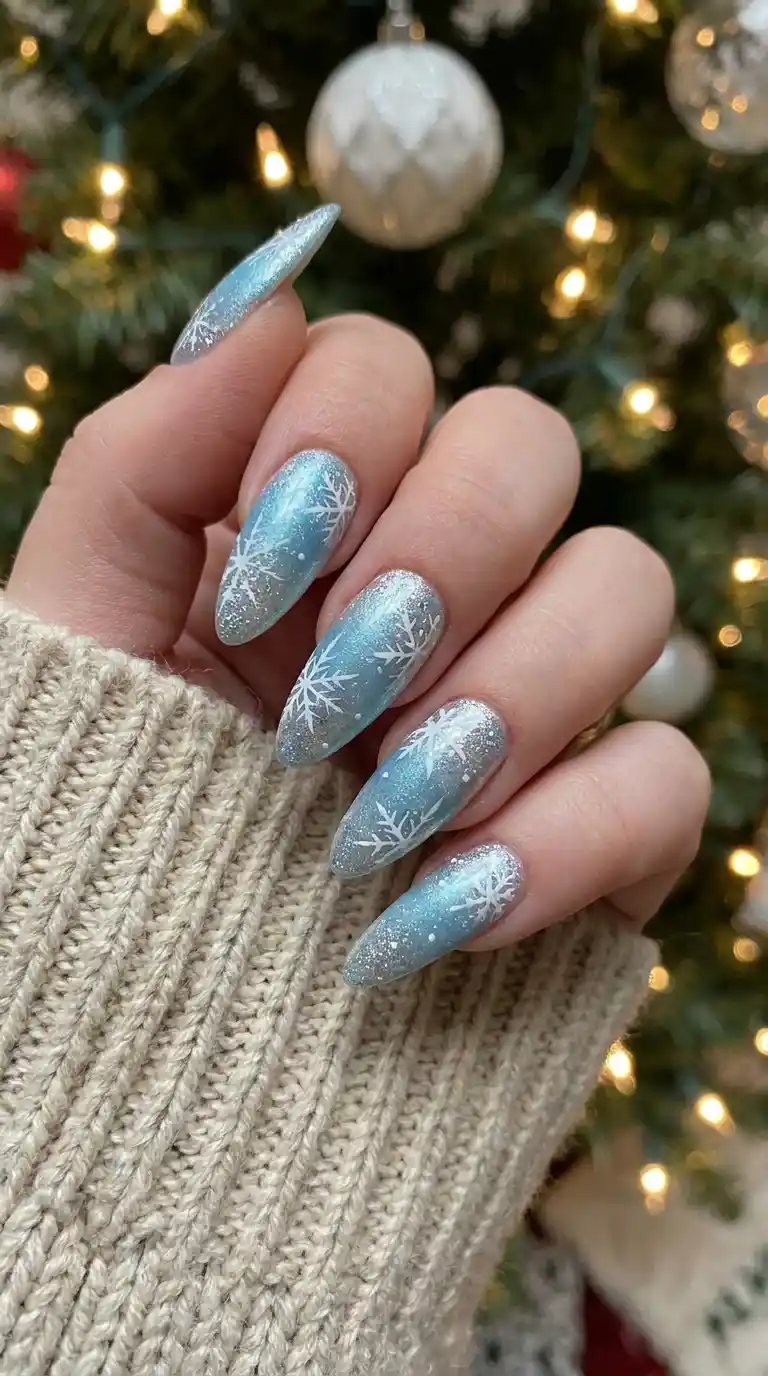
Winter airbrush nail ideas often lean into icy blues, silvers, and deep navy tones, sometimes paired with delicate white snowflake stencils or a dusting of fine glitter to mimic frost.
Airbrush Nail Ideas For Special Occasions
Wedding Nails
Brides often request soft, romantic airbrush nail ideas that will not clash with their gown or bouquet. A gentle white to nude gradient, or a soft blush aura design finished with a few tiny pearls or crystals, creates an elegant bridal look that photographs beautifully without overpowering the rest of the outfit.
Prom And Party Nails
For prom season, clients tend to want something bolder, glittery gradients, holographic chrome finishes over an airbrushed base, or matching a specific dress color exactly. Airbrushing makes color matching incredibly precise since you can mix custom shades to match almost any fabric swatch.
Birthday And Celebration Nails
Birthday nails give more creative freedom. Metallic gold accents, celebratory confetti effects created by flicking small dots of paint over an airbrushed base, or a favorite color scheme brought to life through gradient blending all make wonderful airbrush nail ideas for a birthday set.
Common Mistakes To Avoid With Airbrush Nail Ideas
Learning any new skill comes with a learning curve, and airbrush nail ideas are no exception. Here are mistakes I see beginners make constantly, along with how to fix them.
Holding The Airbrush Too Close
Holding the gun too close to the nail causes paint to pool and creates blotchy, uneven color instead of a soft mist. Keep a consistent distance, usually a few inches away, and move your hand steadily rather than holding it still in one spot.
Skipping The Practice Round
I mentioned this earlier but it deserves repeating. Never spray directly onto a client’s nail, or your own, without testing the pressure and paint flow first on paper or a spare tip.
Using The Wrong Paint Consistency
Regular nail polish will absolutely ruin an airbrush gun. If your paint is too thick, thin it slightly with the appropriate reducer recommended by the brand you are using. If it is too thin, the color will look weak and require far too many layers to build opacity.
Not Cleaning The Airbrush Gun Properly
This one causes so many frustrating clogs. After every session, disassemble the gun and clean it thoroughly with the appropriate cleaning solution. Dried paint inside the nozzle is one of the biggest reasons airbrush nail ideas end up looking sloppy, since a clogged nozzle sprays unevenly no matter how skilled you are.
Rushing The Layering Process
Good airbrush nail ideas take time. Rushing through layers without letting each pass dry slightly results in muddy, oversaturated color instead of that soft gradient effect everyone is chasing.
Forgetting To Mask Properly
Without proper masking tape or stencils, overspray will land on the skin around the nail or bleed into areas you wanted to keep clean. Take the extra two minutes to mask carefully, your finished design will look dramatically more professional.
How Long Do Airbrush Nail Ideas Actually Last
This is one of the most common questions clients ask me, and the honest answer depends on several factors. If the airbrush design is done using gel based paint and properly sealed with a quality top coat, it can last just as long as a regular gel manicure, typically two to three weeks with proper care.
Traditional polish based airbrush designs without a gel top coat tend to be more delicate and may only last five to seven days before chipping becomes noticeable. This is why most professional nail techs today use gel airbrush systems that cure under an LED or UV lamp, since the cured finish is far more durable than air dried polish.
Taking care of your hands, avoiding harsh chemicals, wearing gloves while cleaning, and applying cuticle oil daily will all extend the life of your airbrush nail ideas significantly.
Read Also : Simple Butterfly Nail Art: 15 Pretty Designs Anyone Can Paint At Home
Airbrush Nail Ideas For Beginners Versus Professionals
Beginner Friendly Designs
If you are just starting out, stick to simple two color gradients, soft ombre fades, or basic aura designs using only one stencil shape. These beginner airbrush nail ideas teach you control over pressure and distance without overwhelming you with too many steps.
Intermediate Level Designs
Once you feel comfortable blending two colors smoothly, try adding a third color, experimenting with simple stencil shapes like flowers or stars, or attempting a basic marble effect using a detail brush to drag lines through wet paint.
Advanced Professional Designs
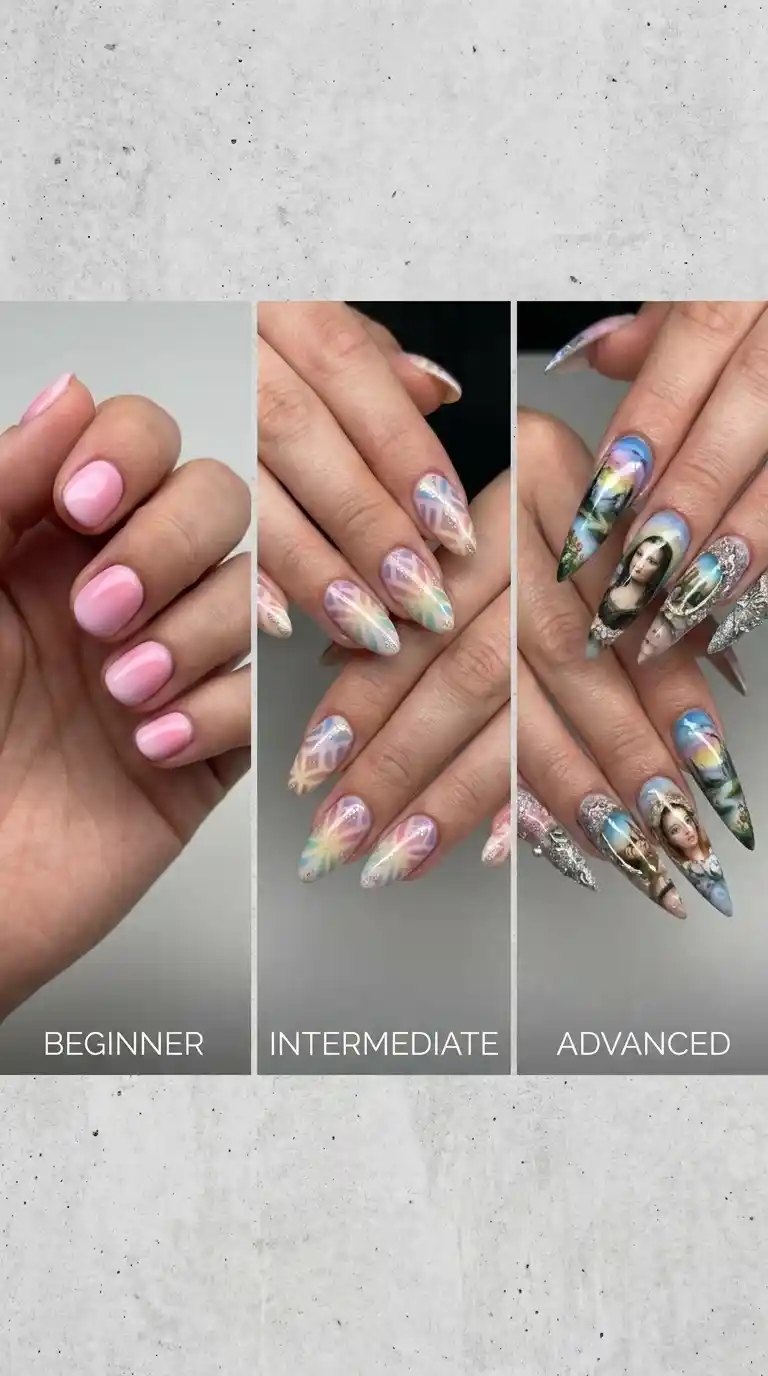
Advanced airbrush nail ideas involve multiple stencils, layered color zones, combining airbrush work with hand painted details, chrome application, or 3D embellishments. These designs take significantly more time and practice but represent the true artistry possible with this technique.
How Nail Salons Are Using Airbrush Nail Ideas To Stand Out
From a business perspective, offering airbrush nail ideas has become a genuine competitive advantage for salons. Clients are willing to pay a premium for the soft, gradient looks that simply cannot be replicated with hand painting alone. Salons that invest in a quality airbrush setup and train their staff properly often see increased bookings specifically from clients who found their work through social media.
I have watched clients bring in screenshots of aura nails or sunset gradients they found online, and being able to say yes, we can absolutely recreate that, has become a huge selling point. If you run a nail salon or work as an independent nail tech, learning airbrush nail ideas is one of the smartest investments you can make in your skill set.
Combining Airbrush Nail Ideas With Other Nail Art Techniques
The most impressive manicures often combine airbrushing with other techniques rather than relying on it alone.
Airbrush And Hand Painted Details
A soft airbrushed background paired with delicate hand painted flowers, tiny dots, or fine linework creates incredible depth. The smooth gradient acts almost like a canvas, making the crisp hand painted details pop even more.
Airbrush And Chrome Powder
As mentioned earlier, layering chrome powder over a cured airbrush base creates a mirror like shine that would look flat if applied over a hand painted design with visible brush strokes.
Airbrush And Glitter Or Rhinestones
Adding fine glitter to wet airbrush paint, or placing rhinestones after the top coat is applied, adds sparkle and dimension to soften designs like galaxy nails or winter frost themed sets.
Airbrush And Encapsulation
Some advanced techniques involve airbrushing a design, then encapsulating it under a layer of clear builder gel, creating a beautiful glass like depth where the color appears to float inside the nail rather than sitting on top of it.
Airbrush Nail Ideas For Different Skin Tones
Choosing the right color palette can make airbrush nail ideas look even more stunning depending on skin tone, though honestly every color can work with the right undertone adjustments.
For fair skin tones, soft pastels, baby pink aura designs, and light lavender gradients tend to look incredibly soft and romantic. For medium skin tones, warm sunset oranges, coral pinks, and golden shimmer accents look particularly radiant. For deeper skin tones, jewel tones like emerald green, sapphire blue, and rich burgundy gradients create striking contrast that really makes the airbrush blending technique stand out.
There really is no wrong choice here, this is more about personal preference than any strict rule, but these general guidelines can help if you are feeling stuck on which airbrush nail ideas to try next.
Maintaining And Caring For Airbrush Nails At Home
Once your airbrush nail ideas are complete, a little maintenance goes a long way in keeping them looking fresh.
Apply cuticle oil daily to keep the surrounding skin hydrated and to help the top coat maintain its shine. Wear gloves when washing dishes or cleaning with harsh chemicals, since prolonged exposure to soap and water can cause even gel based designs to lift prematurely. Avoid using your nails as tools to open cans or scrape labels, as this puts unnecessary stress on the tips where airbrush designs are often most delicate.
If a small chip does appear, resist the urge to peel it off. Instead, gently file the chipped area smooth and apply a fresh layer of top coat to seal it until you can get to your next fill or touch up appointment.
Where To Find Inspiration For New Airbrush Nail Ideas
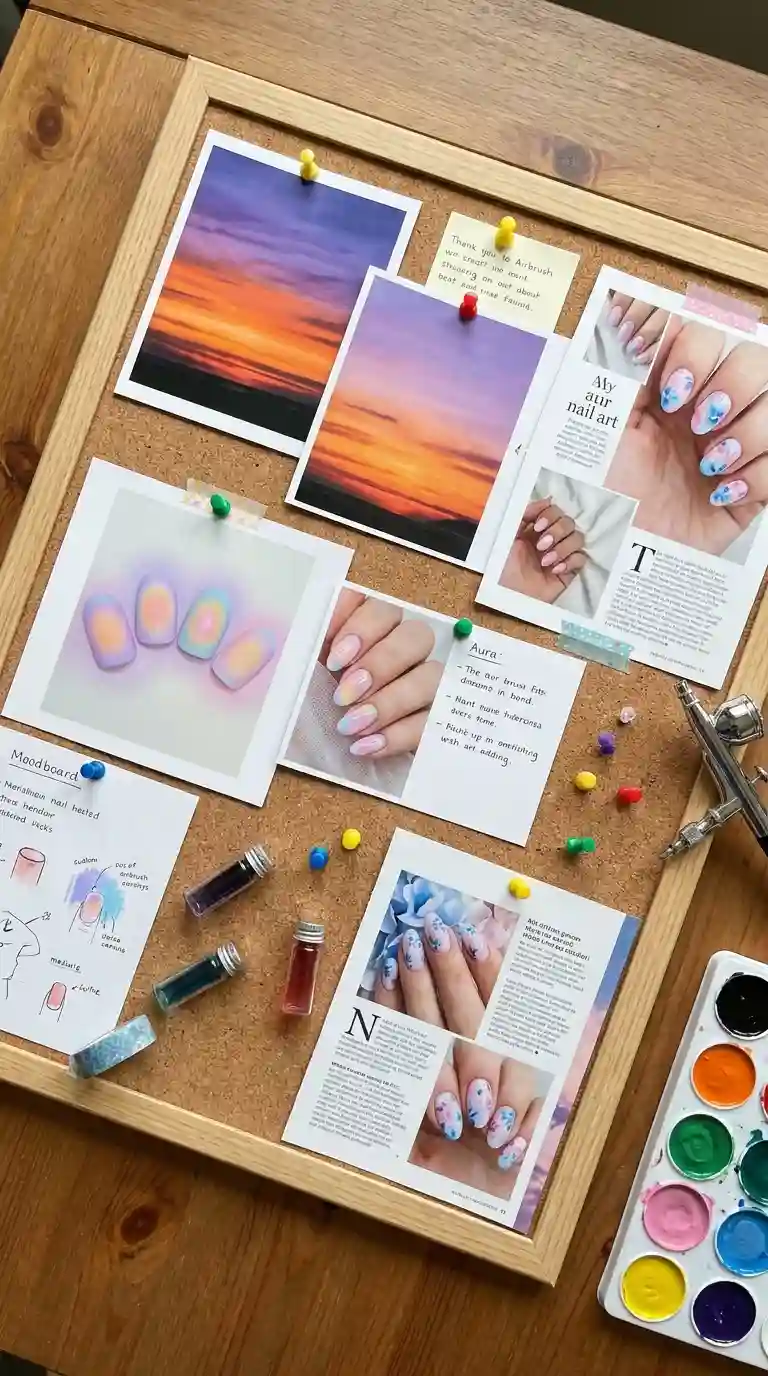
Social media platforms are genuinely the best place to discover fresh airbrush nail ideas. Following nail artists who specialize in this technique will show you real time examples of new color combinations and stencil shapes as trends evolve. Saving images that catch your eye into a dedicated folder makes it much easier to communicate exactly what you want when booking an appointment or practicing at home.
Fashion runways and seasonal color trend reports are another great resource, since many airbrush nail ideas are directly inspired by the color palettes seen in clothing collections each season. Even nature itself, sunsets, ocean waves, flower gardens, provides endless inspiration for new gradient combinations to try.
Budget Friendly Ways To Try Airbrush Nail Ideas
If professional airbrush machines feel like too big an investment right now, there are still ways to experiment with the look on a smaller budget. Some beginner kits combine a small compressor and gun for a fraction of the cost of professional salon equipment, which is perfect for practicing at home before committing to a bigger setup.
Alternatively, many nail salons now offer airbrush add ons for a reasonable additional fee compared to fully custom hand painted nail art, since the technique is often faster to execute once an artist is skilled with it. This makes trying out airbrush nail ideas accessible even if you are not ready to buy your own equipment.
Airbrush Nails Versus Dip Powder And Traditional Gel
Clients often ask how airbrush nail ideas compare to other popular manicure methods like dip powder or traditional gel polish. Dip powder tends to create a thicker, more durable finish but lacks the ability to create smooth gradient blending the way an airbrush can. Traditional gel polish is fantastic for solid colors and simple hand painted designs but again cannot replicate that soft misted color transition.
Airbrush technique really shines specifically because of its ability to blend colors seamlessly, something neither dip powder nor traditional polish application can achieve on their own. That said, many artists combine methods, using dip powder or builder gel for structure and length, then adding airbrush detailing on top for that signature soft finish.
Troubleshooting Airbrush Equipment Issues
Even experienced artists run into technical hiccups occasionally, so here are quick fixes for common problems.
If your airbrush is sputtering instead of spraying a smooth mist, check that the nozzle is not clogged with dried paint and make sure your air pressure is set correctly. If the color is coming out too light no matter how many layers you apply, your paint may need to be shaken more thoroughly, or the pigment concentration in the bottle may need adjusting.
If you notice paint pooling or dripping onto the nail, you are likely holding the gun too close or moving too slowly across the surface. Practice moving your hand in smooth, even passes rather than pausing in one spot, which is a habit that quickly resolves most pooling issues with airbrush nail ideas.
Final Thoughts On Exploring Airbrush Nail Ideas
Airbrush nail ideas represent one of the most exciting developments in modern nail art. The technique opens up a world of soft gradients, dreamy auras, and photorealistic effects that simply were not possible with a brush alone. Whether you are a client looking to request something new at your next appointment, or an aspiring nail artist ready to invest in your first airbrush machine, the learning curve is absolutely worth the stunning results waiting on the other side.
Start simple, be patient with your layers, keep your equipment clean, and do not be afraid to experiment with unexpected color combinations. Some of the most beautiful airbrush nail ideas come from happy accidents during practice sessions. Give yourself room to play, and you will be surprised how quickly your confidence and skill grow.
Frequently Asked Questions
What is the best paint to use for airbrush nail ideas?
Water based airbrush gel polish designed specifically for nails tends to work best since it is formulated to atomize smoothly through the gun without clogging, and it cures properly under a lamp for lasting wear.
Can I do airbrush nail ideas without a compressor?
Technically there are handheld cans of pre pressurized airbrush color, but they offer far less control than a proper compressor and gun setup, so results tend to be less precise for detailed designs.
How much does an airbrush nail machine cost?
Beginner kits can start relatively affordably, while professional grade dual action guns paired with a strong compressor will cost significantly more, though the investment pays off quickly if you are offering this service professionally.
Do airbrush nails last as long as regular gel nails?
When done with gel based airbrush paint and sealed properly with a quality top coat, airbrush nail ideas can last just as long as a standard gel manicure, typically around two to three weeks.
What is the easiest airbrush nail design for beginners?
A simple two color gradient fade is the most beginner friendly place to start, since it teaches you distance control and layering technique without requiring stencils or intricate detail work.
Are airbrush nail ideas safe for natural nails?
Yes, as long as proper prep and removal steps are followed, airbrush designs are just as safe as traditional gel manicures and do not cause more damage to the natural nail plate.
How do you clean an airbrush gun after doing nails?
Disassemble the gun and rinse the components with the manufacturer recommended cleaning solution immediately after use, since dried paint left in the nozzle overnight is much harder to remove later.
Can airbrush nail ideas be done on short nails?
Absolutely, short and round nails work beautifully with simpler airbrush designs like soft auras or basic gradients, and some of the most elegant looks I have created have been on shorter natural nail lengths.
What is the difference between aura nails and regular ombre nails?
Aura nails feature a soft cloud or halo shape concentrated in a specific area of the nail, while regular ombre nails involve a gradient that transitions gradually from one edge of the nail to the other.
How far should you hold the airbrush from the nail?
Most airbrush nail ideas require holding the gun a few inches away from the nail surface, though the exact distance depends on the pressure setting and the softness of blend you are trying to achieve.
Can you mix your own colors for airbrush nail ideas?
Yes, mixing colors is a fantastic way to create custom shades that are not available premixed, and many professional artists develop their own signature color combinations this way.