
I have been doing nails for almost nine years now, and if there is one design that clients ask me for over and over again, it is simple butterfly nail art. I still remember the first time a bride walked into my salon holding a Pinterest photo of tiny butterflies scattered across a nude nail, and she looked at me like it was some impossible task only a professional could pull off. I laughed a little, because honestly, simple butterfly nail art is one of the easiest looks you can create once you understand a few tricks. It just looks fancy. That is the whole secret.
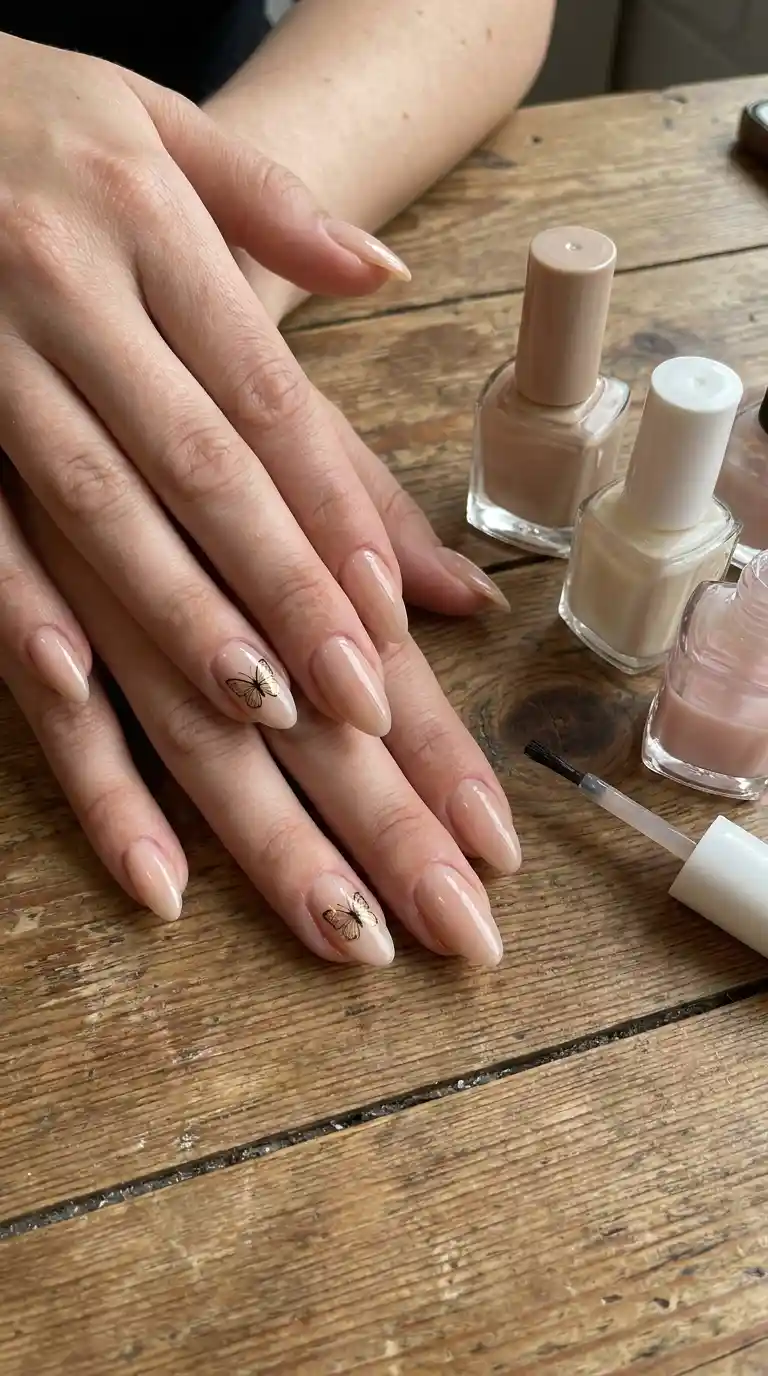
In this article I am going to walk you through everything I have learned from years of painting butterflies on real clients, on my own nails during slow afternoons, and even on my daughter’s tiny fingers when she begs me for “the pretty bug wings.” We will talk about tools, colors, techniques, mistakes people make, and I will give you real steps you can follow at home even if you have shaky hands like I did when I first started.
Why Simple Butterfly Nail Art Never Really Goes Out Of Style
Trends in the nail world come and go fast. One season everyone wants chrome, the next season it is all about matte finishes or French tips with a twist. But butterflies keep coming back, season after season, and I think there is a reason for that. Butterflies feel light and feminine without being loud. They work on a teenager going to prom and they work just as well on a forty year old woman heading to a business dinner.
Simple butterfly nail art is also incredibly forgiving. Unlike a perfectly symmetrical French manicure or a flawless ombre gradient, a butterfly does not need to be perfect to look good. Real butterflies are not perfectly symmetrical either, so a slightly wonky wing actually adds character instead of looking like a mistake. That is something I always tell nervous clients who are trying this for the first time.
There is also the emotional side of it. Butterflies represent change, growth, freedom, all those soft meaningful things that people like to carry with them. I have had clients ask for butterfly nails after a breakup, after finishing chemotherapy, after a big move to a new city. It sounds dramatic for a manicure, but nails matter to people more than we give them credit for.
Also Read : Coffin Nail Designs: The Complete Guide Every Nail Lover Needs This Season
What You Actually Need Before Starting Simple Butterfly Nail Art
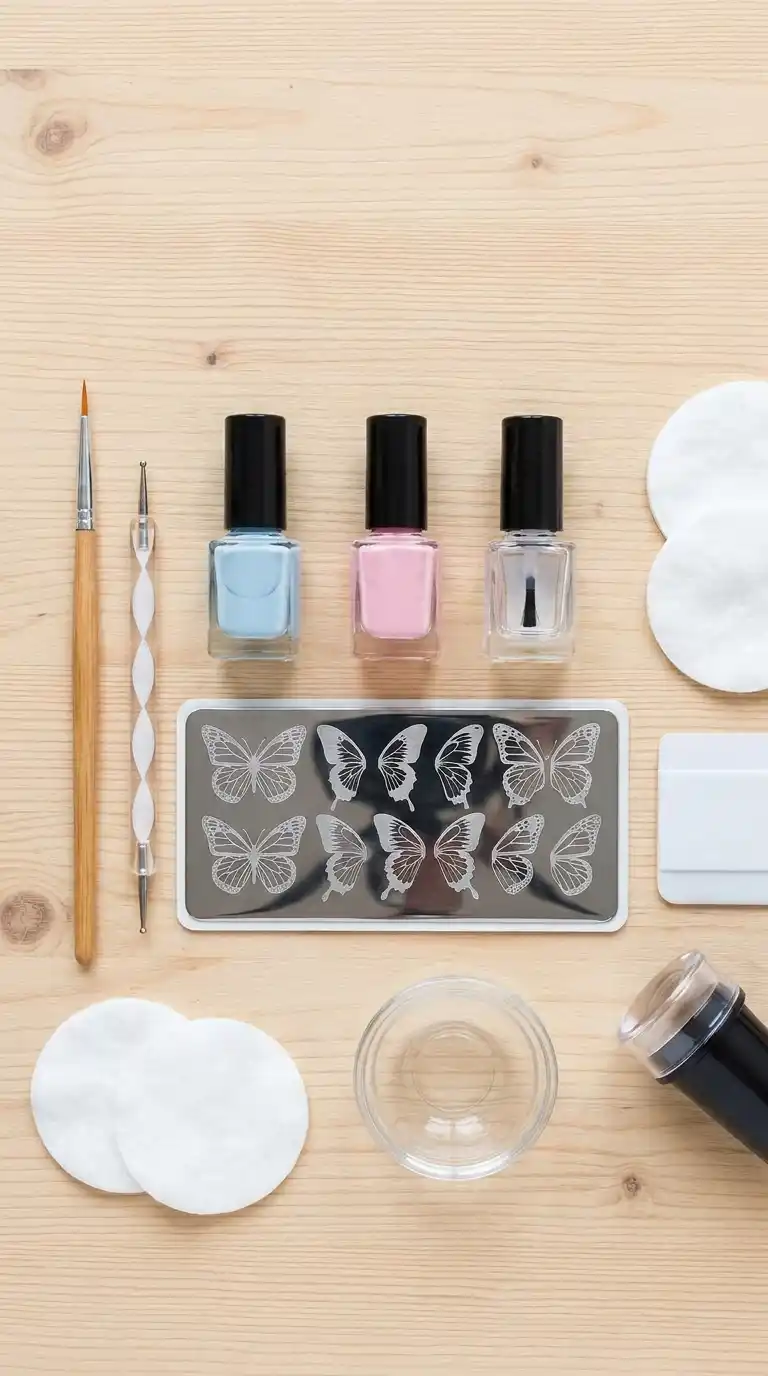
Before you even open a bottle of polish, let’s talk supplies. I get so many messages from people who tried simple butterfly nail art and gave up halfway because they were using the wrong tools. You do not need a professional kit worth hundreds of dollars. I started with things from a drugstore and honestly some of my best butterfly sets were done with basic tools.
Here is what actually helps:
A thin detail brush, sometimes called a liner brush, is probably the single most important tool for simple butterfly nail art. Without it, your wings will look like blobs instead of wings. You can find these in any beauty supply store for a couple of dollars.
A dotting tool, or even the end of a bobby pin in a pinch, helps you create the tiny dots that decorate butterfly wings. I have used everything from actual dotting tools to toothpicks depending on where I am and what I have on hand.
A base coat and top coat are non negotiable in my opinion. Skipping these is where I see the most beginners go wrong. Your butterfly nail art might look great for an hour and then start chipping and smudging by evening.
Nail polish in at least three or four colors. You do not need twenty shades. A neutral base like nude, white, or a soft pink, plus one or two accent colors and a black or dark brown for outlining, is genuinely enough to create beautiful simple butterfly nail art.
Nail stickers or stamping plates with butterfly designs are optional but honestly a great shortcut if your hands shake or you are short on time. I know some purists look down on these, but as someone who has painted thousands of nails, I say use whatever gets you a result you love.
Read Also : Black Nail Designs That Actually Work: A Nail Artist’s Honest Guide to Doing Them Right
Choosing The Right Colors For Simple Butterfly Nail Art
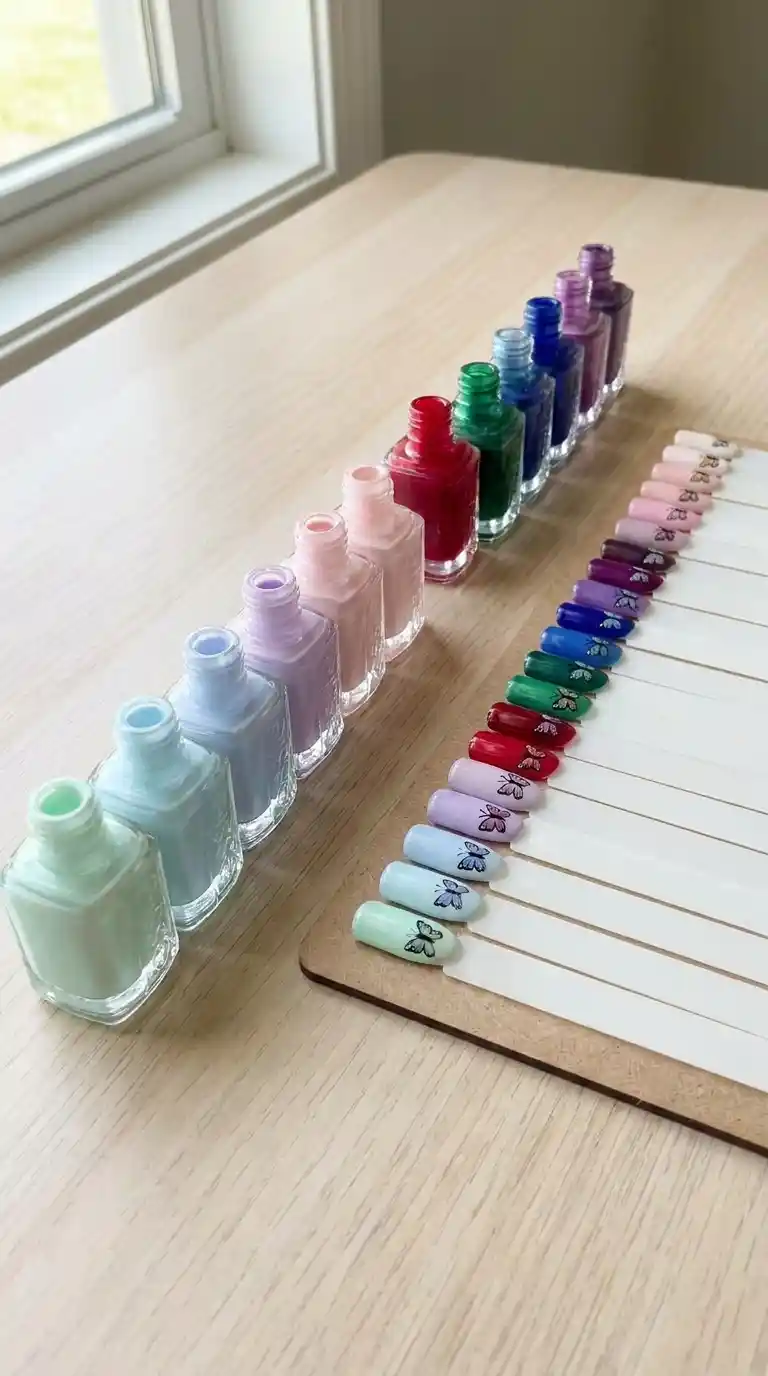
Color choice honestly makes or breaks simple butterfly nail art more than technique does. I have seen technically perfect butterfly designs look flat and boring because the colors did not work together, and I have seen slightly messy butterflies look stunning because the color pairing was so good it distracted from small flaws.
My personal go to combination for simple butterfly nail art is a nude or soft pink base with butterflies painted in a deeper pink, lavender, or even a soft blue. This combination photographs beautifully and works for almost any skin tone, which matters a lot when you are doing this professionally.
For clients who want something bolder, I love pairing a white base with butterflies in bright colors like coral, turquoise, and yellow, almost like a little rainbow scattered across the nail. This version of simple butterfly nail art feels more playful and works great for spring and summer.
If someone wants something more elegant for an evening event, I go with a black or deep burgundy base and paint the butterflies in gold or silver. It looks dramatic but the design itself stays simple, which is really the whole point of this style.
Metallic accents deserve their own mention here. A tiny bit of gold or silver polish along the edge of a butterfly wing, or a few gold flecks scattered around it, elevates simple butterfly nail art instantly without adding any real difficulty to the process.
Step By Step Guide To Simple Butterfly Nail Art For Beginners
Okay, let’s get into the actual how to part, because I know that is what most of you came here for. I am going to break this down exactly the way I teach it to my newer nail techs, so pay attention to the order because it does matter.
Step One: Prep Your Nails Properly
This step gets skipped constantly and it is the number one reason people are disappointed with their simple butterfly nail art results. Push back your cuticles gently, shape your nails the way you like, and buff the surface lightly so the polish has something to grip onto. Wipe your nails with rubbing alcohol or a nail prep pad to remove any oils. This one small step makes your simple butterfly nail art last twice as long.
Step Two: Apply Your Base Color
Apply a thin coat of your chosen base color. I always tell people two thin coats beat one thick coat every single time. Let each coat dry fully before moving on. If you rush this part, your butterflies will smear when you try to paint over a tacky base, and trust me, that is a frustrating way to ruin an afternoon.
Step Three: Sketch The Butterfly Shape Lightly
Using your thin detail brush and a small amount of polish, sketch two light curved lines meeting at a point in the middle of the nail, kind of like a loose bowtie or an hourglass shape. This is the basic skeleton of every butterfly. Do not worry about making it perfect right away.
Step Four: Fill In The Wings
Fill in the top two wings first since they are usually bigger, then the bottom two smaller wings. A lot of people ask me if the wings need to be symmetrical and honestly, no, they do not. Slight variation actually makes simple butterfly nail art look more natural and hand painted rather than stamped from a template.
Step Five: Add The Body And Antennae
Using a darker color, usually black or brown, paint a thin vertical line down the center where the wings meet. This is the butterfly’s body. Add two tiny curved lines at the top for antennae. This step takes seconds but it is what pulls the whole design together and makes it instantly recognizable as a butterfly rather than an abstract shape.
Step Six: Decorate The Wings
This is my favorite part and honestly the part that makes people fall in love with simple butterfly nail art. Use your dotting tool to add small dots along the edges or centers of each wing. You can also add thin lines radiating out from the body for extra detail. Keep it minimal though, because overloading the wings with too many details takes away from the simple, clean look we are going for.
Also Read : 77 Stunning Spring Nail Designs That Will Instantly Refresh Your Whole Look This Season
Step Seven: Seal It With Top Coat
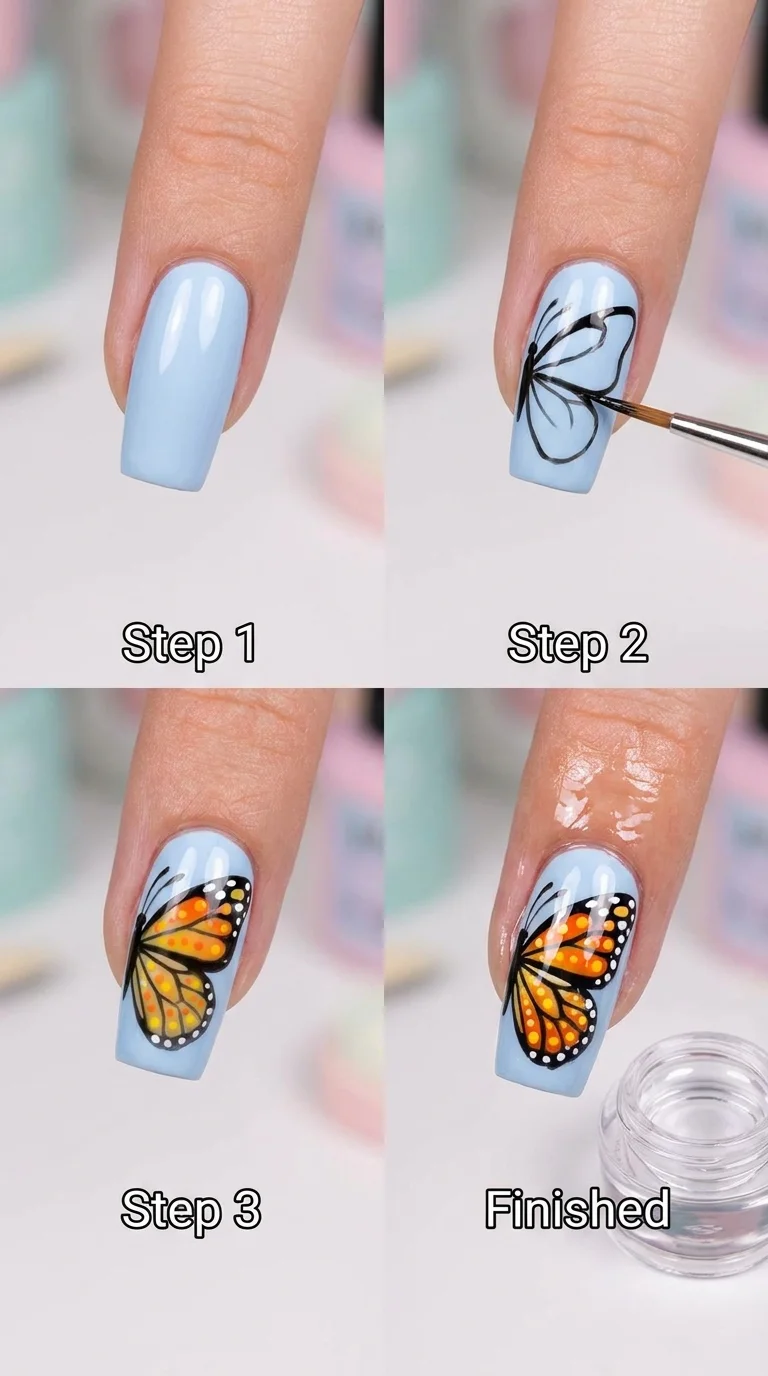
Once everything is completely dry, apply a glossy or matte top coat depending on your preference. This locks everything in and gives your simple butterfly nail art that salon finish look, protecting it from chipping for days.
Simple Butterfly Nail Art Designs I Personally Recommend
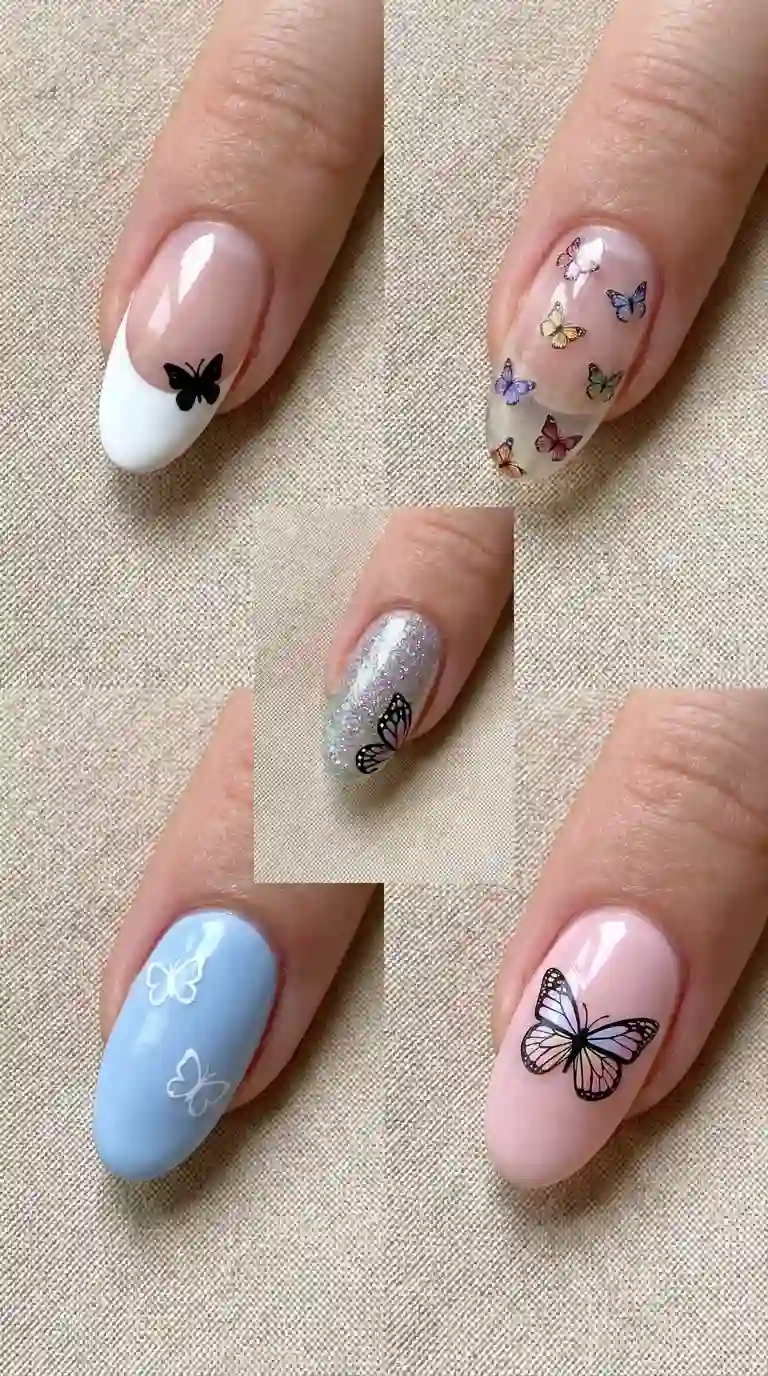
Over the years I have developed a handful of go to variations that I fall back on constantly because clients love them and they are not too time consuming. Let me share some of my favorites with you.
Minimalist Single Butterfly Accent Nail
Instead of painting butterflies on every single nail, just do one accent nail, usually the ring finger, with a single detailed butterfly, while the rest of the nails stay a plain matching color. This version of simple butterfly nail art is my number one recommendation for beginners because it takes so much pressure off. You only need to get one nail right.
Scattered Mini Butterflies
This look involves painting several tiny butterflies across two or three nails, almost like they are flying across your hand. It creates a whimsical, dreamy effect and honestly looks harder than it is. The trick is keeping each butterfly small and simple so you are not trying to add too much detail to a tiny space.
French Tip With A Butterfly Twist
Take a classic French manicure and add a small butterfly sitting right at the edge of the white tip line. This combines a timeless, elegant base with a fun modern touch. I do this one a lot for clients who want something trendy but still office appropriate.
Ombre Background With Butterfly Overlay
If you already know how to do a gradient or ombre nail, adding a simple butterfly on top takes it to another level. The soft color transition in the background makes the butterfly almost look like it is glowing.
Chrome Butterfly Accents
Using chrome powder just on the butterfly wings while keeping the rest of the nail matte creates incredible contrast. This is one of the more advanced takes on simple butterfly nail art, but the actual painting technique stays the same, you are just adding a chrome step at the end.
Simple Butterfly Nail Art For Short Nails
A lot of people assume you need long nails to pull off nail art, but that is not true at all, and I actually think simple butterfly nail art looks incredibly cute on short, natural nails. The key is scaling everything down.
On short nails, I recommend sticking to just one or two butterflies total across all ten fingers rather than covering every nail, since a full nail covered in tiny details can look cluttered on a smaller surface. Choose lighter, softer colors for the base since they tend to make short nails look longer and more elegant. Keep the butterfly itself small, positioned near the base or off to one side rather than centered, which creates a more balanced look on shorter nail beds.
I did this for my own mother, who has always kept her nails short and practical because of her job, and she was shocked at how elegant simple, understated butterfly designs looked on her hands. She still asks me to do it every few months now.
Also Read: Purple Summer Nails: 25 Gorgeous Ideas Every Nail Lover Needs To Try This Season
Simple Butterfly Nail Art For Long Nails
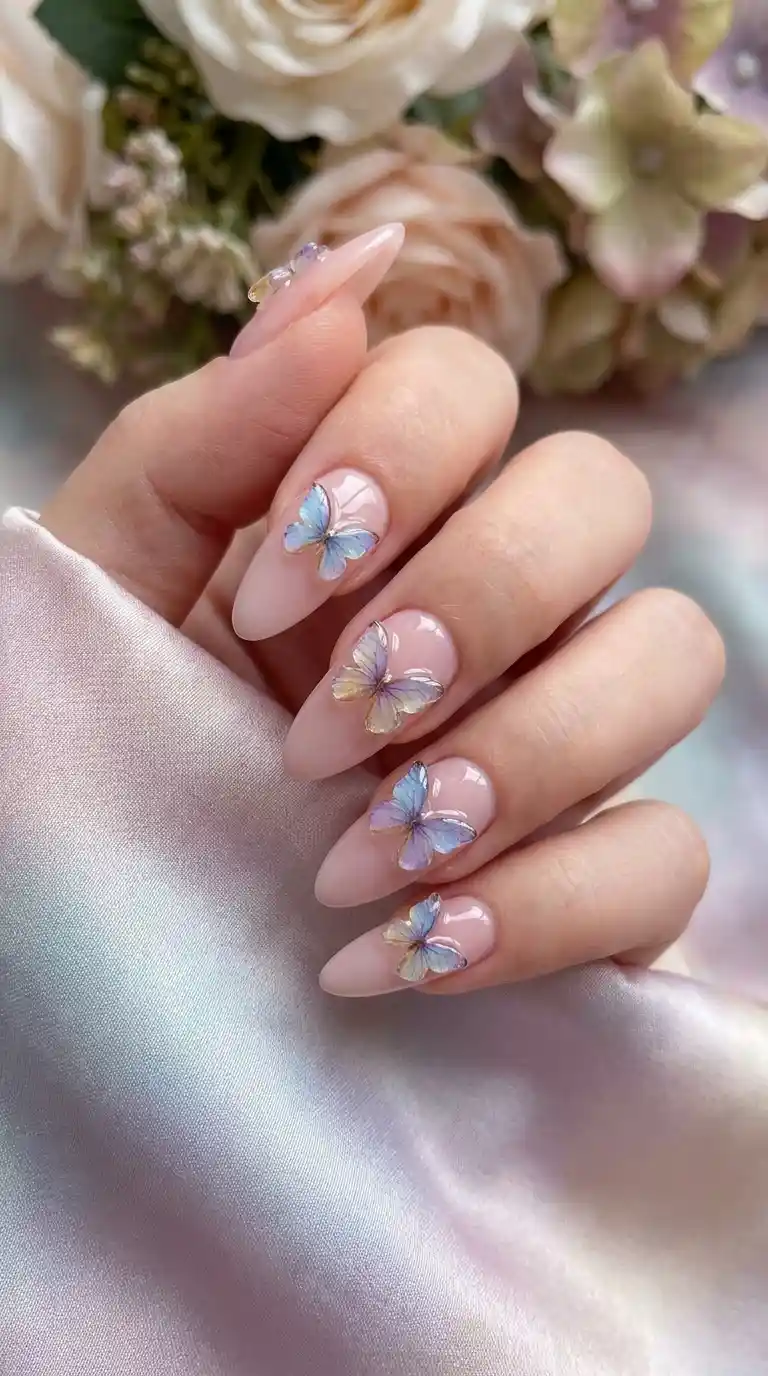
On longer nails, whether natural or acrylic extensions, you genuinely have more room to play. I love using longer nails as a canvas for multiple butterflies in different sizes, creating a sense of movement across the whole hand. You can also incorporate more shading, gradient wings, or even tiny rhinestones along the wing edges without the design feeling overcrowded.
One thing I always warn clients with long nails about is not to go overboard. Just because you have the space does not mean every inch needs decoration. Some of the most stunning simple butterfly nail art I have ever done on long nails used a lot of negative space, meaning bare or single color nail, with just a couple of statement butterflies placed strategically.
Tools And Products That Make Simple Butterfly Nail Art So Much Easier
I mentioned basic supplies earlier, but let me go a bit deeper here because the right products genuinely change your experience.
Gel polish, if you have access to a UV or LED lamp, cures instantly and lets you build up detail without worrying about smudging between steps. This is honestly a game changer for simple butterfly nail art since regular polish takes time to air dry and any accidental touch can ruin your hard work.
Striping tape can help you create perfectly straight guide lines if you want a more geometric take on butterfly designs, though I personally prefer freehand for that natural, organic wing shape.
Nail art pens with a fine tip are fantastic for beginners who feel intimidated by a loose brush. They give you more control since they work similar to a felt tip marker rather than requiring you to load and control a brush with liquid polish.
A good quality top coat with a slightly thick formula helps smooth out any small imperfections in your painted design, giving it that glassy salon finish even if your lines were not perfectly clean underneath.
Common Mistakes People Make With Simple Butterfly Nail Art
I have watched hundreds of people attempt this at home, in classes I have taught, and through video calls with clients who wanted guidance. There are a few mistakes that come up again and again.
Rushing the drying time between layers is probably the biggest one. I know waiting is boring, but painting your butterfly details on top of a wet or tacky base coat is the fastest way to ruin the entire design. Give each layer at least a few minutes.
Using too much polish on the detail brush is another common issue. You want just a small amount loaded onto your thin brush. Too much polish makes your lines thick and blobby instead of delicate and wing like.
Overcomplicating the design is something I see a lot, especially with people who have watched too many advanced tutorials online. Simple butterfly nail art is called simple for a reason. Adding excessive rhinestones, multiple colors per wing, and tiny details all at once often makes the final result look messy rather than elegant.
Not sealing with top coat, which I already mentioned, but it deserves repeating because it is such an easy step to forget when you are excited about how your nails turned out.
Skipping the antennae and body detail. This sounds minor, but without that thin center line and tiny antennae, your design can end up looking like abstract shapes rather than a recognizable butterfly. It is a tiny detail with a big visual impact.
Simple Butterfly Nail Art For Every Season
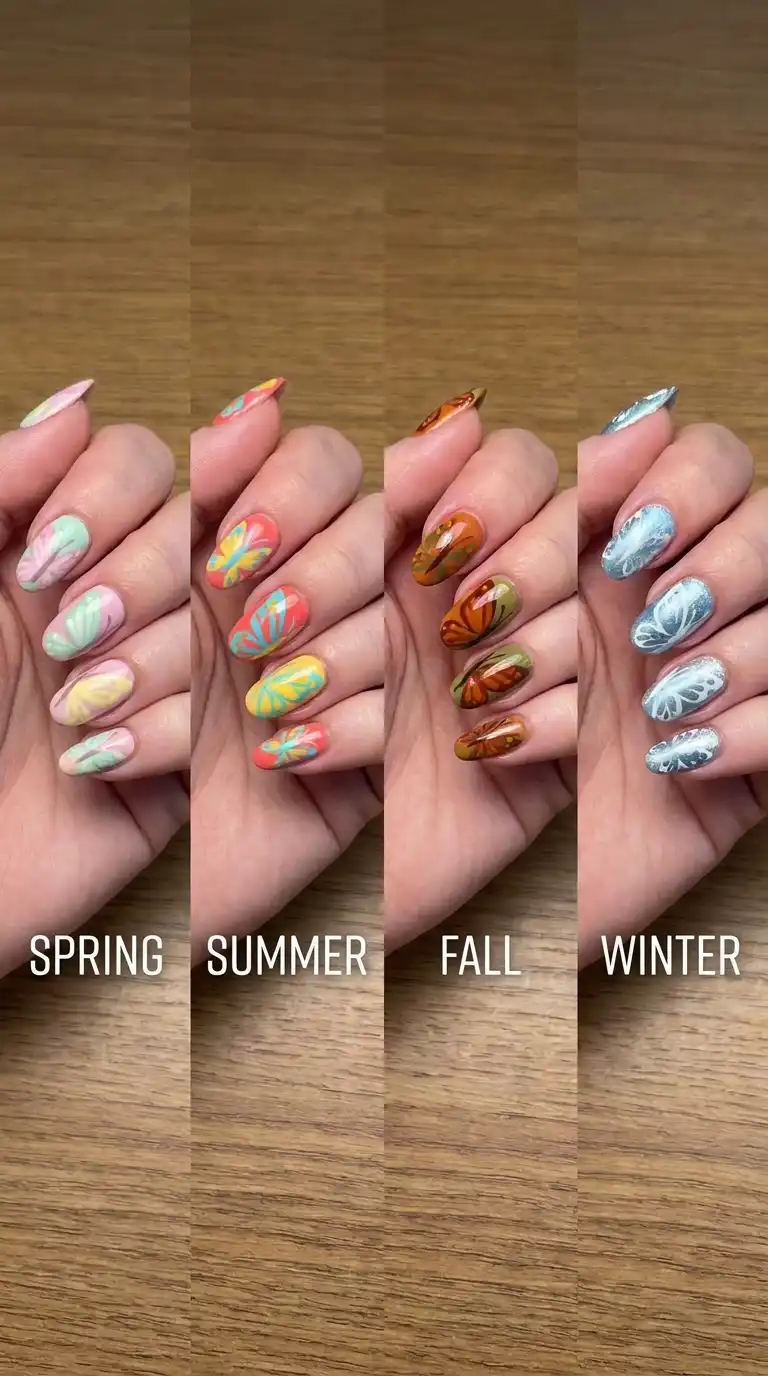
One thing I love about this design is how adaptable it is throughout the year. Let me break down how I adjust simple butterfly nail art depending on the season.
Spring Butterfly Nails
Spring calls for pastel shades, soft pinks, lilacs, baby blues, and mint greens. I usually pair a white or very light base with pastel colored wings for a fresh, floral feeling that matches the season perfectly.
Summer Butterfly Nails
Summer is when I get bold with color. Bright coral, turquoise, sunny yellow, and hot pink all work beautifully for summer inspired simple butterfly nail art. I often add a tiny bit of shimmer to catch the sunlight.
Fall Butterfly Nails
For autumn, I switch to warmer tones like burnt orange, deep mustard, burgundy, and chocolate brown. The butterflies almost look like they belong on a fall leaf, which feels really cohesive with the season.
Winter Butterfly Nails
Winter is where I bring in the metallics and darker bases. Deep navy or black nails with silver or icy blue butterflies look stunning for holiday parties, and they photograph beautifully under string lights, which my clients love for their holiday photos.
How To Make Your Simple Butterfly Nail Art Last Longer
Nobody wants to spend an hour on their nails just to have them chip two days later. Here are the tips I give every single client to extend the life of their manicure.
Always cap the free edge, meaning when you apply your top coat, swipe it over the very tip of the nail as well, not just the top surface. This seals the edges and prevents peeling from starting at the tip, which is where most chipping begins.
Avoid hot water for the first hour or two after finishing your nails if you used regular polish, since heat can soften the polish before it has fully hardened. Gel polish does not have this issue since it cures under a lamp.
Wear gloves for cleaning or dishwashing. I know this sounds obvious but I cannot tell you how many clients come back after a week with chipped nails and admit they were scrubbing pots without gloves.
Reapply top coat every few days. A fresh layer of top coat every three to four days keeps the shine looking fresh and adds an extra protective barrier over your simple butterfly nail art.
Keep cuticle oil handy and apply it daily. Hydrated nails are less likely to crack or peel, and it also keeps the surrounding skin looking healthy, which honestly makes the whole manicure look more polished.
Read Also: 90 Western Nail Ideas That Will Turn Your Manicure Into a Full Blown Cowgirl Statement
What Is Trending In Simple Butterfly Nail Art Right Now
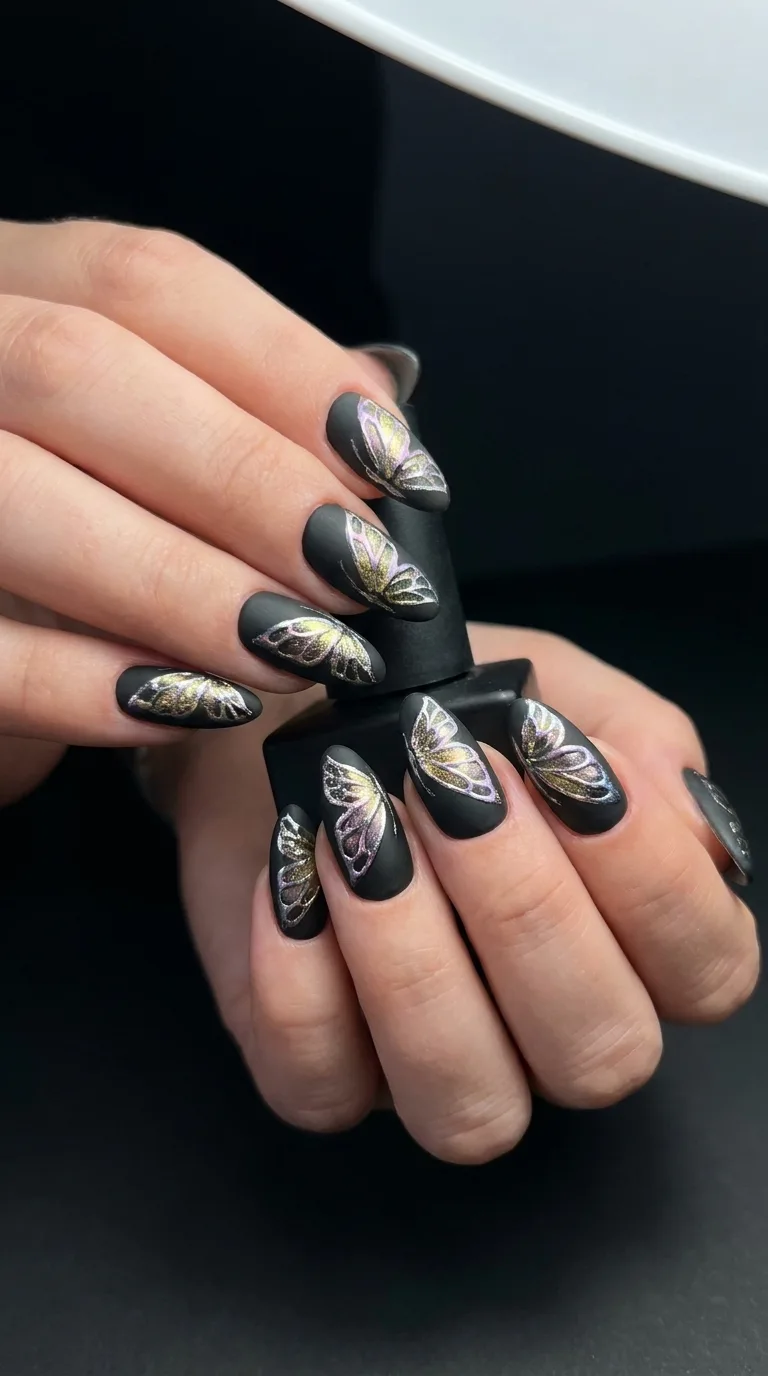
Nail trends shift constantly, and even something as classic as butterfly nails gets little updates each season. Right now, based on what I am seeing in the industry and what clients are requesting most, a few specific takes on simple butterfly nail art are especially popular.
Aura nails combined with butterflies, where a soft blurred cloud of color sits behind the butterfly shape, have become extremely popular. It gives a dreamy, almost airbrushed effect while still keeping the actual technique simple.
Chrome or cat eye butterflies, where the wings have a shifting, magnetic shimmer effect, are also huge right now. This adds a modern twist to a traditional design.
Micro butterflies, meaning several tiny butterflies scattered across just one or two accent nails rather than a single large design, are trending heavily on social media because they photograph so well in close up shots.
Negative space butterflies, where the outline of the butterfly is painted but the inside is left as bare, unpainted nail, giving a delicate, almost lace like appearance, have also become a favorite among my more minimalist clients.
Personal Tips I Would Tell My Younger Self
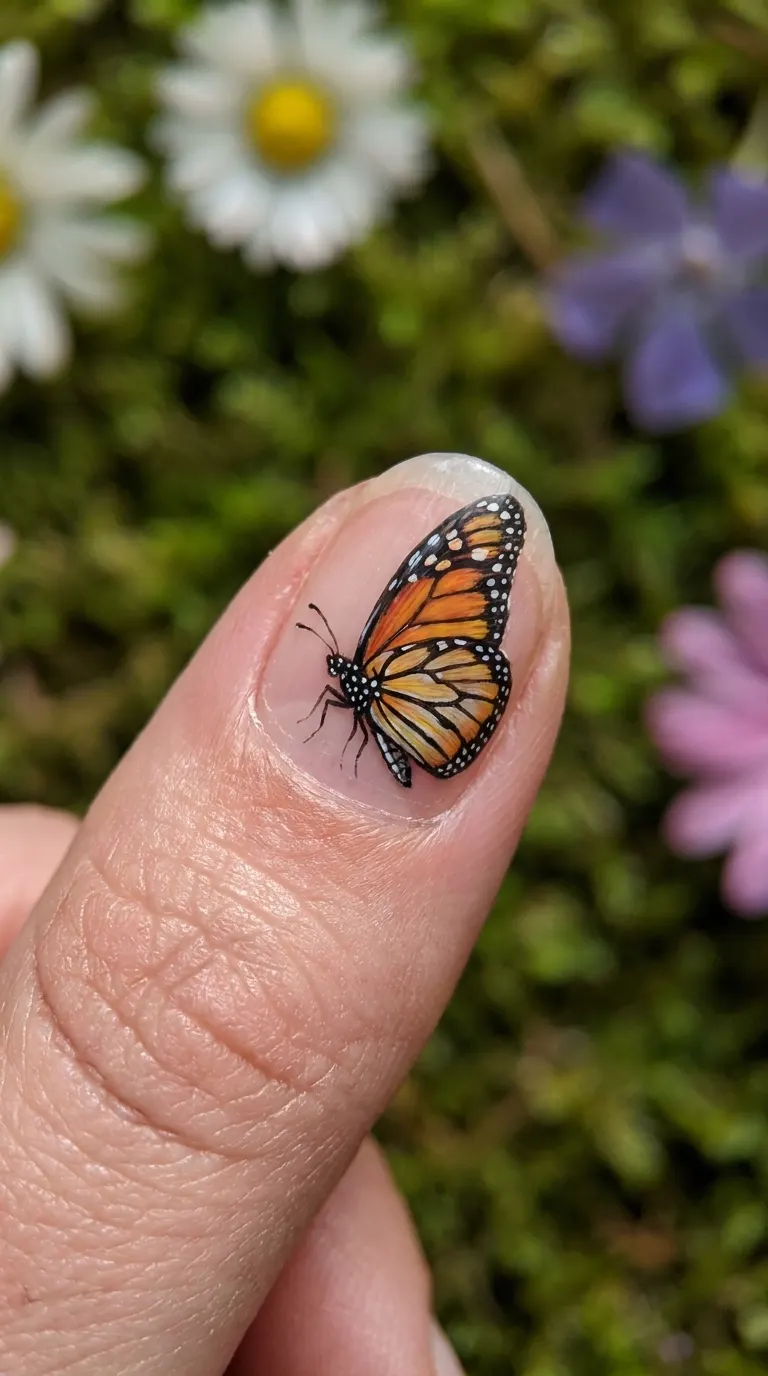
If I could go back and give advice to myself when I first started attempting simple butterfly nail art, here is what I would say.
Practice on paper first. Seriously, before you touch your actual nails, sketch a few butterflies on a piece of paper with a pen to get comfortable with the shape and motion of your hand. It sounds silly but it genuinely helps build muscle memory.
Do not compare your first attempt to a professional’s hundredth attempt. I see so many beginners get discouraged because their first try does not look like the salon photo they saved. Every nail artist you admire also had a messy first attempt.
Invest in good brushes even if everything else is budget friendly. A cheap, scratchy brush will fight you the entire time and make even simple butterfly nail art feel impossible, while a good detail brush glides and makes the whole process smoother.
Take your time on the dominant hand. If you are painting your own nails, your non dominant hand will always look better since it is easier to control the brush. Do your dominant hand first while your hand is steadiest, or consider asking a friend to help with that hand.
Butterfly Nail Art For Special Occasions
I get asked constantly whether simple butterfly nail art is appropriate for events like weddings, proms, or job interviews, and honestly it depends entirely on how you style it.
For weddings, I usually go with a soft nude or white base and paint the butterflies in white on white, meaning a slightly different finish like matte butterflies on a glossy base, or add tiny pearls instead of bright color for an elegant, bridal appropriate look.
For prom or a night out, this is where I encourage clients to have fun with color, glitter, and even small gems along the wing edges. Simple butterfly nail art still keeps its charm even when dressed up with extra sparkle.
For job interviews or professional settings, I recommend keeping it to one or two subtle accent nails with soft, neutral colored butterflies rather than covering all ten nails. It still adds personality without feeling too casual for a formal environment.
Must Read : Snowflake Nail Design: The Ultimate Winter Manicure Trend That Will Make Your Nails Absolutely Magical
Butterfly Nail Art For Kids And Teens
I have painted a lot of little hands over the years, and simple butterfly nail art might genuinely be the most requested design among my younger clients. Kids love butterflies, and the design translates really well to smaller nail beds.
For younger children, I always use non toxic, kid safe polish and keep the design extremely simple, sometimes just a colored dot with two tiny wing shapes rather than a fully detailed butterfly, since little ones do not sit still for long detailed work anyway.
For teens, I get a bit more detailed, often incorporating their favorite colors or even matching butterfly designs with a best friend, which has become a really sweet trend among younger clients wanting matching manicures.
Simple Butterfly Nail Art Using Stickers And Decals
I want to address something honestly here because I think there is a weird stigma around using nail decals in certain online nail art communities. Not everyone has steady hands or the time to freehand paint, and that is completely fine.
Butterfly nail stickers and decals have come a long way and now look genuinely realistic and delicate. If you are short on time or just starting out, applying a butterfly decal over a painted base color, then sealing it with a thick top coat, gives you gorgeous simple butterfly nail art in a fraction of the time.
My advice if you go this route is to still take the time to choose a nice base color and finish it properly with top coat, since the decal is really just replacing the detail painting step, not the entire process.
I actually keep a small drawer of butterfly decals in my station for busy Saturdays when the salon is packed and I need to deliver beautiful results quickly without sacrificing quality. Clients rarely notice the difference once everything is sealed under a glossy top coat, and honestly, that tells you everything you need to know about how far these products have come.
Budget Friendly Ways To Try Simple Butterfly Nail Art
Not everyone wants to spend a lot of money experimenting with a new design, and I completely understand that. When I was first learning, I did not have a big budget for nail supplies either, so let me share a few ways to keep costs low while still getting lovely results.
You can use a regular thin paintbrush, even a cheap one meant for craft painting, as long as you trim the bristles down slightly to create a finer point. It will not last as long as a proper nail brush, but it works perfectly fine for practicing.
Basic drugstore polish in three or four colors is genuinely enough to create dozens of variations of simple butterfly nail art. You do not need an entire collection of specialty shades to make this design look good.
Practice on artificial nail tips before committing to your real nails. A pack of practice tips costs very little and lets you make mistakes without any pressure, which honestly speeds up the learning process quite a bit.
Watch free tutorials and study real butterfly photos rather than paying for expensive classes right away. I taught myself the basics this way long before I ever took a formal course, and it gave me a strong foundation.
Frequently Asked Questions
How do you make easy butterfly nail art at home?
Start with a clean, prepped nail and a light colored base coat. Once dry, use a thin detail brush to sketch two curved wing shapes meeting at a center point, fill them in, then add a thin body line and two tiny antennae with a darker color. Finish with a clear top coat to seal everything in place.
What colors work best for simple butterfly nail art?
Soft nude, pink, or white bases paired with pastel or metallic colored wings tend to work best for most skin tones and occasions. Bold combinations like white with rainbow colored wings are great for a more playful look.
Do I need special tools for butterfly nail art?
A thin detail brush and a small dotting tool make the process much easier, but you can improvise with a toothpick or a bobby pin if you do not have professional tools on hand.
How long does simple butterfly nail art take to do?
For a single accent nail, it usually takes about five to ten minutes once you get comfortable with the technique. A full set with butterflies on multiple nails can take anywhere from thirty minutes to an hour depending on the level of detail.
Can beginners do butterfly nail art without a stencil?
Yes, absolutely. Freehand butterfly designs are actually easier than people expect because slight imperfections in the wings make the design look more natural rather than mistaken. Practicing the basic wing shape a few times really builds confidence quickly.
Is butterfly nail art suitable for short nails?
Yes, simple butterfly nail art looks lovely on short nails, especially when scaled down and kept to one or two accent nails rather than a fully detailed design across every finger.
How do you keep butterfly nail art from smudging?
Allow every layer to fully dry before adding the next detail, use minimal polish on your brush, and always finish with a good quality top coat to lock everything in place.
What is the easiest butterfly nail design for beginners?
A single accent nail with one butterfly on a plain colored base is the easiest starting point. It removes the pressure of matching ten nails and lets you focus on perfecting one design.
Can you do butterfly nail art with gel polish?
Yes, gel polish actually makes the process easier since each layer cures under a lamp instantly, preventing smudging between steps, which is especially helpful for detailed designs.
How do you paint butterfly wings on nails?
Use a thin brush to draw two curved lines that meet at a point in the center, then fill in the shape. Keep the top wings slightly larger than the bottom wings for a realistic, balanced look.
Final Thoughts
After doing this for so many years, I can honestly say simple butterfly nail art remains one of my favorite designs to teach, to perform, and to wear myself. It strikes this perfect balance between being achievable for a total beginner and still looking intentional and pretty enough for someone with years of experience behind the brush.
If you are trying this for the first time, be patient with yourself. Your first butterfly might look a little wobbly, and that is completely normal. Mine did too. What matters is that you keep practicing, keep experimenting with colors, and remember that even a slightly imperfect butterfly still adds so much charm to your hands.
Whether you go bold with bright rainbow wings or keep it soft and delicate with a single nude accent nail, simple butterfly nail art is one of those designs that never really goes out of style, and honestly, I do not think it ever will.