
Moon nail design is not a flashy, loud style. It does not scream for attention the way a full glitter set or a neon ombre might. Instead it works quietly, using shape and contrast to make hands look elegant, longer, and more intentional. That subtlety is exactly why it keeps returning season after season, and why so many people search for it thinking it is a brand new idea when it has actually been around since the 1920s in one form or another.
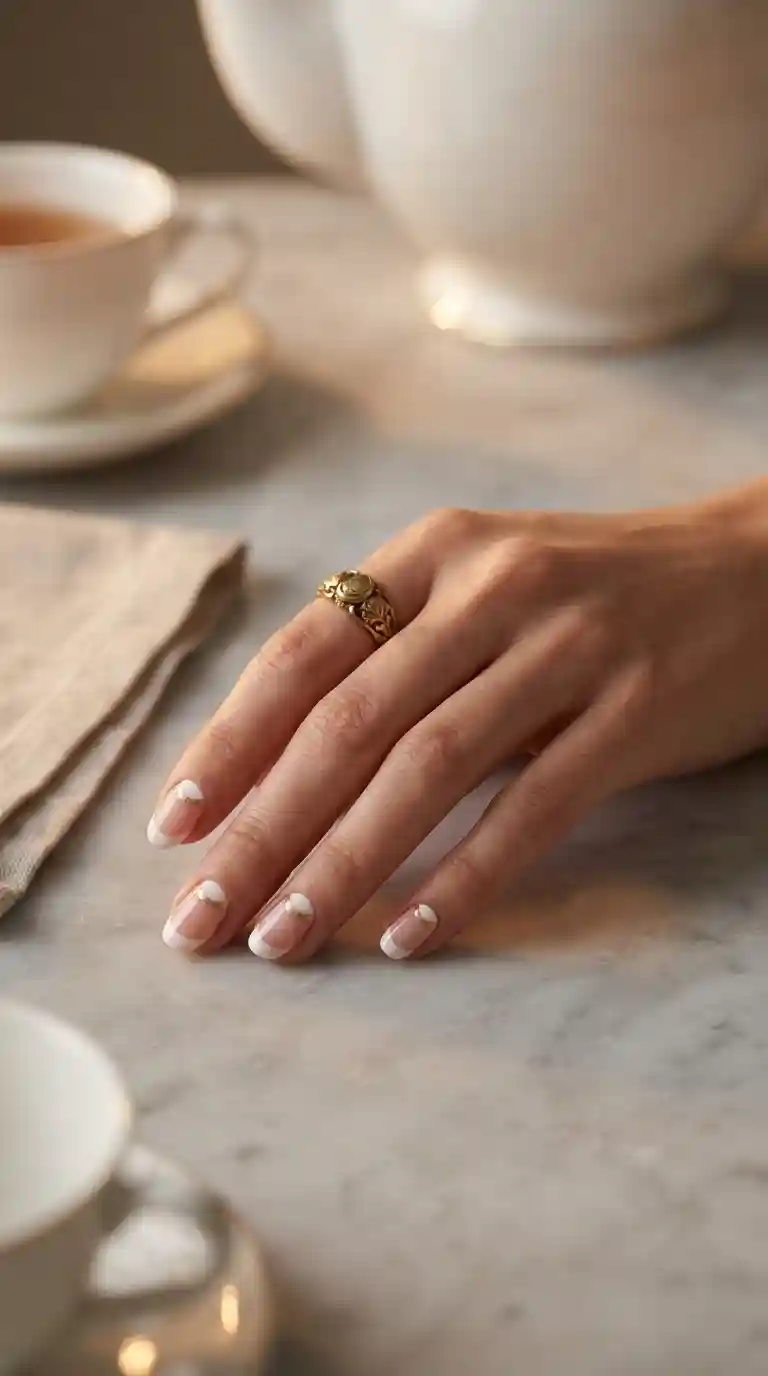
I wanted to put together a genuinely complete resource on moon nail design, the kind of thing I wish someone had handed me when I first started learning nail art. This covers the history, the different styles, the color theory, the actual technique, the mistakes people make, the aftercare, and the questions clients ask me over and over again. Grab a coffee, this is a long one, but by the end you will know more about moon nail design than most nail bloggers do.
Also Read : 65 Leopard Print Nail Ideas That Will Make Your Manicure Absolutely Unforgettable
What Exactly Is Moon Nail Design
Moon nail design is a style of nail art built around the crescent or half circle shape found naturally at the base of the nail, known as the lunula. Rather than painting the entire nail one flat color from cuticle to tip, this style isolates that curved area and either leaves it bare, paints it in a contrasting shade, or decorates it with metallic or glitter finishes to make it stand out.
The technical name for that pale crescent shape is the lunula, which comes from the Latin word for little moon. Nail artists borrowed that natural anatomy and turned it into a design element, which is really the whole origin story of moon nail design in one sentence.
What makes moon nail design different from a plain manicure is the use of negative space and contrast. Negative space simply means an area that is deliberately left uncovered or treated differently from the rest of the design. When you combine a bold base color with a bare or light colored crescent, your eye is drawn straight to that curved line, and it creates the illusion of a slimmer, more elongated nail bed. This is why moon nail design photographs so well and why it tends to look more expensive than people expect from something that can technically be done with two polish colors and a steady hand.
I always explain to new clients that moon nail design is less about decoration and more about architecture. You are not adding random shapes to a nail. You are working with the shape that is already there and simply making it visible.
The History Of Moon Nail Design Nobody Talks About
Most articles about moon nail design skip straight to the current trend cycle, but I think the history is actually the most interesting part, and it helps explain why this style has such staying power.
Back in the 1920s and early 1930s, nail polish itself was still a fairly new luxury product. Women who could afford professional manicures often wore what was called a striped manicure, where the polish was applied only to the center of the nail, leaving both the tip and the lunula bare. This created a natural stripe effect and was, in a way, an early ancestor of modern moon nail design.
By the 1950s, the half moon manicure had become its own dedicated style, separate from the striped look. Nail technicians of that era used small metal cuticle guards, sometimes literally shaped like a crescent, to mask the lunula while painting the rest of the nail. Actresses of the golden age of Hollywood were frequently photographed with this exact look, usually in deep red polish with a bare crescent at the base.
The style slowly faded through the 1960s and 1970s as trends shifted toward solid, glossy nails and later toward the French manicure in the 1980s and 1990s. Moon nail design did not disappear completely, but it became more of a niche request rather than a mainstream trend.
The internet changed everything. Once nail art started being documented and shared on blogs, then Pinterest, then Instagram, and eventually TikTok, moon nail design experienced a full revival. Nail artists began experimenting with chrome powders, cat eye gel polish, and hand painted galaxy details, turning a nearly century old idea into something that felt completely modern again.
I find it genuinely funny that clients half my age think moon nail design is a brand new invention from social media, when in reality their own grandmothers may have worn a version of it decades before Instagram existed. Trends really do move in circles, and moon nail design is one of the clearest examples of that cycle in the entire beauty industry.
Why Moon Nail Design Works So Well On Almost Every Hand
There is a reason moon nail design has outlasted so many other manicure trends, and it comes down to basic visual principles rather than luck.
The human eye naturally follows curved lines and contrast. A moon nail design gives the eye a clear path to follow from the base of the nail toward the tip, which creates a sense of length and movement even on shorter nails. This is very different from a flat, single color manicure, which gives the eye nothing to track and can sometimes make nails look wider or shorter than they actually are.
Moon nail design also works because it uses restraint. Unlike full nail art scenes that cover the entire surface, a moon nail design usually leaves a large portion of the nail in a simple, clean color, with the detail concentrated in one specific area. This balance between simplicity and detail is part of what makes it feel elegant rather than overwhelming.
Another reason moon nail design succeeds across so many different tastes is its flexibility. The exact same technique can be dressed up with metallics and rhinestones for a formal event, or kept extremely minimal in nude and white for an everyday office look. Very few nail art styles offer that much range while still being instantly recognizable as the same core design.
Related Post: Celestial Nail Designs: The Dreamy Manicure Trend That Turns Your Nails Into Tiny Galaxies
Different Types Of Moon Nail Design You Can Try
Over the years I have painted more variations of moon nail design than I can count, and each one carries a slightly different mood. Here are the versions I get asked for most often, broken down so you can see which one matches what you are looking for.
Classic Half Moon Nail Design
This is the original version and the easiest place to start if you are new to moon nail design. The entire nail is painted one solid color, except for the crescent shaped area near the cuticle, which is left bare or painted in a contrasting shade. It requires very little freehand skill if you use a vinyl guide, which makes it a great first attempt for anyone trying moon nail design at home for the first time.
Crescent Moon Nail Design
A crescent moon nail design shifts the focus slightly. Rather than following the natural curve across the entire nail bed, the crescent becomes a smaller accent shape, sometimes placed near the edge of the nail or floating in the middle of a dark background to mimic an actual sliver of moon in the night sky. This version leans more artistic, and it happens to be one of my personal favorites because it feels more like wearable jewelry than a traditional manicure.
Full Moon Nail Design
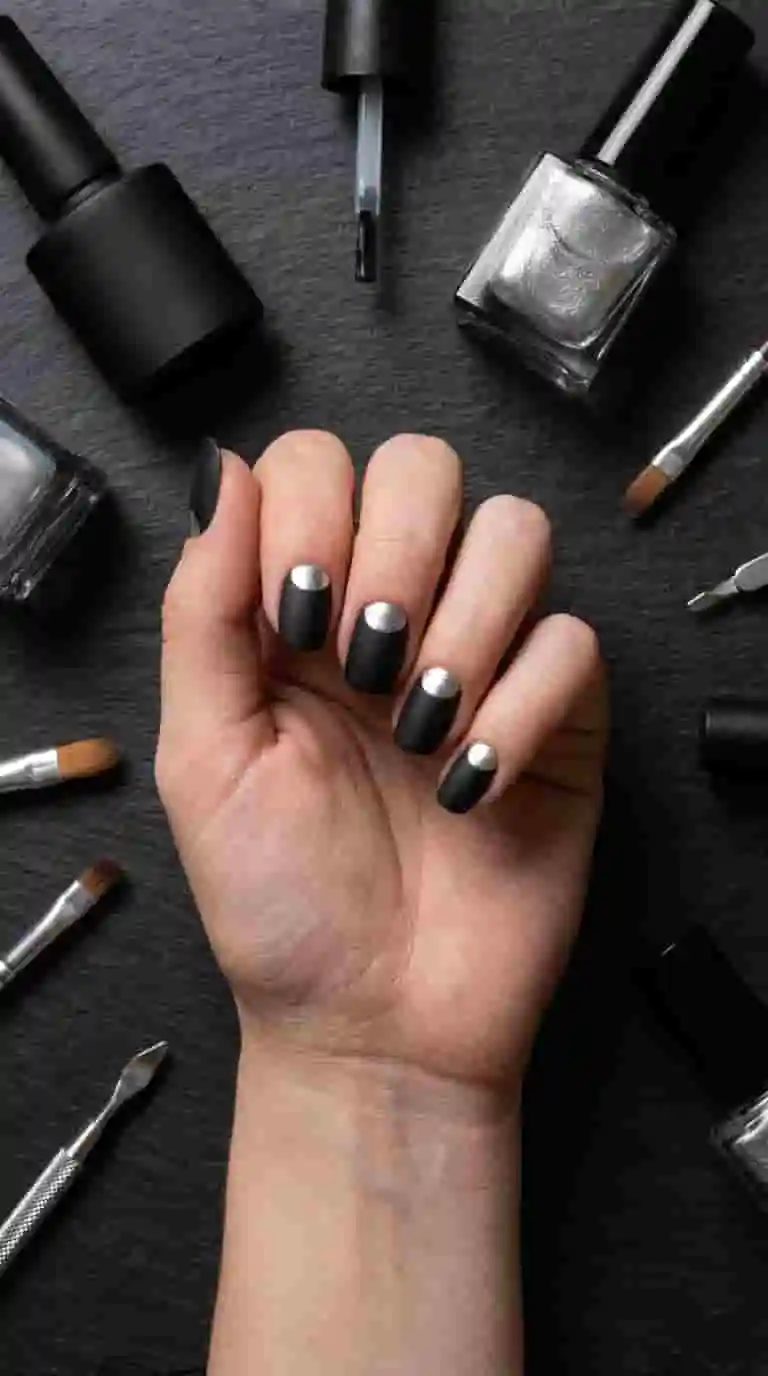
Instead of a crescent, a full moon nail design uses a complete circle, usually in a metallic white, silver, or pearl shade, set against a dark navy or black base. I like pairing this style with a matte top coat because the contrast between the shiny circle and the flat matte background makes the moon shape pop even more.
Galaxy Moon Nail Design
This version takes the celestial theme to its fullest extent. A galaxy moon nail design layers tiny star dots, soft glitter gradients, and sometimes a subtle swirl of purple or teal alongside the main moon shape to represent a small section of the night sky. It takes longer to create than a simple half moon nail design, but it consistently gets the most compliments and the most requests around Halloween and festival season.
French Moon Nail Design
The French moon nail design takes the familiar French manicure and flips the concept. Instead of a white line at the tip, the curved shape sits near the cuticle, sometimes combined with a traditional French tip for a layered effect. I have painted this style in black, chocolate brown, and even a soft lavender, and it always photographs well because it takes something everyone already recognizes and gives it a completely different personality.
Double Moon Nail Design
A newer variation I have been asked for more and more is the double moon nail design, where two crescent shapes are painted facing opposite directions on the same nail, almost like a waxing and waning moon side by side. It works especially well on longer nails where there is enough surface area to keep both shapes clean and separated.
Negative Space Moon Nail Design
This is probably the most minimalist version of moon nail design, and it has become extremely popular among clients who want something subtle. The moon shape is simply the bare, natural nail left untouched against a colored background. No extra paint, no extra detail, just the shape of the nail itself doing the work.
Colors That Work Best For Moon Nail Design
Color choice completely changes the personality of a moon nail design, and I always spend a few minutes talking through this with clients before opening a single polish bottle.
For an elegant, office appropriate look, I usually reach for nude, soft pink, or warm beige as the base, paired with a white or champagne gold moon shape. This combination is subtle enough for a client to wear into a client meeting without drawing too much attention, yet it still shows off the detail the moment someone looks closely.
For a bolder, more glamorous version of moon nail design, classic red or deep burgundy paired with a crisp white or silver moon shape brings back that old Hollywood energy I mentioned earlier. This combination works beautifully for evening events, date nights, or anytime a client wants their hands to make a statement.
For a night sky effect, navy, black, or deep emerald as the base with a silver, pearl, or holographic moon shape gives moon nail design a genuinely artistic feeling rather than just a decorative one.
Pastel moon nail design is one of my personal favorites for spring appointments. Soft lilac, baby blue, or mint green paired with a simple white pearl moon shape feels light and playful while still keeping that structured, elegant line that defines the whole style.
Metallic moon nail design, using rose gold, chrome silver, or copper for the crescent itself, tends to be the most photographed option in my portfolio. The way metallic finishes shift and catch light from different angles gives the moon shape an almost three dimensional appearance that flat colors simply cannot replicate.
I also want to mention skin tone matching, since it comes up often. For warmer undertones, gold, copper, and peachy nude bases tend to blend more naturally with moon nail design. For cooler undertones, silver, icy white, and true nude shades with pink undertones usually look more flattering. This is not a strict rule, but it is a helpful starting point if you are unsure which direction to take your own moon nail design.
Also Read : 77 Gorgeous Gray Nail Ideas That Will Instantly Upgrade Your Manicure Game
How I Actually Create A Moon Nail Design In My Studio
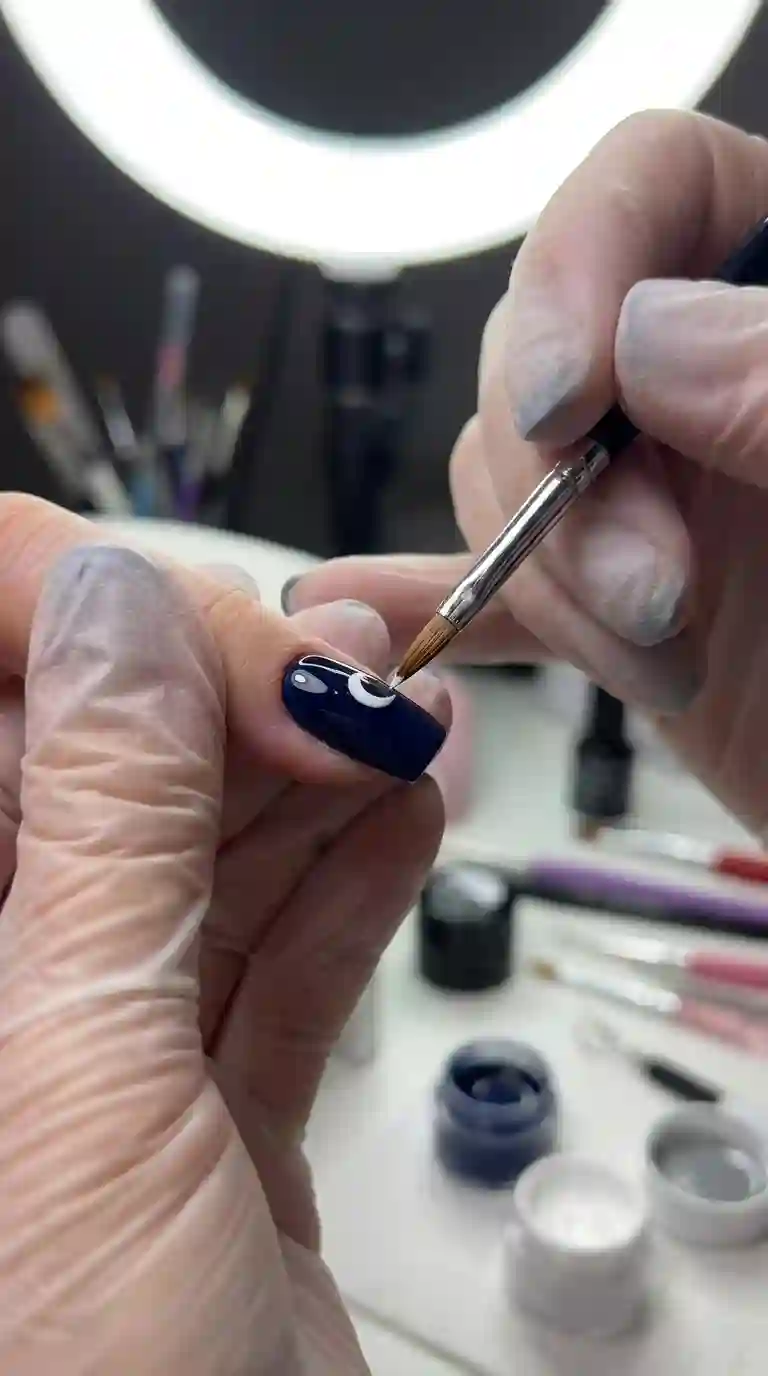
People are often surprised at how much technique goes into a clean moon nail design, because in photos it looks deceptively simple. Achieving that crisp curved line consistently across ten nails takes patience, and I want to walk through the process the way I actually explain it to clients sitting in my chair.
The first step is always nail prep, and I cannot stress this part enough. This means pushing back cuticles, shaping the free edge to the desired length and shape, and lightly buffing the surface of the nail plate so polish has something to properly grip onto. Skipping this step is the single biggest reason a moon nail design starts lifting or chipping within just a day or two, because polish simply does not bond well to a shiny, oily, or uneven surface.
The second step is applying a thin, even base coat and allowing it to fully cure or dry before moving forward. Rushing this stage is another common culprit behind early chipping, especially around the delicate moon shape line where two colors meet.
The third step is painting the main base color across the entire nail. Depending on the specific style, I either paint the moon shape first and mask the area with a vinyl guide, or I paint the base color first and add the crescent detail once it has fully dried. Both methods work, but each requires the previous layer to be completely set before moving on.
The fourth step is where the actual moon shape comes together. I use either a small round dotting tool, a fine detail brush, or precut moon shaped vinyl stickers. Vinyl guides tend to give beginners the cleanest, sharpest line because they physically block the polish from bleeding outside the shape. A steady hand with a detail brush gives a softer, slightly more organic curve, which some clients actually prefer because it looks a little more hand painted and less mechanical.
The fifth and final step is sealing everything with a top coat, either high shine or matte depending on the finish the client wants. This step matters far more than most people realize, because the top coat is what protects the fine detail work at the moon shape border and keeps a gel version of moon nail design looking fresh for two to three full weeks.
Tools And Products You Actually Need For Moon Nail Design
If you want to attempt moon nail design at home, you do not need a fully equipped professional studio, but a handful of specific tools will make a noticeable difference in your results.
A fine tipped detail brush is essential for any freehand moon nail design work. Look for a brush with only a few bristles gathered to a sharp point, since this gives you far more control over thin, curved lines than a standard flat polish brush ever could.
Nail vinyls or precut moon shaped stickers are genuinely a lifesaver for anyone just starting out. These adhesive shapes are placed directly on the nail before you apply polish, then peeled away once everything is dry to reveal a perfectly curved moon nail design without needing years of hand control practice.
A small dotting tool is useful specifically for full moon nail design, where you need to create a clean, perfectly round circle rather than a crescent.
Gel polish paired with a proper LED or UV lamp will extend the life of your moon nail design considerably compared to regular air dry polish, especially if you tend to chip your nails within just a few days of a fresh manicure.
A very fine liner brush becomes important if you want to attempt a galaxy moon nail design, since adding tiny star dots requires far more precision than the main crescent shape itself.
Cuticle oil might seem unrelated to nail art, but keeping the skin around your nails properly hydrated genuinely helps your moon nail design look cleaner overall, since dry or flaky cuticles tend to distract from that crisp curved line that the whole design depends on.
Read Also : Dark Blue French Tip Nails: The Ultimate Guide To A Bold, Beautiful And Confidence Boosting Manicure
Moon Nail Design For Different Nail Shapes
Not every moon nail design looks identical depending on your natural nail shape, and this is something I always bring up with clients before we begin any appointment.
On almond or oval shaped nails, a moon nail design placed near the base tends to look especially elegant, because the natural curve of the nail shape mirrors the curve of the moon itself. The two shapes flow together rather than competing for attention.
On square or squoval nails, a moon nail design works best when the crescent line sits slightly higher and stays clearly defined, since the flat edges of a square nail can make a very low, wide crescent look accidentally cut off instead of intentionally curved.
On coffin or ballerina shaped nails, which have become extremely popular for longer extensions, a moon nail design has significantly more room to work with. I often size up the moon shape slightly or combine it with a French tip for a layered, two toned effect that takes full advantage of the extra nail length.
On stiletto nails, moon nail design becomes noticeably more dramatic, since the sharply pointed shape naturally pulls the eye downward toward the base of the nail, making the moon shape feel like the visual anchor of the entire look.
Short natural nails absolutely can wear a moon nail design too, and some of my favorite work over the years has genuinely been on short nails. A smaller, more delicate crescent near the cuticle looks incredibly refined on a shorter nail bed and does not overwhelm the limited surface area the way a bulkier design might.
Moon Nail Design For Short Nails Versus Long Nails
This question comes up constantly, so I want to address it head on. A moon nail design is not reserved exclusively for long acrylics or dramatic extensions. Some of the cleanest, most polished versions I have ever created were on short, completely natural nails.
For short nails, I recommend keeping the moon shape thin and positioned close to the cuticle line. A thick, exaggerated crescent on a small nail bed can accidentally make the entire nail look stubby rather than refined. Nude, soft pink, or gentle white bases paired with a delicate gold or silver moon shape tend to look the most polished on shorter lengths.
For long nails, whether that means acrylic extensions, gel extensions, or naturally long nail beds, you simply have more surface area available to work with. This is exactly where a full moon nail design, a galaxy theme, or even a double moon accent can really shine. Longer nails also tend to handle bold contrast well, so do not be afraid to go dramatic with combinations like black and gold or navy and silver.
Seasonal Moon Nail Design Ideas Worth Trying
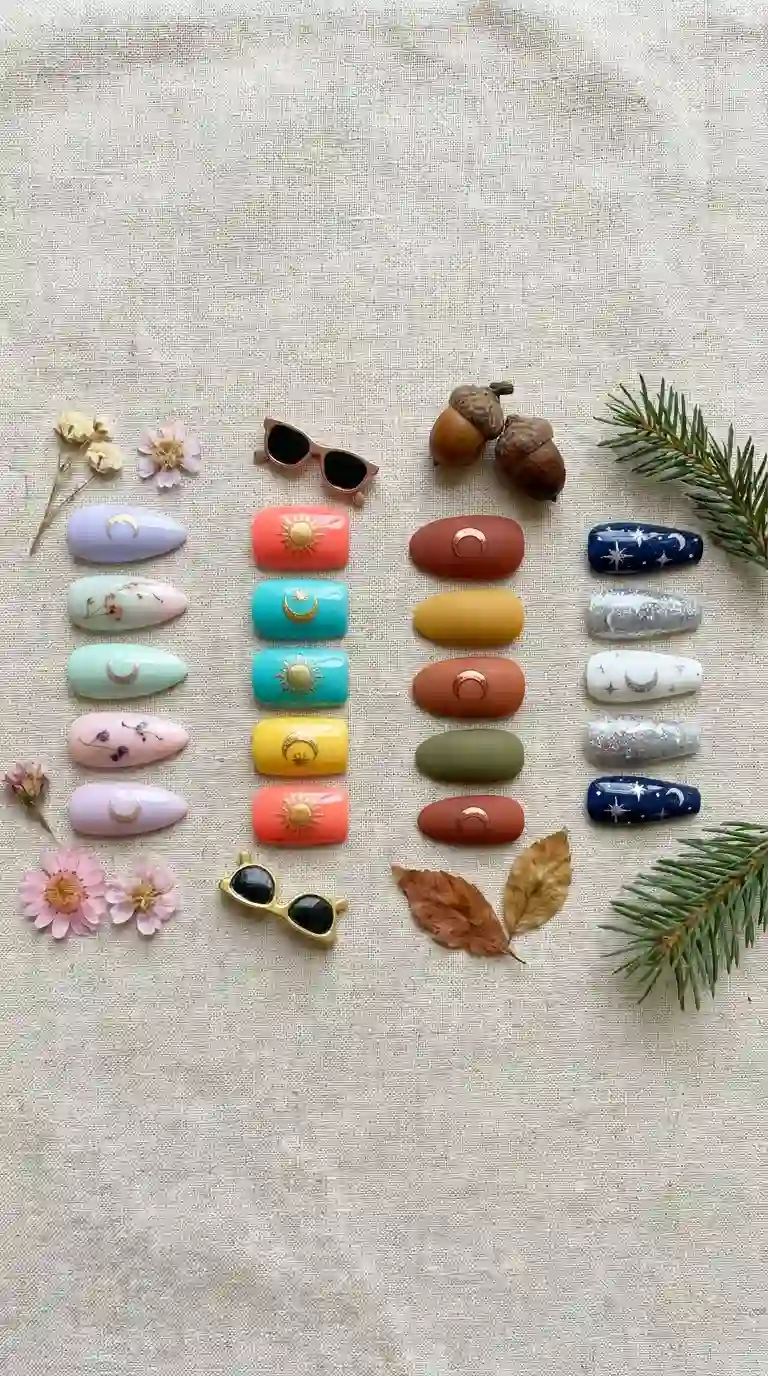
Moon nail design adapts beautifully across every season of the year, which is honestly part of why I never get tired of doing it appointment after appointment.
In spring, I lean toward pastel moon nail design using soft lilac, baby pink, and mint green bases, paired with a simple white or pearl moon shape. It feels fresh and light without losing that celestial charm that makes the style recognizable.
In summer, bright coral, turquoise, or sunny yellow bases with a clean white moon shape give a beachy, playful energy that still reads as intentional nail art rather than a random accent color.
In autumn, deep burgundy, chocolate brown, or burnt orange bases paired with a gold or copper moon shape feel cozy and rich, almost as though the moon itself is glowing against a warm night sky.
In winter, this is genuinely where moon nail design shines the most. Deep navy, black, or emerald bases paired with silver or icy white moon shapes look like something pulled straight off a holiday card. I book an enormous number of winter moon nail design appointments in December alone, because the combination pairs beautifully with festive outfits without leaning too heavily into obvious red and green Christmas colors.
Moon Nail Design At Home Versus At A Professional Salon
I get asked constantly whether someone should attempt moon nail design at home or book a professional appointment, and my honest answer really depends on a few specific factors.
If you are already confident doing your own gel manicures, a simple half moon nail design or a basic crescent accent is completely achievable at home using vinyl guides. It might take a few attempts to get the curve consistent across all ten nails, but it is not an impossible task for someone with reasonably steady hands and a bit of patience.
If you are hoping for something more elaborate, like a full galaxy theme, a chrome moon with hand painted stars, or a complete matching set with accent nails, I genuinely recommend seeing a professional. This is not because home nail art is somehow inferior, but because achieving true symmetry across ten separate nails with intricate detail takes practice that most people simply have not had the opportunity to build yet.
There is also the matter of product quality to consider. Salon grade gel polish and top coats tend to hold a moon nail design significantly longer than standard drugstore polish, which chips faster and does not protect fine line detail nearly as well over time.
Cost is another factor worth mentioning honestly. A basic moon nail design at a salon typically falls within the same price range as any other nail art manicure, though more elaborate versions involving hand painted detail, chrome finishes, or rhinestone accents will naturally cost more due to the added time required. Doing it yourself at home costs significantly less upfront, though you are trading that savings for a learning curve and the possibility of needing a few practice attempts before your moon nail design looks the way you originally imagined.
Must Read : 60+ Fall Dip Nail Ideas That Will Make Your Manicure the Star of the Season
Common Mistakes People Make With Moon Nail Design
After doing this work for so long, I keep noticing the same handful of mistakes come up again and again, whether from clients attempting it at home or from newer nail technicians still building their skills.
The first mistake is skipping proper nail prep entirely. If your nail plate is oily, uneven, or still has old polish residue on it, your moon nail design will not adhere properly and will start peeling within a day or two, no matter how carefully you paint the actual design.
The second mistake is rushing the base color layer before it has fully dried. If the base is still even slightly tacky when you begin adding the moon shape, the two colors bleed into each other and completely ruin the crisp, clean line that makes a moon nail design look intentional rather than smudged.
The third mistake is using too thick a brush for the crescent shape itself. Moon nail design relies heavily on precision, and a chunky, wide brush makes it nearly impossible to create a smooth, controlled curve.
The fourth mistake is forgetting to properly seal the edges with a strong top coat. The moon shape border is often the thinnest, most delicate part of the entire design, and without adequate sealing, it becomes the very first area to chip.
The fifth mistake is choosing two colors with too little contrast between them. If your base color and your moon shape are too similar in tone, the entire design loses its visual impact, since moon nail design fundamentally depends on that contrast to catch the eye.
The sixth mistake, which I see surprisingly often, is applying the top coat too thickly right along the moon shape edge. A heavy, uneven layer of top coat can actually distort the clean curve you worked so hard to create, so a thin, even layer applied with light pressure works far better.
How To Make Your Moon Nail Design Last Longer
Longevity is probably the single most common question I get after a client falls in love with their brand new moon nail design. Here is exactly what I tell everyone before they leave my chair.
Always apply cuticle oil daily, not just for hydration, but because healthy skin around the nail genuinely reduces lifting at the edges near where your moon nail design begins.
Wear gloves when washing dishes or cleaning with harsh chemicals. Hot water and soap are two of the biggest enemies of any manicure, and a moon nail design with fine detail work is even more vulnerable to premature chipping compared to a simple solid color.
Avoid using your nails as tools. I understand the temptation to open a package or scrape off a sticker with your nail, but this kind of pressure tends to chip right along the moon shape line first, since that is where two separate layers of polish meet at an edge.
Get a fresh layer of top coat applied every week if possible. A quick reapplication extends the shine and protects the detail work without requiring a full redo of the entire design.
Book your fill or refresh appointment on time if you are wearing gel extensions with a moon nail design. Waiting too long between appointments allows the natural nail to grow out significantly, which shifts the moon shape further away from the cuticle and makes the entire look appear unbalanced or awkward.
Keep your hands moisturized overall, not just around the cuticles. Dry skin around the fingers can make even a perfectly executed moon nail design look less polished simply because the surrounding skin distracts from the nail itself.
Moon Nail Design For Special Occasions
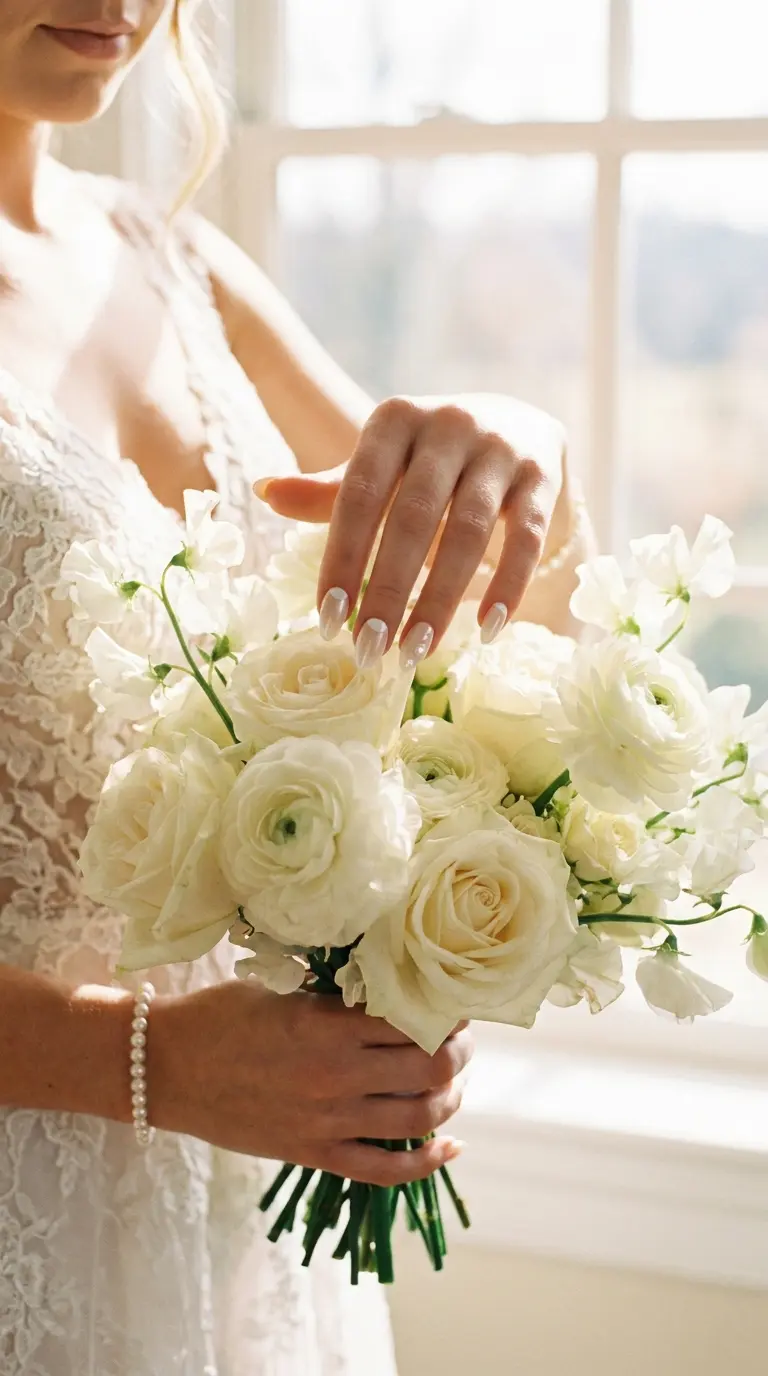
Certain events call for a moon nail design more than others, and I want to share a few specific combinations that have consistently been huge hits with my clients over the years.
For weddings, a soft ivory or blush base paired with a delicate pearl white moon shape looks bridal without feeling overly plain or boring. It photographs beautifully in close up ring shots and works with nearly any dress color a bride chooses.
For prom or other formal events, I often go bolder with a black or deep purple base paired with a silver glitter moon shape. It carries that nighttime, glamorous energy that matches the overall mood of a big event.
For birthdays, especially milestone birthdays, clients frequently request a galaxy moon nail design because it feels celebratory and just a little bit magical without being over the top.
For holiday parties, navy or emerald paired with a gold moon shape feels genuinely festive without leaning on the obvious red and green combination most people expect around Christmas.
For Halloween, black and orange combinations with a crescent moon accented by tiny bat or star details turn moon nail design into a fun, seasonal statement piece that still feels intentional rather than costume like.
Also Read: Bright Orange Nail Designs That Will Steal the Spotlight This Season
Moon Nail Design Trends I Am Seeing Right Now
Trends shift quickly within the nail industry, and moon nail design has evolved noticeably even in just the last couple of years. Here is what I am seeing walk through my salon door most often lately.
Chrome and cat eye moon nail design is extremely popular right now. Instead of a flat matte or glossy moon shape, clients want that shifting, almost magnetic effect where the moon appears to glow differently depending on the angle of the light hitting it.
Milky or jelly base moon nail design has also become a favorite request. A sheer, milky white base paired with a slightly more opaque moon shape creates a soft, cloudy effect that feels dreamy rather than sharply defined.
Double moon accents, where two crescent shapes face opposite directions on the same nail, have started appearing more often, especially paired with minimalist nude bases for a subtle, layered effect.
Combining moon nail design with tiny three dimensional charms, like small star studs or pearls placed near the crescent, gives the overall design a slightly more luxurious, textured feel without becoming overwhelming.
Negative space moon nail design, where the moon shape is literally the bare natural nail left visible against a colored background, continues to be one of the most requested minimalist options because it looks effortless while still being technically precise to execute correctly.
Moon Nail Design And What The Moon Actually Symbolizes
I think part of the reason moon nail design resonates with so many people goes beyond just the visual appeal. The moon itself carries meaning across countless cultures, often associated with change, cycles, intuition, and quiet strength. Choosing to wear that symbol on your hands, even in a small decorative way, taps into something a little more personal than most nail art trends.
I have had clients specifically request moon nail design during major life transitions, like starting a new job, going through a breakup, or celebrating a personal milestone. They rarely explain exactly why the moon feels meaningful to them in that moment, but the pattern shows up often enough that I have started to notice it. There is something comforting about a design tied to natural cycles, especially during times when life feels unpredictable.
Whether or not you personally connect with that symbolism, it adds an extra layer of depth to moon nail design that a lot of purely decorative trends simply do not have.
Moon Nail Design Versus Other Popular Nail Trends
It helps to understand how moon nail design compares to other well known styles, especially if you are trying to decide what to book for your next appointment.
Compared to a traditional French manicure, moon nail design shifts the focal point from the tip of the nail to the base near the cuticle. Both styles rely on contrast and a clean line, but moon nail design tends to feel slightly more artistic and less corporate than the classic French look.
Compared to ombre nails, which blend two or more colors gradually across the nail, moon nail design uses a sharp, defined edge rather than a soft transition. If you prefer crisp lines over blended gradients, moon nail design will likely suit your taste better.
Compared to full glitter or full color nail art, moon nail design offers a much more restrained, minimalist alternative. It gives you a taste of artistic detail without covering the entire nail surface, which makes it a great middle ground for clients who want something more than a solid color but are not ready for elaborate hand painted scenes.
Compared to marble nail art, which creates a swirled, organic pattern across the whole nail, moon nail design is far more structured and geometric in its approach. Some of my clients actually combine both styles, using a marble background with a moon shape accent, which creates a beautifully layered effect.
Moon Nail Design And Nail Health
I want to touch on something that does not get discussed enough in nail art articles, which is the actual health of your natural nails underneath any moon nail design.
Gel polish, when applied and removed correctly, does not inherently damage healthy nails. The damage most people experience comes from improper removal, like peeling gel polish off instead of soaking it, or from skipping breaks between full sets of extensions.
If you plan to wear moon nail design regularly over gel extensions, I always recommend giving your natural nails a short break every few months. This allows the nail bed to recover and reduces the risk of thinning or weakening over time.
Keeping cuticles healthy also directly affects how clean your moon nail design looks. Overgrown or overly dry cuticles can distort the curve of the moon shape and make even a well executed design look slightly off. A simple routine of gentle pushing back and regular oiling goes a long way toward keeping both your nails and your moon nail design looking their best.
Choosing A Moon Nail Design That Matches Your Personality
Before you book your next appointment or attempt this at home, it helps to think about what kind of impression you want your hands to give off.
If you are drawn to understated elegance, a soft nude or white classic half moon nail design will suit you best.
If you gravitate toward bold statements, a black and gold or navy and silver combination will likely match your energy far better.
If you love anything whimsical or dreamy, a pastel or milky jelly moon nail design with soft pearl accents fits that vibe perfectly.
If you are someone who loves having a story behind your style, a galaxy moon nail design with tiny stars and a subtle swirl of color gives you something genuinely interesting to talk about every time someone compliments your hands.
There really is no wrong way to wear a moon nail design. The beauty of this particular style is how adaptable it remains across colors, nail shapes, lengths, and personal taste.
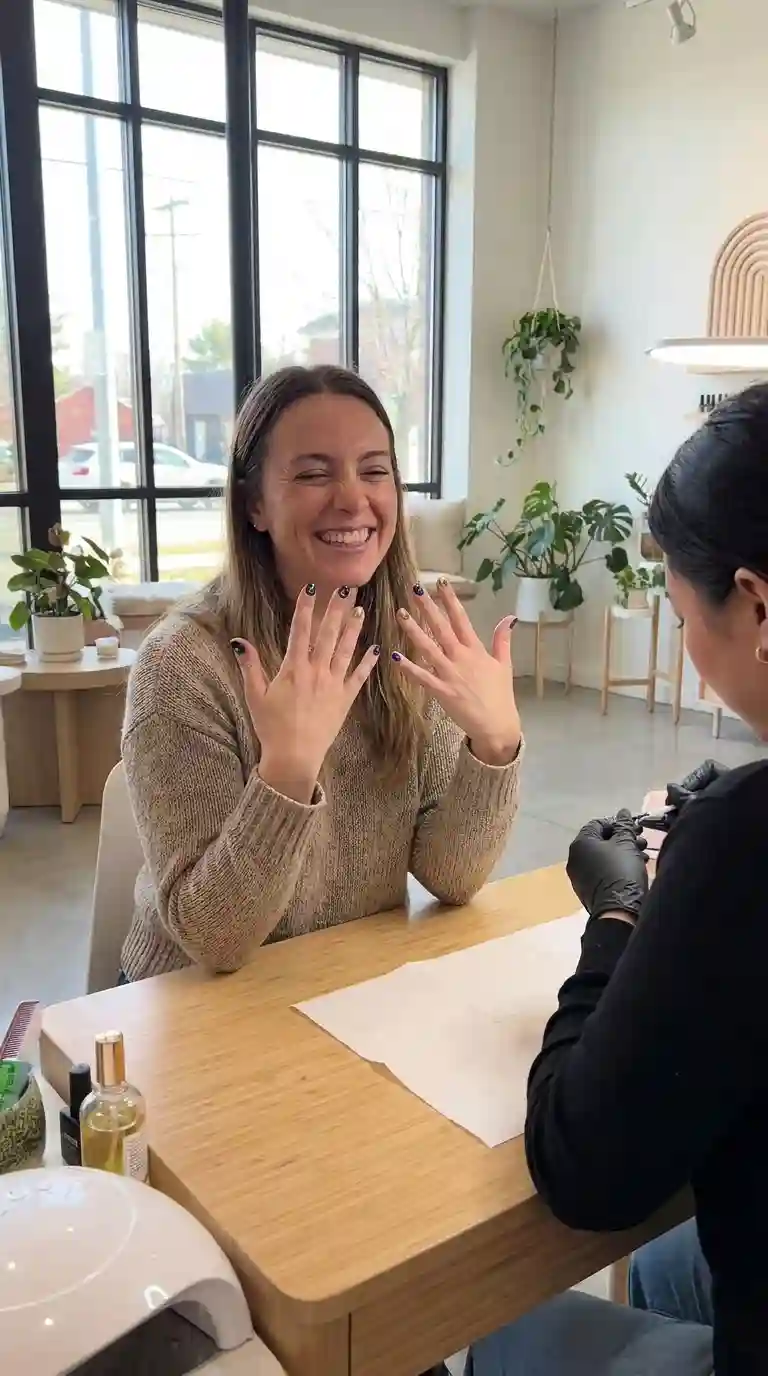
[IMAGE PROMPT 6: A joyful candid photograph of a woman smiling and admiring her freshly done moon nail design manicure in a bright modern nail salon setting, natural window light]
Moon Nail Design For Beginners Who Want To Try It At Home
If this is your very first time attempting moon nail design, start small. Pick a single accent nail, maybe your ring finger, and practice the crescent shape there before committing to all ten nails at once. This gives you room to experiment without the pressure of potentially ruining an entire fresh set.
Use a light hand when applying your base color, since thinner layers dry faster and give you a cleaner, more even surface to work with once you move on to adding the moon shape.
Practice on a nail wheel or a spare acrylic tip before going straight to your real nails. Nail artists do this constantly during training, and it genuinely helps build the muscle memory needed for that curved line which defines a good moon nail design.
Do not get discouraged if your first attempt is not perfectly symmetrical. Even professionals had to practice this exact shape hundreds of times before it became second nature. The flawless moon nail design you see in polished online photos often took several less than perfect attempts behind the scenes before it looked that clean.
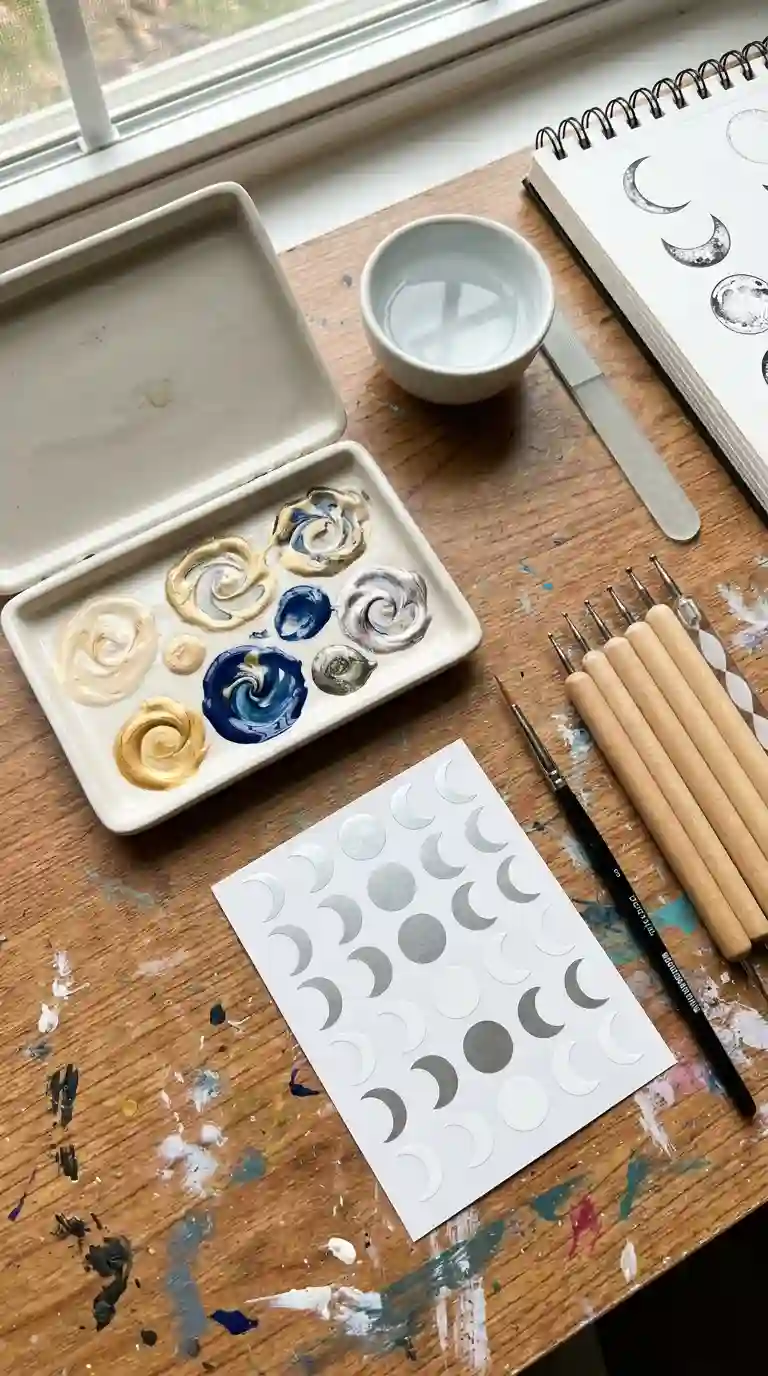
[IMAGE PROMPT 7: A creative overhead shot of a nail artist’s workstation with an open palette of polish colors, a fine detail brush, dotting tools, and vinyl moon shaped stickers laid out neatly in preparation for a moon nail design]
Combining Moon Nail Design With Other Nail Art Trends
One of my favorite things about moon nail design is how well it blends with other popular styles instead of competing against them.
Pairing moon nail design with a French tip creates a layered, sophisticated look where you get the classic white line at the tip along with a crescent detail near the cuticle, giving you two design elements in one manicure.
Combining moon nail design with chrome powder gives the crescent shape a mirror like finish that catches light beautifully, especially under the indoor lighting typical of most evening events.
Adding tiny rhinestones or small pearls along the edge of the moon shape elevates a simple moon nail design into something that feels bridal or occasion ready without requiring an entirely different technique.
Mixing moon nail design with an ombre background, where the base color fades gradually from one shade into another, creates a soft gradient effect behind the crisp moon line, adding noticeably more depth to the overall look.
Layering moon nail design over a marble or swirl background works especially well for clients who want something artistic and unique rather than a straightforward two tone combination.
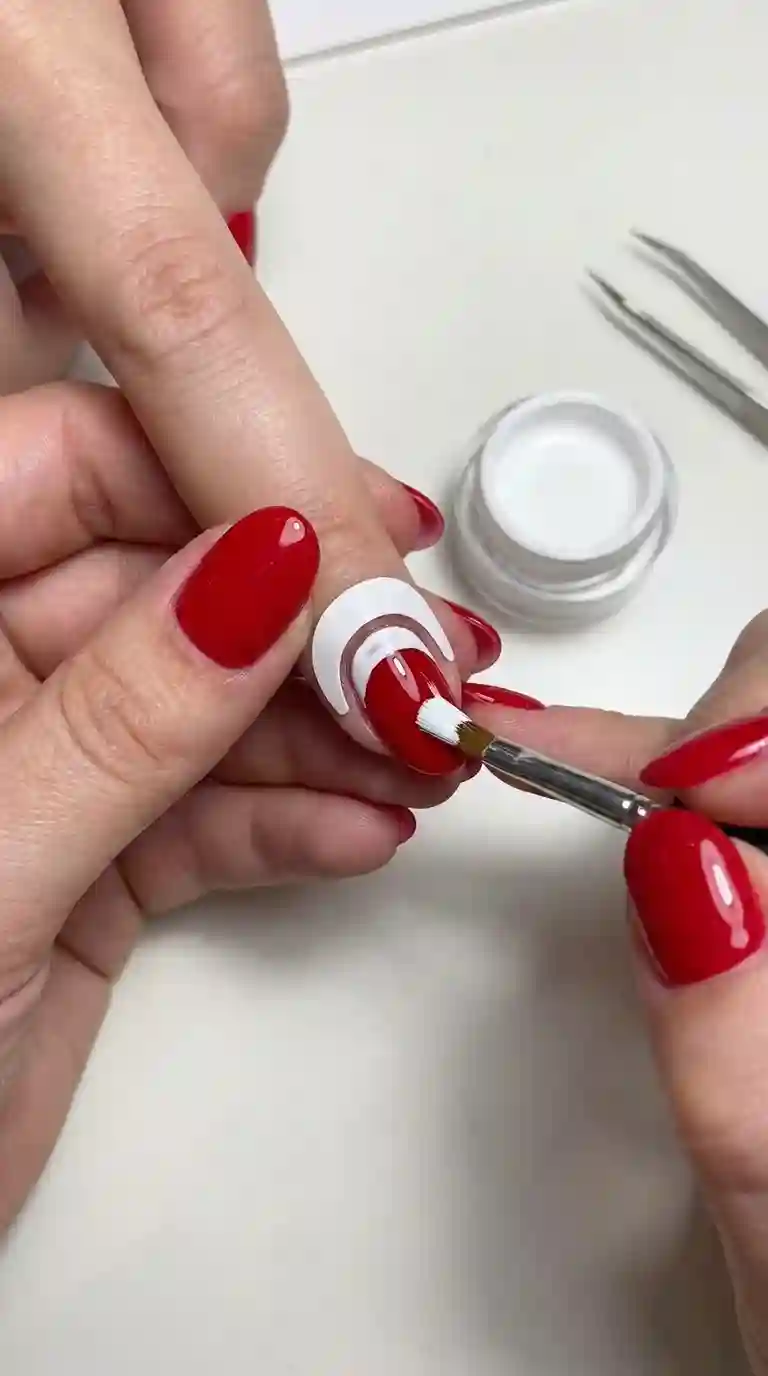
[IMAGE PROMPT 8: A step by step tutorial style photograph showing a hand painting a white crescent moon shape onto a red base nail polish using a small vinyl guide sticker, bright even lighting, instructional photography style]
Read Also : Rose Nail Design Magic: 50+ Gorgeous Ideas Every Nail Lover Needs To Try
Real Client Requests That Shaped My Approach To Moon Nail Design
I want to share a few real patterns I have noticed from actual client requests over the years, because they say a lot about why moon nail design has such broad appeal.
One recurring request comes from clients heading into job interviews or important presentations. They almost always ask for a very subtle, nude toned moon nail design, something professional enough to not distract during a handshake but detailed enough to still feel intentional and put together.
Another common request comes from clients planning trips, especially beach vacations. Bright, warm toned moon nail design combinations in coral or turquoise tend to dominate these bookings, since clients want something that photographs well against sand and water.
I also get a surprising number of requests tied to personal milestones, like finishing a degree, starting a new chapter after a divorce, or simply turning a certain age that feels significant to them. These clients often gravitate toward the galaxy or full moon versions, which I think connects back to that symbolism I mentioned earlier around change and new cycles.
Listening to these patterns over the years has genuinely shaped how I present moon nail design options to new clients, since understanding the occasion behind the request helps me recommend the right color palette and level of detail from the very first consultation.
Sustainability And Reusable Options For Moon Nail Design
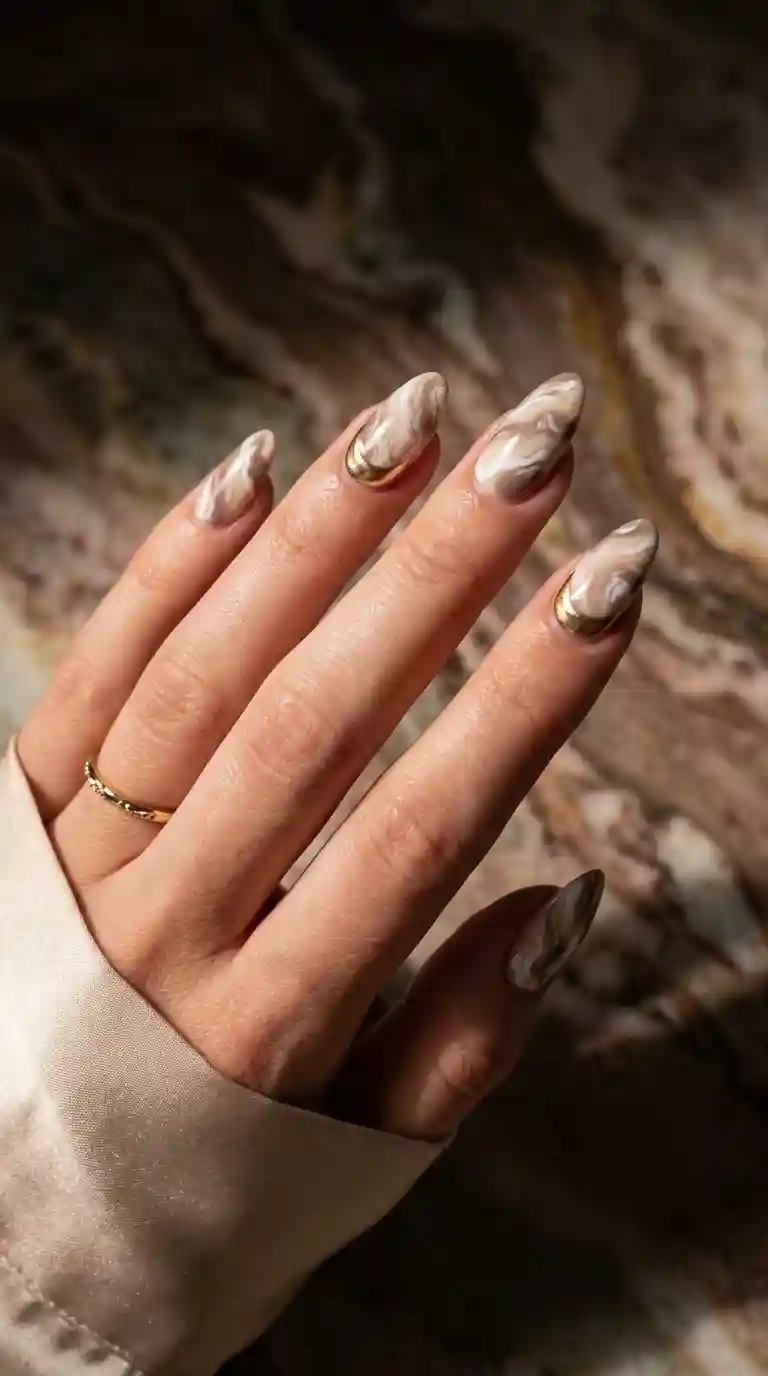
For clients who want to experiment with moon nail design without committing to a full salon appointment or removing gel polish frequently, press on nails have become a genuinely solid alternative. High quality press on sets now come pre designed with moon nail design patterns already applied, using durable adhesive tabs or gel strips that can last a week or more with proper care.
Some press on brands even offer reusable sets, meaning the same moon nail design can be removed carefully and reapplied multiple times before needing replacement. This appeals to clients who like to switch up their nail look frequently but do not want to keep paying for a full new set every single time.
I do still recommend proper prep even with press ons, including gently buffing the natural nail and applying a thin base coat before application, since this improves both the fit and the longevity of any moon nail design applied this way.
[IMAGE PROMPT 9: A luxurious close up of a hand with almond shaped nails featuring a marble swirl background paired with a gold chrome moon nail design accent, dramatic lighting, editorial beauty photography style]
My Honest Opinion On Moon Nail Design As A Nail Artist
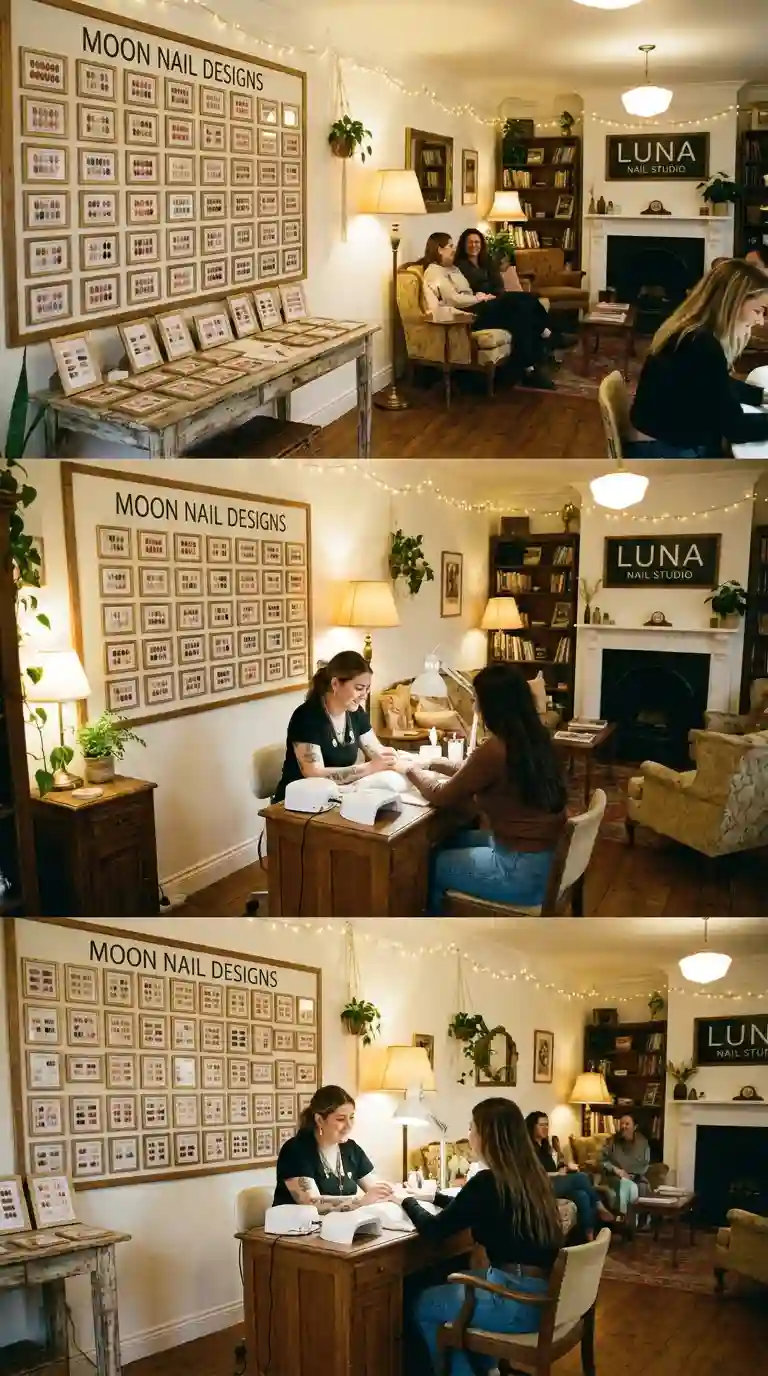
After years of painting hundreds of these designs, my honest opinion is that moon nail design earns its popularity fairly. It is not a fleeting trend built purely on hype or algorithm driven visibility. It respects the natural shape of the nail, it works with negative space instead of covering every inch in color, and it gives people an easy way to feel put together without needing an elaborate five nail scene on every single finger.
I also appreciate how easily moon nail design can be dressed up or down. A client heading into a corporate job can wear a soft nude version, while another client heading to a music festival can request a full galaxy version on the exact same day, using the exact same underlying technique with completely different color choices.
If you are on the fence about trying moon nail design, my honest advice is to start with a single accent nail or a subtle nude and white combination first. Once you see how much it elevates a simple manicure, you will understand why this style has managed to survive nearly a century of constantly changing beauty trends.
[IMAGE PROMPT 10: A wide shot of a cozy well lit nail salon interior with a nail artist working on a client’s hand, various finished moon nail design samples displayed on a nearby wall or table, warm inviting atmosphere]
Frequently Asked Questions
What is a moon nail design?
A moon nail design is a style of nail art that uses a crescent or half moon shape, usually placed near the cuticle or as an accent, to create contrast against the rest of the nail color. It highlights the natural lunula shape and remains one of the most recognizable styles in modern nail art.
How do you do a moon manicure at home?
To do a moon manicure at home, apply your base color first and let it dry completely. Then use a vinyl moon guide sticker or a fine detail brush to add a contrasting shade in a crescent shape near the cuticle. Seal everything with a top coat once the design is fully dry.
What is the difference between a half moon manicure and a French manicure?
A French manicure highlights the tip of the nail with a white line, while a moon nail design highlights the base of the nail near the cuticle with a crescent or curved shape. Some designs combine both elements for a more layered look.
Does moon nail design work on short nails?
Yes, moon nail design works beautifully on short nails. A smaller, thinner crescent shape near the cuticle tends to look the most polished on shorter nail beds, since it does not overwhelm the smaller surface area available.
What colors are best for moon nail design?
Popular combinations include nude with white or gold, red with silver, navy or black with silver or pearl, and pastel shades paired with a soft white moon. The best choice really depends on the mood you want your manicure to give off.
How long does a moon nail design last?
With gel polish and proper aftercare, a moon nail design can last two to three weeks without significant chipping. Regular polish versions typically last about five to seven days before needing a touch up.
Can you do moon nail design with regular polish instead of gel?
Yes, moon nail design can absolutely be done with regular polish, though it may not last as long or hold fine detail as well as a gel version. A good quality top coat helps extend its wear either way.
What tools do I need for a moon nail design?
You will need a base coat, your chosen polish colors, a fine detail brush or dotting tool, optional vinyl moon shaped guides, and a top coat to seal the design once it is finished.
Is moon nail design good for a wedding?
Yes, moon nail design is a genuinely popular choice for weddings, especially in soft ivory, blush, or pearl white tones. It gives a subtle, elegant look that photographs well without feeling too flashy for bridal photos.
What nail shape works best with moon nail design?
Almond and oval nail shapes tend to complement moon nail design the most, since their natural curve mirrors the crescent shape. That said, moon nail design can be adapted to fit square, coffin, or stiletto shapes just as easily.
Final Thoughts On Moon Nail Design
Moon nail design has earned its place as one of the most enduring styles in the entire nail art world, and after years of working behind the nail table, I genuinely do not see that changing anytime soon. It remains flexible enough to fit any color palette, any nail shape, and any occasion, while still holding onto that timeless, elegant curve that first made it popular nearly a century ago.
Whether you decide to try a simple half moon nail design at home using a basic vinyl guide, or you book a full galaxy themed set at your local salon, the most important thing is choosing colors and shapes that feel genuinely true to your own personal style. That, far more than any passing trend report, is what makes a moon nail design truly stand out on your hands.
Pingback: 27 Daisy Nail Design ideas That Are Cute & Stunning
Pingback: 45+ Boho Nail Ideas for a Stylish Bohemian Manicure