
There is something about a rose that just works on nails. I still remember the first time a client sat down in my chair, slid a photo across the table, and asked for tiny roses on her ring finger. That was years ago, and rose nail design has never really left the salon since then. Trends come and go every season, chrome nails, cat eye gel, that one summer everyone wanted french tips with a twist, but rose nail design keeps coming back stronger every single time.
If you search online right now, you will find thousands of photos of rose nail design, from soft pastel buds on a nude base to full blown 3D acrylic roses that look like they belong in a bouquet instead of on a fingertip. This article is going to walk you through everything, from what rose nail design actually is, to the tools you need, to color combos, occasions, seasonal ideas, and the mistakes that ruin a good rose nail design before it even gets to dry.
Grab a coffee, because this one is going to be long and detailed, the kind of guide I wish someone had handed me when I first tried to paint a rose on a nail the size of a fingernail and realized it is a lot harder than it looks.
Also Read : Rainbow Ombre Nails: The Ultimate Guide To Stunning Salon Quality Color Blends At Home
What Makes Rose Nail Design So Popular Right Now
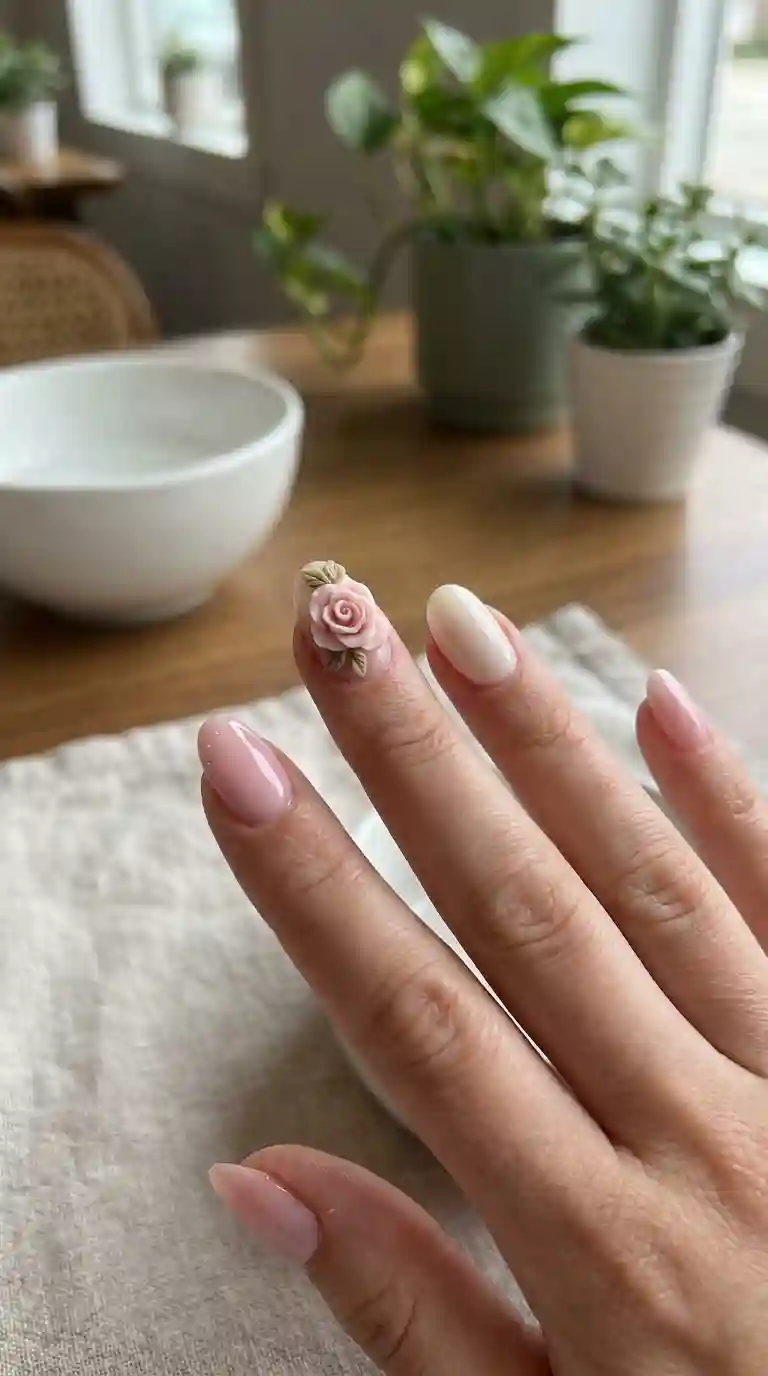
Roses mean something to almost everyone. Love, romance, celebration, grief, elegance, all of it gets tied to this one flower, and that emotional weight is exactly why rose nail design has stayed relevant for so long. A client does not just want pretty nails, she wants nails that say something about her, and a rose says a lot without saying a word.
There is also the versatility factor. Rose nail design can look soft and romantic, or it can look dark and gothic, or it can look bold and modern with a splash of chrome. Very few floral designs stretch across that many moods the way roses do. A daisy is cute. A sunflower is cheerful. But a rose can be whatever the wearer needs it to be that day.
Social media pushed rose nail design even further into the spotlight. Short videos showing a nail artist building up petals layer by layer get millions of views because watching a flat blob of acrylic turn into a tiny sculpted rose is genuinely satisfying to watch. That online exposure trained a whole generation of clients to walk into salons already knowing the word “blooming gel” or asking specifically for a 3D rose accent nail.
Understanding The Basics Of Rose Nail Design Before You Start
Before anyone jumps into painting or sculpting a rose, it helps to actually understand what rose nail design involves at a technical level. It is not one single technique. It is a whole family of methods that all end up creating the same flower shape, just through different tools and products.
There is hand painted rose nail design, where an artist uses acrylic paint or gel paint and a fine brush to draw the flower directly on the nail. There is one stroke rose nail design, a technique using a flat brush loaded with two colors at once to create a rose in a handful of confident strokes. There is 3D rose nail design, built with acrylic or polymer clay to create a rose that actually has raised petals you can feel with your finger. And there is blooming gel rose nail design, a newer method where a special gel spreads and blooms in water or oil like a real flower opening.
Each of these approaches gives a totally different final look, and knowing the difference matters a lot when you are trying to describe what you want to your nail tech, or when you are trying to learn the technique yourself.
Tools You Need For Rose Nail Design
If you want to actually create rose nail design at home or in a salon setting, the tool list matters more than people expect. A cheap dollar store brush will never give you the same clean petal lines as a proper detail brush made for nail art.
Here is what I always keep on my desk when a client books anything involving roses.
A fine detail brush with a very small tip, usually a size 000 or 00, for outlining and fine petal work. A flat one stroke brush for the classic loaded brush rose technique. Acrylic paint in a range of reds, pinks, whites, and greens, since most rose nail design work still relies on traditional nail acrylic paint rather than regular polish. A dotting tool for small filler flowers and centers. A thin nail art liner brush for stems and leaves. Top coat that is specifically rated for nail art, because a cheap top coat can smear pigment and ruin hours of work in one swipe.
For 3D rose nail design you will also need sculpting acrylic powder, a small ball tool or rose making tool, and a clean silicone mat to shape petals before placing them on the nail.
None of this needs to be expensive to start. I built my first rose nail design kit slowly, one brush at a time, and honestly some of my best rose work in the early years came from a brush that cost less than a coffee.
Choosing The Right Nail Shape For Rose Nail Design
Nail shape changes how a rose sits on the nail bed, and this is something a lot of beginners skip over. Almond and coffin shaped nails give you the most surface area for a full blooming rose, which is why you see so many rose nail design photos on longer almond nails. Square nails work beautifully for a clean, structured rose placed off center near the cuticle or the tip. Short round nails are trickier but not impossible, a smaller, simplified rose with fewer petals usually looks cleaner than trying to cram in every detail on a tiny canvas.
Stiletto nails give a dramatic runway feel to rose nail design, especially when the rose is placed vertically along the length of the nail rather than centered. If you have short natural nails and still want rose nail design, my honest advice is to go for one accent nail rather than roses on all ten, since a full set of tiny detailed roses on short nails can start to look cluttered rather than elegant.
Read Also : Red and Gold Nail Design: The Ultimate Guide to Bold, Glamorous Nails That Turn Heads
Classic Rose Nail Design Styles Every Nail Lover Should Know
Rose nail design is not a single look. It is a whole category, and within that category there are styles that have basically become their own mini trends. Let me walk through the ones clients ask for the most, and the ones I personally think hold up the best over time.
Red Rose Nail Design For Timeless Romance
Red rose nail design is the one that never really goes out of style. There is a reason bridal shops, Valentine’s campaigns, and romance movies all lean on red roses, the color itself carries the message before the flower even needs shaping.
A classic red rose nail design usually pairs a deep red or crimson rose against a nude, white, or soft pink base. The contrast makes the rose pop instead of blending into the background. I like adding a tiny green leaf or stem detail near the base of the rose because it grounds the design and stops it from looking like a random red blob.
For clients who want something bolder, a full red chrome background with a single hand painted red rose in a slightly darker shade creates a rich, almost velvet effect that photographs beautifully.
Pink Rose Nail Design For Soft Feminine Looks
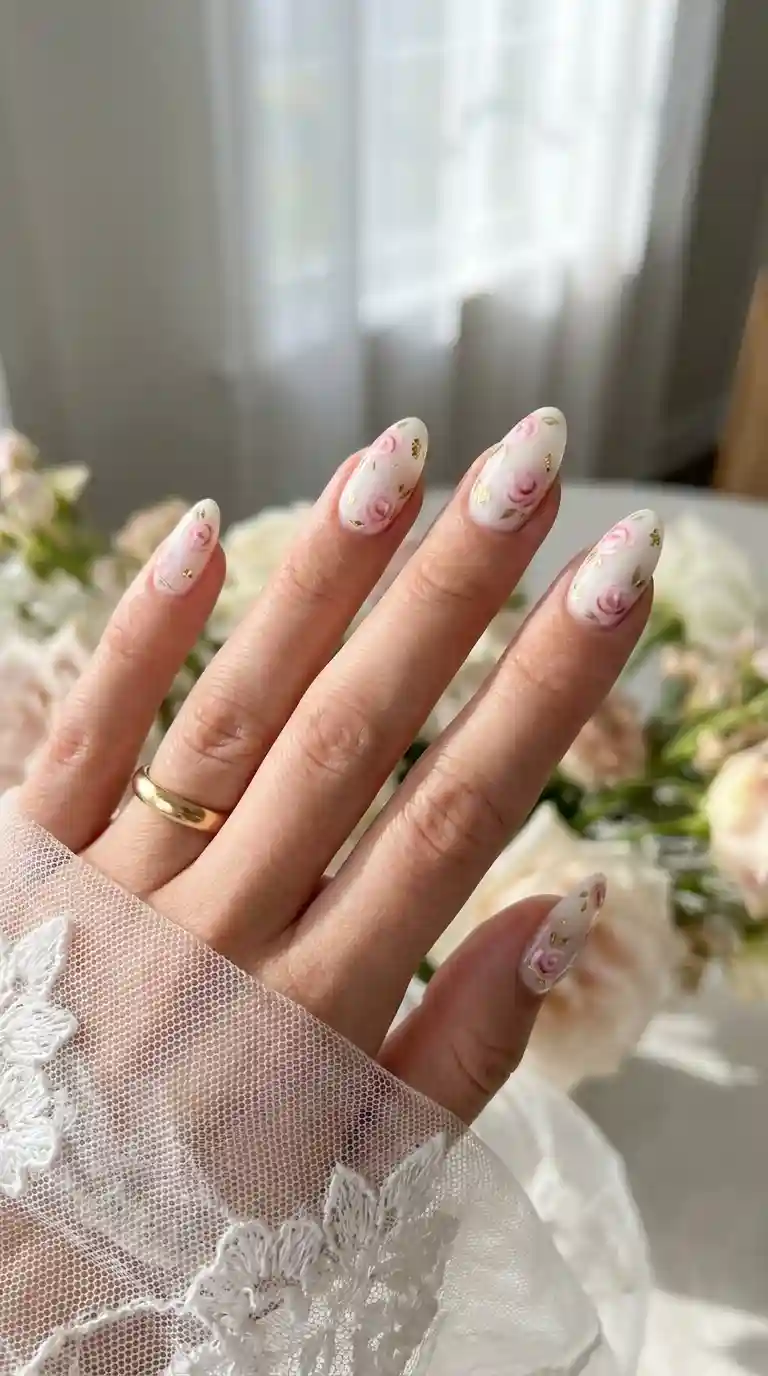
Pink rose nail design tends to be the most requested version in my experience, especially among younger clients or anyone going for a soft, romantic aesthetic. Pink roses read as gentle and feminine without feeling as intense as a bold red.
Blush pink, dusty rose, and baby pink are the three shades I reach for most. Pairing a pink rose nail design with a milky white or sheer pink base creates a bridal, almost porcelain doll type look that a lot of clients fall in love with instantly.
Black Rose Nail Design For Edgy Style
Not every client wants soft and romantic. Black rose nail design has carved out its own space for anyone who wants that gothic, dramatic, slightly rebellious energy without abandoning the flower theme entirely.
A black rose against a matte black base, or against a deep burgundy background, creates a moody, almost velvet texture that stands out in a completely different way than pink or red rose nail design. Adding a tiny bit of silver or chrome detailing on the petal edges keeps the design from looking flat under salon lighting.
White Rose Nail Design For Bridal Elegance
White rose nail design shows up constantly around wedding season, and for good reason. A white rose carries purity and simplicity, and it works beautifully on almost every skin tone and nail shape.
The trick with white rose nail design is shading. A completely flat white rose can look boring or even a bit blank under bright light, so I always add subtle grey or ivory shadowing between the petals to give the flower dimension. That small shading step is honestly the difference between an amateur looking rose and a professional looking one.
3D Rose Nail Design Techniques That Wow Every Client
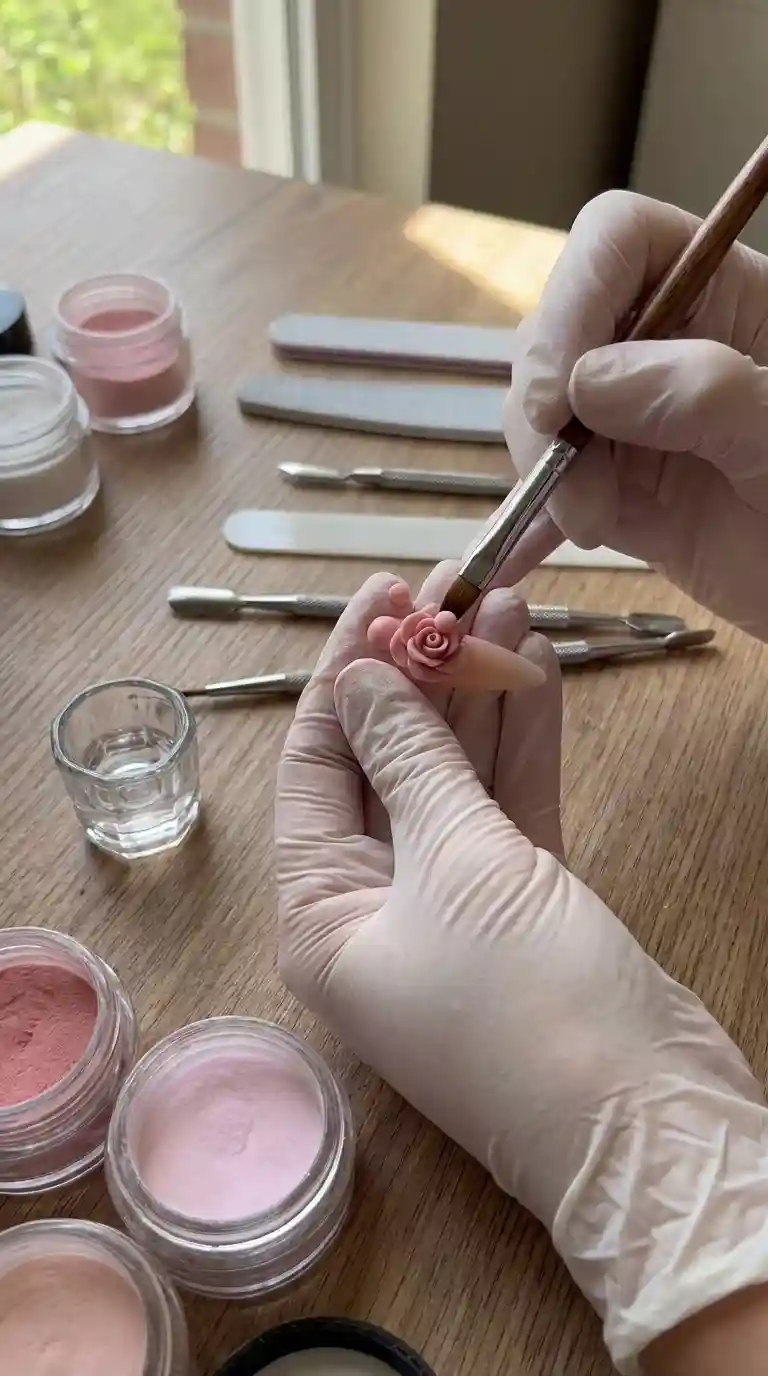
If hand painted roses are the classic version, 3D rose nail design is the showstopper. This technique uses acrylic powder or polymer clay to physically sculpt each petal, layering them on top of each other the same way you would build a real flower, until you get a tiny raised rose sitting right on the nail.
The process starts with a small ball of acrylic pressed flat into a petal shape using a silicone tipped tool. You build the center first, a tight little coil that becomes the bud, then wrap petal after petal around it, slightly overlapping each one and angling them outward as you go. It takes patience. My first attempts at 3D rose nail design looked more like cabbage than flowers, and it took a solid few months of practice before I could shape a petal that actually curved the way a real rose petal does.
The payoff is huge though. 3D rose nail design has real texture, real shadow, and a level of realism that flat painted designs simply cannot match. It is also more durable to touch damage than people expect, as long as it gets sealed properly with a thick top coat.
The downside is time. A full 3D rose accent nail can take anywhere from twenty minutes to over an hour depending on the size and detail level, which is why salons usually charge extra for this specific style.
Also Read : Silver Nail Inspo: 60 Dazzling Ideas That Will Instantly Upgrade Your Manicure Game
One Stroke Rose Nail Design For Beginners
If 3D rose nail design feels intimidating, one stroke technique is where I tell every beginner to start. This method uses a flat brush loaded with two colors, usually a light and dark shade of the same color family, blended right on the brush itself before touching the nail.
With a few confident curved strokes, a flat brush can create a surprisingly realistic looking rose bloom. It relies on brush pressure and angle rather than fine detail work, which makes it much more forgiving for beginners than trying to paint individual petals with a tiny brush.
The learning curve is still real. One stroke rose nail design requires practice on paper or a practice nail wheel before you try it on an actual client, since the paint needs to stay wet enough to blend but not so wet that it runs. I usually tell students to practice the same five stroke rose pattern at least fifty times before attempting it on skin.
Once you get comfortable, one stroke rose nail design becomes one of the fastest ways to add a beautiful floral accent without the time investment that 3D work demands.
Blooming Gel Rose Nail Design And Why It Is Trending
Blooming gel rose nail design took over social media a couple of years ago and it has not slowed down since. Blooming gel is a special type of gel polish, usually clear or lightly tinted, that stays wet longer than regular gel and reacts when you drop colored gel or ink into it. The color spreads and blooms on its own, creating natural, unpredictable petal shapes that look almost like watercolor paintings.
Watching blooming gel rose nail design happen in real time is honestly mesmerizing, and that is exactly why videos of the process go viral so often. An artist drops a small dot of red or pink pigment into the wet blooming gel base, then uses a fine tool to gently guide the bloom into a rough rose shape, sometimes adding a second or third color for depth before curing under a UV lamp.
What makes blooming gel rose nail design special is that no two roses ever come out exactly the same. Even the same artist doing the same colors will get slightly different petal spreads every time, which gives each manicure a one of a kind quality that hand painted designs cannot fully replicate.
The technique does take practice to control though. Blooming gel can spread too far or too fast if the base layer is too thin or the room temperature is off, so beginners often end up with muddy looking blobs before they master timing and pigment ratio.
Rose Nail Design Ideas For Every Season
One of my favorite things about rose nail design is how easily it adapts across the calendar. A rose does not belong to one season the way certain trends do. It just changes color and pairing depending on the time of year.
Spring Rose Nail Design
Spring calls for soft, fresh colors. Pastel pink, lilac, mint green, and buttery yellow roses paired with a sheer nude or milky white base capture that fresh bloom energy perfectly. I love adding tiny baby’s breath style dots around a spring rose nail design to make it feel like a little garden sitting on the nail.
Summer Rose Nail Design
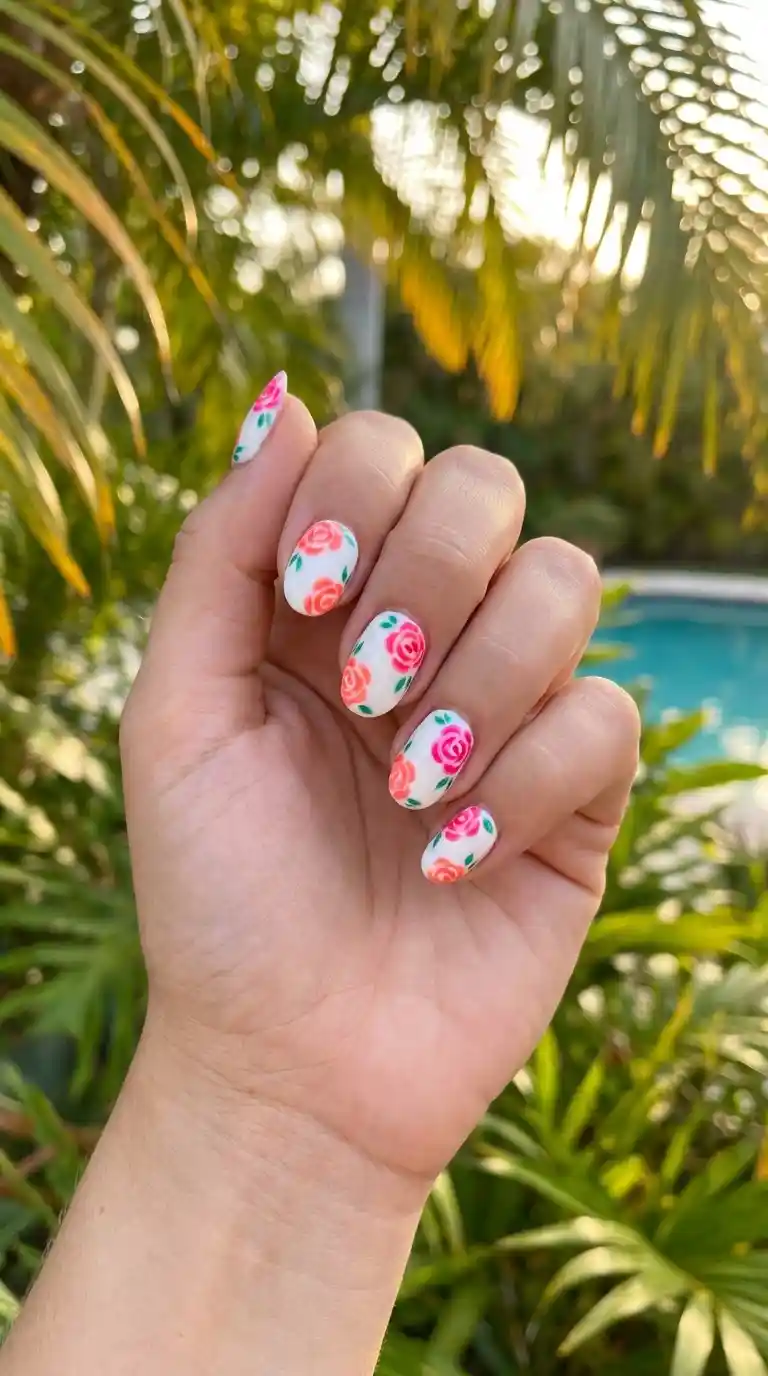
Summer rose nail design leans brighter and bolder. Hot pink, coral, and tropical orange roses against a bright white or neon base feel right for beach season. Chrome or holographic accents also work beautifully in summer since sunlight makes them shimmer in a way indoor lighting never quite matches.
Also Read : Pastel Yellow French Tip Nails: The Sunshine Manicure Every Nail Lover Needs This Season
Fall Rose Nail Design
Autumn is where rose nail design gets rich and warm. Burgundy, burnt orange, deep mustard, and chocolate brown roses paired with a matte nude or olive green base fit the cozy fall aesthetic that so many clients ask for once September hits. Adding tiny gold leaf flecks near the rose gives it a harvest, almost vintage feel.
Winter Rose Nail Design
Winter rose nail design often goes one of two directions, either deep jewel tones like emerald and wine paired with a black rose, or icy pale designs with white and silver roses that look like they belong in a snow scene. Both directions work beautifully for the holiday season and both photograph really well under warm indoor lighting.
Rose Nail Design For Special Occasions
Certain events almost demand rose nail design, and knowing which style fits which occasion helps a lot when a client is not sure what to ask for.
Wedding Rose Nail Design
Bridal clients usually want something timeless rather than trendy, since wedding photos last forever. White, ivory, or blush rose nail design with subtle pearl or crystal accents tends to be the safest and most requested bridal choice. I always recommend keeping the rose smaller and more delicate for a bride, since oversized 3D roses can look heavy in close up ring shots.
Valentine’s Day Rose Nail Design
Valentine’s Day is peak season for red rose nail design, no surprise there. Hearts, tiny cupid accents, and red or pink chrome pairs beautifully with roses during this time of year. This is also when I get the highest volume of rose nail design bookings all year, sometimes double a normal week.
Prom Rose Nail Design
Prom season brings out bold, statement rose nail design, often matching the color of the dress. A single dramatic 3D rose on an accent nail, paired with simpler glitter or ombre on the rest of the set, tends to photograph better for prom than an overly busy full set of roses on every finger.
Rose Nail Design On Different Nail Shapes And Lengths
I touched on shape earlier, but it deserves a deeper look because this is one of the most common questions I get from clients trying to decide what rose nail design will actually suit their hands.
Long almond and coffin nails give the most room for detailed, multi petal roses, and honestly this is where rose nail design looks its absolute best in photos. There is enough canvas to show shading, layering, and fine detail without everything looking cramped.
Medium length square or squoval nails work well with a single centered rose or a rose placed near the base of the nail, leaving the tip area clean or french tipped for balance.
Short nails are not a dead end for rose nail design, they just need a simplified approach. A tiny two or three petal rose, or a rose outline rather than a fully shaded one, keeps the design from looking overwhelming on a smaller surface. I always tell clients with shorter nails that less detail actually reads as more elegant once the nail gets small enough.
Stiletto and edge shaped nails suit a vertical, elongated rose design that follows the point of the nail rather than sitting centered like a stamp, which creates a much more dramatic, runway ready look.
Also Read : Leaf Nail Design: The Ultimate Guide To Gorgeous Botanical Nail Art That Actually Lasts
Color Combinations That Make Rose Nail Design Pop
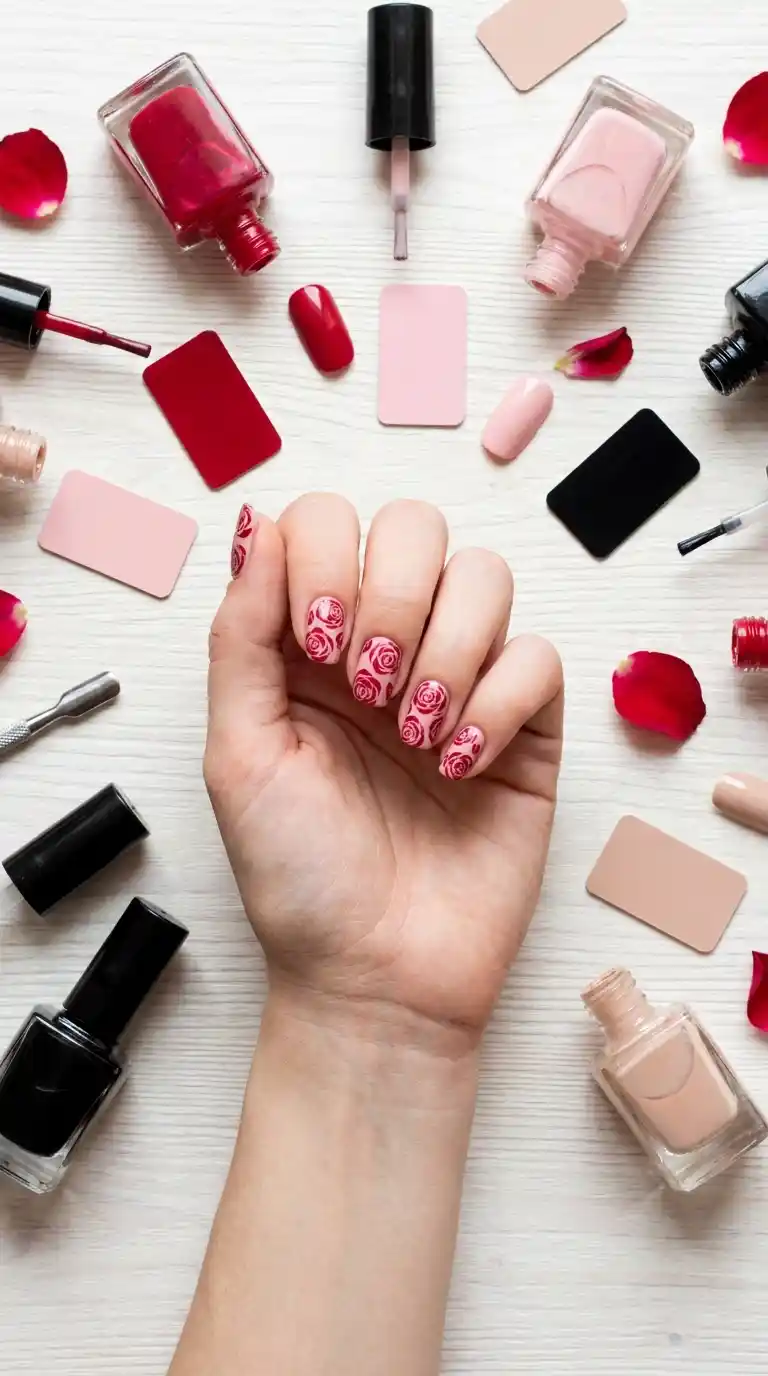
The rose itself is only half the equation. Base color choice makes or breaks how a rose nail design actually reads once it is finished and dried.
Nude and rose gold bases are the safest, most universally flattering pairing, letting almost any rose color stand out without fighting for attention. Milky white or sheer pink bases give a soft, bridal feel and work especially well with pastel or white roses. Black or deep burgundy bases create dramatic contrast, perfect for red or white roses that need to pop against something dark. Chrome or metallic bases add a modern twist to otherwise classic rose nail design, especially popular with silver, gold, or holographic chrome under a hand painted rose.
I personally love pairing a matte black base with a single glossy red rose, since the contrast between matte and gloss finishes adds another layer of visual interest beyond just color.
Step By Step Rose Nail Design Tutorial For Home And Salon
If you want to actually try rose nail design yourself, here is the basic process I walk beginners through, using the one stroke method since it is the most accessible starting point.
Start with a fully cured or dried base color, letting it set completely before adding any rose detail on top. Load your flat brush with two colors, a lighter shade on one corner of the brush and a darker shade on the other, blending them slightly together with light strokes on your palette.
Create the center of the rose first with a small C shaped stroke, curling the brush slightly as you pull it across the nail. Build outward from that center with a series of connected C strokes, each one slightly larger than the last, rotating the nail or your wrist as you go to keep the curve consistent.
Add two or three outer petals using longer, looser strokes to give the rose a fuller, blooming appearance rather than a tight bud. Once the rose shape is complete, use a fine detail brush to add small green leaves or a stem near the base if you want that finished, botanical look.
Let everything dry completely, then seal with a good quality top coat, applying gently so you do not drag or smear the fresh paint underneath.
This same basic structure applies whether you are doing hand painted rose nail design, one stroke, or even a simplified guide for 3D petal placement. The center out, layer by layer approach is universal across almost every version of rose nail design.
Common Mistakes To Avoid In Rose Nail Design
Over the years I have seen, and honestly made myself, pretty much every mistake possible when it comes to rose nail design. Here are the ones that come up the most.
Using paint that is too thick or too thin ruins petal definition almost every time. Paint that is too thick drags and creates rough, clumpy petals, while paint that is too watery bleeds and loses its shape before it dries.
Rushing the layers is another big one. Rose nail design relies on visible layering, whether that is petal over petal in 3D work or stroke over stroke in painted work, and rushing that process almost always results in a flat, muddy looking flower instead of a dimensional one.
Skipping a proper top coat causes smearing, dulling, and premature chipping, especially on detailed rose work where the surface texture is already uneven from the paint layers.
Overcrowding the nail is a mistake I see constantly with beginners who get excited and try to fit too much detail onto too small a space. A rose nail design with one clean, well shaped flower almost always looks more professional than one crammed with three roses, five leaves, and a scattering of rhinestones all fighting for attention.
Ignoring nail shape when planning the design also trips people up. A rose that would look stunning on a long almond nail can look completely out of proportion squeezed onto a short round one without adjusting the size and detail level first.
How To Make Rose Nail Design Last Longer
Clients always ask how to protect their rose nail design once they leave the salon, and honestly the answer is mostly about basic nail care combined with a few specific habits.
Always wear gloves for cleaning, dishwashing, and gardening, since chemicals and constant water exposure break down top coat faster than almost anything else. Apply cuticle oil daily, not just for nail health but because well hydrated cuticles reduce lifting around the edges where rose nail design tends to chip first.
Avoid using your nails as tools, opening cans, scratching stickers, prying things open, since detailed rose nail design is more delicate at the tip and edges than a simple one color manicure.
Get a gel top coat refresh every ten to fourteen days if your rose nail design is done in gel, since UV cured gel starts to lose its shine and gloss around that mark even if the color itself has not chipped yet.
Book fills or touch ups every two to three weeks if you are wearing acrylic or hard gel extensions with 3D rose accents, since the raised petals are more exposed to accidental knocks than a flat design and benefit from more frequent maintenance checks.
Rose Nail Design Price And What You Are Paying For
Pricing for rose nail design varies a lot depending on region, salon reputation, and technique, but I think it helps to understand what actually drives the cost up so it does not feel random when you see the price list.
A simple hand painted accent nail with one small rose usually adds a modest amount on top of a standard manicure price, often somewhere in the twenty to forty dollar range depending on your area. A full set with rose nail design on every nail, especially in 3D, can add significantly more, sometimes doubling the base price of a regular acrylic or gel set, because of the time investment alone.
Blooming gel rose nail design tends to sit in the middle price range, since it requires specific products and training but moves faster once an artist is skilled at it compared to fully sculpted 3D work.
The honest truth is that detailed rose nail design takes real time behind the table, sometimes forty five minutes to over an hour for a single accent nail if it is done properly, and that time gets reflected in the price whether the client realizes it or not.
Rose Nail Design Trends For 2026
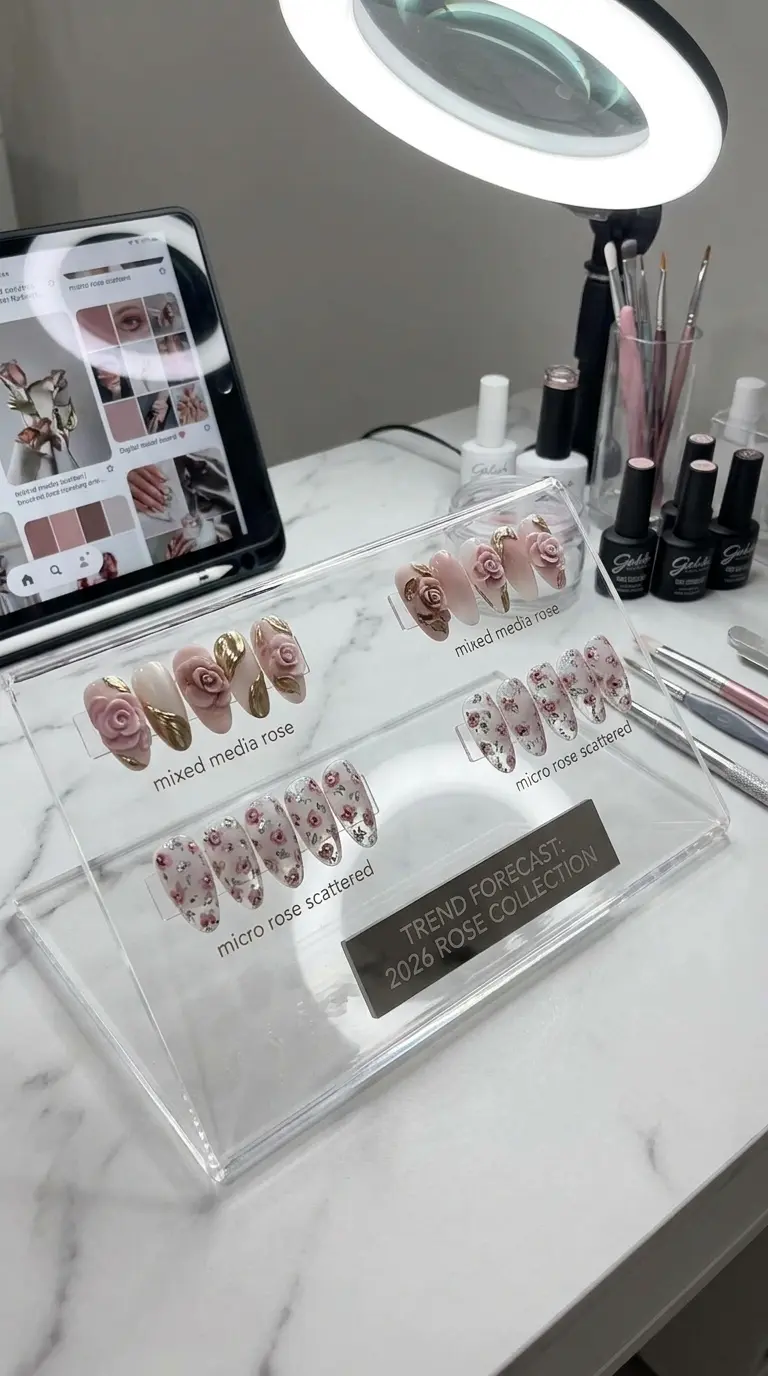
Every year rose nail design shifts slightly, and this year has brought a few directions I am seeing repeatedly in both salon requests and online inspiration boards.
Mixed media rose nail design is having a real moment, where artists combine a hand painted rose with a small 3D acrylic accent petal on top, blending two techniques into one design rather than picking just one method. Micro roses are also trending, tiny scattered rose buds across multiple nails instead of one large statement flower, giving a delicate, almost tattoo inspired look.
Sheer, jelly based rose nail design is showing up more too, where the rose sits underneath a translucent colored gel layer rather than on top of an opaque base, creating a soft, almost underwater effect. And chrome edged roses, where the outline or center of a painted rose gets a thin line of chrome powder pressed in, continue to grow in popularity as a way to modernize an otherwise classic technique.
Also Read : Swirl Nail Designs: The Complete Guide To Painting Gorgeous, Head Turning Swirls On Every Nail Shape
My Honest Thoughts On Rose Nail Design After Years Behind The Table
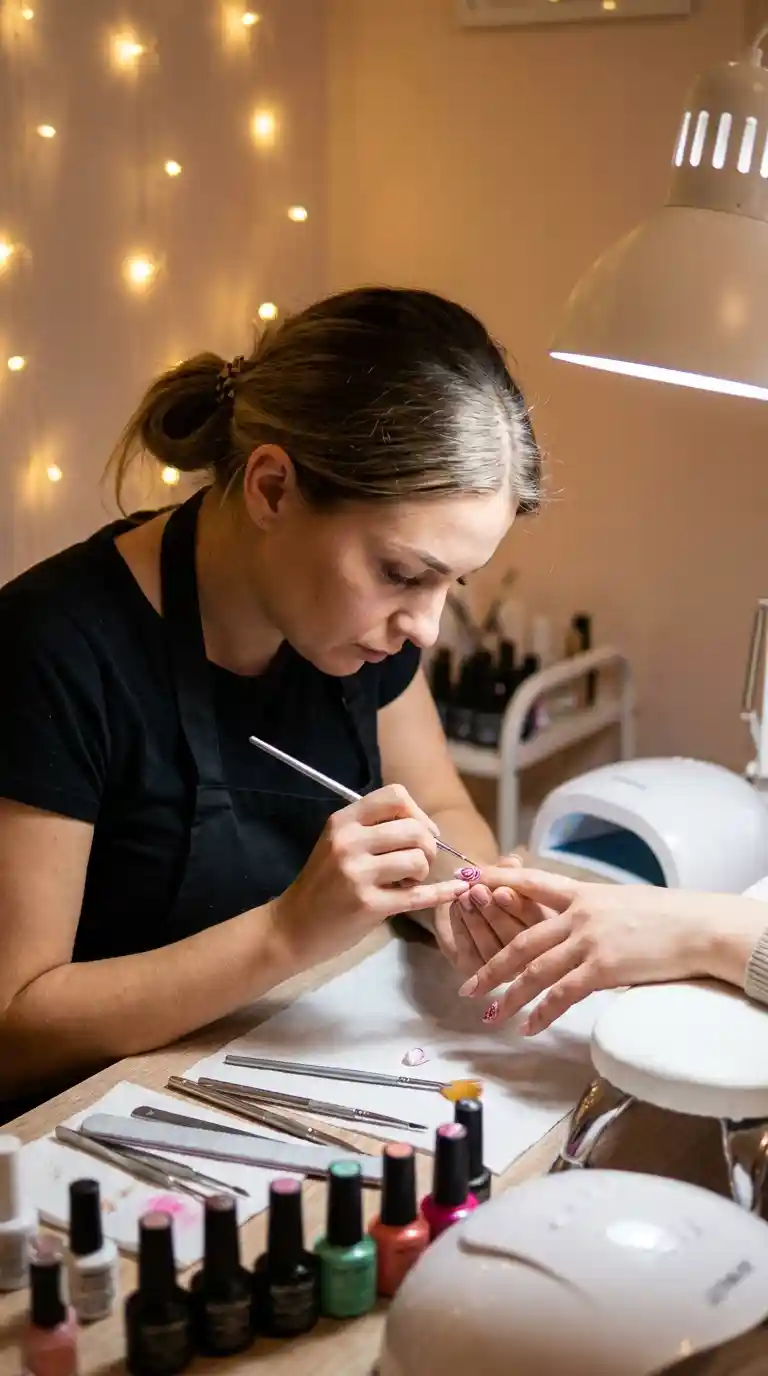
People ask me all the time if rose nail design is overrated, if it is just a trend that will fade eventually the way certain nail art fads have come and gone. My honest answer is no, and I say that after watching it survive at least three or four major shifts in nail trends already.
What keeps rose nail design relevant is that it is not really about the flower itself. It is about what the flower represents to the person wearing it. I have painted roses for brides on their wedding day, for teenagers going to their first school dance, for a woman celebrating five years cancer free, and for someone who just wanted something pretty after a rough week. The rose becomes whatever the client needs it to mean, and that emotional flexibility is rare in nail art.
Technically speaking, rose nail design also keeps evolving with new products, which keeps it from ever feeling stale to actually work on. Blooming gel did not exist in the same way ten years ago, and now it has opened up a whole new category of rose work that did not require the same painting skill the old hand painted method demanded. That kind of innovation keeps artists like me interested year after year, and it keeps clients coming back to see what is new.
If I had to give one piece of advice to anyone starting out with rose nail design, whether as a client picking a style or an artist trying to learn the technique, it would be this. Do not rush the center of the rose. Every rose, no matter the method, builds outward from that center point, and if the base is rushed or sloppy, no amount of outer petal detail will save it. Slow down, build the layers properly, and the rest tends to fall into place naturally.
Rose Nail Design For Different Skin Tones
This is a topic that does not get talked about enough, but base color choice for rose nail design should really account for skin tone if you want the whole hand to look balanced and flattering.
For fair skin tones, soft pastel roses in blush, lilac, or baby pink tend to look the most harmonious, while very pale white bases can sometimes wash out fair hands if not paired with a slightly deeper rose color for contrast.
For medium skin tones, almost every rose color works beautifully, but warm toned roses like coral, terracotta, and warm red tend to complement medium undertones especially well.
For deeper skin tones, bold and saturated rose colors like deep burgundy, bright fuchsia, and true red create stunning contrast, and metallic or chrome accents within the rose nail design tend to shine even more against richer skin tones.
None of these are strict rules, plenty of clients break them and still end up with gorgeous results, but it is a useful starting point when someone is unsure which direction to take their rose nail design.
Read Also : 40+ Stunning Beach Cruise Nail Ideas That Will Make Every Head Turn On Deck
Rose Nail Design Inspiration From Real Nature
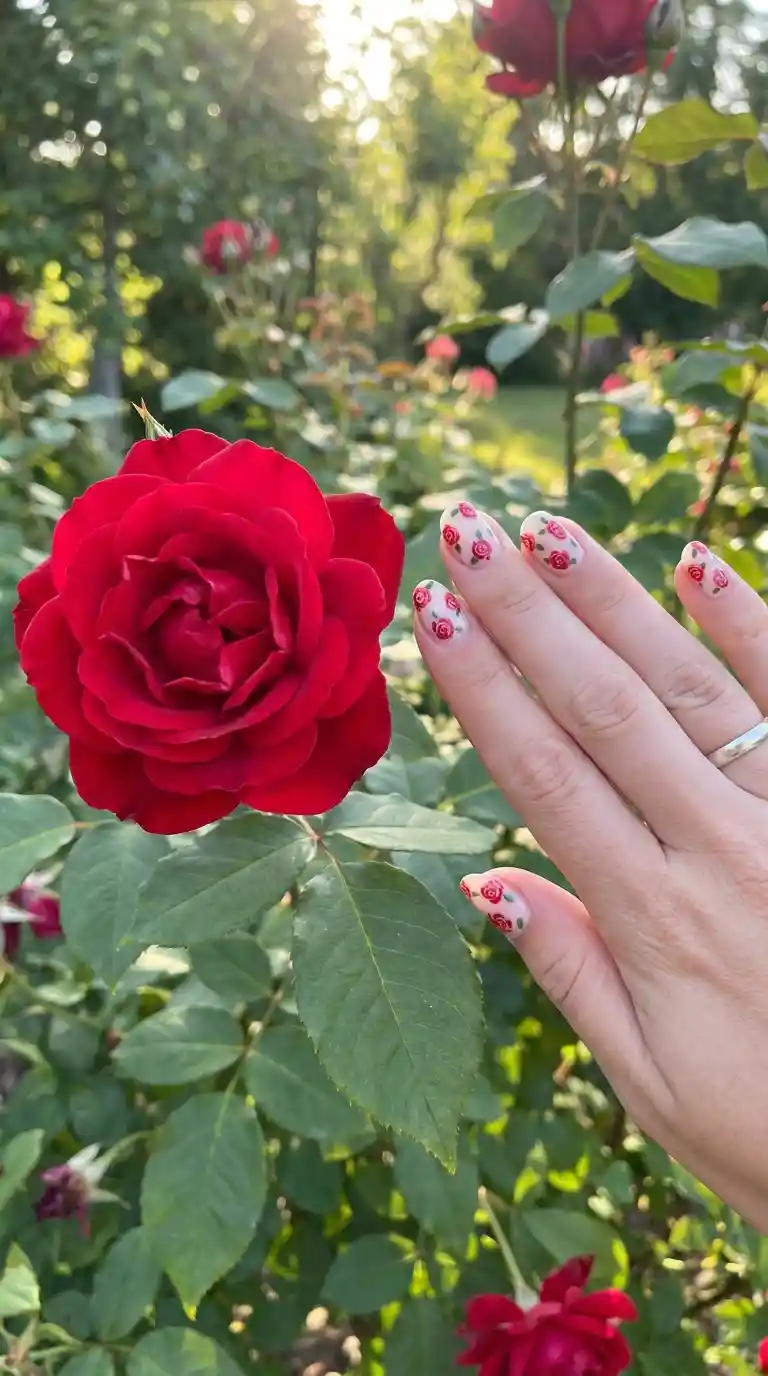
One habit I picked up early in my career that genuinely improved my rose nail design work was studying real roses instead of just copying other nail art photos. Real roses have irregular petals. They are not perfectly symmetrical, and honestly the slight imperfection is what makes them look believable instead of stiff and cartoonish.
I started keeping a small folder of rose photographs taken from different angles, fully bloomed roses, half open buds, roses with slightly curled or damaged outer petals, because all of that variety translates into more realistic and interesting rose nail design once you start referencing it instead of just repeating the same generic five petal shape over and over.
If you are learning rose nail design, I genuinely recommend spending time looking at actual flowers, even just photos, before you keep practicing on nails. It changes how you see the shading and structure, and that shows up in the final result.
Rose Nail Design Tools Comparison For Beginners
A lot of beginners ask what specific supplies actually matter versus what is optional when starting rose nail design, so here is a quick breakdown based on what I actually reach for.
Acrylic paint versus gel paint is the first decision point. Acrylic paint dries faster and is more forgiving for blending strokes, making it better for beginners learning one stroke rose nail design. Gel paint stays workable longer under regular light and only sets when cured under UV or LED, which gives more time to perfect shading but requires a lamp.
Detail brush size matters more than brand. A size 000 or 00 brush covers most fine line work needed for rose nail design, and spending extra money on a fancier brush before mastering brush control usually is not worth it early on.
Silicone mats are essential for anyone attempting 3D rose nail design, since acrylic will not release cleanly from paper or glass the way it does from silicone, and a clean release is what keeps petal edges looking sharp rather than torn.
Frequently Asked Question
What is rose nail design?
Rose nail design is a style of nail art where a rose flower is painted, sculpted, or created using blooming gel directly on the nail, either as a full design or as an accent on one or two nails within a set.
How long does rose nail design take to complete?
A single hand painted rose accent nail usually takes between fifteen and thirty minutes, while a full set with detailed 3D rose nail design on multiple nails can take over an hour depending on complexity.
Is rose nail design hard to do at home?
It can be challenging for complete beginners, especially fine detail or 3D work, but simpler versions like one stroke rose nail design or basic outline roses are achievable at home with practice and the right brushes.
What products are used for 3D rose nail design?
Sculpting acrylic powder, a small ball or rose shaping tool, and a silicone mat are the core products used to build raised, dimensional roses in 3D rose nail design.
Does rose nail design last as long as regular nail polish?
Yes, as long as it is properly sealed with a quality top coat, rose nail design lasts just as long as any other detailed manicure, typically two to three weeks with gel or acrylic.
What is blooming gel rose nail design?
Blooming gel rose nail design uses a special slow drying gel base that allows colored pigment to spread and bloom naturally when dropped in, creating a soft, watercolor style rose shape.
Can rose nail design be done on short nails?
Yes, though it works best with a simplified version, fewer petals, or a smaller scale rose, since very detailed roses can look cramped on a small nail surface.
What colors work best for rose nail design?
Red, pink, white, and black are the most popular colors, but rose nail design can technically be done in any color, including blue or purple for a more fantasy inspired look.
How much does rose nail design cost at a salon?
Pricing varies widely by region and technique, but adding rose nail design to a manicure typically increases the total cost, with detailed 3D versions costing more than simpler hand painted accents.
Is rose nail design good for weddings?
Yes, white or blush rose nail design is one of the most popular bridal choices because it feels timeless and elegan
Final Thoughts On Rose Nail Design
Rose nail design has earned its place as one of the most enduring styles in the nail industry, and after years of painting, sculpting, and blooming roses onto client after client, I still find something new to try nearly every month. Whether you prefer the softness of a pastel painted rose, the drama of a black gothic bloom, or the modern unpredictability of blooming gel, there is a version of rose nail design that fits your personality and your season of life.
If you are thinking about trying it, my advice is simple. Start small, be patient with the learning curve, and remember that even the most stunning rose nail design you have ever seen online started as a rough, imperfect attempt on someone’s practice nail wheel. That is true for every nail artist, myself included, and it is part of what makes finally nailing that perfect petal so satisfying.
[IMAGE PROMPT 10: Wide styled flat lay photo of a full finished manicure set featuring various rose nail designs across all ten nails, elegant props like fresh roses and a nail polish bottle arranged around the hand, high end editorial nail art photography]