
Spring air, garden walks, and that first cup of coffee on the porch all have one thing in common lately. They keep showing up on nail feeds tagged with leaf nail design. If you have scrolled through Pinterest or Instagram in the last year, you already know what I mean. Tiny painted leaves curling across a nude base, gold foil veins catching the light, a single fern leaf resting on an accent finger. It is soft, it is pretty, and honestly, it is one of the easiest ways to make plain nails look expensive.
I work behind the nail desk every single day, and leaf nail design has become one of the most requested looks in my salon. Clients bring in screenshots, ask for custom color combos, and want to know if it will hold up through a wedding weekend or a beach trip. So I decided to put everything I know into one place. This guide covers what leaf nail design actually is, the tools you need, the techniques that work, seasonal variations, mistakes to dodge, and answers to the questions people search for most.
Grab a cup of tea and settle in, because we are going deep on this one.
Also Read : Dark Green Nail Design: The Bold Manicure Trend Every Nail Lover Needs To Try
What Is Leaf Nail Design
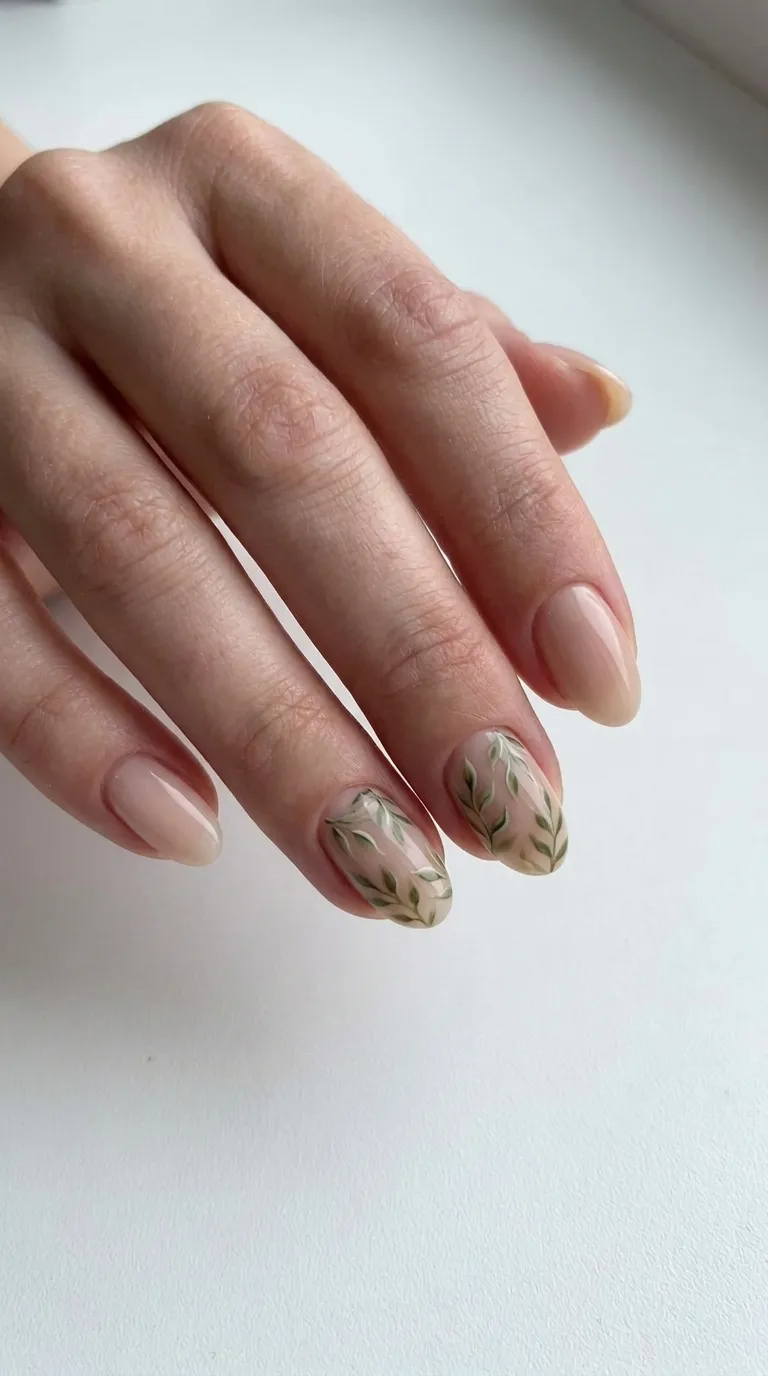
Leaf nail design is a style of nail art where painted, stamped, or applied leaf shapes decorate the nail surface. It can be as simple as a single hand painted leaf on an accent nail or as detailed as a full botanical scene with veins, shading, and layered greenery across all ten fingers.
The beauty of leaf nail design lies in its flexibility. You can keep it minimal with one clean leaf outline, or you can go bold with tropical monstera leaves, delicate ferns, autumn maple leaves, or metallic gold foil leaves. There is no single correct way to do it, which is exactly why it has become so popular among both nail artists and people who paint their own nails at home.
What makes leaf nail design different from other floral or botanical trends is its versatility across seasons. Flowers tend to feel tied to spring and summer, but leaves work all year round. A warm toned maple leaf feels perfect in October. A cool sage green fern feels right in April. A frosted silver leaf outline works beautifully for a winter party.
I always tell my clients that leaf nail design is a gateway into nail art for people who feel intimidated by more complex designs. You do not need to be a trained artist to create a believable leaf shape. A leaf is forgiving. It does not need perfect symmetry the way a flower petal does. A slightly wobbly leaf still reads as a leaf, and honestly that little imperfection often looks more organic and natural.
Read Also : Swirl Nail Designs: The Complete Guide To Painting Gorgeous, Head Turning Swirls On Every Nail Shape
Why Leaf Nail Design Is Trending Right Now
There are a few reasons leaf nail design has taken over nail boards this year, and I have watched this shift happen firsthand at the salon.
First, people are leaning toward softer, more natural looking manicures. The neon and rhinestone heavy trends of a few years back are still around, but there has been a strong pull toward earthy, botanical, minimalist looks. Leaf nail design fits perfectly into that shift because it feels organic rather than flashy.
Second, social media algorithms love texture and detail. A close up shot of a hand with tiny painted leaves and gold veins performs really well because it looks intricate even when the actual technique is simple. Clients see these videos, screenshot them, and bring them straight into my chair.
Third, leaf nail design pairs with almost any nail shape and length. Whether someone wants short almond nails for work or long coffin nails for a night out, leaves scale beautifully. You can shrink the design for a tiny accent or stretch a single leaf across a long nail bed for drama.
Lastly, and this is something I noticed clinically at the salon, leaf nail design photographs incredibly well. The natural color variation of green, olive, sage, and gold tones catches light in a way that looks polished in every photo, which matters a lot to clients who want their manicure to look good on camera for weeks.
Tools And Products You Need For Leaf Nail Design
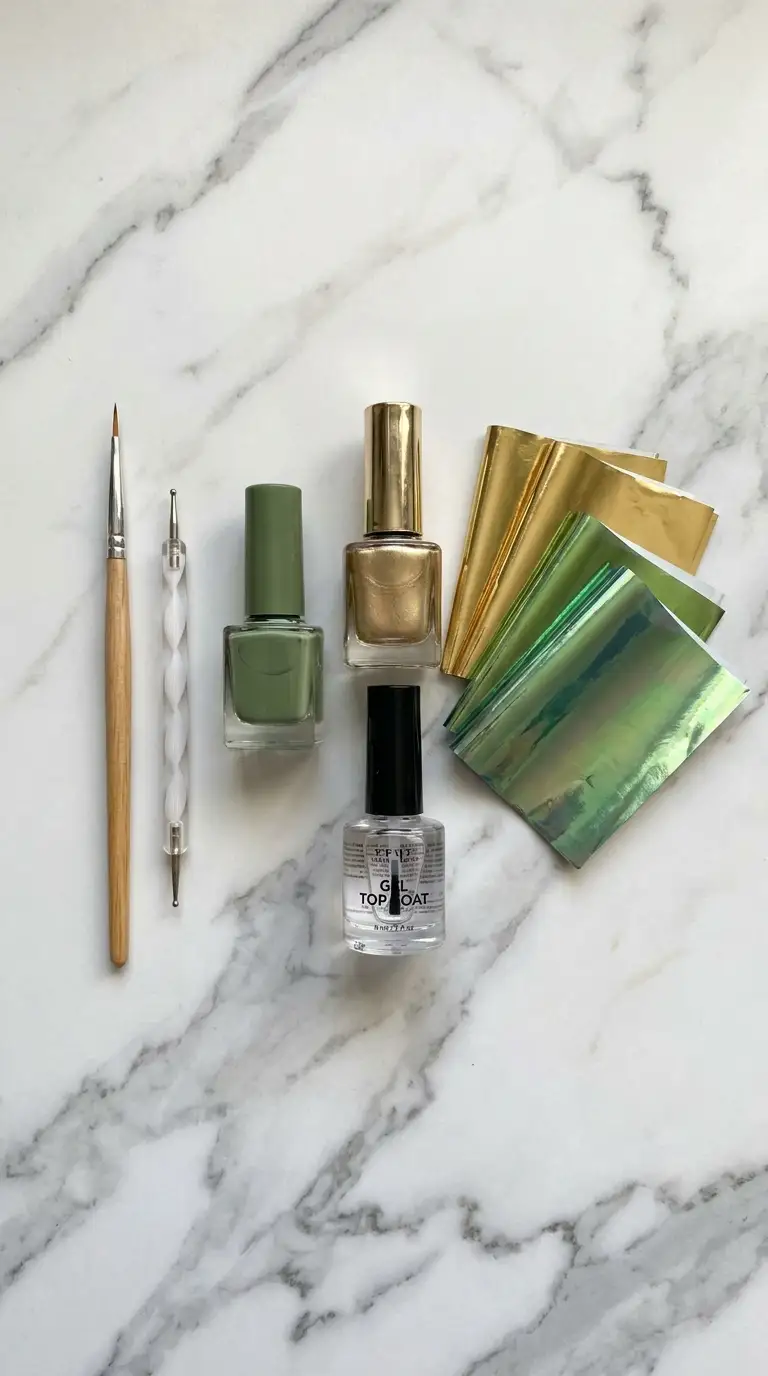
Before we get into techniques, let us talk supplies. You do not need a huge kit to create beautiful leaf nail design work, but a few specific tools make the process much smoother.
Detail Brushes
A good fine tip detail brush is the single most important tool for leaf nail design. Look for a brush with a pointed tip and short bristles, since that gives you the most control for painting thin leaf outlines and vein lines. I personally keep three sizes on my desk: a 000 for the tiniest veins, a 5/0 for general leaf shapes, and a slightly wider flat brush for filling in larger leaf bodies.
Gel Polish Or Regular Polish
You can create leaf nail design with either gel polish or traditional lacquer. Gel polish holds thin lines much better because it does not drag or pool the way regular polish sometimes does, especially on longer nails. If you are doing this at home and only have regular polish, thin it slightly with a bit of polish thinner for smoother strokes.
Base Colors
Nude, beige, soft pink, white, and sheer milky bases work best as a canvas for leaf nail design because they let the green and gold tones pop. Clear jelly bases are also popular right now for a fresh, dewy look.
Green Shades
For the leaves themselves, stock a range of greens. Sage, olive, forest green, mint, and emerald all give you the ability to layer shades for a more dimensional leaf. Mixing two or three greens on one leaf, rather than using a flat single tone, makes the design feel far more realistic.
Gold Foil Or Gold Leaf Flakes
Gold veins and gold foil accents are a signature part of many leaf nail design looks. You can use gold leaf flakes, gold foil transfer sheets, or a fine metallic gold striping polish for veins.
Top Coat
A high shine gel top coat seals everything in and gives the leaves that glossy, healthy look. Matte top coat is also a lovely option if you want a more velvety, botanical garden feel.
Types Of Leaf Nail Design Styles
Leaf nail design is not one single look. It is really a family of styles that share the same core idea. Let me walk you through the most requested variations at my salon.
Also Read : Mexican Nails: The Ultimate Guide To Bold, Colorful, And Culture Rich Nail Art That Turns Heads
Tropical Leaf Nail Design
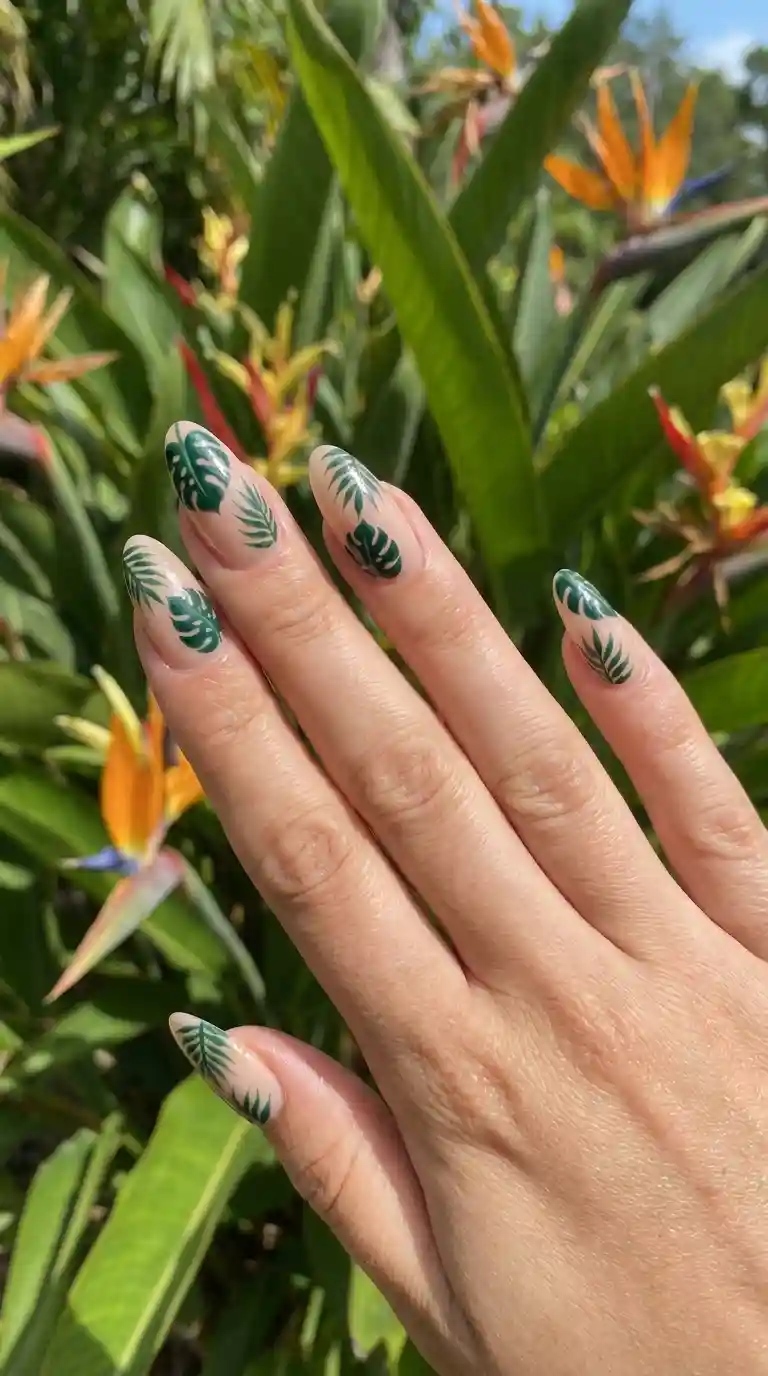
Tropical leaf nail design usually features larger leaf shapes like monstera, palm, or banana leaves. These are bold, graphic, and often painted in deep greens with visible cut outs on the monstera leaves. This style pairs well with vacation nails, summer manicures, and anyone who wants a statement look rather than something subtle.
I love doing tropical leaf nail design for clients heading to a beach destination. The bold shapes photograph beautifully against sand and ocean backgrounds, and the deep green tones do not fade or look washed out in bright sunlight the way pastel designs sometimes can.
Minimalist Leaf Nail Design
This is probably my most requested version. Minimalist leaf nail design keeps things simple, usually just one or two small leaf outlines on an accent nail, with the rest of the nails left in a clean solid color or completely bare with just top coat. It is quiet, elegant, and works in professional settings where bold nail art might not be appropriate.
For minimalist leaf nail design, I usually use a single fine line brush and one shade of green, sometimes adding a tiny gold vein for a bit of shimmer. The restraint is what makes it look expensive.
Fall Leaf Nail Design
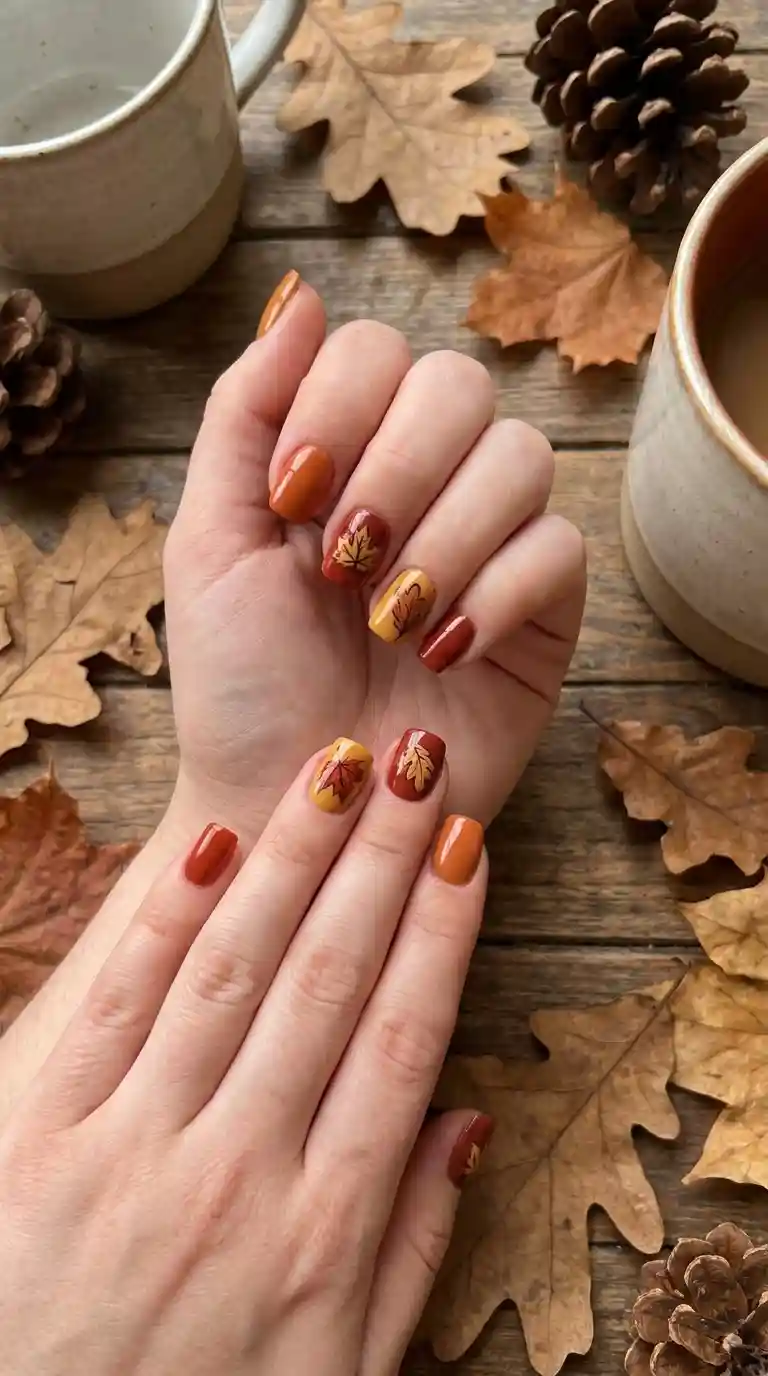
When the weather starts to cool, fall leaf nail design takes over my appointment book. Instead of greens, this style uses warm oranges, burgundy, deep reds, and mustard yellows to mimic changing autumn leaves. Maple leaf shapes are especially popular in the fall season, along with oak leaves and small acorns as accent details.
I find that clients who normally stick to neutral polish colors are much more willing to experiment with fall leaf nail design because the warm tones still feel wearable and season appropriate rather than flashy.
Watercolor Leaf Nail Design
Watercolor leaf nail design blends soft, blurred edges rather than sharp outlines. This technique uses a slightly damp brush to feather the edges of each leaf, creating a dreamy, painterly effect. It takes more practice than the standard outlined leaf style, but the result looks incredibly artistic.
French Tip Leaf Nail Design
This variation combines a classic French manicure with small leaf accents placed along the tip line or scattered near the cuticle. It is a lovely way to modernize a French manicure without losing that timeless, clean look. French tip leaf nail design has become especially popular for bridal manicures.
Must Read: 40+ Stunning Beach Cruise Nail Ideas That Will Make Every Head Turn On Deck
Metallic Leaf Nail Design
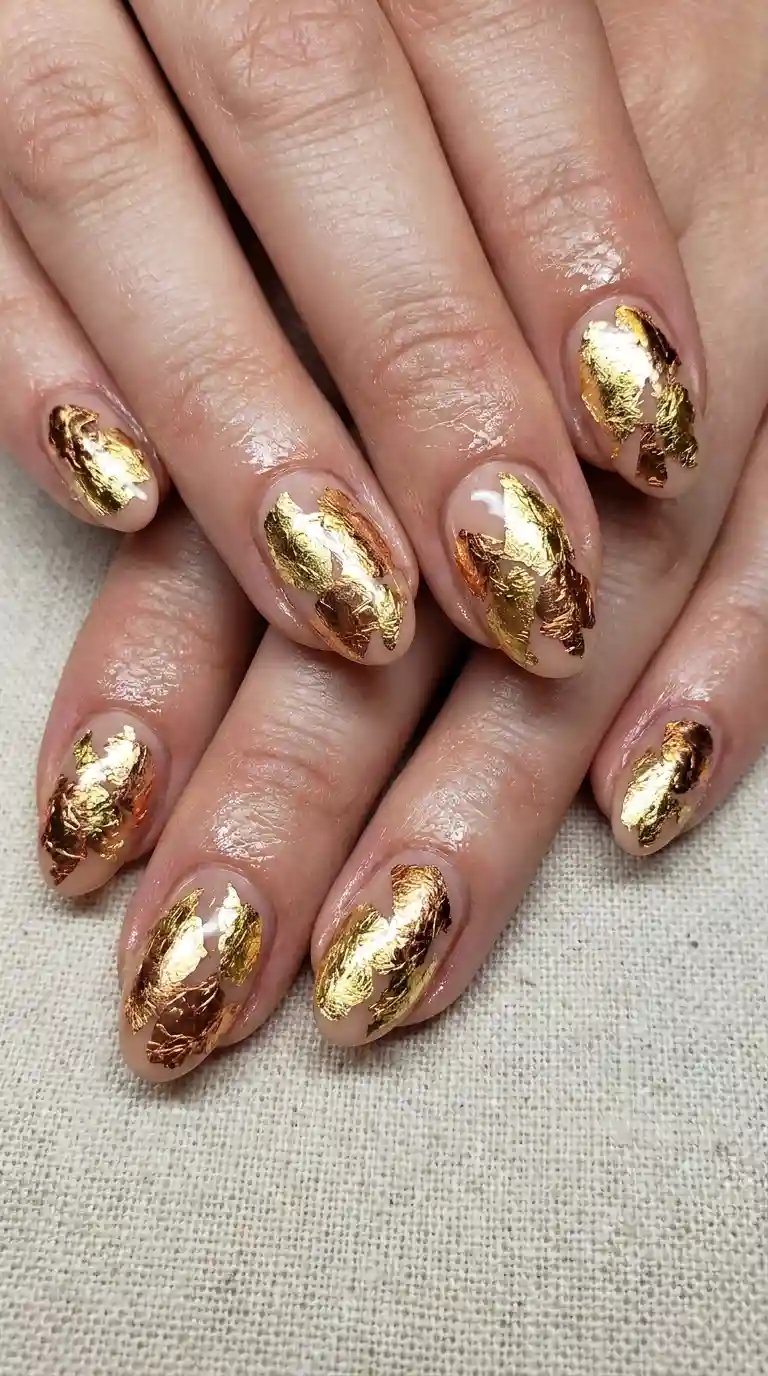
Metallic leaf nail design swaps green polish for gold, copper, rose gold, or silver foil leaves. This look feels luxurious and works wonderfully for holiday parties, weddings, or any occasion where you want your manicure to sparkle a little more than usual. I often combine metallic leaf nail design with a soft nude or white base to let the metallic shine take center stage.
Step By Step Leaf Nail Design Tutorial
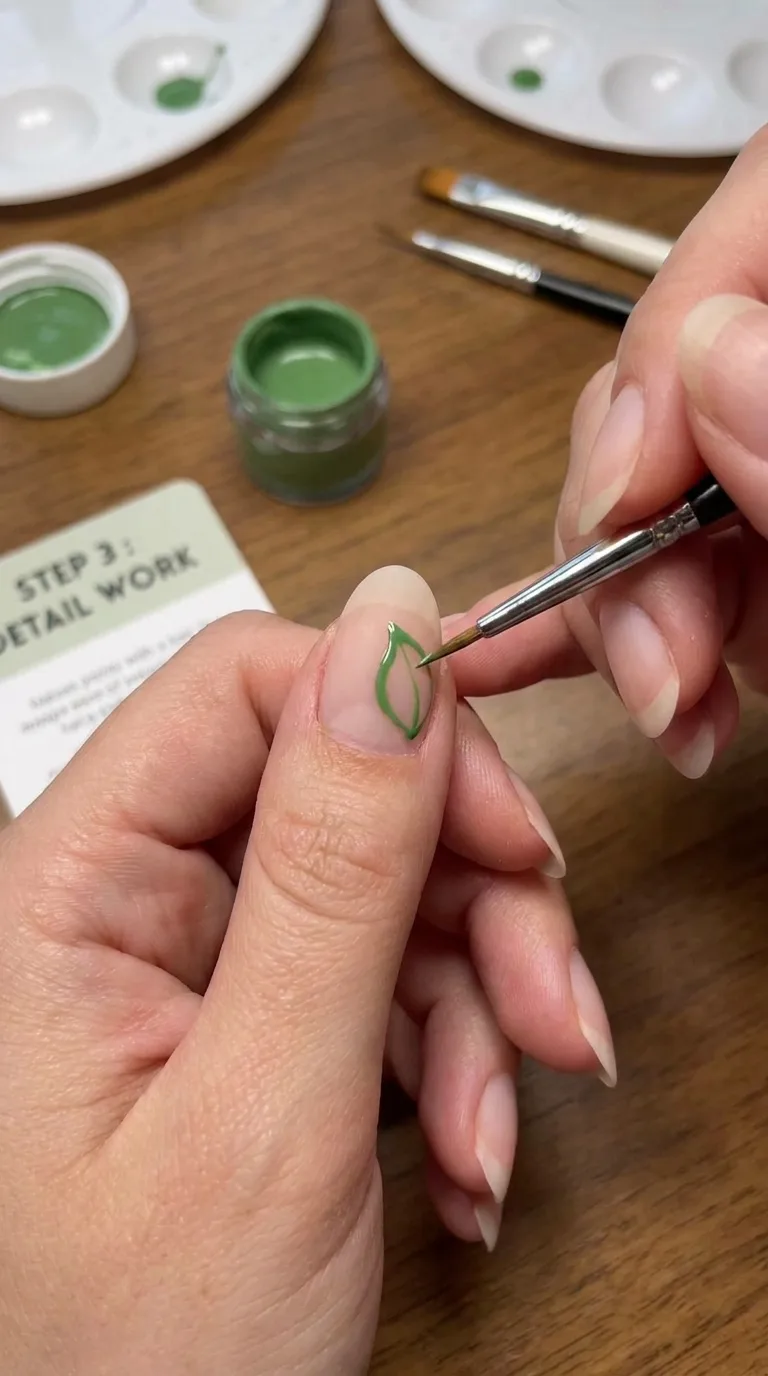
Alright, let us actually get into the technique. This is the exact process I use at my station, and it works whether you are a professional or painting your own nails at home.
Step One: Prep Your Nails
Start with clean, shaped nails. Push back the cuticles, buff the surface lightly, and wipe with alcohol or a lint free wipe to remove any oils. This step matters more than people think because polish and gel do not adhere well to oily nail plates.
Step Two: Apply Your Base Color
Apply your chosen base shade, whether that is nude, white, pink, or a clear jelly tone. Let it cure fully under a lamp if using gel, or allow regular polish to dry completely. A rushed base coat is one of the most common reasons leaf nail design ends up looking smudged.
Step Three: Plan Your Leaf Placement
Before picking up your detail brush, take a second to plan where your leaves will sit. Most leaf nail design looks best when the leaves flow diagonally across the nail rather than sitting perfectly centered. Think about how a real leaf falls, it rarely lands in a perfectly straight line.
Step Four: Paint The Leaf Outline
Using your fine detail brush, paint a simple almond or oval shape with a slight point at the top and bottom. This is your basic leaf silhouette. Do not worry about making it perfect, since leaves in nature are never perfectly symmetrical either.
Step Five: Add The Center Vein
Once your leaf shape is dry, use a thinner brush to paint a single line down the center of the leaf from base to tip. This central vein is what instantly makes a shape read as a leaf rather than just a blob of green.
Step Six: Add Side Veins
Branch a few thin lines off the center vein at an angle, similar to how a fish bone pattern looks. Two or three side veins per leaf is usually enough. Too many lines can make the leaf look cluttered rather than natural.
Step Seven: Layer In Shading
For a more dimensional leaf nail design, use a slightly darker green along one edge of the leaf and a lighter green or even a touch of white along the opposite edge. This shading trick is what separates a flat, cartoonish leaf from one that looks realistic and painterly.
Step Eight: Add Metallic Accents If Desired
If you are going for a more luxe leaf nail design, apply gold foil or a metallic striping polish along the veins instead of a solid green line. This catches light beautifully and adds a bit of glam to the botanical theme.
Step Nine: Seal With Top Coat
Finish with a high shine or matte top coat depending on the finish you want. This locks in the design and protects it from chipping.
Best Nail Colors For Leaf Nail Design
Choosing the right base color can make or break your leaf nail design. Here are the combinations I reach for most often at the salon.
Nude and sage green is a timeless pairing that works for almost any occasion, from office settings to weddings. The soft contrast keeps the leaves looking elegant rather than loud.
White base with emerald leaves gives a crisp, clean look that feels a bit more editorial and modern. This combination photographs especially well.
Milky pink with olive green leaves has become one of my favorite requests this year. It softens the overall look and feels very romantic.
Black base with metallic gold leaves is dramatic and works beautifully for evening events or holiday parties. The contrast makes the gold veins really pop.
Terracotta or rust base with deep forest green leaves gives an earthy, autumn inspired feel that many clients love in the fall months.
Leaf Nail Design For Different Seasons
One thing I appreciate most about leaf nail design is how naturally it adapts across the year. Let me break down how I adjust the style season by season.
Spring Leaf Nail Design
Spring calls for fresh, light tones. I lean into mint green, soft sage, and pale pistachio shades paired with a milky white or blush base. Small floral accents alongside the leaves work beautifully here too, since spring is when actual leaves and blossoms appear together in nature.
Summer Leaf Nail Design
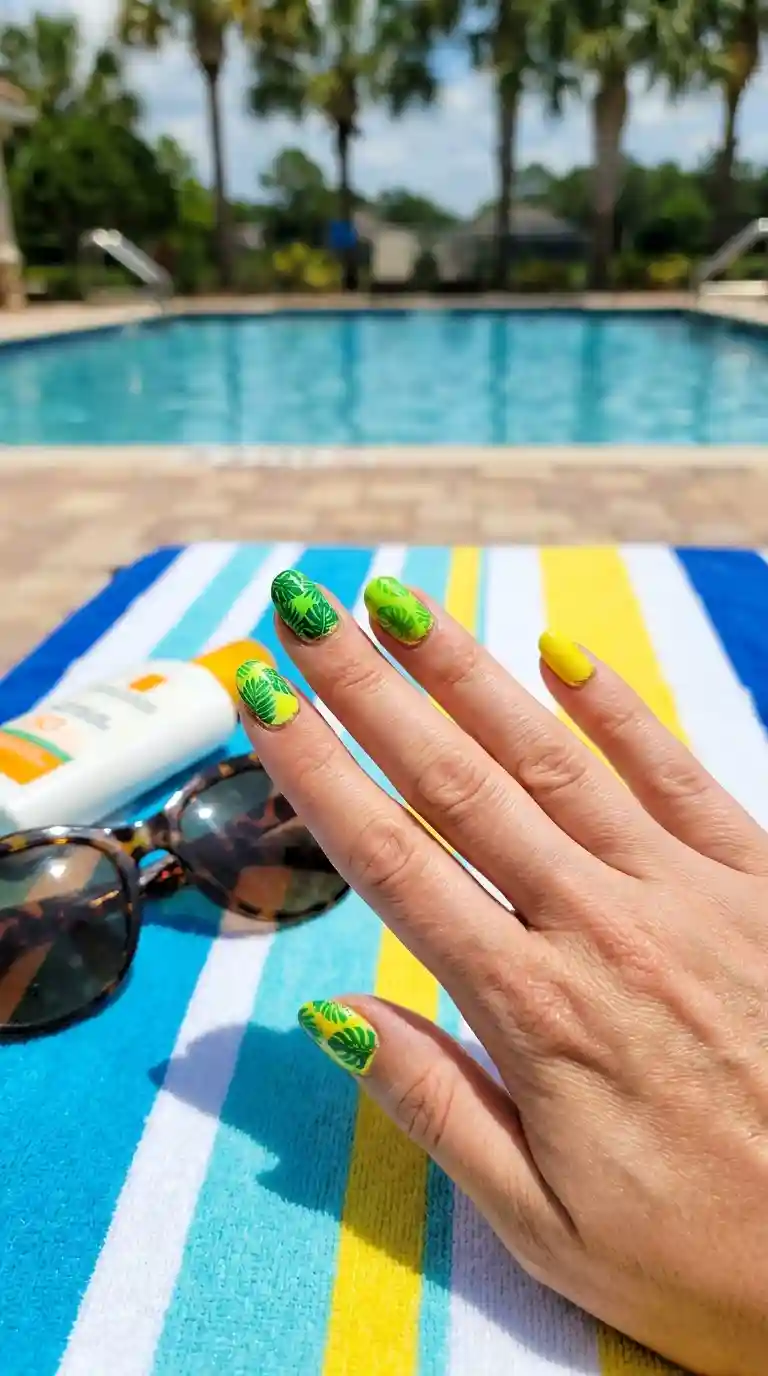
Summer is the season for bold, tropical leaf nail design. Deep greens, monstera shapes, and even a bit of neon accent color capture that vacation energy. This is also the season where I get the most requests for full hand designs rather than a single accent nail, since clients want their manicure to be a whole statement for beach trips and pool days.
Autumn Leaf Nail Design
As mentioned earlier, warm oranges, burgundies, and mustard yellows take over in fall. I also start incorporating a bit more shimmer and matte top coat during this season, since it mimics the slightly dried, textured look of real autumn leaves.
Winter Leaf Nail Design
Winter leaf nail design often shifts toward metallics and cooler tones. Silver, frosted white, deep evergreen, and icy blue accents work well. I have also done a beautiful holly leaf variation for December, pairing deep green leaves with tiny red berry dots for a festive touch.
Also Read : Cherry Nail Design: 50 Sweet, Stunning and Show Stopping Ideas Every Nail Lover Needs To Try
Leaf Nail Design For Short Nails Versus Long Nails
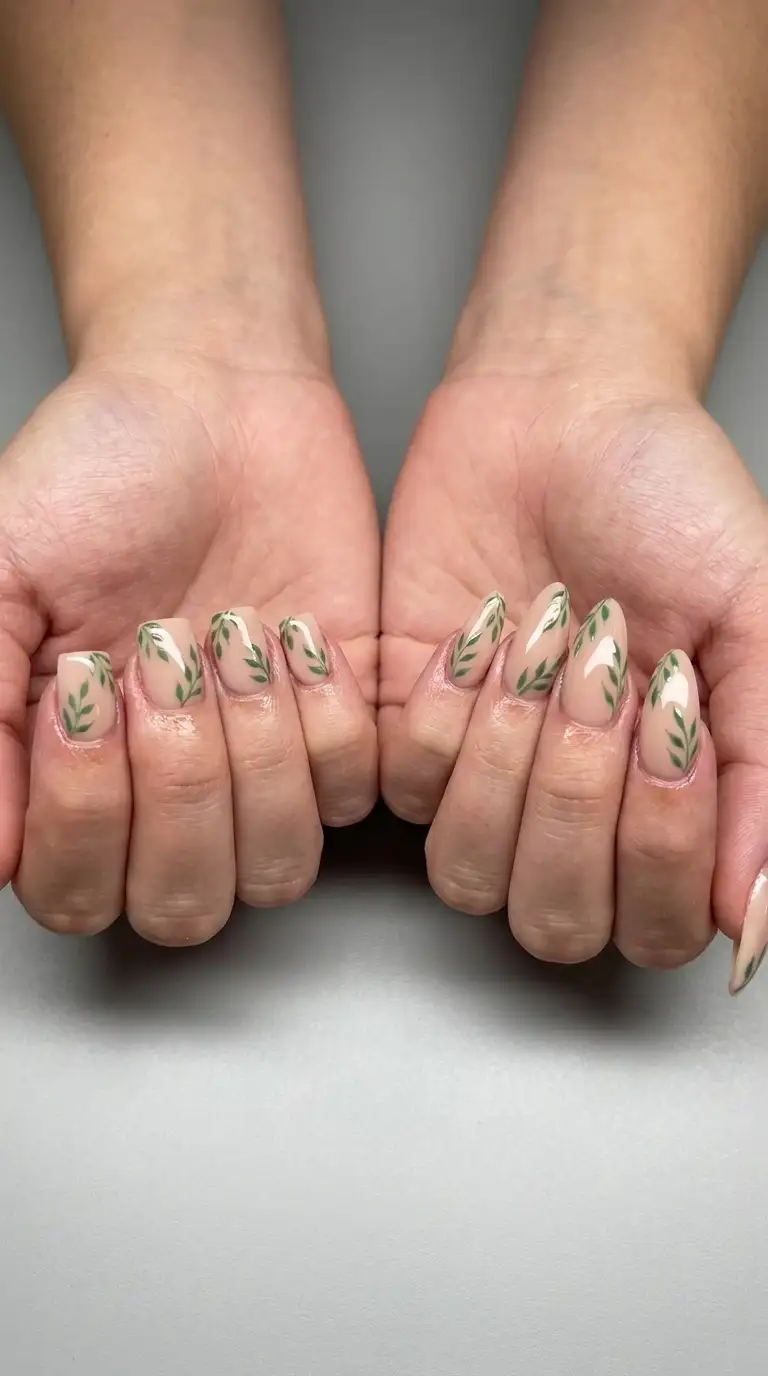
A question I get constantly is whether leaf nail design works on short nails, and the answer is absolutely yes. The technique simply needs to be scaled down.
For short nails, I recommend keeping the leaf design smaller and placing it near the cuticle or along one side, rather than trying to fit a full leaf scene across the whole nail. A single small leaf with one or two veins looks clean and proportional on a shorter nail bed.
For long nails, whether almond, coffin, or square shaped, you have much more room to play with layered leaves, larger vein detail, and even a small vine connecting multiple leaves across several fingers. Long nails also give you more space to add shading and dimension, which really lets a leaf nail design shine.
Regardless of length, the key is proportion. A leaf that looks perfect on a long coffin nail will look oversized and clumsy if painted at the same scale on a short round nail. Always adjust the size of your leaf shapes to match the nail you are working on.
Common Mistakes To Avoid In Leaf Nail Design
After years of doing this at the salon, I have seen (and made) plenty of mistakes. Here are the ones I see most often and how to avoid them.
Using too much polish on the brush. This causes the leaf outline to bleed or blob rather than staying crisp. Always wipe excess polish off your brush on a paper towel before painting a leaf.
Skipping the vein detail. A leaf shape without any vein lines often just reads as a random blob rather than a recognizable leaf. Even one simple center vein makes a huge difference.
Making every leaf identical. Real leaves vary in size and angle. If every single leaf in your leaf nail design looks exactly the same, it can start to look stamped and artificial rather than hand painted.
Rushing the base coat. If your base color is not fully dry or cured before you start painting leaves, the green polish can drag through the base and create a muddy, smeared look.
Overcrowding the nail. More leaves does not always mean a better design. Leave some negative space so the leaves have room to breathe and the eye has a place to rest.
Ignoring nail shape. As mentioned above, not adjusting leaf size to fit the nail shape and length is one of the most common beginner mistakes in leaf nail design.
How To Make Leaf Nail Design Last Longer
Clients often ask how to extend the life of their leaf nail design, especially since the fine detail work can feel more delicate than a simple solid color manicure. Here is what actually helps.
Always finish with a strong gel top coat rather than a regular polish top coat. Gel tends to resist chipping much better and keeps the fine leaf lines protected.
Cap the free edge of the nail with your top coat every time you apply it. This seals the tip of the nail, which is the area most prone to chipping first.
Wear gloves for household chores involving water or chemicals. Dish soap and cleaning products break down polish and gel faster than people expect.
Apply cuticle oil daily. Keeping the surrounding skin and nail plate hydrated helps prevent lifting at the edges, which is often where leaf nail design starts to peel first.
Avoid using your nails as tools. I know it is tempting to pop open a can or scratch off a sticker with your nail, but this is one of the fastest ways to chip fine detail work like leaf nail design.
Book fill in appointments on time if you have gel extensions. Growth at the cuticle line can cause lifting that eventually takes the whole design down with it.
Leaf Nail Design For Special Occasions
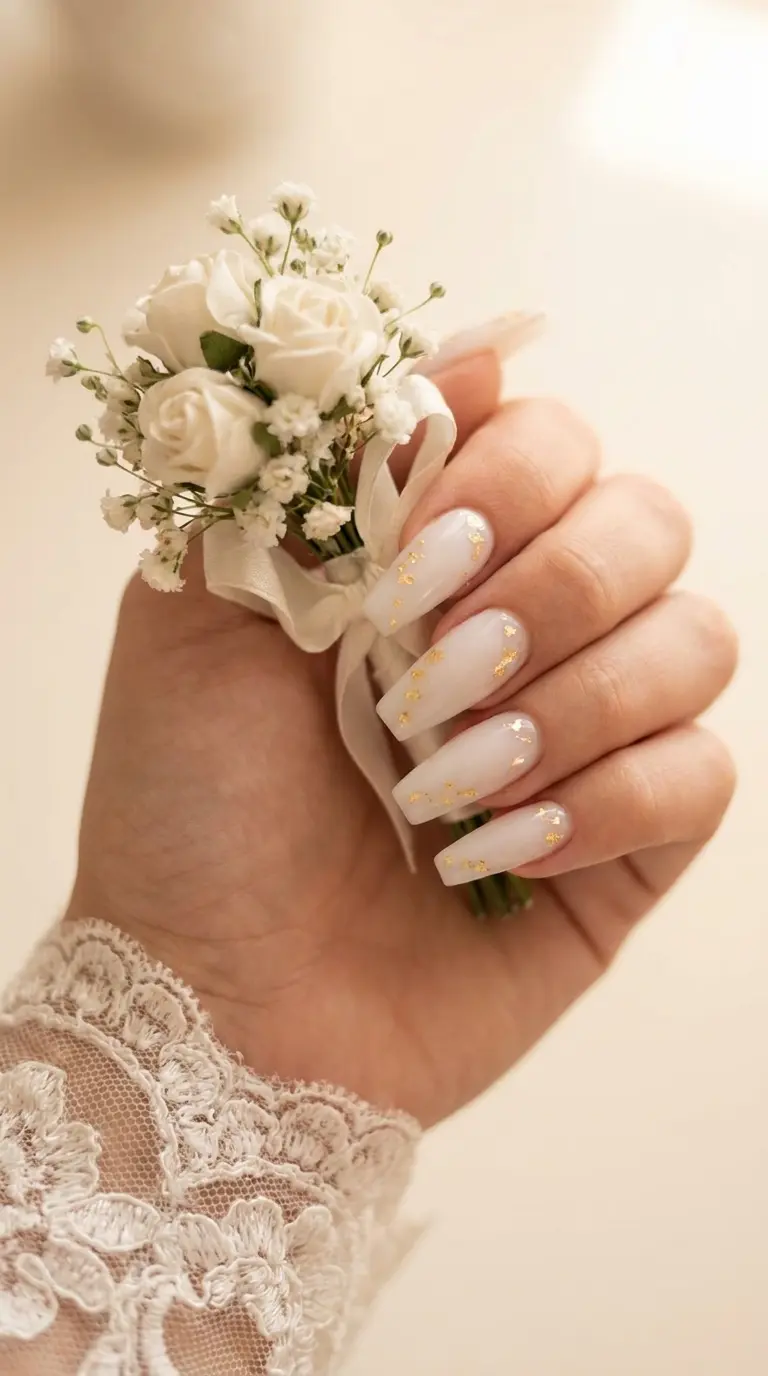
Leaf nail design has become one of my favorite options for special occasions because it strikes a balance between elegant and unique.
For weddings, I often do a soft white or ivory base with delicate gold leaf veins. It complements a bridal bouquet beautifully without competing with the dress or jewelry. Many brides also like incorporating a small pearl or crystal accent alongside the leaves for a bit of extra sparkle.
For proms and formal events, metallic leaf nail design in silver or rose gold pairs wonderfully with most dress colors, since green and gold tones tend to be neutral enough to match a wide range of outfits.
For holiday parties, I lean into deeper jewel tones like emerald and burgundy paired with gold leaf accents, which feels festive without being overly literal like a full Christmas themed nail set.
For garden parties or bridal showers, a fresh sage green and white leaf nail design captures that outdoor, botanical feeling perfectly.
Read Also : Sun Nail Design Ideas That Will Make Your Manicure Glow All Summer Long
DIY Leaf Nail Design At Home Versus Salon
I get asked often whether leaf nail design is something people can realistically do at home, and my honest answer is yes, with a bit of patience.
If you are doing leaf nail design at home, start with simple, minimalist designs before attempting a full tropical or layered look. A single small leaf on one or two accent nails is a great starting point. Practice your brush strokes on a paper towel first to get a feel for how much pressure creates a thin versus thick line.
Investing in a proper detail brush makes an enormous difference. Many people try to do fine leaf nail design work with the standard brush that comes attached to a polish bottle, and it simply is not precise enough for thin vein lines.
That said, there are real advantages to having leaf nail design done professionally. A trained nail artist can create more complex layered designs, use gel products that last significantly longer, and achieve a level of symmetry and shading that takes years of practice to master at home. If you have a big event coming up, like a wedding or milestone birthday, I would always recommend booking with a professional to make sure everything looks flawless and lasts through the entire event.
For everyday, casual leaf nail design, doing it yourself at home is completely doable and honestly a lot of fun once you get the hang of the basic leaf shape.
Leaf Nail Design Trends For This Year
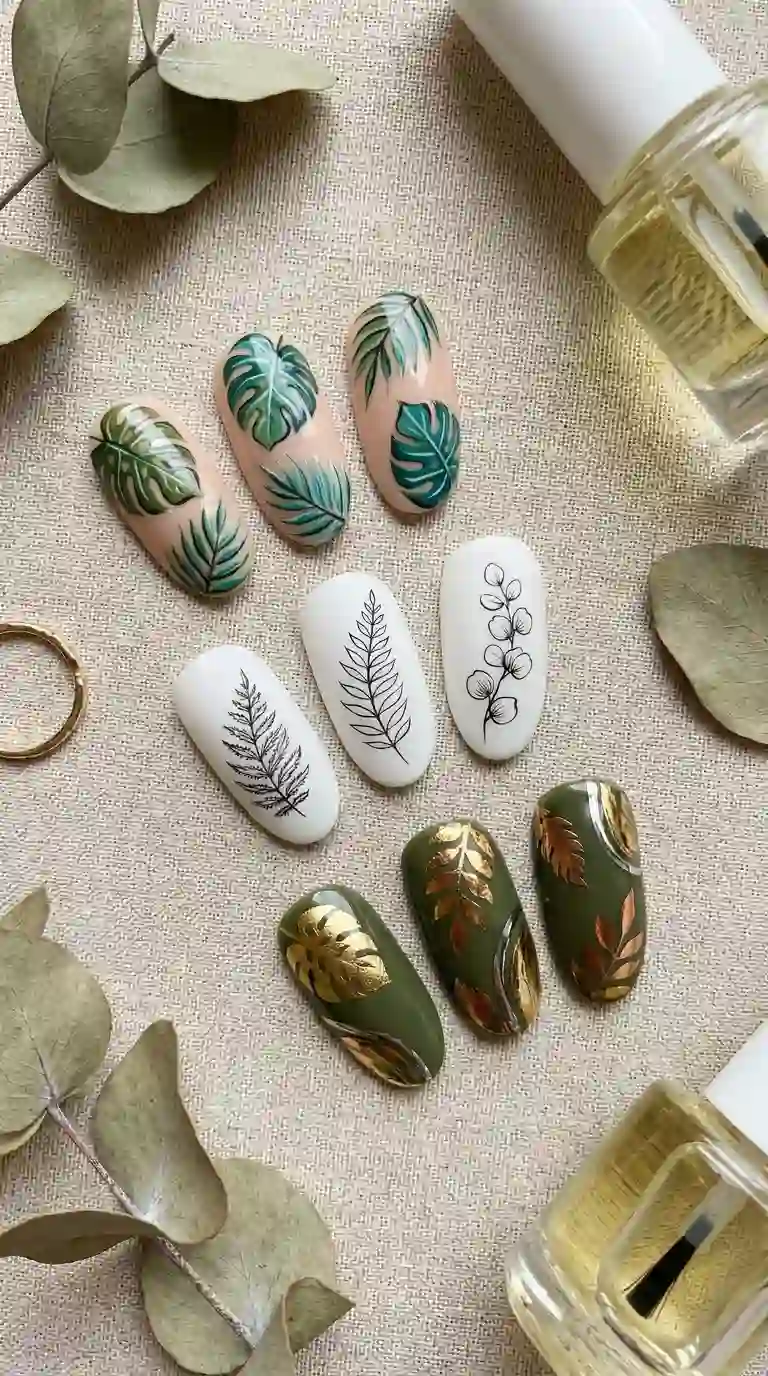
Trends shift constantly in the nail world, but here is what I am seeing dominate leaf nail design requests this year.
Chrome and leaf combinations are having a real moment. Clients are pairing a chrome or pearl finish base with matte leaf shapes on top, creating a beautiful contrast between shiny and flat textures.
Negative space leaf nail design is also trending, where the leaf outline is painted but left unfilled, showing the bare nail or base color through the center of the leaf shape. It creates a lighter, more airy version of the classic look.
3D leaf accents made from acrylic or gel are popping up more in editorial and special occasion nail sets. These raised, sculpted leaves add a tactile dimension that flat painted leaves cannot achieve.
Mixed metallics, meaning combining gold and silver leaf accents on the same set rather than sticking to one metallic tone, is another trend I have noticed picking up steam recently.
Single statement leaf nails, where only one nail on each hand features the leaf design and the rest stay a solid neutral color, continue to be extremely popular for anyone who wants a subtle nod to the trend without a full botanical scene across all ten nails.
Must Read : White Nail Design: The Timeless Manicure Trend Every Nail Lover Needs To Try
My Personal Tips As A Nail Artist
Over the years of doing leaf nail design at my station, I have picked up a handful of small tricks that make a real difference in the final result.
Always angle your brush slightly rather than holding it perfectly straight up and down. This gives you more control over the taper at the tip of each leaf.
Practice your leaf shapes on a nail wheel or a spare acrylic tip before committing to a client’s actual nail. It takes the pressure off and lets you warm up your hand.
Do not be afraid of asymmetry. Some of the most beautiful leaf nail design sets I have created were the ones where I let each leaf be a little different rather than forcing perfect uniformity.
Keep a small dish of acetone nearby to clean your brush between colors. A brush loaded with leftover polish from a previous stroke will muddy your next leaf shade.
Take your time with the vein details. This is the step that separates an amateur looking leaf from a professional looking one, so do not rush through it even if the outline took longer than expected.
Lastly, trust the process even when a leaf looks a bit odd mid design. Sometimes a leaf that looks strange with just the outline transforms completely once the veins and shading are added.
Final Thoughts On Leaf Nail Design
Leaf nail design has earned its place as one of the most versatile, elegant, and genuinely enjoyable nail art trends out there. Whether you prefer a single delicate leaf on an accent nail or a full tropical scene across all ten fingers, there is a version of this style that fits your personality, your season, and your occasion.
What I love most about leaf nail design is how forgiving it is for beginners while still offering enough depth and technique for experienced nail artists to keep pushing creatively. It bridges that gap beautifully, which is probably why it has stuck around in salons and on nail boards for as long as it has.
If you are thinking about trying leaf nail design for the first time, start small, be patient with your brush strokes, and remember that a slightly imperfect leaf often looks more natural than a stiff, perfectly symmetrical one. Nature is not perfectly symmetrical either, and that is exactly what makes real leaves beautiful.
Frequently Asked Questions
What is leaf nail design?
Leaf nail design is a nail art style featuring painted, stamped, or applied leaf shapes on the nails, ranging from minimalist single leaf accents to full botanical scenes with veins and shading.
Is leaf nail design hard to do at home?
No, leaf nail design is actually one of the more beginner friendly nail art styles. Starting with a simple single leaf on one accent nail is a great way to practice before attempting more detailed designs.
What colors work best for leaf nail design?
Sage green, olive, emerald, and forest green are the most popular leaf tones, usually paired with a nude, white, or milky pink base for contrast. Gold or metallic accents are also commonly added for extra dimension.
How long does leaf nail design last?
With gel polish and proper top coat application, leaf nail design can last two to three weeks, similar to any standard gel manicure. Regular polish versions typically last about a week before chipping.
What brush do I need for leaf nail design?
A fine tip detail brush with a pointed end works best for painting leaf outlines and thin vein lines. Many nail artists use a size 000 or 5/0 detail brush for this kind of work.
Can I do leaf nail design on short nails?
Yes, leaf nail design works beautifully on short nails as long as the leaf shapes are scaled down to fit the smaller nail surface. A single small leaf near the cuticle often looks best on shorter nail beds.
What is the difference between leaf nail design and floral nail design?
Leaf nail design focuses on botanical leaf shapes rather than flower petals, giving it a more earthy, natural, and often more minimalist appearance compared to floral designs which tend to be more colorful and detailed.
Is leaf nail design in style right now?
Yes, leaf nail design has become one of the most popular botanical nail art trends recently, appearing frequently across social media and salon requests due to its versatility across seasons and occasions.
Can leaf nail design work for a wedding?
Absolutely. Many brides choose soft white or ivory bases paired with delicate gold leaf accents for a bridal leaf nail design that feels elegant without overpowering the rest of the bridal look.
What nail shape looks best with leaf nail design?
Leaf nail design works on any nail shape, though almond and coffin shapes offer more surface area for detailed leaf placement, while short square or round nails suit smaller, simplified leaf accents.