
There is a specific kind of quiet that happens in a nail studio right before someone tries swirl nail designs for the first time. They sit down, look at the little dish of polish colors lined up on the desk, and say some version of the same sentence. “I don’t think I can do this. I can’t even draw a straight line.” And every single time, I smile a little, because swirl nail designs are one of the very few nail art styles where a shaky hand actually works in your favor. The wobble is the whole point.
I have painted more swirls than I could ever count at this stage of my career, on brides the night before their wedding, on teenagers who saved up birthday money for a full set, on tired nurses who wanted five minutes of something pretty in an otherwise exhausting week. Swirl nail designs keep showing up in my chair no matter what season it is, no matter what the trend cycle says is “in” right now, and after years of watching this pattern repeat itself, I finally understand why. Swirls forgive you. They do not ask for perfect symmetry or a steady wrist. They ask for movement, personality, and a little bit of courage with the brush.
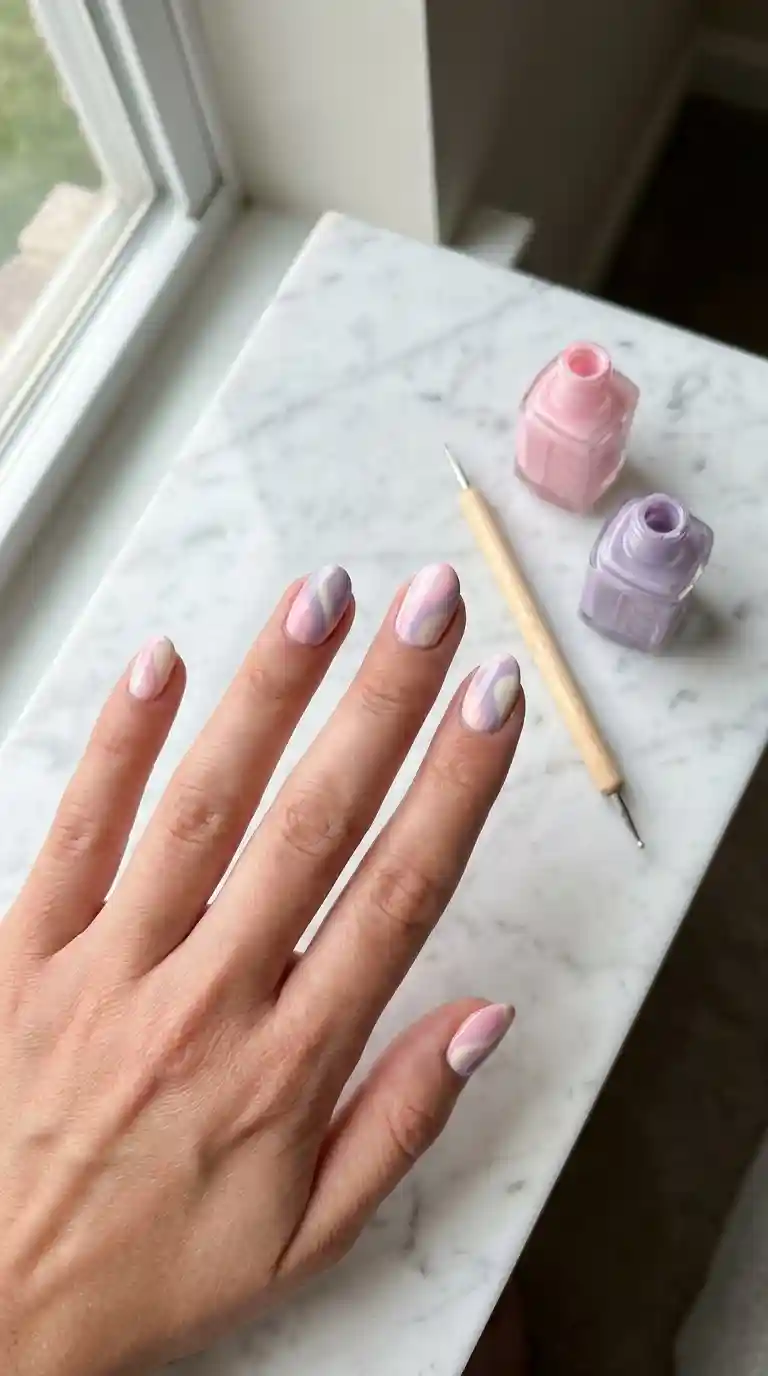
This guide is everything I know about swirl nail designs, written the way I would explain it to a friend sitting across the table from me, polish bottles open, good lighting, maybe a cup of tea going cold because we got too into the conversation. By the end of it you will understand what swirl nail designs actually are, which tools genuinely matter and which ones are a waste of money, how to pick colors that flatter your skin instead of fighting it, and how to keep your swirl nail designs looking fresh instead of turning into a smudgy mess three days later.
Also Read: Cherry Nail Design: 50 Sweet, Stunning and Show Stopping Ideas Every Nail Lover Needs To Try
What Are Swirl Nail Designs, Exactly?
At the most basic level, swirl nail designs are exactly what the name suggests. You take a base color, let it dry, and then use a thin brush or a dotting tool to drag curved, looping lines of contrasting polish across the nail. The lines cross over each other, spiral into little coils, or drift lazily from the cuticle to the tip. There is no single template you have to follow, which is exactly why swirl nail designs have stuck around as long as they have.
Some artists describe swirl nail designs as controlled chaos, and I actually think that is a fair way to put it. You are not trying to paint a perfect flower or a crisp geometric line. You are trying to create movement. A good swirl feels like it is caught mid motion, almost like you paused a video of paint being poured into water and captured one single frame. That sense of motion is what separates a great swirl nail design from a lazy one.
I have noticed that clients often lump swirl nail designs in with abstract nail art, and while they are cousins, they are not identical twins. Abstract nail art can include splatters, blocks of color, uneven shapes, and random dots. Swirl nail designs are more specific. The defining feature is always the curved, flowing line. If you remove the curve, you no longer have a swirl, you have something else entirely.
The Difference Between Swirl Nail Designs And Marble Nails
This question comes up in my chair almost weekly, so let me clear it up here too. Marble nails use a water marbling technique, where polish is dropped onto the surface of water and then picked up onto the nail in a veined, stone like pattern. Swirl nail designs, on the other hand, are painted freehand directly onto the nail using a brush. Marble nails tend to look more chaotic and fluid, almost like actual stone. Swirl nail designs feel more deliberate, more like brushstrokes with intention behind them. Both are beautiful, but if you ask for a marble mani and expect swirl nail designs, you might be a little disappointed, and vice versa.
Why Swirl Nail Designs Have Become So Popular
I have been doing this job through a lot of trend cycles. I watched chrome nails explode, I watched the “glazed donut” moment take over every salon in the country, and I watched French tips get reinvented about a dozen different ways. Very few trends have the staying power that swirl nail designs have shown, and I think there are a few real reasons behind it, not just marketing hype.
First, swirl nail designs are genuinely beginner friendly. You do not need years of training to attempt them, which cannot be said for detailed floral work or intricate lace patterns. Second, they photograph beautifully. Social media rewards texture and movement, and a well done swirl catches the light in a way that flat, single color polish simply cannot compete with. Third, and this is the part I think gets overlooked, swirl nail designs are endlessly adaptable. The same basic technique can be dressed up for a wedding or dressed down for a casual Tuesday, which makes them one of the most versatile styles in the entire nail art world.
I also think there is something almost nostalgic about swirl nail designs. The look pulls from decades of pattern history, from psychedelic seventies prints to the swirled soft serve ice cream cones we all grew up eating. There is a comfort baked into the shape itself. It reminds people of something familiar even when the color palette is brand new.
Swirl Nail Designs Across Social Media
Search engines and social platforms both show a steady, climbing interest in swirl nail designs year over year, and anyone scrolling Pinterest or TikTok right now can see why. The hashtag communities built around swirl nail designs are enormous, filled with tutorials, before and after transformations, and endless color combination inspiration. What strikes me most is how many different aesthetics fall under this one umbrella. You can find minimalist, single toned swirl nail designs sitting right next to loud, neon, maximalist versions, and both get equal love online.
Read Also : Sun Nail Design Ideas That Will Make Your Manicure Glow All Summer Long
Tools You Actually Need For Swirl Nail Designs
Let me save you some money here, because I have watched too many clients and students buy entire kits of specialty tools they never end up using. Swirl nail designs do not require a professional studio setup. Here is what genuinely matters.
A Thin Detail Brush
This is the single most important tool for swirl nail designs. Look for a brush labeled as a size 000 or 00 nail art liner brush. The bristles should come to a fine point and hold their shape when wet. A cheap brush that splays out in three directions will fight you the entire time, and no amount of skill will fix a bad brush.
A Dotting Tool
Dotting tools are useful for adding little accent dots between your swirls, and some artists actually prefer using the rounded tip of a dotting tool to drag out their swirl shapes instead of a brush. Both approaches work. I personally switch between the two depending on how thick I want the line to be.
Base Coat And Top Coat
I cannot stress this enough. Skipping base coat leads to staining, especially with darker swirl colors like navy or black. Skipping top coat means your swirl nail designs will scratch off within a day or two. These two products are not optional extras, they are the foundation of a swirl that actually survives real life.
Thinner Or Polish Remover For Consistency
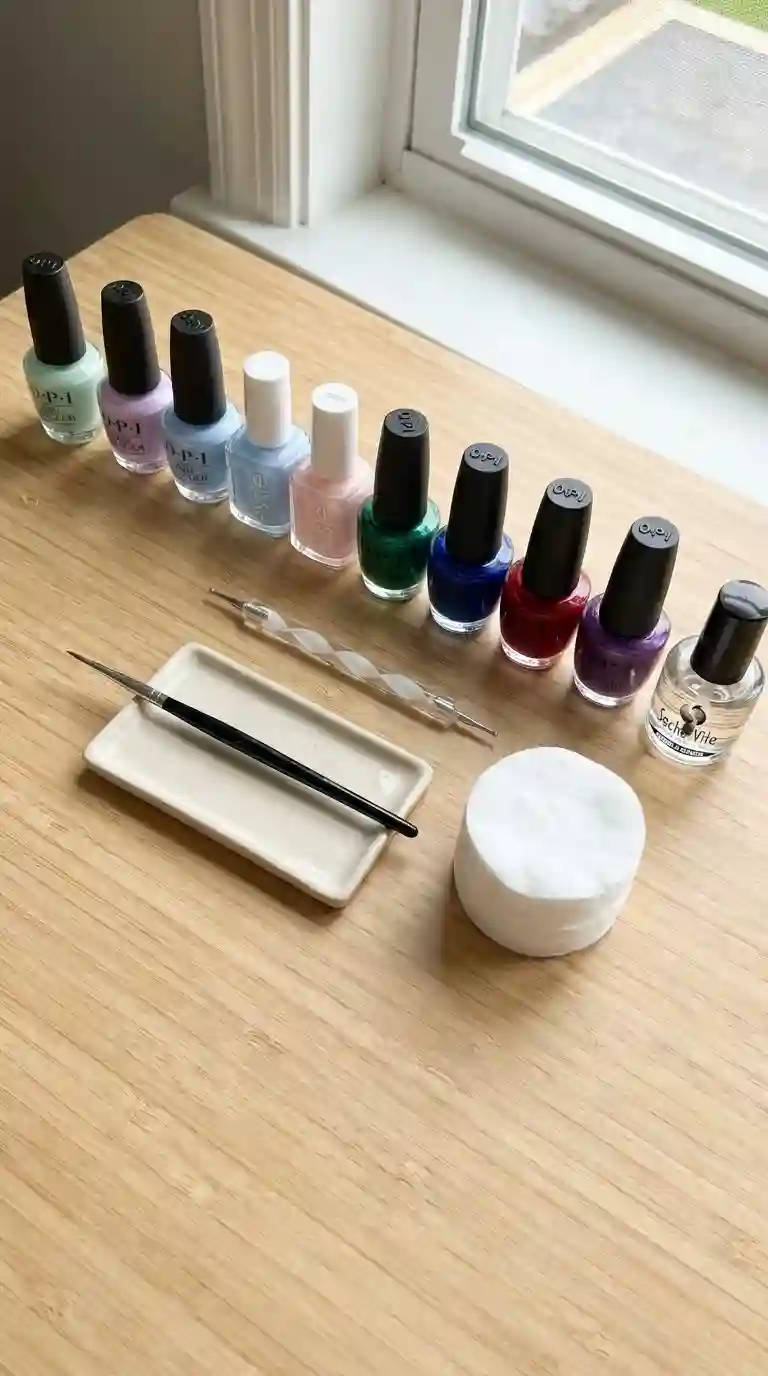
Swirl nail designs work best when the polish has the right consistency, thin enough to glide but not so thin that it becomes translucent. A tiny drop of polish thinner mixed into an older bottle can make a huge difference in how smoothly your swirls flow across the nail.
Gel Polish Versus Regular Polish For Swirl Nail Designs
If you are doing swirl nail designs at home for a one time event, regular polish is fine and much easier to clean up. If you want your swirl nail designs to last two to three weeks without chipping, gel polish is the better choice, though it does require a UV or LED lamp to cure between steps. I personally lean toward gel for anything with fine detail work because it does not dry out mid design the way regular polish sometimes can, especially if you are a slower painter working through several colors.
How To Create Swirl Nail Designs At Home, Step By Step
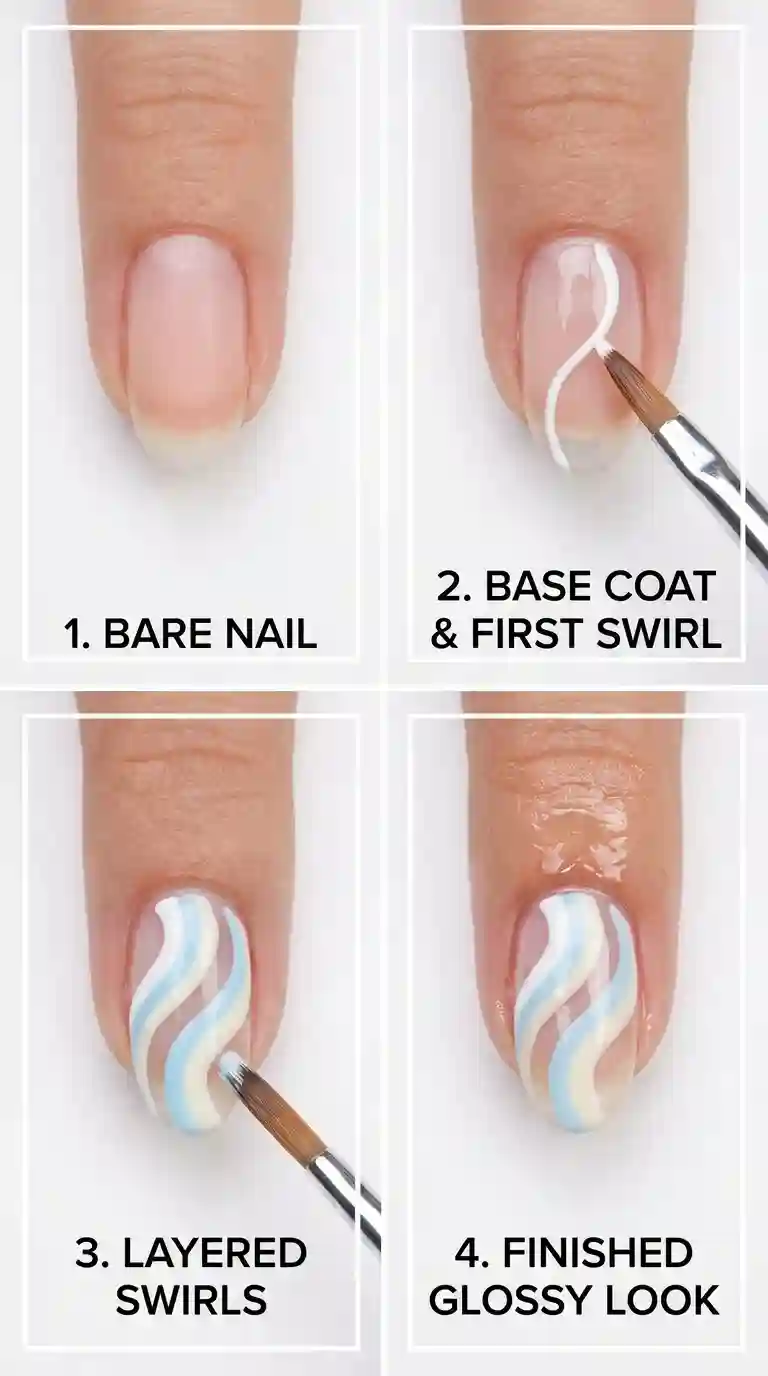
I get asked constantly whether swirl nail designs are something a beginner can actually pull off without paying salon prices every single time. The honest answer is yes, with practice. Here is the exact process I walk my newer clients through when they want to try swirl nail designs themselves between appointments.
Also Read : White Nail Design: The Timeless Manicure Trend Every Nail Lover Needs To Try
Step One: Prep Your Natural Nail
Push back your cuticles gently, shape your nails with a file, and buff the surface lightly so the polish has something to grip onto. Wipe each nail with a lint free pad soaked in a little rubbing alcohol to remove oils. This step gets skipped constantly and it is the number one reason swirl nail designs peel off early.
Step Two: Apply Your Base Color
Choose a solid base shade and apply two thin coats, letting each one dry fully. Most swirl nail designs use a soft, neutral base like nude, white, or pale pink, though bold bases like black or deep red are having a real moment right now too. Let this base cure completely before moving forward. Painting swirls onto a wet base will drag the colors together into mud instead of a clean swirl.
Step Three: Load Your Brush With The Accent Color
Dip your thin detail brush into your accent polish and wipe off the excess on the neck of the bottle. You want just enough polish on the brush to draw a smooth, continuous line, not so much that it pools into a blob.
Step Four: Draw Your First Swirl
Starting from either the cuticle or the side edge of the nail, drag the brush in a loose, curving motion. Do not try to control every millimeter. Let your wrist move naturally. This is where most beginners tense up, and tension is exactly what makes swirl nail designs look stiff instead of fluid.
Step Five: Layer In Additional Colors
Once your first swirl is placed, clean your brush and repeat the process with a second or third color, weaving the new lines around the first. This is where swirl nail designs really come alive, in the layering. A single color swirl is pretty, but a layered swirl with two or three tones is what gets you stopped in the grocery store checkout line.
Step Six: Seal With Top Coat
Once everything is fully dry, which usually takes longer than people expect with layered designs, apply a glossy or matte top coat depending on your preference. This step locks in your swirl nail designs and protects the artwork from daily wear.
Best Nail Shapes For Swirl Nail Designs
I get this question in almost every consultation, and the truth is that swirl nail designs can work on any shape, but some shapes genuinely showcase the art better than others.
Almond And Coffin Shapes
These elongated shapes give the swirl line more room to breathe. A curve needs distance to actually curve, and shorter shapes sometimes cut that movement off too early. If someone comes in specifically asking for a dramatic, editorial style swirl nail design, I almost always steer them toward almond or coffin.
Square And Squoval Shapes
These shapes work beautifully for a cleaner, more restrained version of swirl nail designs. Because the nail bed is wider and flatter, the swirls tend to read as more graphic and structured rather than flowing and loose. This is a great option for anyone who wants swirl nail designs for a professional office setting.
Short, Natural Nails
Do not let anyone tell you that swirl nail designs only work on long, dramatic nails, because that is simply not true. On short nails, I scale the swirl down, usually to just one or two curved lines instead of a full layered pattern, and the result is subtle and elegant rather than busy. Some of my favorite swirl nail designs I have ever painted were on nails barely past the fingertip.
Popular Color Combinations For Swirl Nail Designs
This is genuinely my favorite part of the entire process, because color is where swirl nail designs go from a technique to a personality statement. Below are the combinations I return to again and again, along with why they work.
Pastel Swirl Nail Designs
Soft pink, baby blue, lavender, and mint green swoop together over a milky white or sheer nude base. This combination is soft, feminine, and works for almost any occasion, from a baby shower to a spring wedding. Pastel swirl nail designs are consistently the most requested option in my chair during the warmer months.
Black And White Swirl Nail Designs
There is something almost architectural about a black and white swirl. It reads as edgy without being loud, and it pairs well with literally any outfit because black and white match everything. I often suggest this combination to clients who normally stick to solid colors but want to test the waters with nail art for the first time.
Neon Swirl Nail Designs
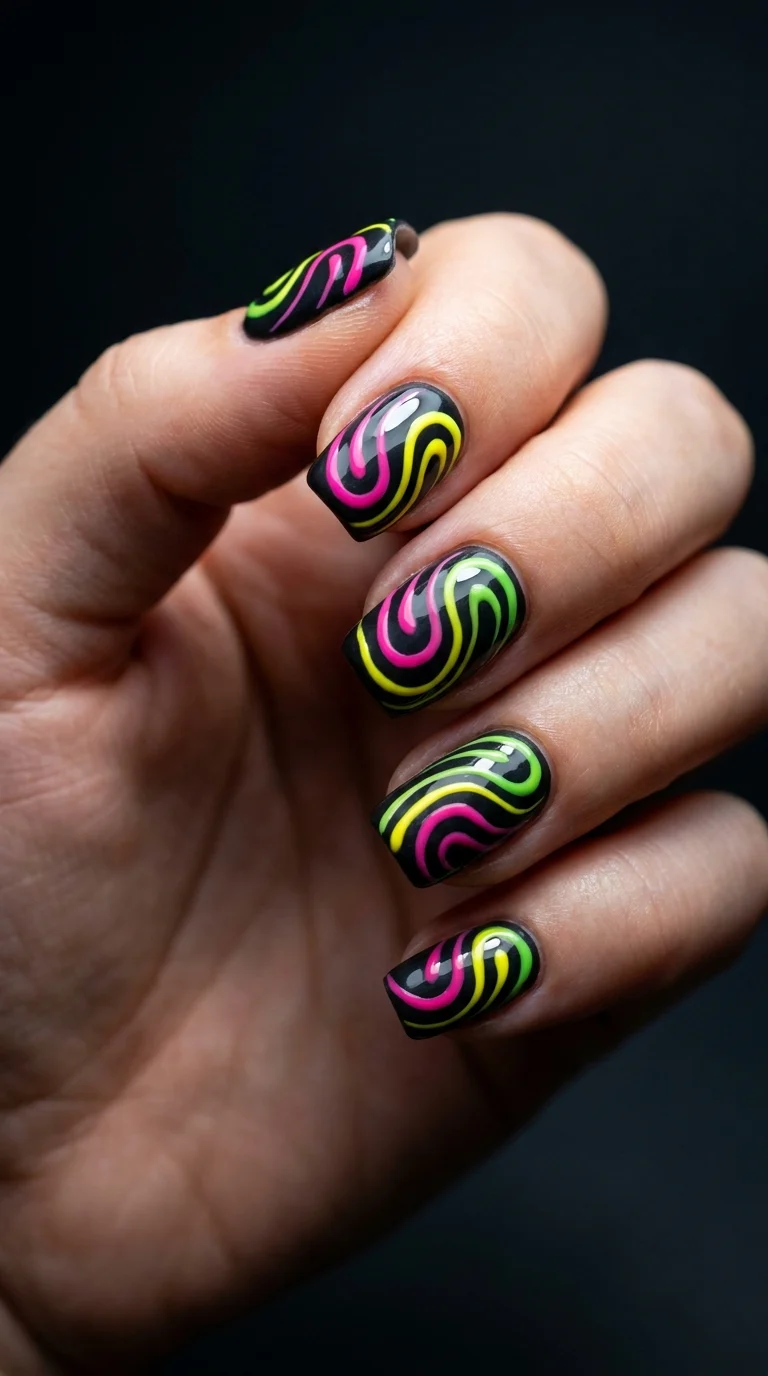
Bright orange, hot pink, electric green, and yellow layered over a black or dark navy base create a genuinely striking look. Neon swirl nail designs are the ones that stop people in a crowded room. They are bold, a little bit rebellious, and honestly a lot of fun to paint because the color contrast does most of the visual work for you.
French Tip Swirl Nail Designs
Instead of the classic straight white line at the tip, this variation uses a swirled, colorful border instead. It keeps the elegance of a French manicure while adding personality and movement. This is one of the most requested versions of swirl nail designs for brides who want something a little different from a traditional white tip.
Chrome And Metallic Swirl Nail Designs
Metallic swirl nail designs use chrome powder or metallic polish for the swirl lines instead of a flat color, which creates a mirror like shine that shifts depending on the angle of the light. These take a bit more patience to apply evenly, but the payoff is worth it for anyone who wants their swirl nail designs to feel a little more luxurious.
Earth Tone Swirl Nail Designs
Terracotta, sage green, cream, and warm brown swirled together give an autumn inspired, grounded feeling that has been climbing in popularity every year I have been in this industry. Earth tone swirl nail designs feel sophisticated and a little bit unexpected, which is exactly why they keep gaining traction with clients who want something outside the usual pink and white palette.
Also Read: 50+ Gorgeous Acrylic Nail Designs That Will Instantly Upgrade Your Manicure
Swirl Nail Designs For Different Occasions
One of the reasons swirl nail designs remain so popular in my studio is that the style genuinely adapts to whatever life event a client has coming up.
Wedding Swirl Nail Designs
Brides tend to gravitate toward soft, muted swirl nail designs in white, ivory, champagne, and blush tones, sometimes with a hint of pearl shimmer worked into the swirl itself. I usually recommend keeping the swirl subtle for wedding day nails since the focus should stay on the dress and the ring, not compete with them.
Everyday Casual Swirl Nail Designs
For clients who wear their nails to the office or to run errands, I keep the color palette neutral, usually nude, taupe, and soft white, with just one or two thin swirl lines per nail instead of a full pattern. This keeps swirl nail designs looking polished and professional rather than overwhelming.
Party And Night Out Swirl Nail Designs
This is where I go all in on color saturation and metallic finishes. Deep jewel tones like emerald, sapphire, and ruby swirled with gold accents create a look that photographs beautifully under club lighting and camera flash, which matters more than people think when it comes to nail art for a big night out.
Holiday Swirl Nail Designs
Red and green swirl combinations, sometimes with a little gold glitter tucked in, are extremely popular around the winter holidays. I have also painted plenty of orange and black swirl nail designs for Halloween, and pastel candy colored versions for Easter. The technique itself barely changes, only the color story shifts with the season.
Swirl Nail Designs Trends Season By Season
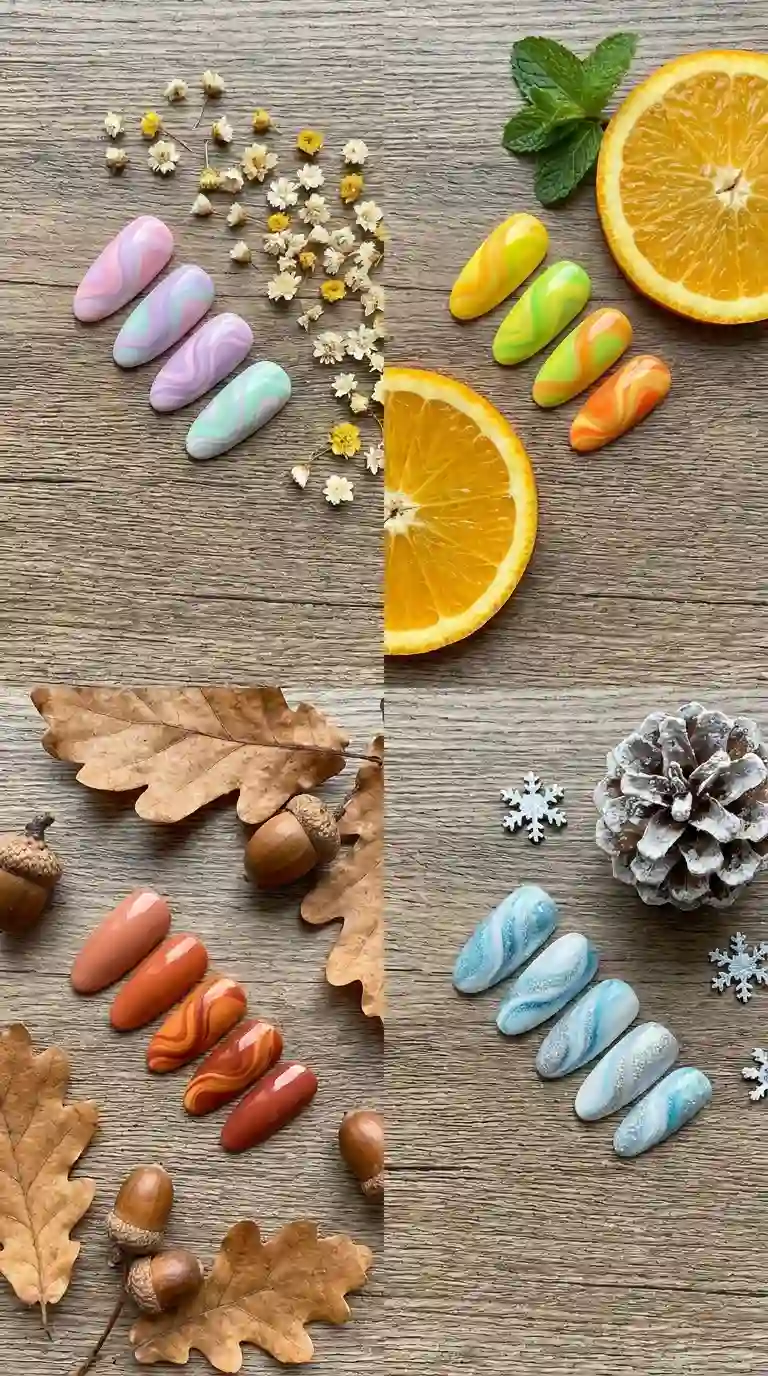
Spring Swirl Nail Designs
Spring brings out the soft, floral leaning side of swirl nail designs. Think buttery yellow, baby blue, and blush pink swirled over a milky base. Clients often ask me to add tiny flower accents between the swirls during this season, and the combination genuinely feels like the first warm day of the year translated onto a nail.
Summer Swirl Nail Designs
Summer swirl nail designs lean tropical and saturated, with coral, turquoise, and citrus orange showing up constantly in my color trays between June and August. There is also a noticeable rise in requests for glossy, high shine finishes during summer, since the sun catches the swirl detail beautifully outdoors.
Autumn Swirl Nail Designs
Once the weather cools down, my clients start asking for deeper, moodier tones. Rust, mustard, forest green, and chocolate brown swirl nail designs dominate my autumn appointment book, often paired with a matte top coat instead of glossy for a more grounded, cozy feel.
Winter Swirl Nail Designs
Winter is when I see the most experimentation with metallics and icy tones. Silver, ice blue, and deep burgundy swirl nail designs show up constantly around the holiday season, and I frequently add a touch of fine glitter along the swirl edge to catch the light the way snow does.
Common Mistakes People Make With Swirl Nail Designs
After years of teaching this technique to newer nail artists and curious clients, I have noticed the same handful of mistakes show up over and over. Avoiding these will save you a lot of frustration.
Overloading The Brush
Too much polish on the brush leads to thick, uneven lines that pool at the edges instead of flowing smoothly. Wipe your brush against the neck of the bottle before you touch the nail, every single time.
Rushing Between Layers
If you paint your second swirl color before the first one is dry, the two will smear together into a muddy mess instead of two distinct, clean lines. Patience genuinely matters more than raw skill when it comes to swirl nail designs.
Skipping The Practice Round
I always tell newer artists and DIY clients to practice their swirl motion on a spare nail wheel or even a scrap of paper before touching real nails. Thirty seconds of practice strokes will teach your wrist the movement so your actual swirl nail designs come out confident instead of hesitant.
Choosing Colors That Do Not Contrast Enough
If your base and your swirl colors sit too close together on the color wheel, the whole design can look flat and washed out in photos, even if it looks fine in person under bright salon lighting. A little contrast goes a long way in making swirl nail designs pop.
Forgetting To Cap The Free Edge
When applying your top coat, always drag it across the very tip of the nail, not just the top surface. This small habit dramatically extends how long your swirl nail designs will last before chipping at the edges.
How To Make Swirl Nail Designs Last Longer
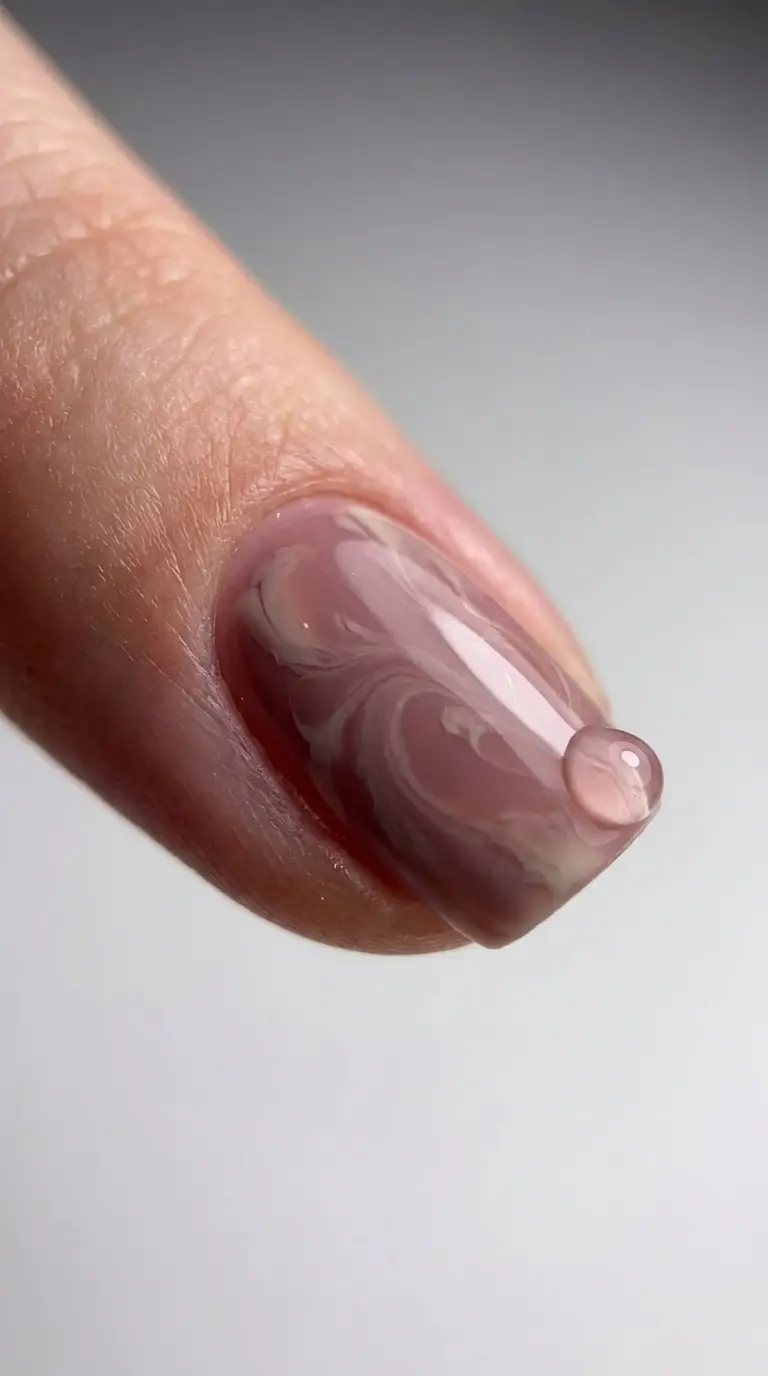
I hear the same complaint from clients constantly, that their swirl nail designs looked amazing on day one and chipped by day three. Nine times out of ten, this comes down to a handful of fixable habits rather than a flaw in the design itself.
Always apply a proper base coat before you start, since this creates a barrier between your natural nail and the polish, which prevents staining and helps everything adhere better. Use thin coats rather than thick ones, since thick polish takes longer to cure and is more prone to denting before it fully hardens. Cap the free edge with every single layer, including your top coat, to seal the design against daily wear from typing, washing dishes, and general life.
If you are using gel polish for your swirl nail designs, make sure each layer gets a full, proper cure under your lamp before moving to the next step. Rushing the curing process is one of the biggest reasons gel swirl nail designs peel prematurely. For regular polish, give yourself more drying time than you think you need, ideally a full hour before you do anything with your hands that involves pressure or friction.
Lastly, moisturize your cuticles daily with a nourishing oil. Dry, brittle cuticles lead to lifting at the base of the nail, which is often the very first place a manicure starts to fail, swirl nail designs included.
Must Read : Nude Nail Designs: The Ultimate Guide to Effortless, Elegant Nails for Every Occasion
Swirl Nail Designs For Short Nails
I want to spend a little extra time here because I think short nail swirl designs get overlooked constantly in favor of longer, more dramatic examples online. In my honest opinion, some of the most elegant swirl nail designs I have ever created were on nails barely a few millimeters past the fingertip.
The trick with short nails is scale. A busy, multi layered swirl that looks stunning on a long almond nail can look cramped and messy on a short square nail simply because there is not enough surface area for all those lines to breathe. Instead, I recommend one or two clean swirl lines per nail, using a thinner brush than you might use on longer nails, and choosing an accent nail approach rather than covering all ten nails in the full pattern.
Short nail swirl designs are also incredibly practical for anyone who works with their hands often, whether that is in healthcare, food service, or any job where long nails simply are not realistic. You do not have to give up expressive nail art just because your nails are short. Swirl nail designs adapt beautifully to a smaller canvas when the scale is adjusted properly.
DIY Swirl Nail Designs Versus Salon Swirl Nail Designs
I get this question from clients often enough that I think it deserves its own honest section. Should you attempt swirl nail designs at home, or is this something worth paying a professional for?
Here is my genuinely balanced take after doing this professionally for years. If you are looking for a quick, low pressure design for a casual day, DIY swirl nail designs are absolutely achievable with a little patience and the right thin brush. The technique rewards imperfection, which makes it one of the most forgiving styles for beginners to attempt at home.
That said, if you want a very precise, layered, editorial style swirl with clean lines and long lasting gel application, a trained nail technician will get you there faster and with a more polished, even finish. There is real skill in controlling line thickness consistently across ten nails, something that takes most people quite a bit of practice to master.
My honest advice is to try DIY swirl nail designs first as a way to learn what colors and styles you actually like, and then bring reference photos to your next salon appointment once you know your preferences. This saves you money on trial and error and helps your nail artist understand your vision immediately.
Swirl Nail Designs And Skin Tone
Something I wish more articles talked about honestly is how much skin tone affects which swirl nail designs will look their absolute best on you. This is not about limiting anyone’s choices, it is simply about understanding undertones so your manicure feels intentional rather than accidental.
For warmer, golden undertones, earth tones, coral, warm reds, and golden metallics tend to make swirl nail designs feel especially harmonious against the skin. For cooler, pink or blue undertones, jewel tones like sapphire, emerald, and icy pastels tend to create a beautiful contrast that makes the swirl pattern stand out even more.
If you are unsure of your undertone, a quick trick I share with clients constantly is to check the veins on the inside of your wrist in natural light. Greenish veins usually indicate a warmer undertone, while bluish or purplish veins usually indicate a cooler undertone. Once you know this, choosing colors for your swirl nail designs becomes a much less overwhelming process.
Nail Art Products I Personally Recommend For Swirl Nail Designs
I try to stay neutral about specific brands in most of my writing, but I do think it is genuinely helpful to point people toward the type of product rather than a random guess. Look for gel polish lines marketed specifically as nail art or detail lines, since these are formulated to be slightly thicker and more pigmented than standard gel polish, which makes them hold their shape better when painting fine swirl detail.
For regular polish, choose formulas labeled quick dry or that mention a thin, brush friendly consistency on the label. Avoid extremely old bottles of polish that have started to thicken, since thick, gloopy polish is one of the fastest ways to ruin an otherwise beautiful swirl nail design attempt.
Read Also: 50 Stunning Red Nail Designs That Will Instantly Upgrade Your Manicure Game
Removing Swirl Nail Designs Without Damaging Your Nails
Eventually every manicure has to come off, and swirl nail designs are no exception. If you used regular polish, a standard acetone based remover with a cotton pad will lift the design in a few minutes of gentle wiping. If you used gel polish, resist the urge to peel it off, since this can strip layers off your natural nail plate and leave it thin and weak.
Instead, soak a cotton pad in acetone, place it directly on the nail, wrap the fingertip in a small piece of foil, and let it sit for about ten to fifteen minutes before gently pushing the softened gel off with a cuticle stick. Follow up with a nourishing cuticle oil and a light buff, since your nails deserve a little recovery time between one set of swirl nail designs and the next.
Final Thoughts On Swirl Nail Designs
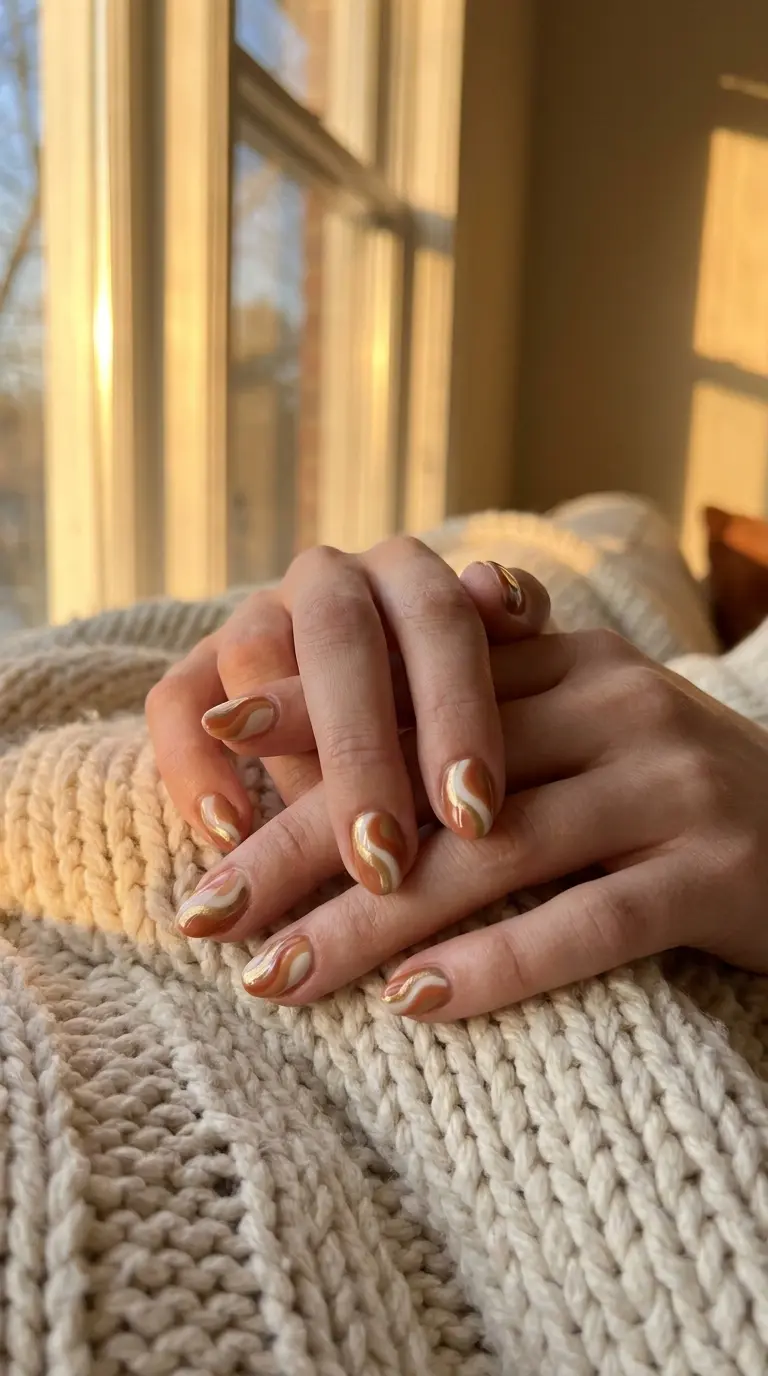
After everything I have shared here, I hope it is clear why swirl nail designs have earned such a permanent spot in the nail art world. They are approachable enough for a nervous beginner painting their own nails at the kitchen table, yet detailed enough to challenge a professional artist who wants to push their skill further. They adapt to every season, every occasion, and every personal style, which is genuinely rare for a single nail art technique.
If you take nothing else away from this guide, take this. Do not aim for perfection when you paint swirl nail designs. Aim for movement. Let your wrist relax, let the lines curve naturally, and trust that a little bit of imperfection is exactly what makes this style so beautiful in the first place. Every swirl I have ever painted has been a little bit different from the last, and that is precisely the point.
Frequently Asked Questions
Are swirl nail designs hard to do?
Swirl nail designs are actually one of the more beginner friendly nail art styles available. Unlike detailed floral or geometric patterns, swirls forgive a shaky hand because the whole aesthetic is built around loose, flowing movement rather than perfect symmetry.
What tools do I need for swirl nail designs?
At a minimum you need a thin detail brush, a base coat, your chosen polish colors, and a top coat. A dotting tool is a helpful extra but not strictly required to create beautiful swirl nail designs.
Can I do swirl nail designs on short nails?
Yes, absolutely. Short nail swirl designs work best when you scale the pattern down to one or two clean lines rather than attempting a busy, layered design that needs more surface area to breathe.
How long do swirl nail designs last?
With gel polish and proper application, swirl nail designs can last two to three weeks. With regular polish, expect closer to five to seven days before you start seeing wear at the tips.
What colors work best for swirl nail designs?
There is no single best answer here since it depends heavily on personal preference and skin undertone, but pastel combinations, black and white, and neon over dark bases are consistently the most requested swirl nail designs in my experience.
Do swirl nail designs work on all nail shapes?
Yes, though almond and coffin shapes tend to showcase the flowing line the best because they offer more length for the curve to develop. Square and short nails still look great, just with a more compact version of the swirl.
How do I keep my swirl nail designs from smudging?
Let each layer dry completely before adding the next color, and avoid touching your nails for at least thirty minutes after your final top coat. Rushing this step is the most common reason swirl nail designs smudge.
What is the difference between swirl nails and marble nails?
Swirl nail designs are painted freehand directly onto the nail with a brush, creating deliberate curved lines. Marble nails use a water marbling technique that creates a more random, stone like veined pattern.
Can beginners really do swirl nail designs at home?
Yes, and I genuinely encourage it. Practicing your swirl motion on a spare nail wheel or piece of paper first will help your wrist learn the movement before you attempt it on your actual nails.
What polish consistency is best for swirl nail designs?
You want a thin, smooth consistency that glides easily off a fine detail brush. Thick or gloopy polish makes clean swirl lines nearly impossible, so a few drops of thinner in an older bottle can genuinely help.
Are swirl nail designs in style right now?
Yes, swirl nail designs have remained consistently popular for several years now and continue trending strongly across social platforms, with new color and shape variations emerging every season.