
I still remember the first time a client sat down in my chair and pulled up a photo of tiny pearly shells scattered across a soft cream base. She said one word. Seashell nails. I had done pearl accents before, I had done ocean themed sets before, but something about that photo made me stop and actually study what made it work. That was almost four years ago, and since then seashell nails have become one of the most requested designs in my salon, especially the moment spring rolls around and everyone starts dreaming about sand between their toes.
If you are here because you typed seashell nails into Google at midnight while scrolling through inspiration photos, I understand completely. This look has a way of pulling you in. It is soft, it is elegant, it feels expensive without actually being complicated, and it works for almost every skin tone and every nail shape. In this guide I am going to walk you through everything I have learned as a working nail artist about seashell nails, from the exact products I reach for to the mistakes I see beginners make over and over again.
This is not a quick listicle written by someone who has never held a nail brush. This is the kind of guide I wish existed when I was first trying to figure out how to recreate seashell nails on my own hands using nothing but a kitchen table and cheap polish. Grab a cup of tea and settle in, because we are covering a lot of ground.
Also Read : Nail Inspo Short: 60 Gorgeous Short Nail Ideas Every Nail Lover Needs To Try
What Are Seashell Nails Exactly
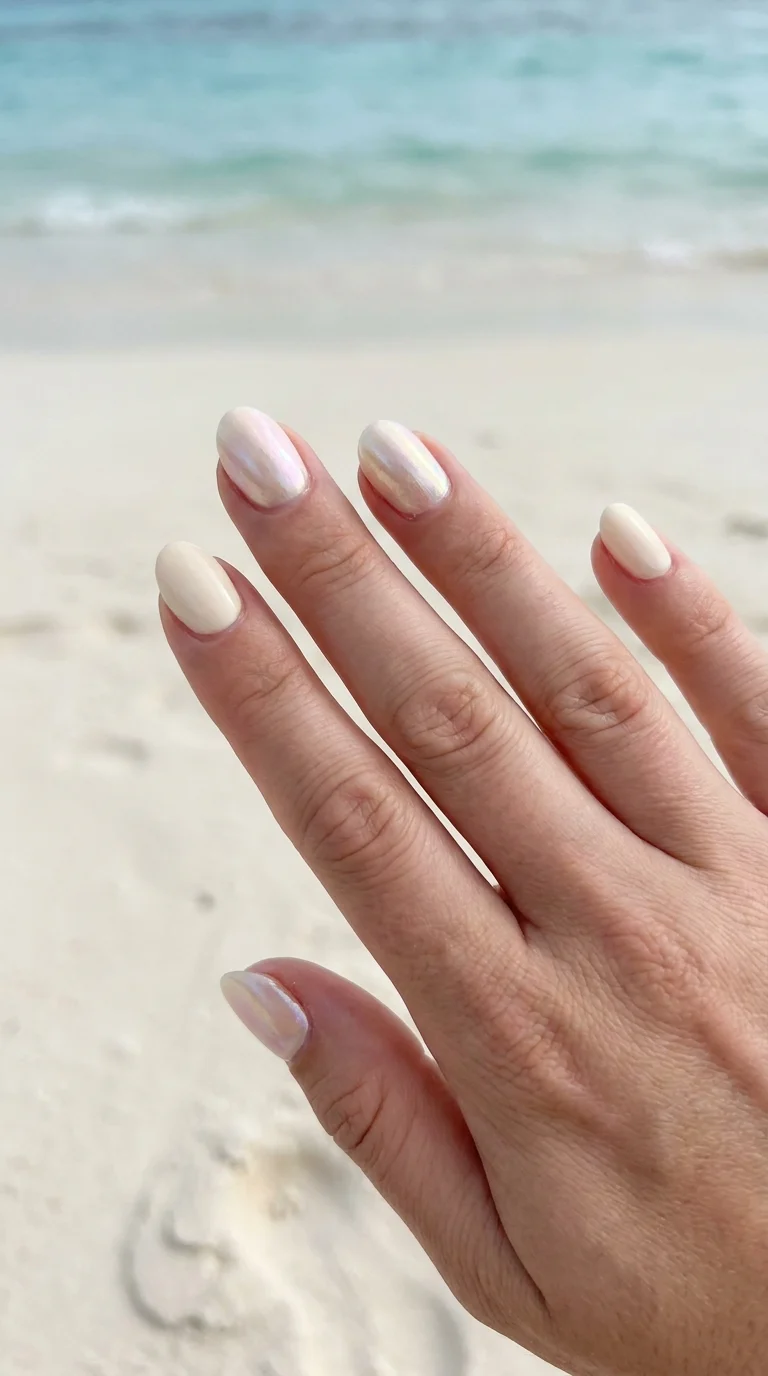
Seashell nails are a nail art style that mimics the look, texture, and color palette of actual seashells found along the shoreline. Think soft pinks, creamy whites, pearlescent finishes, tiny ridges, and sometimes even a subtle iridescent shimmer that catches the light the way real shell does when it is wet from the ocean.
The beauty of seashell nails is that there is no single correct way to do them. Some nail artists create the look using 3D gel sculpting to build an actual raised shell shape on the nail. Others keep it flat and simple, using chrome powder and soft pastel polish to suggest the feeling of a shell without literally sculpting one. Both approaches fall under the seashell nails umbrella, and both can look absolutely stunning depending on your skill level and what kind of vibe you are going for.
When clients ask me to explain seashell nails in one sentence, I usually say this. It is a manicure that borrows its color story and shine from the beach, without needing an actual picture of a shell printed on the nail. That subtlety is what makes seashell nails feel classy rather than costume like.
Why Seashell Nails Are Trending Right Now
I have been doing nails professionally for over ten years, and trends come and go faster than most people realize. Chrome nails had their moment. Cat eye gel had its moment. Milky white nails are still hanging around because they are just that flattering. Seashell nails, though, feel different. They are not a flash in the pan trend that disappears after one season.
Part of the reason seashell nails keep growing in popularity is because they photograph beautifully. Anyone who has ever tried to take a nice picture of their manicure for social media knows that certain finishes just catch light better than others. The pearlescent quality that defines seashell nails means they shimmer differently depending on the angle, which makes them incredibly satisfying to film and share.
Another reason seashell nails have staying power is that they are not tied to a single season the way some beach inspired looks are. Sure, they peak in popularity during late spring and summer when everyone is planning vacations, but I have plenty of clients who wear seashell nails through autumn and even into winter because the soft neutral tones work with almost any outfit. A cream and pearl seashell nail set does not scream summer only. It just looks polished.
There is also something to be said about the emotional pull of the ocean. People associate seashells with calm, with vacation, with slowing down. In a world where everyone is glued to their phone and stressed about a hundred things, wearing seashell nails is a small daily reminder of sand, salt air, and quiet mornings by the water. I have had clients tell me their seashell nails make them feel like they are on vacation even when they are stuck at a desk job. That emotional connection is powerful, and it is a huge part of why this trend refuses to fade.
Different Types Of Seashell Nail Designs
Seashell nails are not a one size fits all category. Over the years I have created dozens of variations for clients, and I want to walk you through the main styles so you can figure out which version of seashell nails actually fits your personality and your lifestyle.
Chrome Seashell Nails
Chrome seashell nails are probably the most requested version in my chair right now. This style uses a chrome or pearl pigment powder buffed over a light colored gel base to create that signature iridescent shimmer. The finish shifts between pink, lavender, and gold depending on the lighting, which is exactly the kind of shimmer you see on the inside of a real shell.
I love chrome seashell nails for clients who want something eye catching but still elegant. The application process takes a bit of practice because the powder needs to be applied to tacky gel in thin, even layers, but once you get the hang of it, chrome seashell nails become one of the easiest ways to get a jaw dropping result in under an hour.
3D Seashell Nail Art
This is where things get really fun for nail artists who love a challenge. 3D seashell nails involve actually sculpting a small shell shape using acrylic or hard gel, then painting and shaping it to sit on top of the natural nail like a tiny accent piece. Usually this is done on just one or two nails per hand, often the ring finger, while the rest of the set stays simple with a soft nude or white base.
3D seashell nails take real skill. I would not recommend this as a first attempt if you are new to nail art. It took me months of practice to get my shell sculptures looking realistic instead of lumpy. But when done well, 3D seashell nails are absolutely showstopping and often become the centerpiece of an entire wedding or vacation look.
Minimalist Seashell Nails
Not everyone wants a loud statement set, and that is completely fine. Minimalist seashell nails usually involve a sheer milky base with one or two tiny shell charms or a light dusting of shimmer near the cuticle. This version of seashell nails is perfect for people who work in more conservative environments or who simply prefer understated elegance.
I actually think minimalist seashell nails are the most underrated version of this trend. They require less time in the chair, they last longer because there is less bulky product to chip, and they still give off that unmistakable beachy elegance that makes people ask where you got your nails done.
Must Read : 50 Trendy Simple Nail Designs That Will Instantly Transform Your Manicure Game
Ombre Seashell Nails
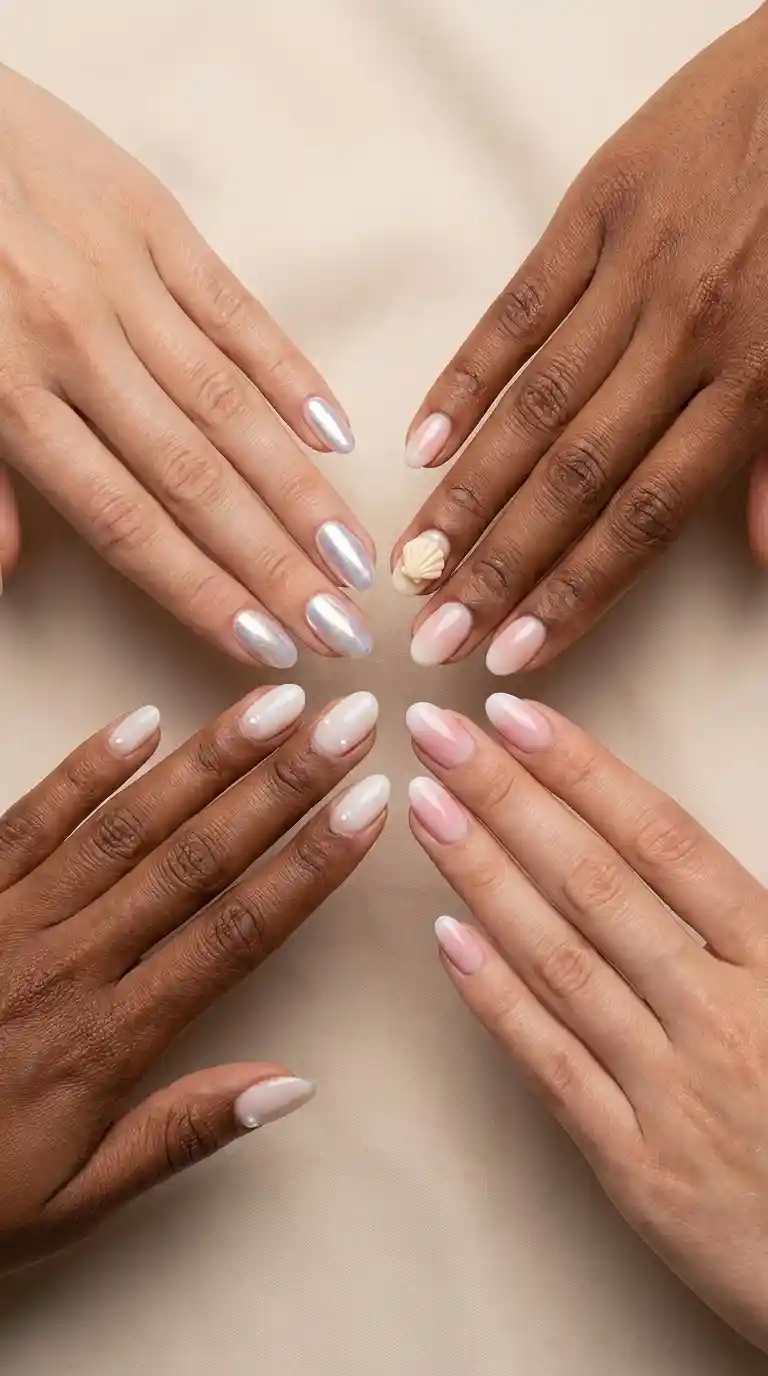
Ombre seashell nails blend two or three soft shades, usually starting pale near the cuticle and deepening toward the tip, or vice versa. Popular combinations include blush pink fading into white, or a soft blue fading into cream. Adding a pearl top coat over the ombre gives the entire set that unmistakable seashell nails glow
How To Do Seashell Nails At Home Step By Step
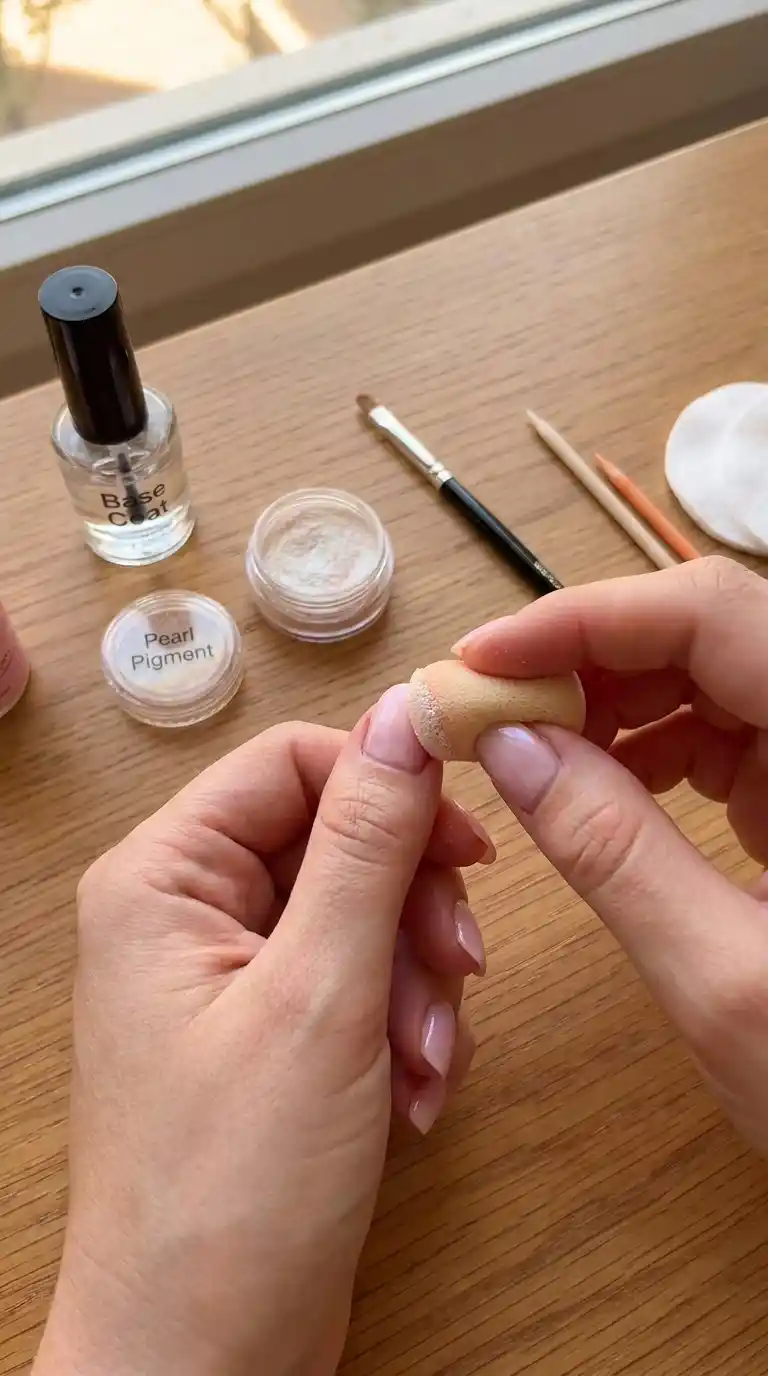
I know not everyone has access to a salon, and honestly, a lot of people just enjoy doing their own nails as a form of relaxation. I get asked constantly how to recreate seashell nails without professional equipment, so here is my honest, tested process using tools that are easy to find online or at a beauty supply store.
First, start with clean, dry nails. Push back your cuticles gently and shape your nails into whatever length and shape you prefer. Almond and coffin shapes tend to show off seashell nails beautifully because the longer surface area gives the shimmer more room to move, but square and round shapes work perfectly fine too.
Next, apply a thin base coat and let it dry completely. This step matters more than people realize. A tacky or uneven base coat will ruin the smooth finish that seashell nails depend on for that glassy shell like shine.
After your base coat, apply one or two coats of a sheer milky white or soft blush polish. You want something translucent, not fully opaque, because part of what makes seashell nails look realistic is that subtle glow from underneath rather than a flat solid color.
Once that layer is fully dry, this is where the magic happens. Take a small piece of makeup sponge and dab on a pearl or chrome pigment powder in gentle circular motions, focusing more product near the cuticle or in one corner and less as you move outward. This uneven, organic application is exactly what gives seashell nails their natural, non uniform shimmer instead of looking like a flat glittery coat.
If you want to add tiny shell details, now is the time to place small shell shaped charms, or hand paint delicate swirl lines using a thin detail brush and white polish. These lines mimic the natural ridges you see on real seashells.
Finish with a high shine top coat. I cannot stress enough how much the top coat affects the final look of seashell nails. A matte top coat will completely kill the shimmer effect, so always reach for something glossy unless you specifically want a soft satin finish for a more subtle version of seashell nails.
Let everything cure fully, whether that means air drying for regular polish or curing under a UV or LED lamp for gel formulas, and you are done. This entire process usually takes me about forty five minutes to an hour when doing seashell nails on myself at home, though professional application in a salon setting with gel extensions can take a bit longer.
Also Read: Airbrush Nail Ideas That Will Make Your Manicure Look Like Wearable
Best Colors For Seashell Nails
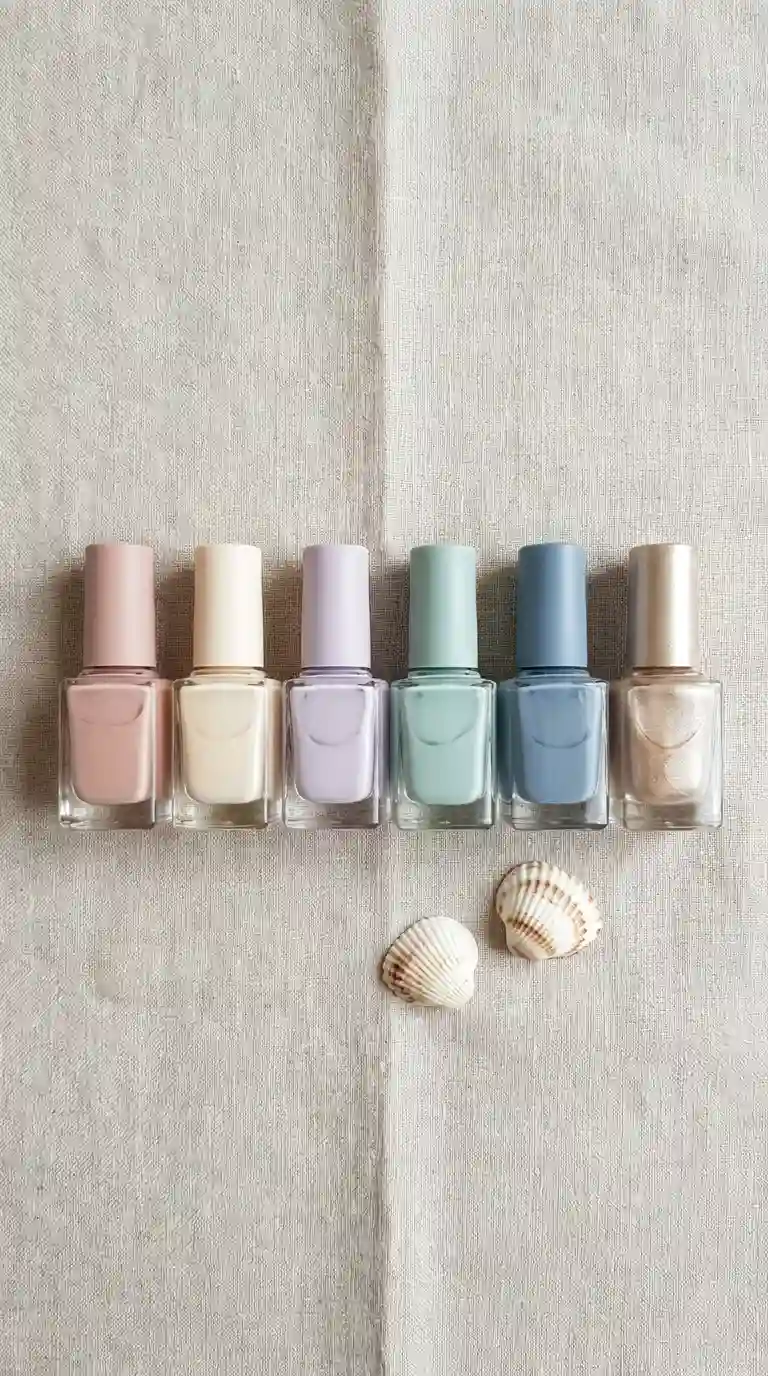
People often assume seashell nails only come in white or cream, but the real color palette is much richer once you actually look closely at real shells. Here are the shades I reach for most often when creating seashell nails for clients.
Soft blush pink is probably my number one choice. It mimics the inside of a conch shell beautifully and flatters almost every skin tone. Warm ivory and cream tones work incredibly well too, especially layered under a pearl chrome for that classic seashell nails glow.
Pale lavender is a bit less expected but absolutely gorgeous for seashell nails, especially when you want something with a slightly cooler undertone. I have also had great results with soft seafoam green and dusty blue, both of which lean into the more oceanic side of the shell color story rather than the warm neutral side.
For clients who want something bolder, I sometimes suggest a deep pearlized champagne or even a soft rose gold. These richer tones still fall under the seashell nails category because the finish and shimmer stay consistent with the trend, even though the base color is a touch darker than the typical pastel palette.
One thing I always tell clients is that the color matters less than the finish. You could technically create seashell nails using almost any soft, muted shade as long as you top it with that signature pearl shimmer. The shimmer is what tells the eye seashell, not necessarily the exact hue underneath.
Seashell Nails For Different Nail Shapes
I get asked all the time whether seashell nails work on every nail shape, and the honest answer is yes, though certain shapes do highlight different aspects of the design better than others.
Almond Shaped Seashell Nails
Almond shapes are my personal favorite for seashell nails. The tapered tip mimics the natural curve of a real shell, and the elongated surface gives you plenty of room to play with ombre blending or 3D shell accents without things feeling cramped.
Square Seashell Nails
Square nails give seashell nails a more polished, structured look. This shape is great for clients who want the trend but in a slightly more professional, buttoned up presentation. The flat tip also makes it easier to place a small shell charm right at the center without it looking crowded.
Coffin Shaped Seashell Nails
Coffin nails, sometimes called ballerina shape, are dramatic and give seashell nails a very editorial, high fashion feel. This shape works beautifully with 3D sculpted shells because there is enough length and width to actually build a realistic looking miniature shell without it appearing too bulky.
Round Seashell Nails
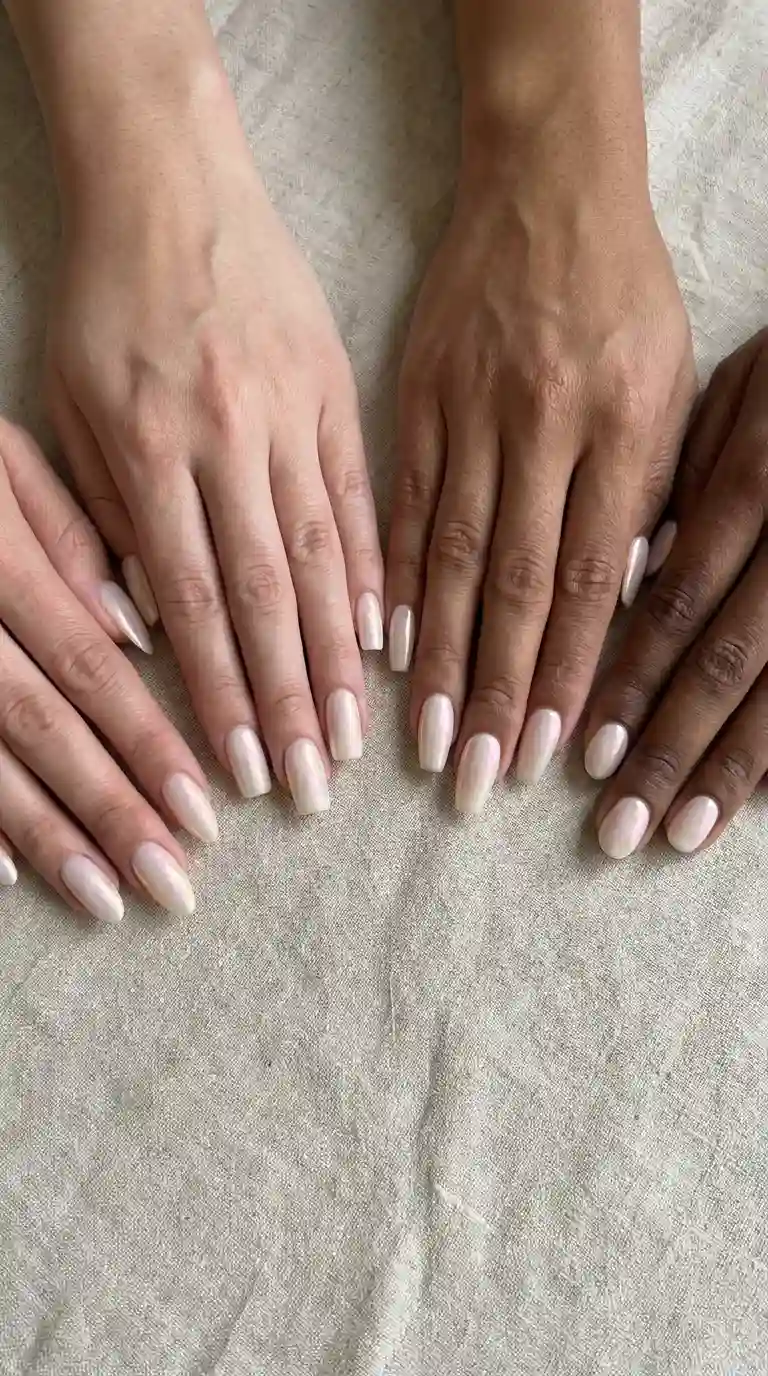
Round shapes keep seashell nails looking soft and approachable. I often recommend this shape to clients who are new to nail art in general, or to anyone with shorter natural nails who still wants to try the trend without adding length.
Read Also : Rainbow Nail Ideas That Will Turn Your Manicure Into a Work of Art
Products You Need For Seashell Nails
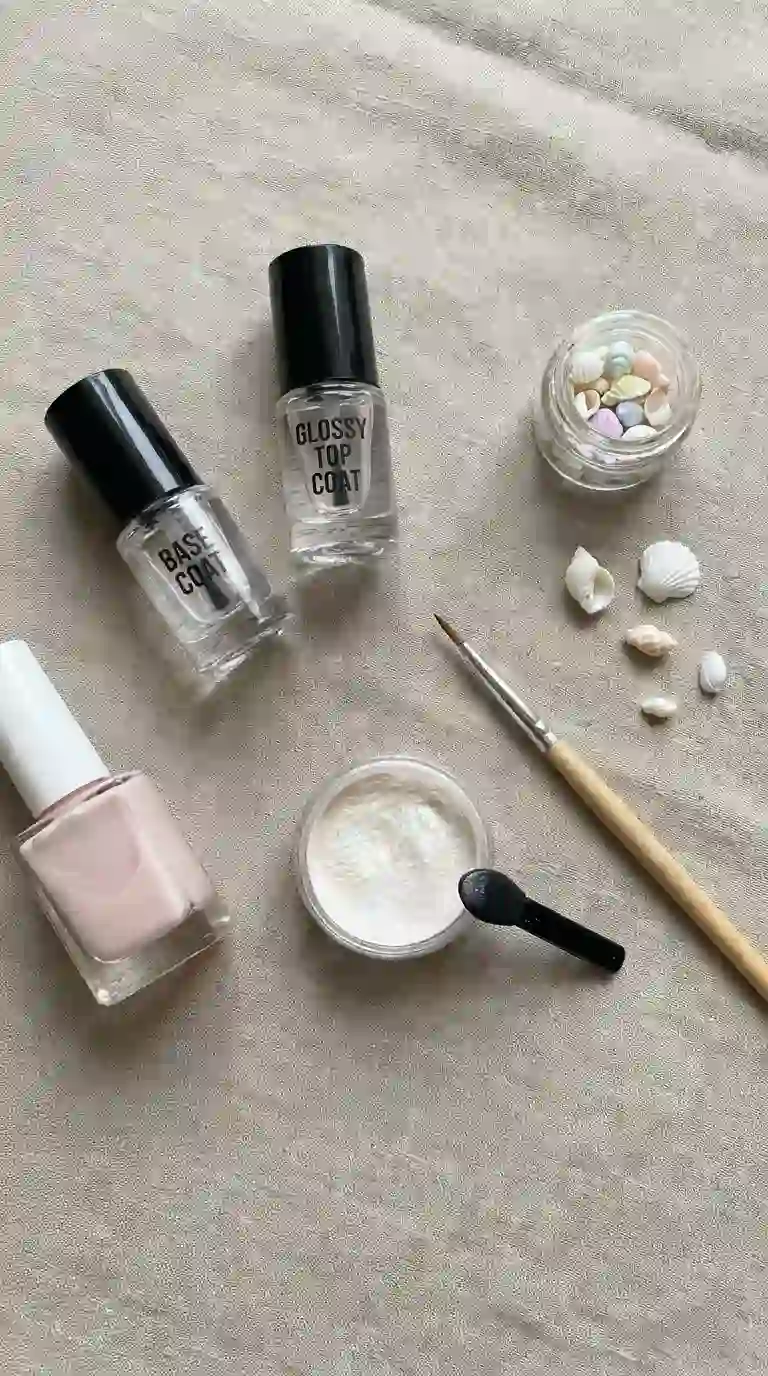
If you are planning to try seashell nails at home, having the right products makes an enormous difference. Here is exactly what sits in my kit whenever I am prepping for a seashell nails appointment.
A good quality base coat is non negotiable. I always use one with a slight ridge filling property so the final surface is as smooth as possible before adding any shimmer.
Sheer milky or blush gel polish is the backbone of most seashell nails looks. Look for something labeled as a jelly or sheer formula rather than a fully opaque polish, since the translucency is key to getting that authentic glow.
Chrome or pearl pigment powder is essential for the signature shimmer. These usually come in small pots and are applied with either a silicone tool or a soft applicator. A little goes a long way, so do not overload your brush.
A fine detail brush is important if you want to hand paint any shell ridges or swirl details. I use a size 000 brush for this kind of fine work.
Optional shell charms or press on shell accents can be found at most beauty supply stores now, given how popular seashell nails have become. These are a great shortcut if freehand painting is not your strong suit.
Finally, a glossy top coat seals everything in and gives seashell nails that wet, glass like shine that really sells the whole look. I personally prefer a no wipe gel top coat for longevity, but a good quality regular top coat works fine for shorter wear
Seashell Nails For Different Occasions
One of the reasons I recommend seashell nails to so many different clients is because this style genuinely adapts to almost any event or setting.
Seashell Nails For A Beach Wedding
Brides getting married near the water have been requesting seashell nails from me constantly over the past two years. There is something so fitting about wearing a manicure that echoes the exact environment of the ceremony. I usually suggest a soft ivory base with delicate pearl shimmer and one accent nail featuring a tiny 3D shell for brides who want that extra romantic detail.
Seashell Nails For A Summer Vacation
If you are heading somewhere tropical, seashell nails are basically the unofficial uniform of vacation season. I like keeping these sets a bit more playful, sometimes mixing in a soft coral or seafoam accent nail alongside the classic pearl shimmer.
Also Read : Simple Toe Nail Designs That Look Expensive Without Trying Too Hard
Seashell Nails For Everyday Wear
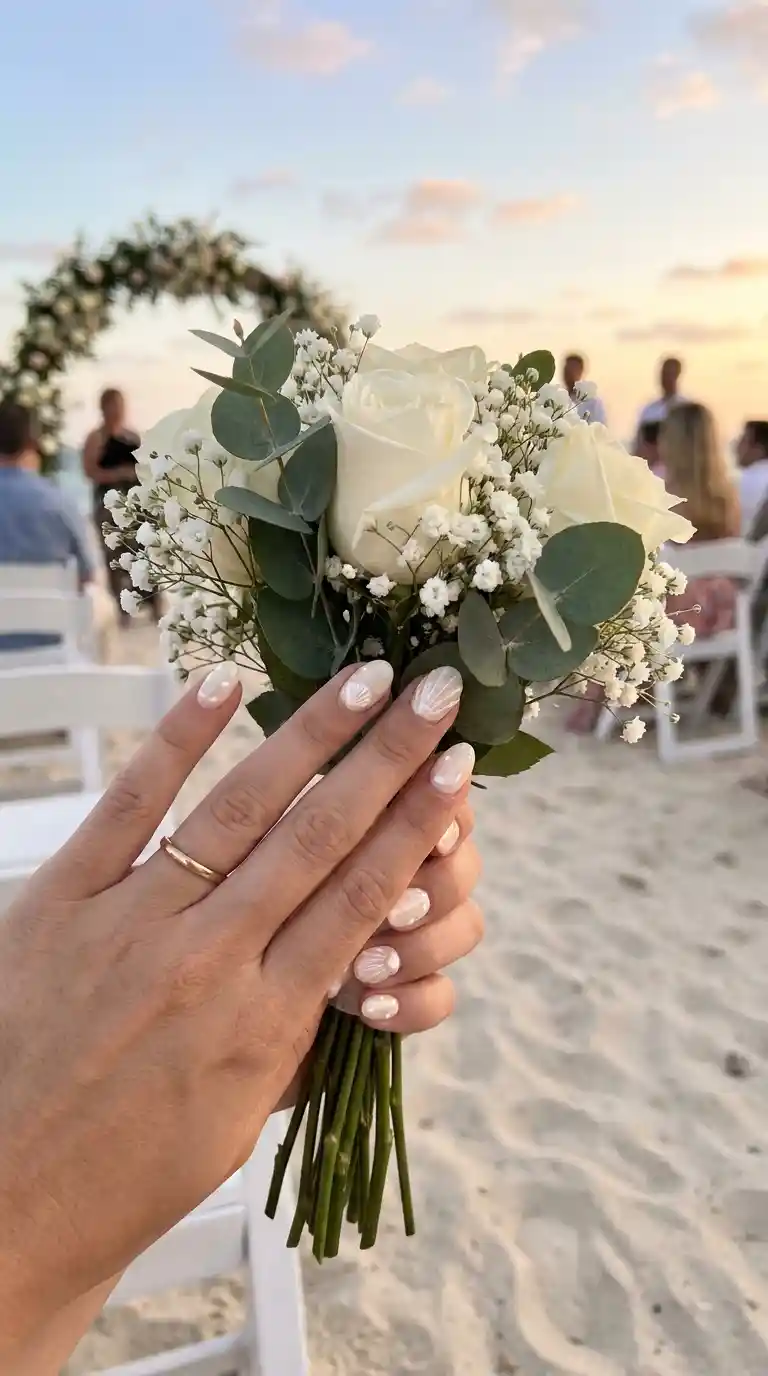
You absolutely do not need a special occasion to wear seashell nails. A toned down, minimalist version using a sheer nude base and light shimmer works beautifully in an office setting or for daily life. This is honestly the version I wear on my own nails most often because it goes with everything and never looks out of place.
How Long Do Seashell Nails Last
This is one of the most common questions I get, and the honest answer depends heavily on the method used. If you go with a full gel application done professionally, seashell nails can easily last two to three weeks with proper care, especially if a strong top coat is used to protect the chrome shimmer underneath.
Regular polish versions of seashell nails, meaning ones done without gel or acrylic, typically last about five to seven days before chipping becomes noticeable, which is fairly standard for any regular polish manicure regardless of the design.
If you opt for 3D sculpted seashell nails, those tend to last as long as a standard acrylic or hard gel set, usually around three to four weeks, though the sculpted shell accent itself is generally quite durable since it is built from a hardened product rather than delicate polish.
I always tell clients that the biggest factor in how long seashell nails last is not the product itself but daily habits. Using your nails to open cans, scratching off stickers, or skipping cuticle oil will shorten the life of any manicure, seashell nails included.
Common Mistakes To Avoid With Seashell Nails
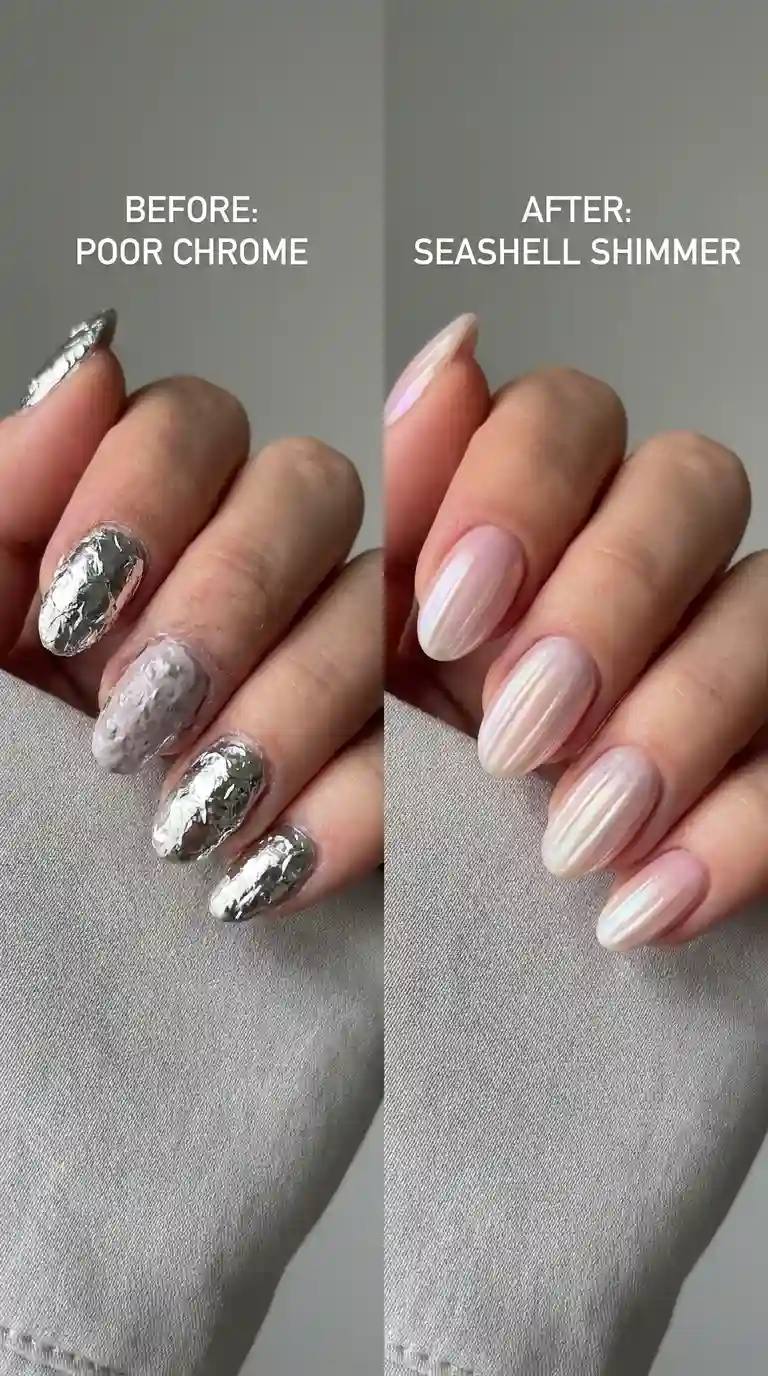
After years of doing seashell nails on hundreds of clients, and yes, plenty of practice on my own hands too, I have seen the same mistakes pop up again and again. Let me save you some frustration.
The biggest mistake is applying chrome powder too thickly. People assume more shimmer equals better results, but seashell nails actually look more realistic and more expensive when the shimmer is applied in a soft, gradient like manner rather than a flat, opaque coat.
Another common issue is skipping the base coat step or using an old, gloopy base coat. This leads to a bumpy foundation that makes the entire seashell nails look appear uneven once light hits it.
Choosing a fully opaque base color instead of a sheer one is another mistake I see often. Seashell nails rely on that inner glow, and an opaque base flattens the entire effect, making it look more like a regular glittery manicure than an actual seashell inspired design.
People also tend to rush the top coat step. A thin or uneven top coat will not give you that glassy, wet look shell finish that makes seashell nails so striking in photos.
Lastly, overcrowding the design is a mistake beginners make constantly. Trying to add shell charms, hand painted swirls, chrome shimmer, and rhinestones all on the same nail usually backfires. The most stunning seashell nails I have created have always leaned toward simplicity, letting one or two elements shine rather than cramming everything in at once.
Also Read : Natural Nail Ideas Short: The Complete Guide To Effortless Beauty That Actually Lasts
Seashell Nails Aftercare Tips
Getting a gorgeous set of seashell nails is only half the battle. Keeping them looking fresh requires a little bit of maintenance, and I always send clients home with a short list of aftercare tips.
Apply cuticle oil daily. This keeps the skin around your nails hydrated and actually helps prevent lifting at the edges, which extends the life of your seashell nails significantly.
Wear gloves when doing dishes or cleaning with harsh chemicals. Chrome and pearl finishes are particularly sensitive to prolonged exposure to household cleaners, and I have seen beautiful seashell nails dull prematurely simply because a client skipped this step.
Avoid picking at any lifting edges. I know the temptation is real, but picking at a lifted edge almost always leads to a bigger chip that ruins the whole nail rather than just a small manageable area.
Reapply top coat every few days if you are wearing a regular polish version of seashell nails rather than gel. This simple habit alone can add several extra days of wear and keeps the shine looking fresh.
Schedule a fill or touch up appointment around the two to three week mark if you have gel or acrylic seashell nails. Waiting too long past this window increases the risk of lifting and can make removal more difficult on your natural nail.
Seashell Nails Inspiration By Season
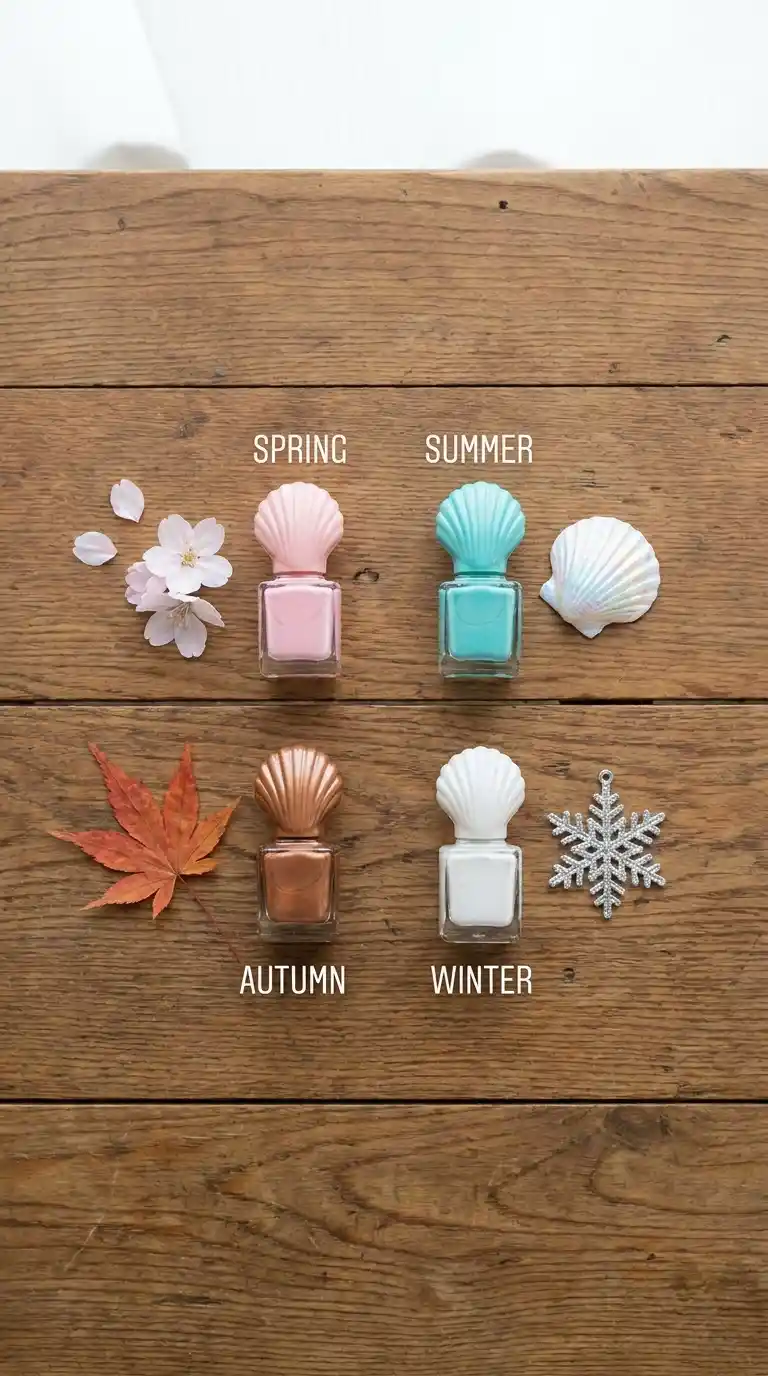
Even though seashell nails are wearable year round, I do like adjusting the color palette slightly depending on the season, and clients often ask me for seasonal suggestions.
In spring, I lean toward pale pastel pinks and soft lavender tones paired with a light chrome finish. It feels fresh and matches the general mood of the season perfectly.
Summer is obviously peak season for seashell nails, and this is when I go bolder with bright coral accents, seafoam green, and heavier pearl shimmer that really pops in the sunlight.
Autumn seashell nails tend to shift toward warmer tones like champagne, soft caramel, and a slightly deeper rose gold shimmer. It still reads as seashell nails but feels more in tune with the cozier mood of the season.
Winter is where I get creative, sometimes pairing a classic white and pearl seashell nails base with a touch of icy blue shimmer or even subtle snowflake detailing on one accent nail. It sounds unexpected, but the pearl finish translates beautifully into a winter wonderland aesthetic without losing that signature seashell nails charm.
Read Also : Sun Kissed and Stunning: 50 Summer Almond Nail Ideas You Will Fall in Love With This Season
My Personal Experience As A Nail Artist With Seashell Nails
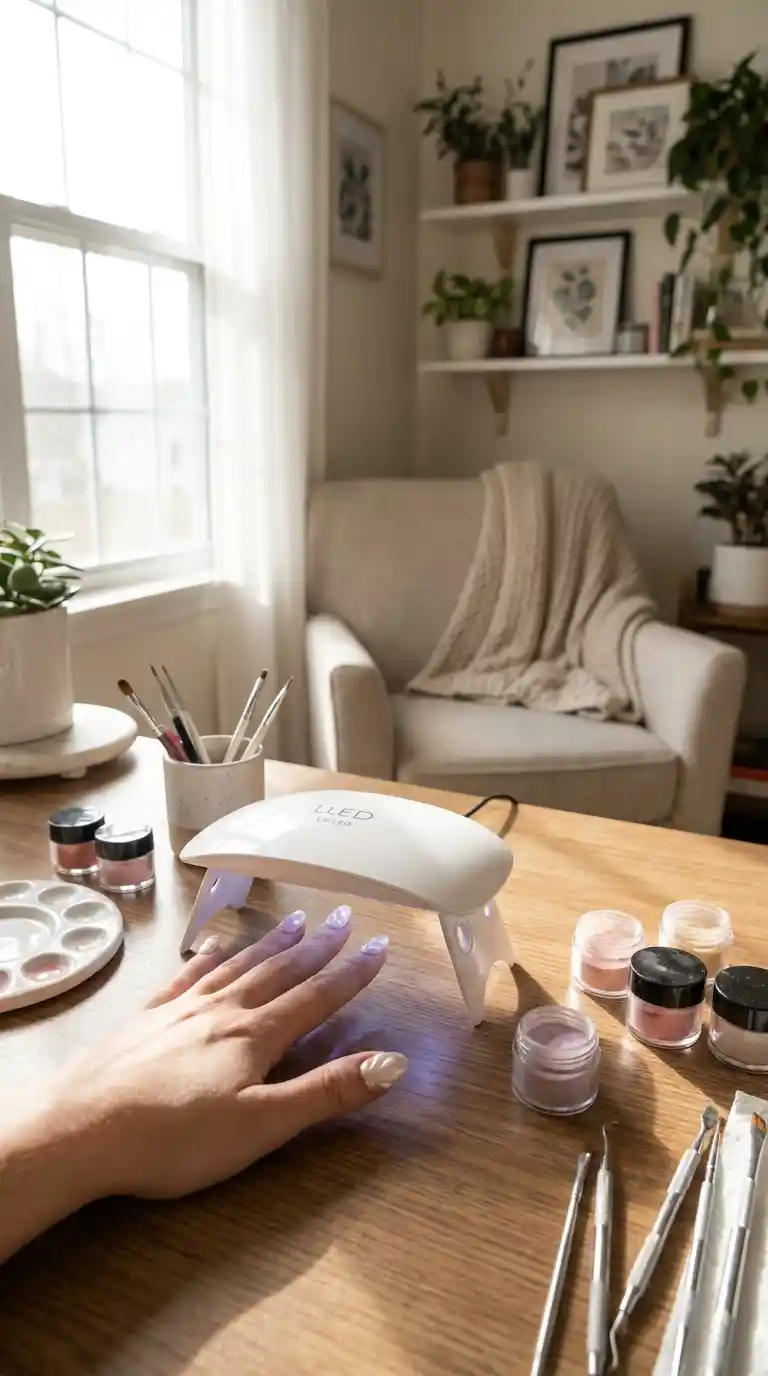
I want to take a moment to get personal here because I think it matters. When I first started doing nails professionally, ocean themed manicures were pretty basic. We are talking hand painted starfish and literal shell decals glued onto a plain blue background. It looked fun, but it also looked a bit dated even back then.
Seashell nails changed the entire conversation around beach inspired manicures. The first time I really nailed the technique, pun fully intended, was for a client heading to Hawaii for her honeymoon. She wanted something that felt like the ocean without being literal or costume like. I spent almost two hours experimenting with different pigment application techniques before landing on the sponge dabbing method I still use today.
What surprised me most was how universally flattering seashell nails turned out to be. I have applied this look on clients with every skin tone imaginable, from very fair to deep rich complexions, and it has looked stunning every single time because the pearl shimmer adapts to whatever undertone sits beneath it.
Over the years I have also noticed something interesting about the clients who request seashell nails specifically. They tend to be people going through a season of change, a wedding, a big vacation, a new job, a fresh start of some kind. There is something symbolic about choosing a design inspired by the ocean, something that represents calm and renewal. I do not think that is a coincidence, and honestly, it is one of my favorite parts of this job, hearing the stories behind why someone wants a particular design.
Also Read : 87 Gorgeous Orange Nail Ideas That Will Make Your Hands Impossible To Ignore
I have made my fair share of mistakes learning this technique too. Early on I definitely overloaded the chrome powder more than once, ending up with nails that looked more like disco balls than delicate shells. I have also had chrome finishes turn slightly patchy because I did not properly cure the gel base underneath before applying pigment. These mistakes taught me patience, and honestly, they taught me that seashell nails reward a light hand far more than a heavy one.
If there is one piece of advice I would give to anyone attempting seashell nails for the first time, whether you are a fellow nail tech or someone trying this at home for the first time, it would be this. Do not rush the process. The most beautiful seashell nails I have ever created were the ones where I slowed down, worked in thin layers, and let each step fully dry or cure before moving to the next. Rushing is where mistakes happen, and this particular style truly does reward patience over speed.
Seashell Nails And Nail Health
I want to briefly touch on something that does not get talked about enough in nail art guides, and that is the health of your natural nails underneath all this beautiful shimmer. Seashell nails, especially the gel and chrome versions, involve several layers of product, and it is important to give your nails proper breaks between applications.
I always recommend clients take at least a week or two off between gel seashell nails sets to let the natural nail breathe and recover. Constantly layering gel without breaks can lead to thinning or weakening of the natural nail plate over time, regardless of how careful the application process is.
Strengthening base coats can help if your natural nails tend to be on the thinner or more brittle side. I often suggest a calcium infused or protein enriched base coat for clients who want to wear seashell nails regularly but are worried about nail health.
Proper removal matters just as much as application. Never pick or peel gel seashell nails off, since this can strip layers of your natural nail along with the product. Always soak off gel properly using acetone and gentle filing, or visit a professional for removal if you are unsure how to do this safely at home.
Where To Get Seashell Nails Done Professionally
If doing seashell nails at home feels intimidating, and honestly that is completely understandable given how detailed the chrome and 3D techniques can be, visiting a professional nail salon is always a solid option. When searching for a salon, I recommend looking specifically for technicians who showcase chrome or pearl nail work in their portfolio, since not every salon specializes in this particular finish.
Ask to see examples of seashell nails the artist has done previously before booking. A good technician will happily show you a portfolio, and this helps set realistic expectations for what your own seashell nails will look like based on their particular style and skill level.
Booking during off peak hours, like a weekday morning, often gives you a bit more one on one time with your nail artist, which can be helpful for a detailed style like seashell nails that benefits from careful, unrushed application.
Frequently Asked Questions About Seashell Nails
What are seashell nails?
Seashell nails are a nail art style inspired by the colors, textures, and pearlescent shine of real seashells, typically achieved using soft pastel polish combined with chrome or pearl shimmer powder.
How do you get the seashell effect on nails?
The seashell effect is usually created by applying a sheer base color and then dabbing on a pearl or chrome pigment powder using a sponge or applicator tool in an uneven, gradient like pattern before sealing everything with a glossy top coat.
What colors are used for seashell nails?
Common colors include soft blush pink, cream, ivory, pale lavender, seafoam green, and dusty blue, though almost any muted pastel shade can work as long as it is finished with a pearl or chrome shimmer.
Do seashell nails work on short nails?
Yes, seashell nails absolutely work on short nails. In fact, round or square short nails often make the pearl shimmer look extra delicate and natural, since there is less surface area competing for attention.
How long do seashell nails last?
Gel versions of seashell nails typically last two to three weeks, while regular polish versions last about five to seven days, and 3D sculpted seashell nails can last as long as a standard acrylic set, usually three to four weeks.
Can I do seashell nails at home without gel?
Yes, you can absolutely create seashell nails using regular polish and chrome pigment powder, though the finish may not last quite as long as a gel version and will require more frequent top coat touch ups.
What is the difference between chrome nails and seashell nails?
Chrome nails typically use a solid metallic pigment applied evenly across the whole nail, while seashell nails use a softer, more gradient like application of pearl pigment over a sheer pastel base, creating a more organic, less uniform shimmer.
Are seashell nails only for summer?
No, while seashell nails are especially popular during summer, the color palette and finish can be adjusted seasonally, making this a style that works beautifully year round with small tweaks to the base color.
What nail shape looks best with seashell nails?
Almond and coffin shapes tend to show off seashell nails particularly well due to their elongated surface, though square and round shapes look equally beautiful and are often easier for beginners to manage.
How much does it cost to get seashell nails done professionally?
Pricing varies widely depending on location and salon, but seashell nails typically cost slightly more than a standard gel manicure due to the additional time required for chrome application, usually falling somewhere in the range of a specialty nail art service
Seashell Nails For Beginners Who Are Nervous To Try
If you are someone who has never attempted nail art beyond a basic solid color, I want to reassure you that seashell nails are far more forgiving than they look in photos. The imperfect, organic nature of the pearl shimmer actually works in your favor as a beginner, since you are not trying to achieve perfectly straight lines or symmetrical designs the way you would with something like French tips or intricate line art.
My advice for nervous beginners is to start with just one accent nail rather than committing your entire set to seashell nails right away. Practice the sponge dabbing technique on your ring finger first, see how it turns out, and build confidence from there before attempting a full set.
Another tip is to practice on nail wheels or practice tips before working on your actual nails. This lets you experiment with different pigment amounts and application techniques without the pressure of ruining a finished manicure, and it is exactly how I trained myself when learning new techniques early in my career.
Do not be discouraged if your first attempt at seashell nails does not look exactly like the inspiration photo you found online. Every nail artist, myself included, went through a phase of uneven, patchy chrome application before figuring out the right pressure and product amount. Give yourself grace and treat it as a skill you are building over time rather than something you need to master instantly.
How Seashell Nails Compare To Other Ocean Inspired Trends
Seashell nails often get grouped together with other beach inspired nail trends, but there are some clear differences worth understanding if you are trying to decide which style suits you best.
Mermaid nails, for example, tend to be much more colorful and dramatic, often incorporating multiple bright shades like teal, purple, and blue in a swirled pattern to mimic the look of scales. Seashell nails, by comparison, stay much more muted and neutral, leaning into soft pastels rather than bold, saturated color combinations.
Ocean wave nails focus specifically on hand painted or gel textured wave patterns, often in shades of blue and white, and tend to be more literal in their beach imagery compared to the softer, more abstract shimmer of seashell nails.
Beach sand nails, another related trend, use a textured matte finish to mimic actual sand grains, which is essentially the opposite finish of seashell nails, since sand nails skip the glossy shimmer entirely in favor of a rough, grainy texture.
Understanding these distinctions can help you communicate more clearly with your nail artist if you are booking an appointment, since simply saying beach nails can lead to a very different result depending on which specific trend your technician has in mind.
Seashell Nails Trends On Social Media
I would be lying if I said social media had nothing to do with how popular seashell nails have become. Short video platforms in particular have played a massive role, since the shimmer and shine of a good seashell nails set genuinely looks mesmerizing on camera when the light hits it just right.
I have noticed a specific trend within seashell nails content online where artists film the entire application process in a satisfying, slowed down way, focusing closely on the sponge dabbing technique as the pigment builds up layer by layer. These videos tend to perform incredibly well because there is something almost meditative about watching the shimmer slowly appear.
Another trend I have seen gaining traction is pairing seashell nails with matching accessories, like small shell jewelry or beachy hair accessories, creating a full coordinated aesthetic rather than just focusing on the nails alone. This has pushed seashell nails beyond just a manicure trend into more of a lifestyle aesthetic that people build entire outfits and vacation photos around.
Final Thoughts On Seashell Nails
After everything I have shared here, I hope it is clear why seashell nails have earned such a devoted following, both among clients and among nail artists like myself. This is not a trend built on flashy gimmicks or complicated gimmick heavy application. Seashell nails succeed because they tap into something timeless, the natural beauty of the ocean, translated into a wearable, elegant manicure that suits nearly everyone.
Whether you decide to try a simple minimalist version at home with just a sponge and a bottle of pearl polish, or you book an appointment with a skilled technician for a full 3D sculpted shell accent, seashell nails offer something for every skill level and every personal style. My biggest hope is that this guide gave you the confidence and the practical knowledge to go out and create your own beautiful set, whether that is for a beach wedding, a summer vacation, or simply because you deserve a little reminder of calm ocean mornings on your fingertips every single day.
Take your time, work in thin layers, do not be afraid to make mistakes along the way, and enjoy the process. Seashell nails, more than almost any other trend I have worked with in my career, are proof that sometimes the most stunning results come from the softest, most patient touch.
Quick Recap Of Everything We Covered About Seashell Nails
Before you go, here is a short recap of the main points covered in this guide to help this information stick.
Seashell nails are defined by their soft pastel base combined with a pearlescent or chrome shimmer finish. There are multiple styles within this trend, including chrome seashell nails, 3D sculpted seashell nails, minimalist seashell nails, and ombre seashell nails. Application at home involves a sheer base color, a sponge dabbing technique with pearl pigment, and a glossy top coat to finish. Popular colors include blush pink, ivory, lavender, seafoam green, and dusty blue. Almond and coffin nail shapes tend to highlight seashell nails particularly well, though every shape can work beautifully. Proper aftercare, including cuticle oil and avoiding harsh chemicals without gloves, extends the life of any seashell nails set. And finally, patience and a light hand are the two most important skills to develop if you want your seashell nails to look truly professional.
Thank you for reading this deep dive into seashell nails. If you try this look at home, be patient with yourself, and remember that even professional nail artists needed practice before mastering that soft, natural shimmer. I hope your seashell nails turn out absolutely beautiful, and that they bring you a little piece of ocean calm no matter where you are.
Thank you for reading this deep dive into seashell nails. If you try this look at home, be patient with yourself, and remember that even professional nail artists needed practice before mastering that soft, natural shimmer. I hope your seashell nails turn out absolutely beautiful, and that they bring you a little piece of ocean calm no matter where you are.